Front
Front Brake Pad Inspection and ReplacementCAUTION:
Frequent inhalation of brake pad dust, regardless of material composition, could be hazardous to your health.
^ Avoid breathing dust particles.
^ Never use an air hose or brush to clean brake assemblies. Use an OSHA-approved vacuum cleaner.
Replacement-'05 Model
1. Remove some brake fluid from the master cylinder.
2. Raise the front of the vehicle, and support it with safety stands in the proper locations.
3. Remove the front wheels.
4. Remove the brake hose mounting bolt (A).
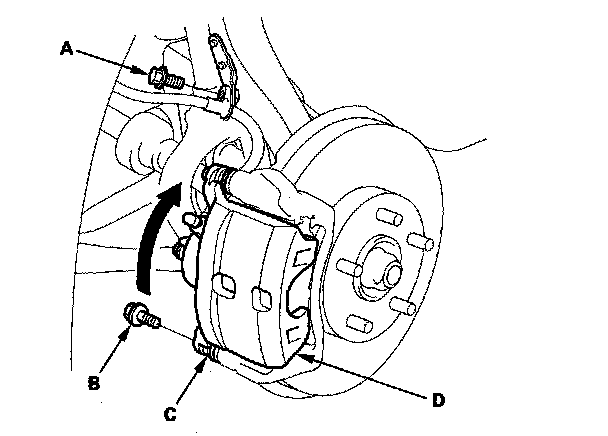
5. Remove the flange bolt (B) while holding the caliper pin (C) with a wrench being careful not to damage the pin boot, and pivot the caliper (D) up out of the way. Check the brake hose and pin boots for damage and deterioration.
6. Remove the brake pads (A) and the pad shims (B).
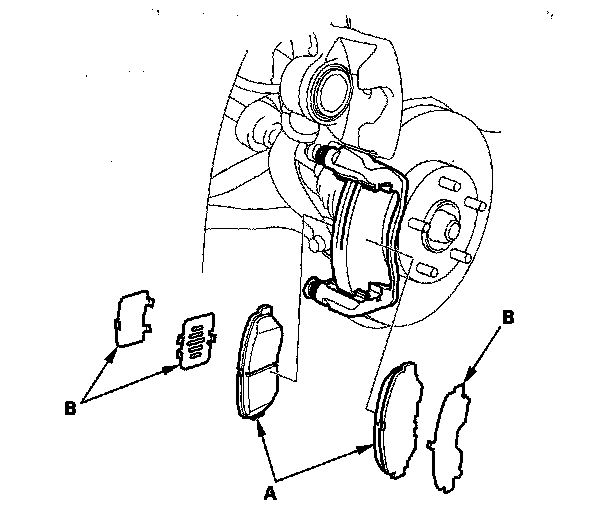
7. Check the hose and pin boots for damage and deterioration.
8. Remove the pad retainers (A), and check the caliper pin for free movement.
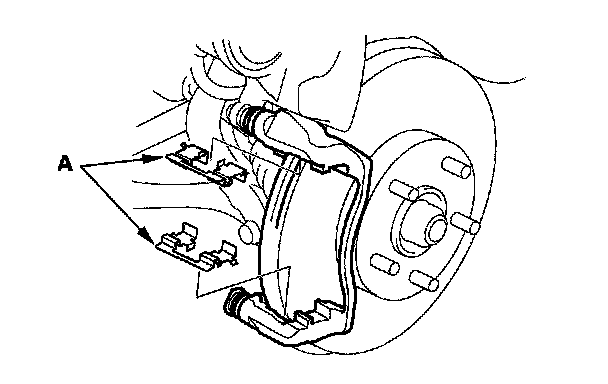
9. Clean the caliper thoroughly; remove any rust, and check for grooves and cracks.
10. Check the brake disc for damage and cracks.
11. Clean and install the pad retainers.
12. Apply a thin coat of M-77 assembly paste (P/N 08798-9010) to the pad side of outer pad shim C, inner pad shim B, both sides of inner pad shim A, the back of brake pads (D), and to the other areas indicated by the arrows. Wipe excess assembly paste off the pad shims and brake pads. Contaminated brake discs and pads reduce stopping ability. Keep assembly paste off the brake discs and brake pad material.
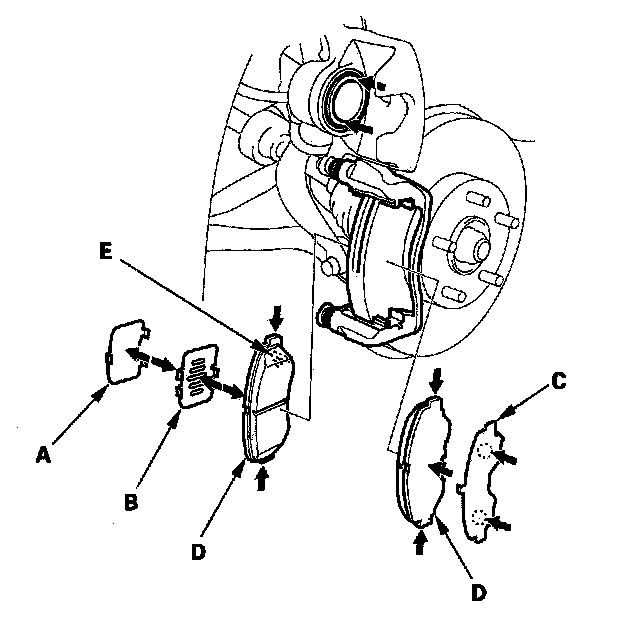
13. Install the brake pads and pad shims correctly. Install the brake pads with the wear indicator (E) on top.
If you are reusing the brake pads, always reinstall the brake pads in their original positions to prevent a momentary loss of braking efficiency.
14. Push in the piston (B) so the caliper will fit over the brake pads. Check the brake fluid level. The brake fluid may overflow if the reservoir is too full. Make sure the piston boot is in position to prevent damaging it when pivoting the caliper down.
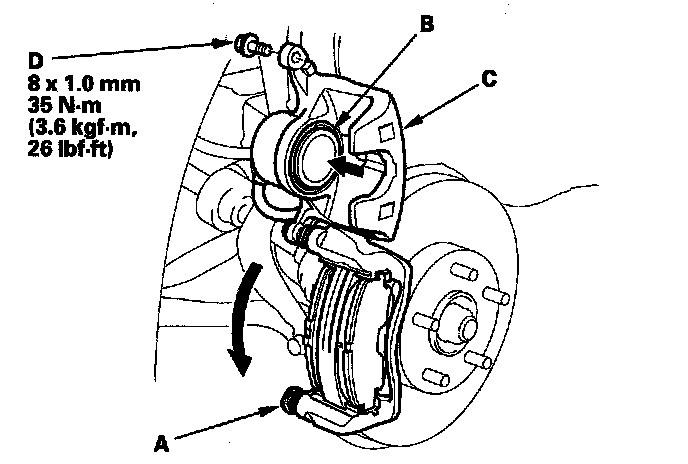
15. Pivot the caliper (C) down into position. Install the flange bolt (D), and tighten it to the specified torque while holding the pin A with a wrench being careful not to damage the pin boot.
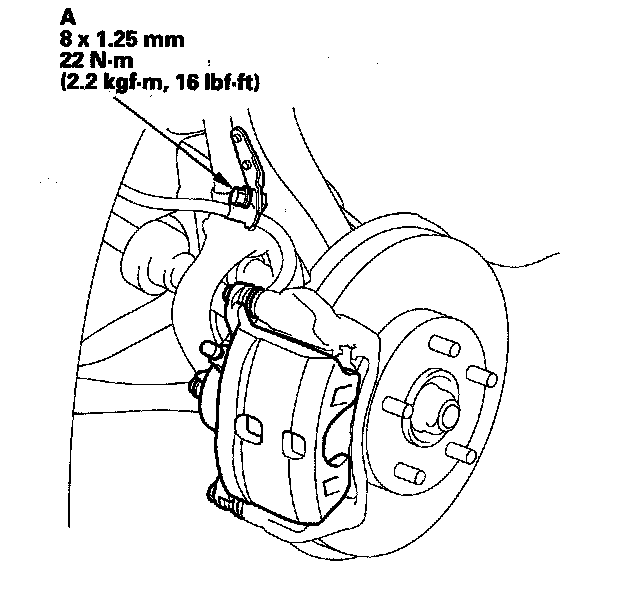
16. Install the brake hose mounting bolt (A), and tighten it to the specified torque.
17. Press the brake pedal several times to make sure the brakes work.
NOTE: Engagement of the brake may require a greater pedal stroke immediately after the brake pads have been replaced as a set. Several applications of the brake pedal will restore the normal pedal stroke.
18. Add brake fluid as needed.
19. After installation, check for leaks at hose and line joints or connections, and retighten if necessary. Then test-drive the vehicle.
CAUTION:
Frequent inhalation of brake pad dust, regardless of material composition, could be hazardous to your health.
^ Avoid breathing dust particles.
^ Never use an air hose or brush to clean brake assemblies. Use an OSHA-approved vacuum cleaner.
Replacement-'06-07 Models
1. Remove some brake fluid from the master cylinder.
2. Raise the front of the vehicle, and support it with safety stands in the proper locations.
3. Remove the front wheels.
4. Remove the brake hose mounting bolts (A).
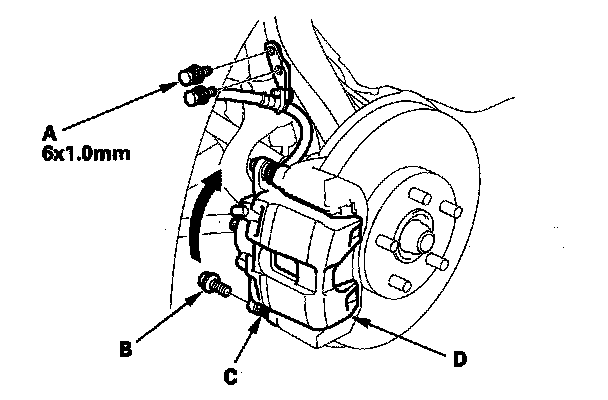
5. Remove the flange bolt (B) while holding the caliper pin (C) with a wrench being careful not to damage the pin boot, and pivot the caliper (D) up out of the way. Check the brake hose and pin boots for damage and deterioration.
6. Remove the brake pads (A) and the pad shims (B).
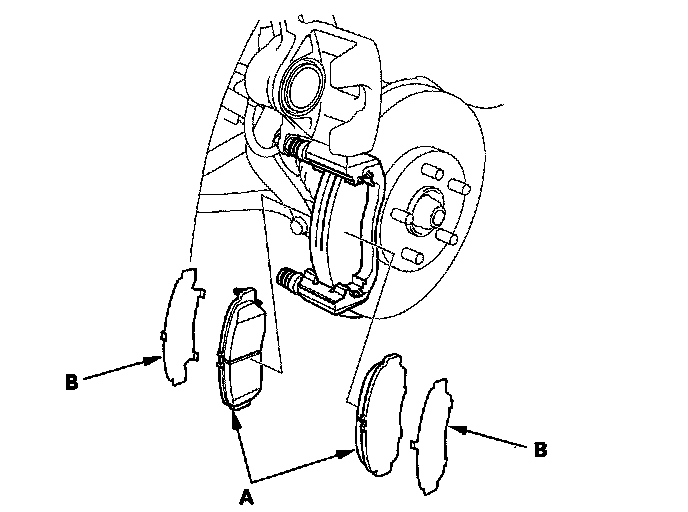
7. Check the hose and pin boots for damage and deterioration.
8. Remove the pad retainers (A), and check the caliper pin for free movement.
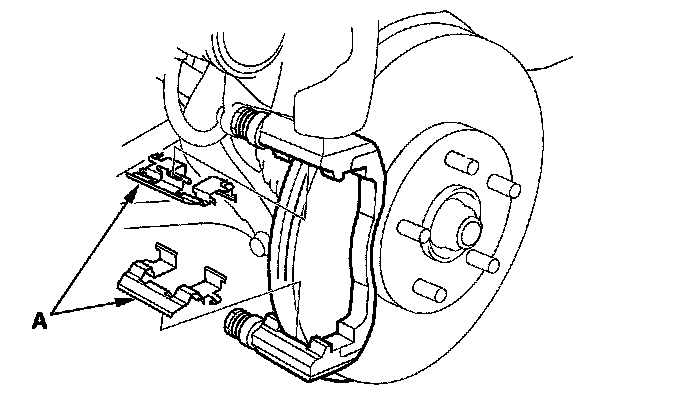
9. Clean the caliper thoroughly; remove any rust, and check for grooves and cracks.
10. Check the brake disc for damage and cracks.
11. Clean and install the pad retainers.
12. Apply a thin coat of M-77 assembly paste (P/N 08798-9010) to the pad side of outer pad shim (A), both sides of inner pad shim (B), the back of brake pads (C), and to the other areas indicated by the arrows. Wipe excess assembly paste off the pad shims and brake pads. Contaminated brake discs and pads reduce stopping ability. Keep assembly paste off the brake discs and brake pad material.
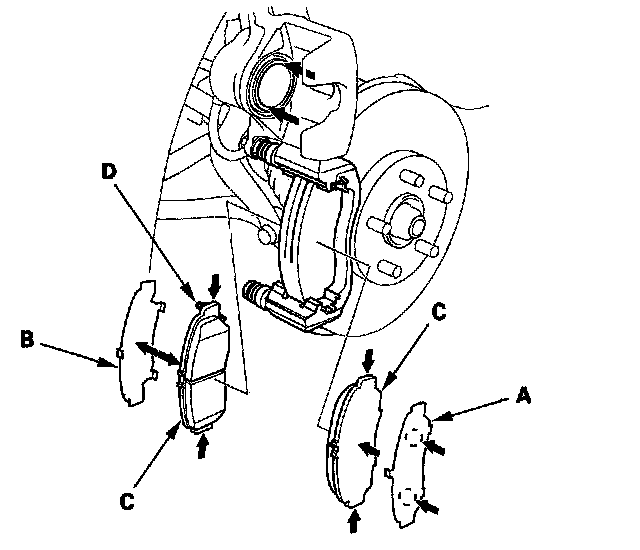
13. Install the brake pads and pad shims correctly. Install the brake pads with the wear indicator (D) on top.
If you are reusing the brake pads, always reinstall the brake pads in their original positions to prevent a momentary loss of braking efficiency.
14. Push in the piston (B) so the caliper will fit over the brake pads. Check the brake fluid level. The brake fluid may overflow if the reservoir is too full. Make sure the piston boot is in position to prevent damaging it when pivoting the caliper down.
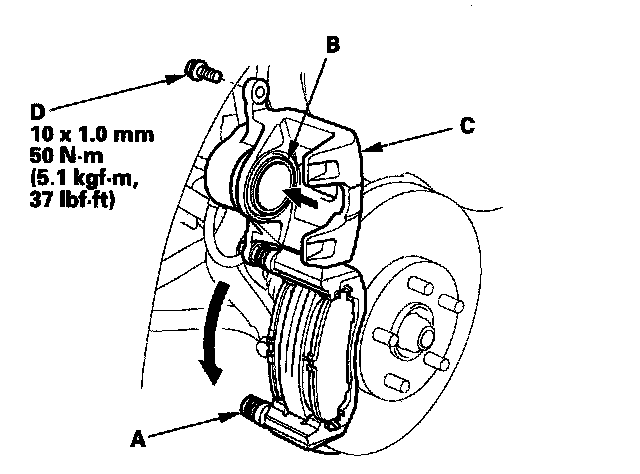
15. Pivot the caliper (C) down into position. Install the flange bolt (D), and tighten it to the specified torque while holding the pin A with a wrench being careful not to damage the pin boot.
16. Install the brake hose mounting bolts (A), and tighten it to the specified torque.
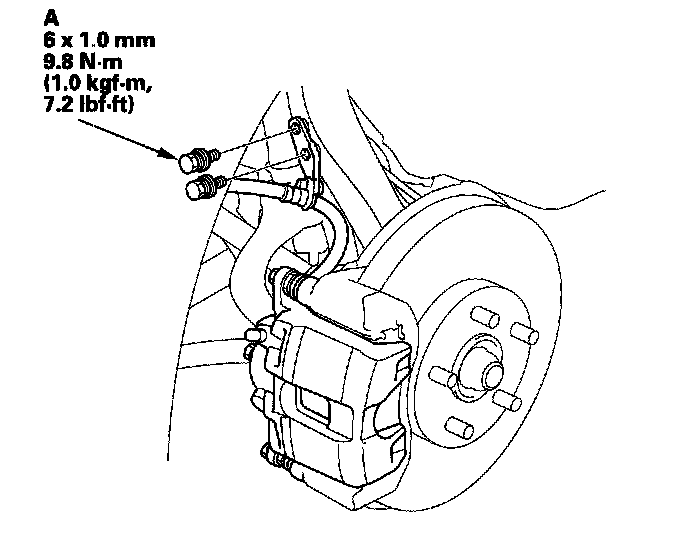
17. Press the brake pedal several times to make sure the brakes work.
NOTE: Engagement of the brake may require a greater pedal stroke immediately after the brake pads have been replaced as a set. Several applications of the brake pedal will restore the normal pedal stroke.
18. Add brake fluid as needed.
19. After installation, check for leaks at hose and line joints or connections, and retighten if necessary. Then test-drive the vehicle.