Alternator: Service and Repair
- Disconnect the battery earth lead.
- Remove the air pump for access (where fitted).
- Remove the support bracket to water pump securing bolts.
- Displace and remove the bracket.
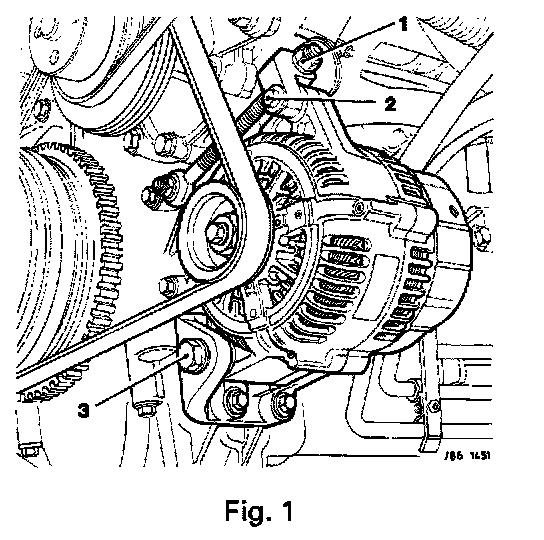
- Loosen the generator link arm adjusting nut (1 Fig. 1).
- Remove the generator link arm trunnion securing bolt (2 Fig. 1).
- Undo and remove adjusting rod to water pump securing nut.
- From beneath the vehicle:
• Remove the link arm pivot bolt and pivot the generator towards the engine.
• Remove the adjusting rod and trunnion assembly from the water pump.
• Remove the pivot bolt (3 Fig. 1).
• Displace the generator from its mounting bracket and remove the spacer.
• Remove the generator main terminal securing nut.
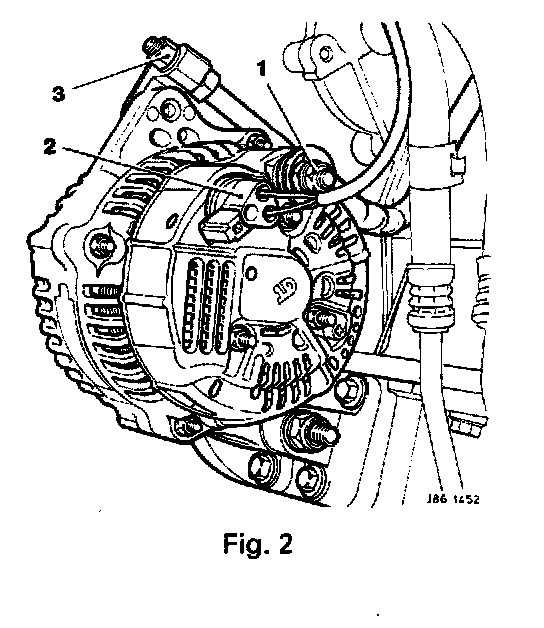
• Disconnect the positive terminal (1 Fig. 2).
• Disconnect the generator multi-plug (2 Fig. 2).
• Remove the generator.
- Fit a new generator to position.
- Connect the generator multi-plug.
- Connect the positive terminal.
- Fit and torque tighten the generator main terminal securing nut.
- Refit the generator to its mounting bracket and refit the spacer.
- Refit the pivot bolt.
- Refit the adjusting rod and the trunnion assembly to the water pump.
- Refit the link arm pivot bolt and pivot the generator away from the engine.
- Refit the adjusting rod to water pump securing nut.
- Refit the generator link arm trunnion securing bolt.
- Fit and align the support bracket to the water pump, fit and tighten the support bracket bolts.
- Tighten the generator link arm adjusting nut, and, using a Burroughs gauge, ensure that the drive belt is adjusted to the correct tension of 510N (115 lbs).
- Refit the air pump.
- Connect the battery earth lead.