Interior - Console Side Trim Separation
XJ501-03DATE 07/03
XJ range
MODEL
2004 MY
XJ range
VIN
G00442-G09005
Vertical Seam Separation - Center Console Side Panel Trim - Repair Procedure
Issue:
Owners of some 2004 MY XJ range vehicles within the above VIN range, may complain about the side panel trim of the center console separating next to the vertical sewn seam. This is caused by the material not being correctly adhered to the center console. It is not a split in the material.
To eliminate the issue outlined in the summary above, the center console side panel trim should be re-adhered to the center console panel.
Note:
This is the authorized repair method - do not replace the center console for this issue.
Action:
In case of a customer complaint of the above condition only follow the workshop procedure outlined below.
WORKSHOP PROCEDURE
1. Open front door and locate area of customer complaint.
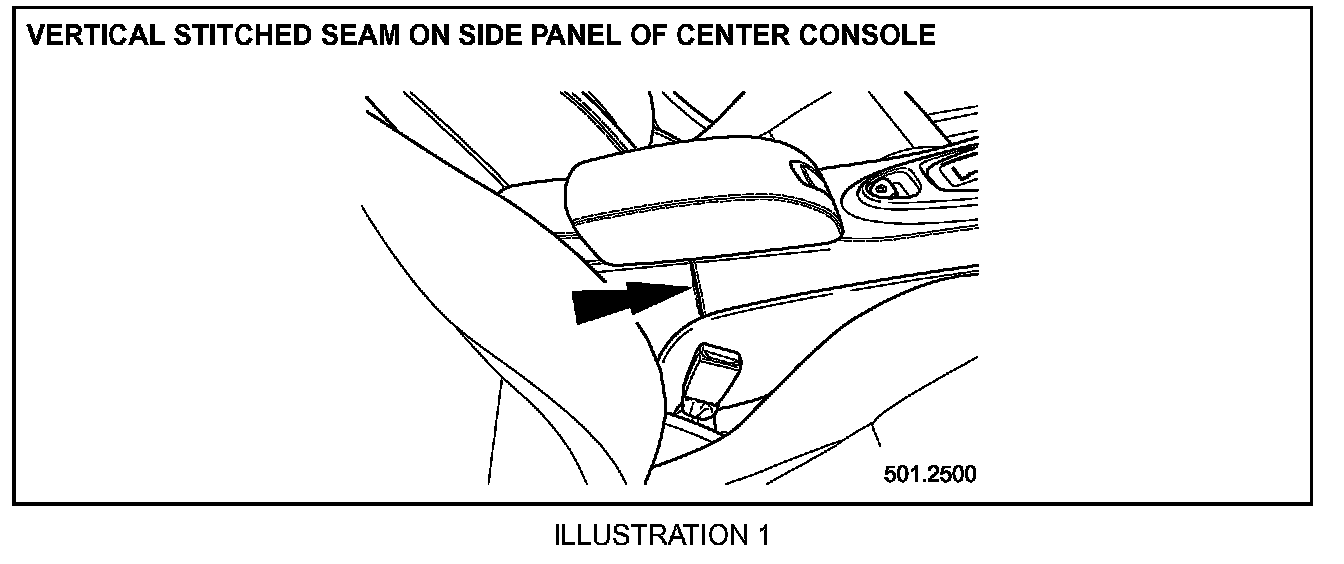
Note:
Center console side panel vertical stitched seam (Illustration 1).
2. Reposition the front seat fully rearward, with the cushion fully down and the seat back fully reclined.
3. Reposition the front seat belt buckle downwards.
4. Open center console glovebox lid.
5. Unclip the telephone from the glovebox lid and place in empty glovebox.
6. Place suitable protective material on center console adjacent to the front edge of the glovebox.
7. Use a suitable tool to lever against the protective material, and displace the glovebox from the center console.
8. Remove the protective material from the center console.
9. Reposition the glovebox for access to the glovebox lid securing screws.
10. Remove the glovebox lid securing screws and remove the glovebox lid.
11. Reposition the glovebox behind the rear of the center console.
12. Fold back the sound deadener from the inside face of the center console to reveal the side panel securing clips.
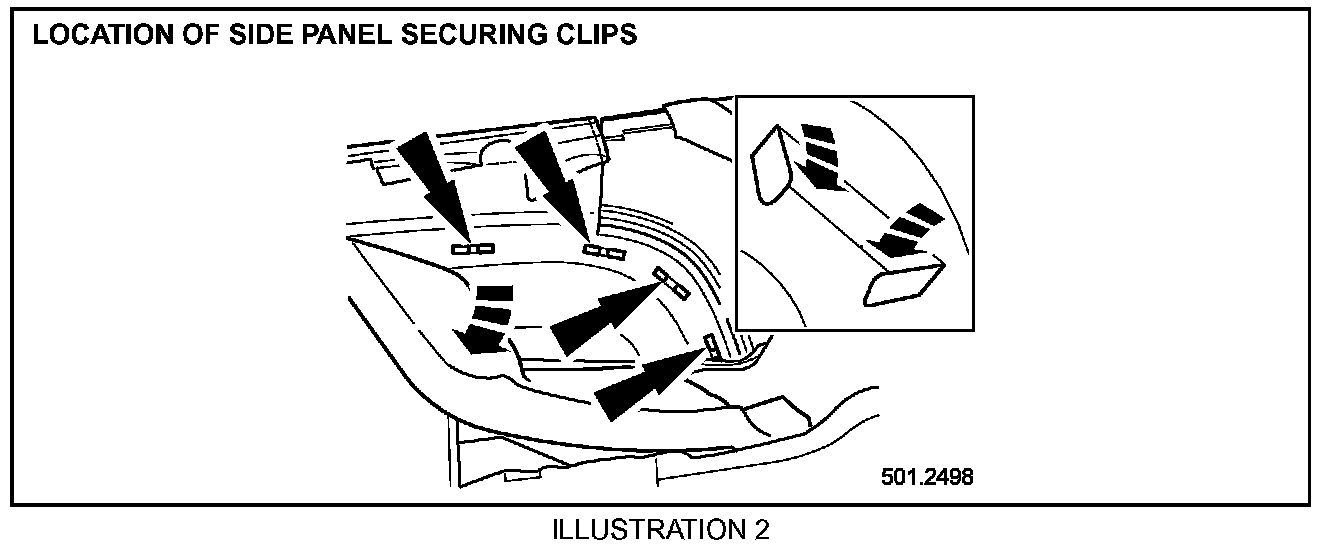
13. Straighten the prongs on the four rearmost side panel securing clips (Illustration 2).
14. Place suitable protective material against the center console adjacent to the side panel.
15. Using a suitable tool and levering against the protective material, displace the side panel from the center console.
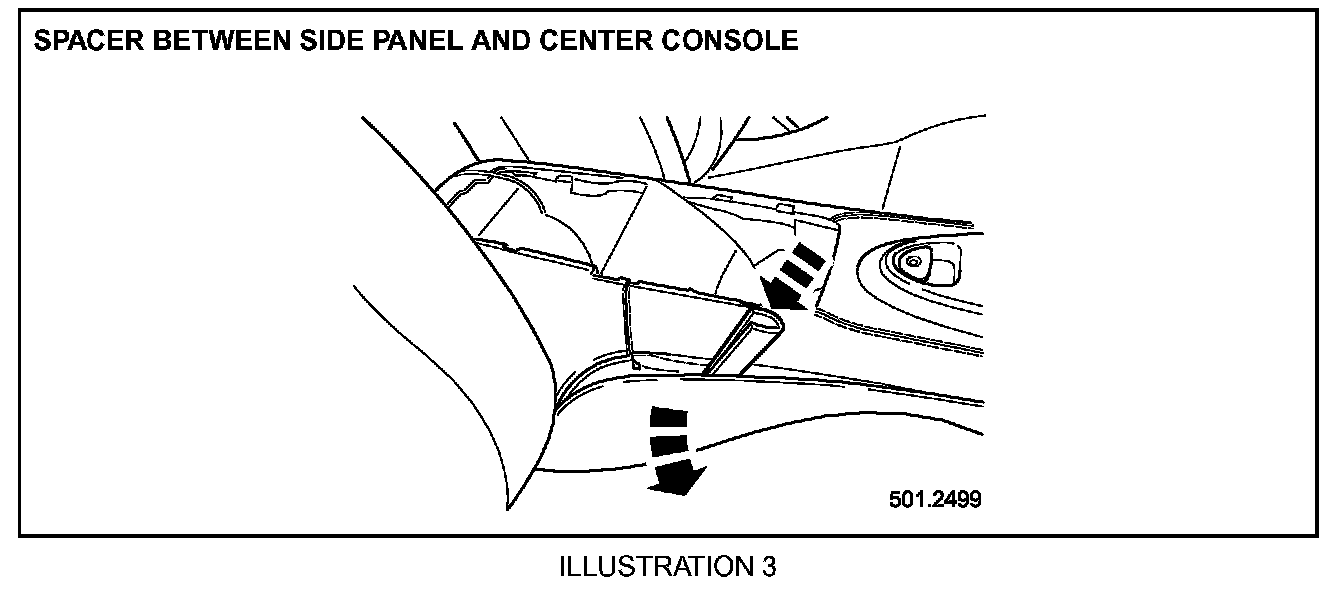
16. Insert suitable spacer between the side panel and the center console side for working access (Illustration 3).
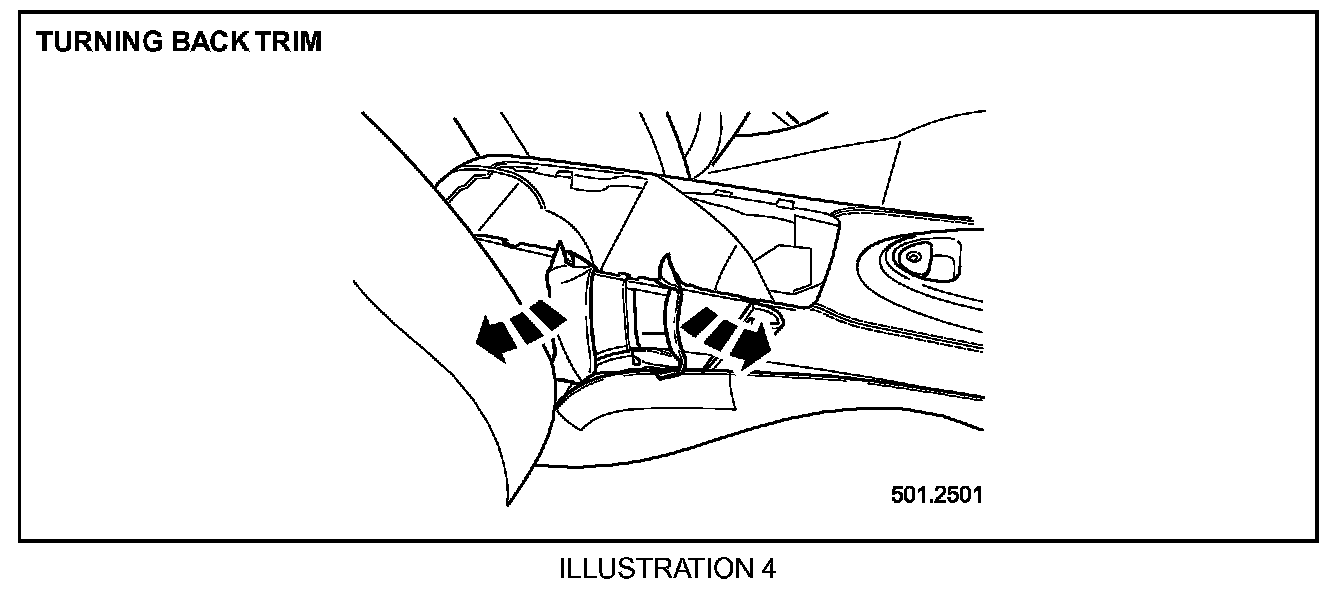
17. Turn back the center console front sewn trim approximately 40 mm. Turn back the rear trim approximately 60 mm. (Illustration 4).
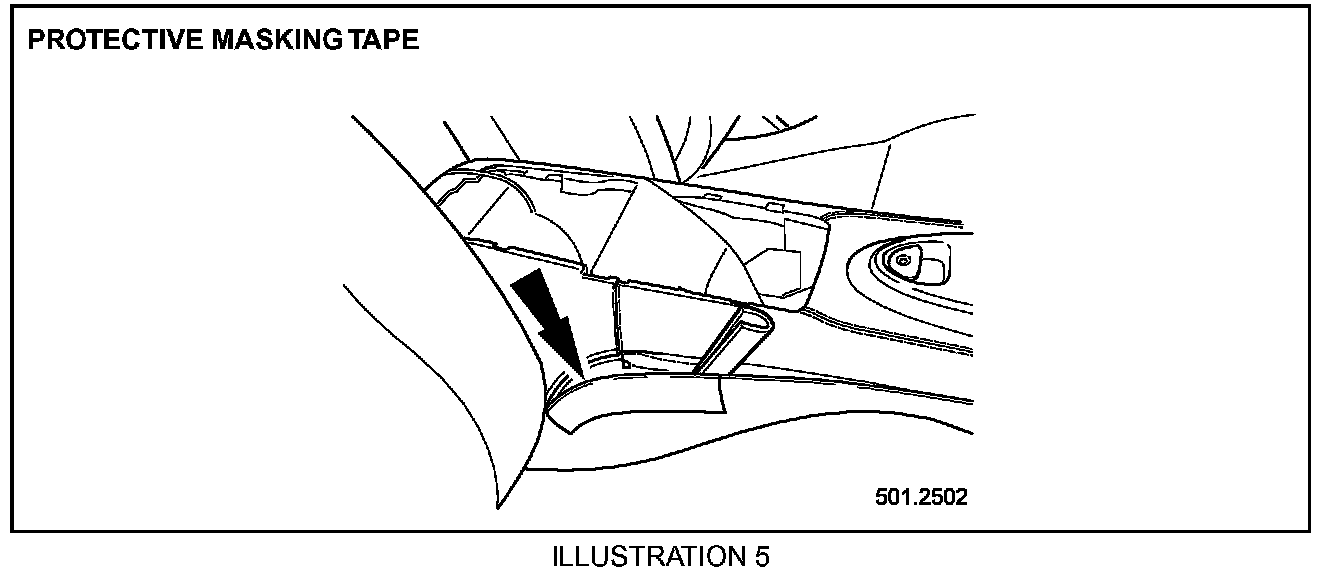
18. Apply two layers of masking tape to the upper rear edge of the side panel for protection (Illustration 5).
Caution:
Ensure the seat protection cover is in position.
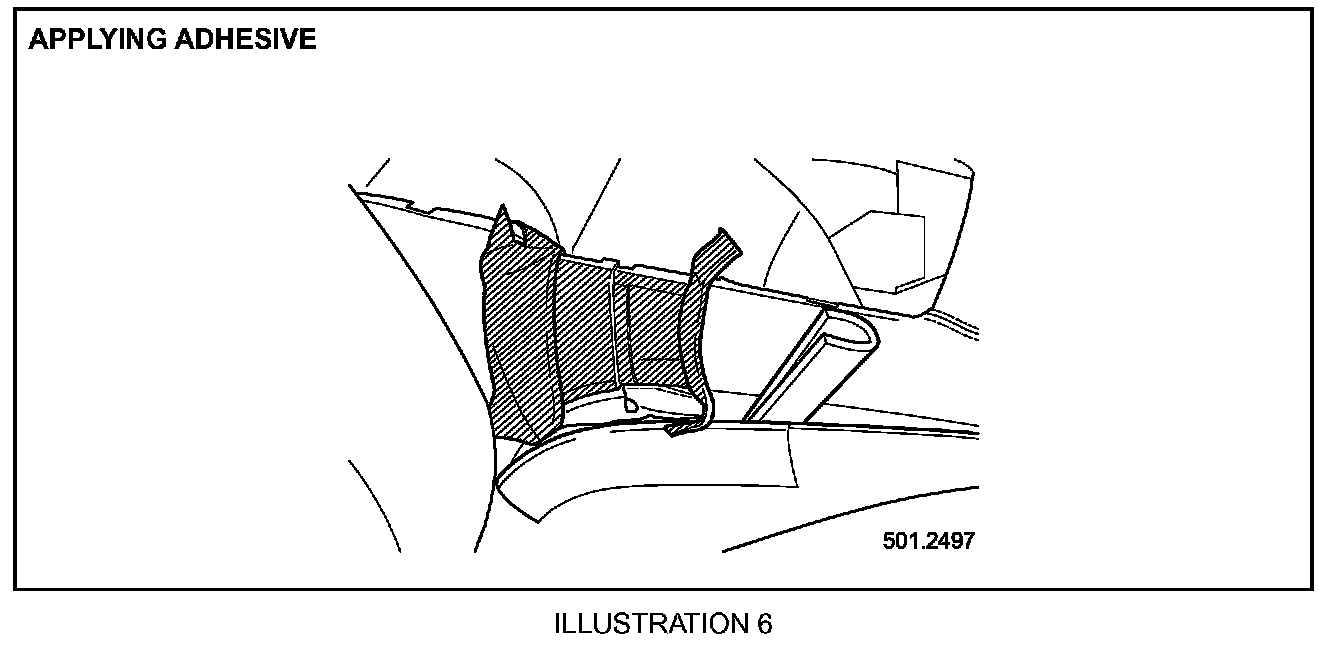
19. Apply suitable adhesive to shaded exposed center console and trim rear faces (Illustration 6).
Note:
Bostik 4018 and Dunlop 1358 are the recommended adhesives, if they are not available then use a suitable locally sourced adhesive, such as 3M Fast Tack Trim Adhesive part no. 08031.
20. Allow adhesive to dry completely.
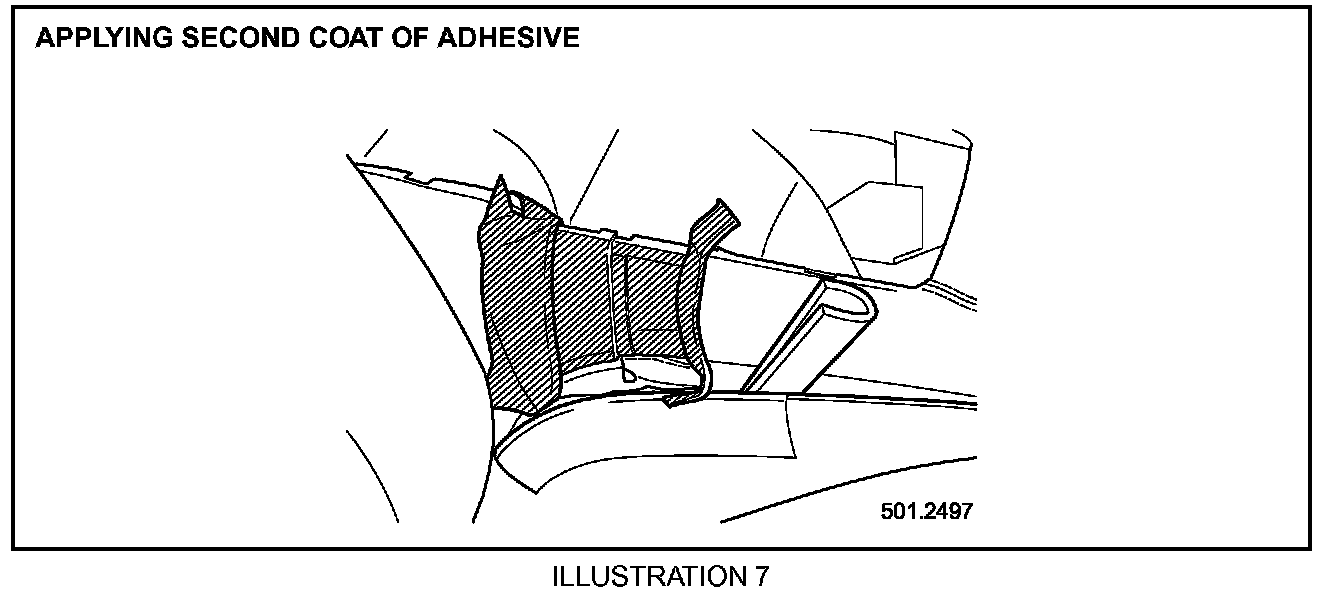
21. Apply another coat of adhesive to the shaded exposed center console and trim rear faces (Illustration 7).
Note:
Follow the instructions supplied with the adhesive, before installing the trim.
22. Apply tension to the rear trim and adhere to the center console pressing well into the recesses.
23. Apply tension to the front sewn trim and adhere to the center console pressing well into the recesses.
24. Remove and discard the masking tape from the upper rear edge of the side panel.
25. Remove the spacer from between the side panel and the center console.
26. Reposition and install the side panel to the center console, engage the securing clip prongs in the fixing holes.
27. While applying hand pressure against the side panel, bend the prongs of the four clips to secure the panel.
28. Apply suitable adhesive to the sound deadener.
29. Reposition sound deadener and adhere to the inside face of the center console.
Note:
If both sides of the center console side trim are separated, carry out step 12 onwards. If not continue from step 30.
30. Reposition glovebox forward.
31. Install and align glovebox lid.
32. Install and tighten glovebox lid securing screws.
33. Reposition glovebox into the center console aperture.
34. Clip telephone onto the glovebox lid.
35. Fully seat glovebox to the center console.
36. Close center console glovebox lid.
37. Reposition front seat buckle upwards.
38. Return front seat to original position.
39. Close door.
Parts Information:
Note:
Bostik 4018 and Dunlop 1358 (or a suitable locally sourced adhesive, such as 3M Fast Tack Trim Adhesive part no. 08031) are considered workshop consumables and as such may not be claimed.
Warranty Information:
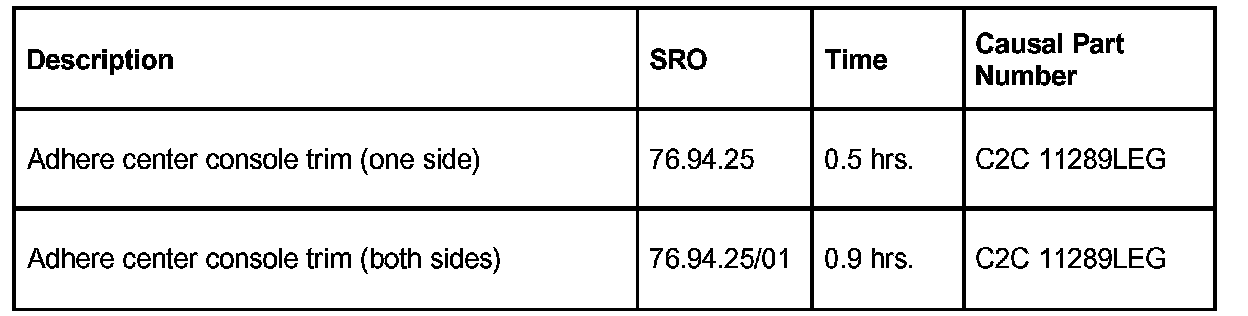
Warranty claims should be submitted quoting the information found in the table.
This will result in payment of the stated time and, where applicable parts/miscellaneous expense codes as listed.