Canister Purge Control Valve: Service and Repair
Evaporative Emission Canister Purge Valve
Removal
1 Remove the intake air resonator. For additional information, refer to Intake Air Resonator Service and Repair
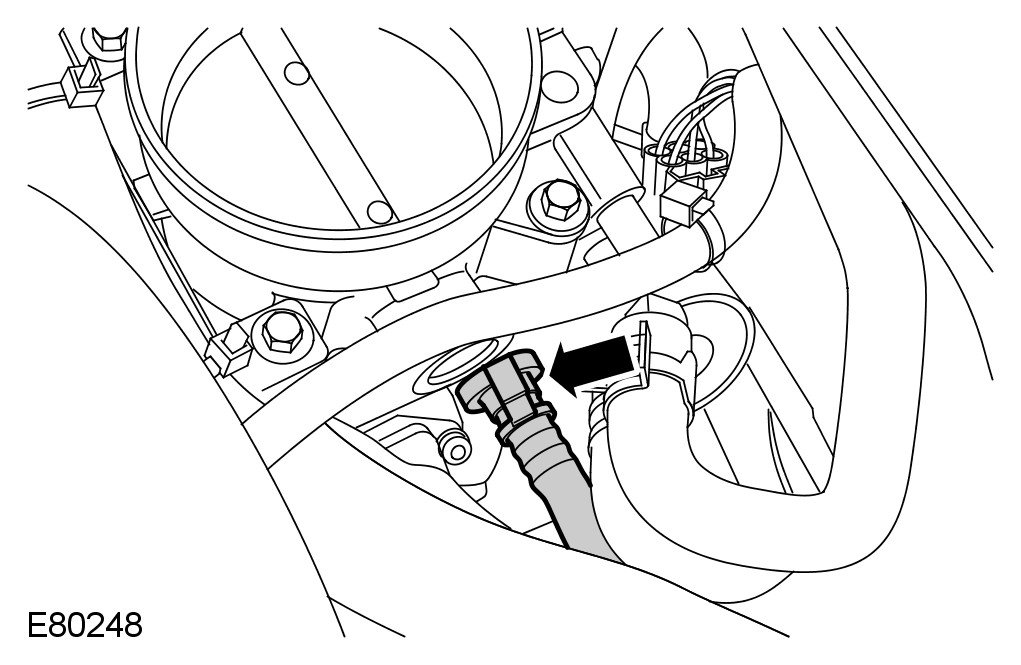
2
CAUTION: Before disconnecting or removing the components, ensure the area around the joint faces and connections are clean. Plug open connections to prevent contamination.
Disconnect the purge outlet line.
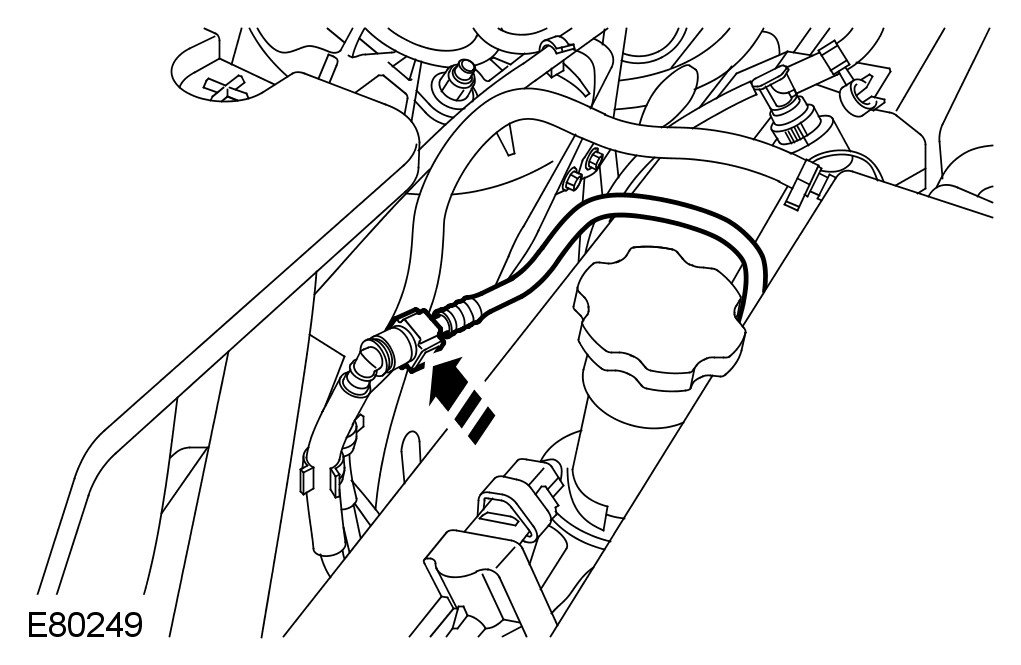
3
CAUTION: Before disconnecting or removing the components, ensure the area around the joint faces and connections are clean. Plug open connections to prevent contamination.
Disconnect the purge inlet line.
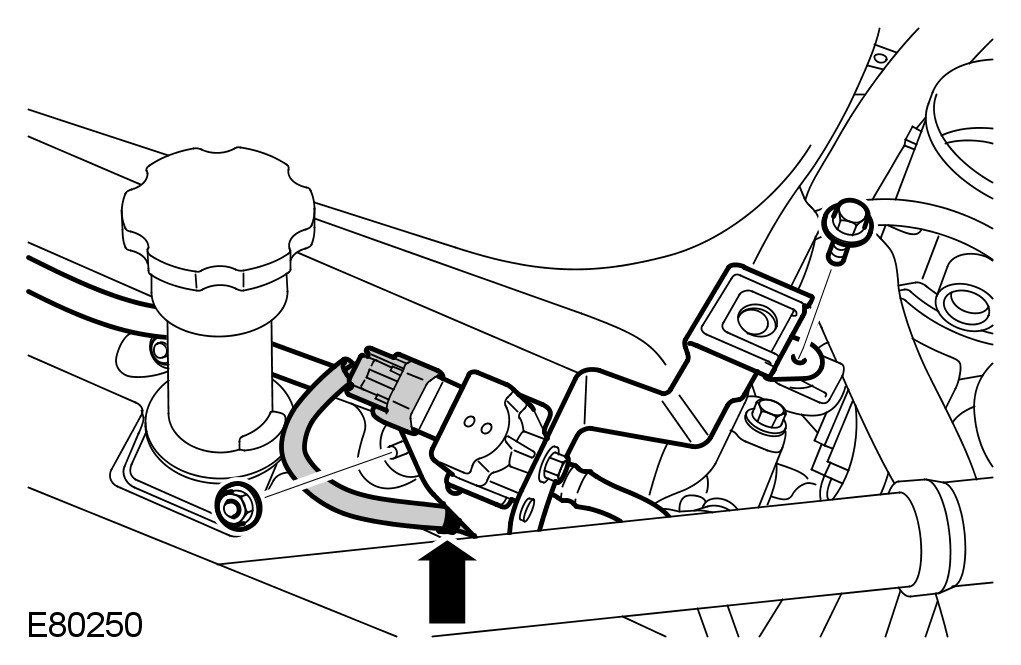
4 Remove the purge valve assembly.
- Disconnect the electrical connector.
- Remove the nut.
- Remove the bolt.
- Release the wiring harness.
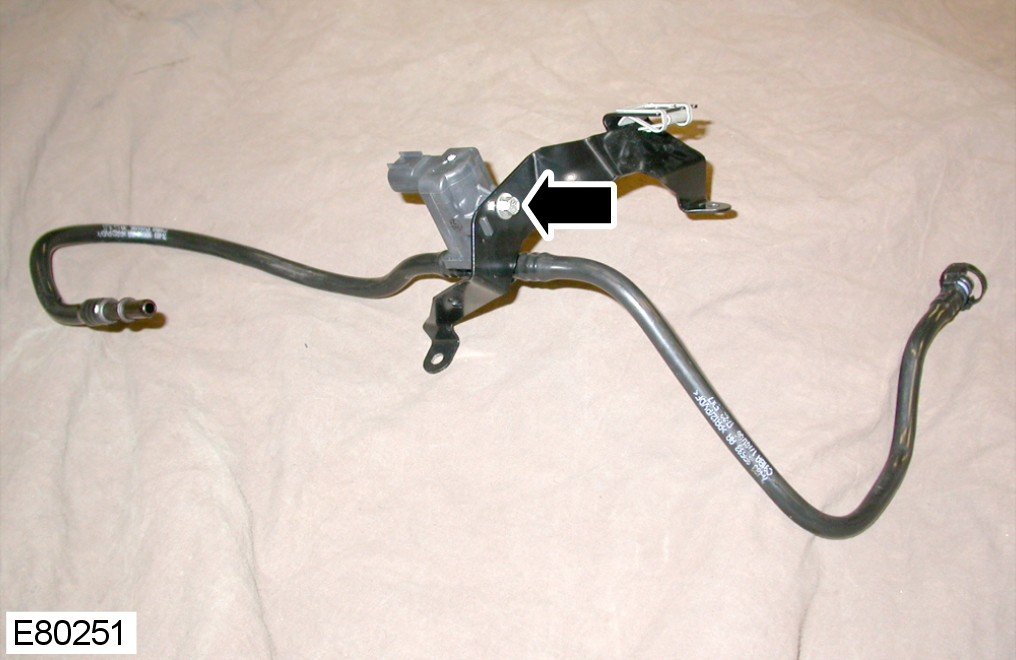
5
NOTE:
Do not disassemble further if the component is removed for access only.
NOTE:
Note the fitted position.
Remove the purge valve.
- Remove the bolt.
Installation
1 Install the purge valve, align the peg and tighten the bolt to 6 Nm (4 lb.ft).
2 Install the purge valve.
- Attach the wiring harness.
- Tighten the bolt to 6 Nm (4 lb.ft).
- Tighten the nut to 6 Nm (4 lb.ft).
- Connect the electrical connector.
3 Connect the purge lines.
- Clean the component mating faces.
4 Install the intake air resonator. For additional information, refer to Intake Air Resonator Service and Repair