Canister Purge Control Valve: Service and Repair
Evaporative Emission Canister Purge Valve
Removal
1 Disconnect the battery ground cable. For additional information, refer to Specifications [1][2]Battery
2 Remove the engine cover. For additional information, refer to Engine Cover Service and Repair
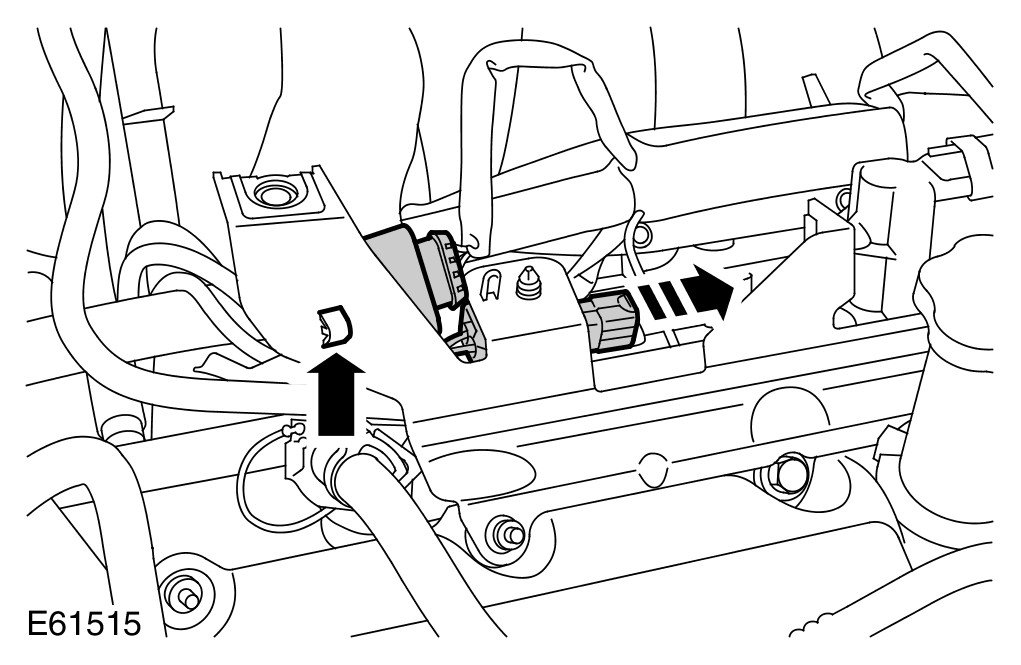
3 Release the 2 electrical connectors.
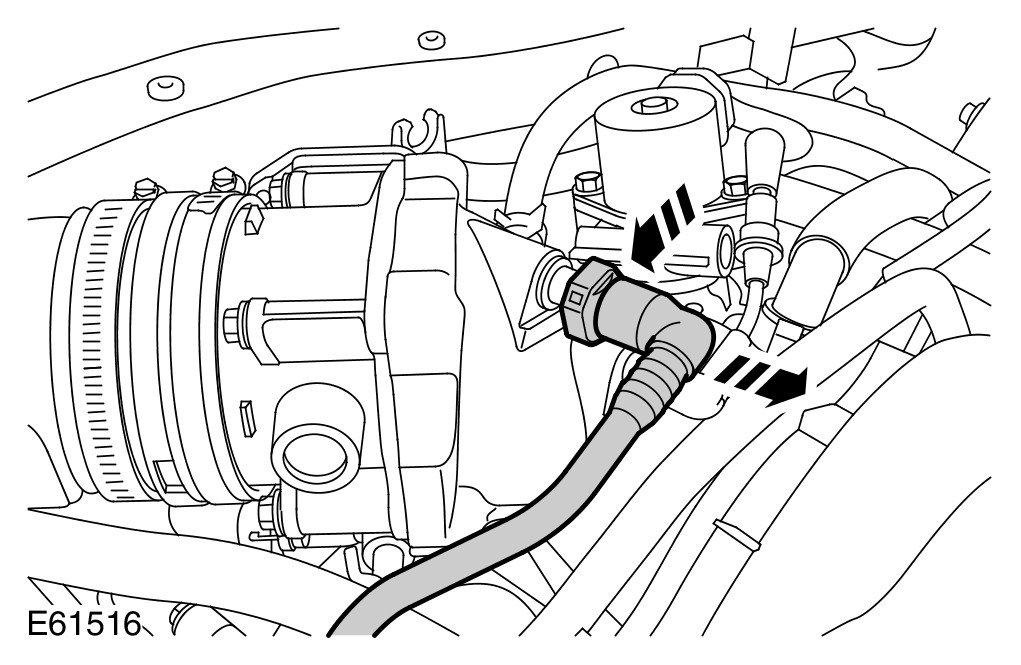
4
CAUTION: Before disconnecting or removing the components, ensure the area around the joint faces and connections are clean. Plug open connections to prevent contamination.
Release the clip and disconnect purge outlet line at the intake elbow.
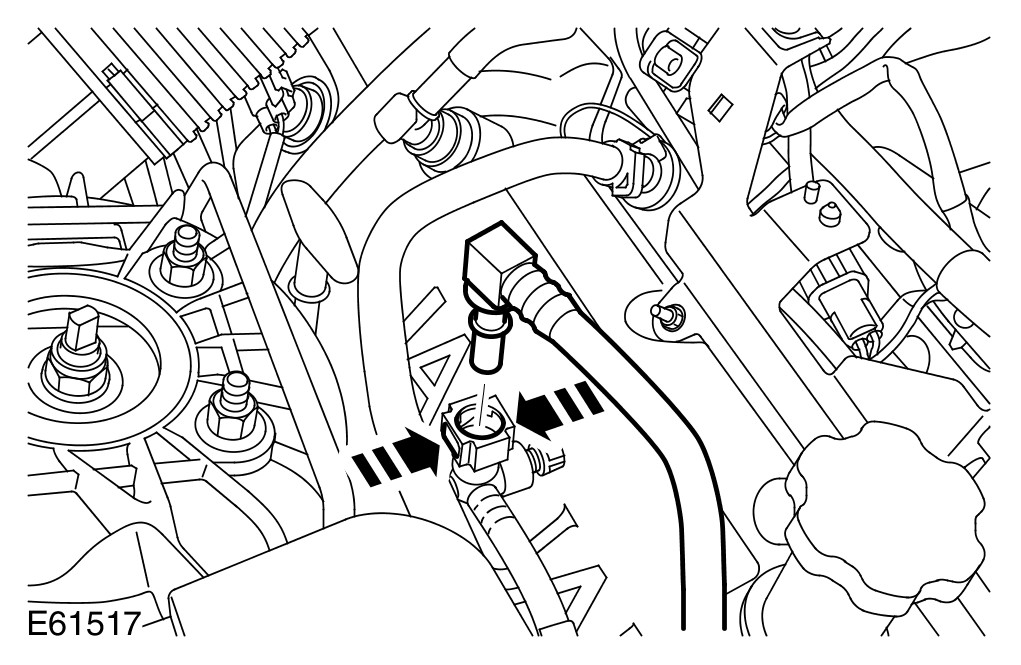
5
CAUTION: Before disconnecting or removing the components, ensure the area around the joint faces and connections are clean. Plug open connections to prevent contamination.
Release the clip and disconnect the purge inlet line.
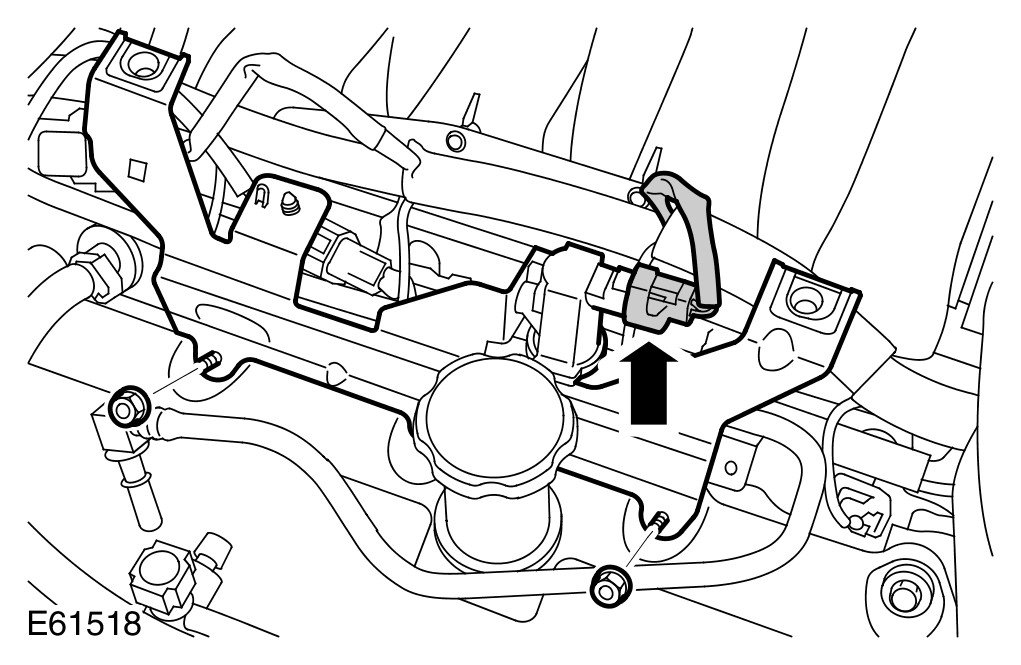
6 Remove the purge valve assembly.
- Disconnect the electrical connector.
- Remove the 2 nuts.
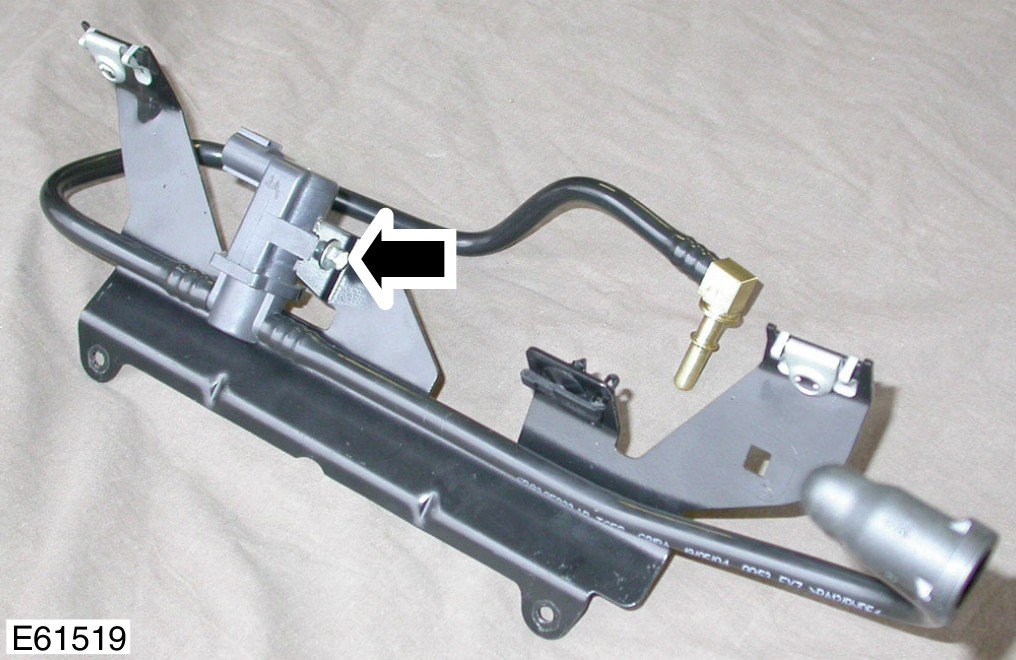
7
NOTE:
Do not disassemble further if the component is removed for access only.
NOTE:
Note the fitted position.
Remove the purge valve.
- Remove the bolt.
Installation
1 Install the purge valve, align the peg and tighten the bolt to 6 Nm (4 lb.ft).
2 Install the purge valve.
- Connect the electrical connector.
- Tighten the nuts to 10 Nm (7 lb.ft).
3 Connect the purge lines.
- Clean the component mating faces.
4 Secure the electrical connectors.
5 Install the engine cover. For additional information, refer to Engine Cover Service and Repair
6 Connect the battery ground cable. For additional information, refer to Specifications [1][2]Battery