Starter Motor: Testing and Inspection
1. Checking commutator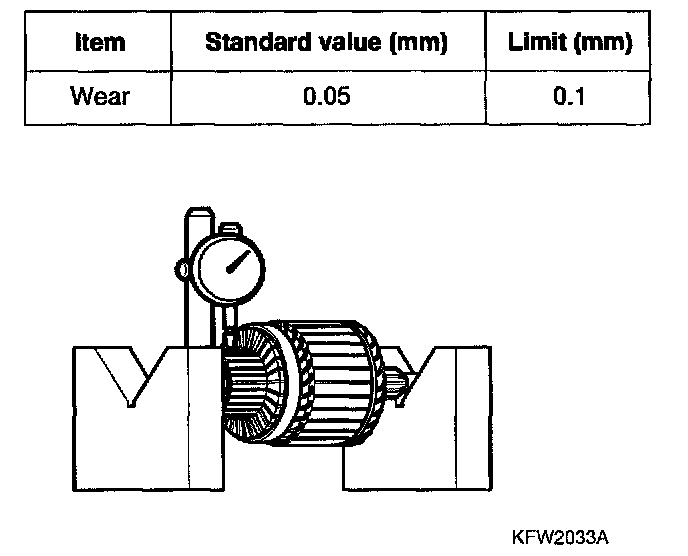
1. Place the armature on a pair of V-blocks and check the wear with dial indicator.
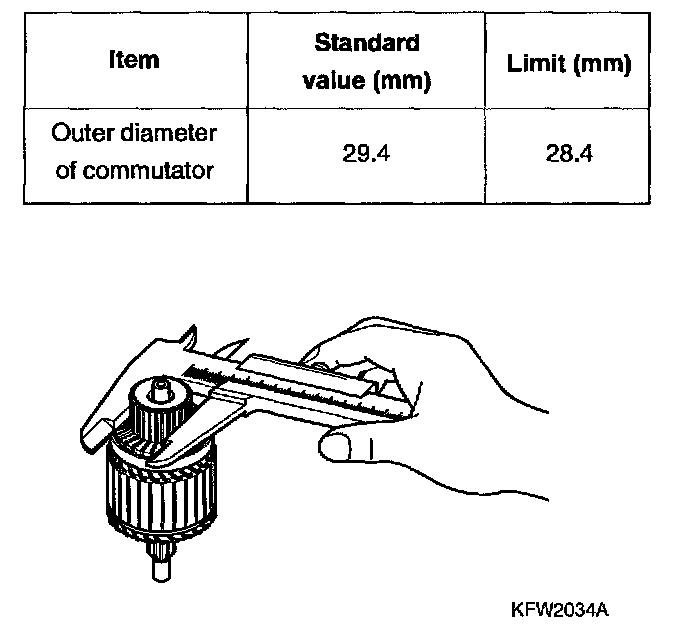
2. Measure the outer diameter of commutator.
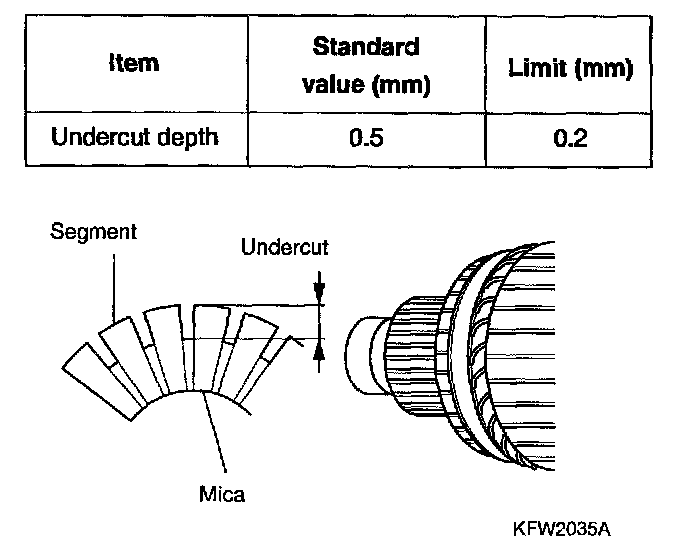
3. Check the depth of the undercut between segments.
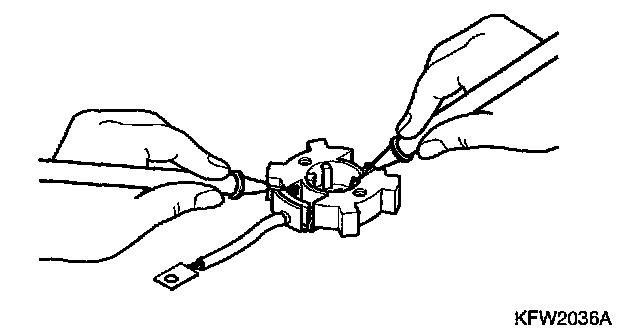
2. Brush holder
Check for continuity between the brush holder plate and the brush holder No continuity is normal.
3. Overrunning clutch
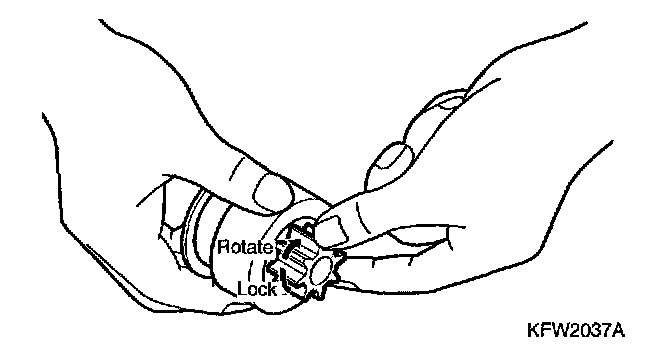
1. Rotate the pinion while holding the clutch housing. The drive pinion should rotate smoothly in only one direction. It should not rotate in the reverse direction.
2. Check the pinion for wear or burrs and replace the overrunning clutch assembly if the opinion is worn or burred. Check the ring gear for wear or burrs if pinion is damaged.
4. Front and rear bracket bushing Check the bushing for wear or burrs and replace the front and rear bracket if wear or burr is found.
5. Replacing brush and spring
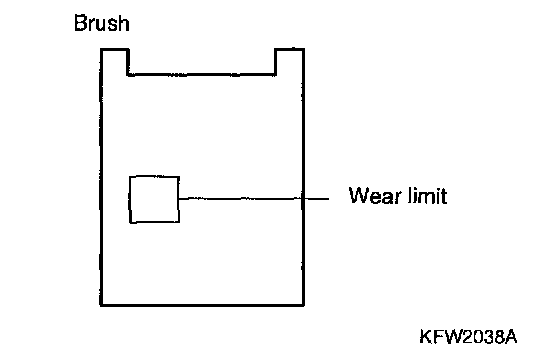
1. Brushes that are worn beyond wear limit should be replaced.
2. Take care not to damage the pigtail when replacing the field coil.
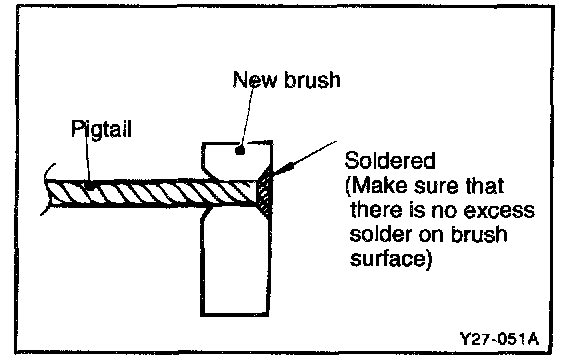
3. Sand the end of pigtail with sandpaper to ensure good soldering.
4. Insert the pigtail into the hole on new brush and solder it.
5. When replacing the ground brush, move the retaining spring backward and remove the brush from the brush holder.
6. Testing armature
1. Armature short circuit test
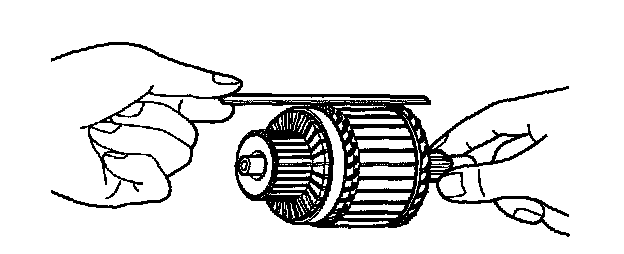
1. Locate the armature on growler.
2. Turn the armature slowly with a thin steel blade placed right on it.
Replace the armature when the blade shakes or sticks to the core as there is a short circuit in it.
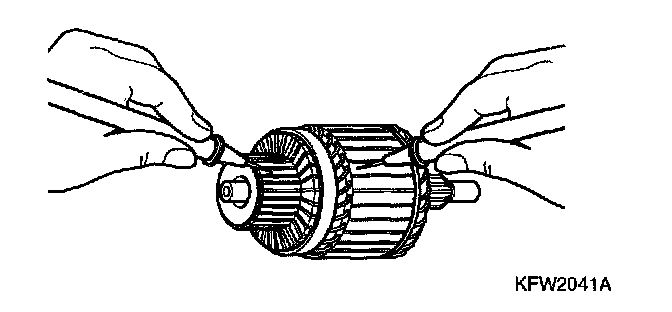
2. Earthing test for armature
The cut between armature coil core and commutator segment is regarded as normal it there is no continuity when checking the insulation.
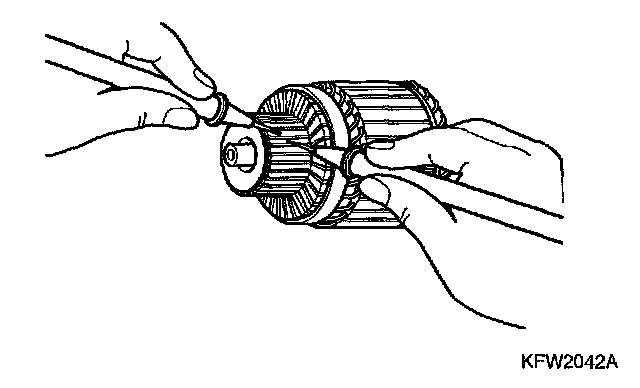
3. Checking the armature coil wiring for damage or disconnection. If there is continuity when checking the continuity between the segments, it is regarded as normal.
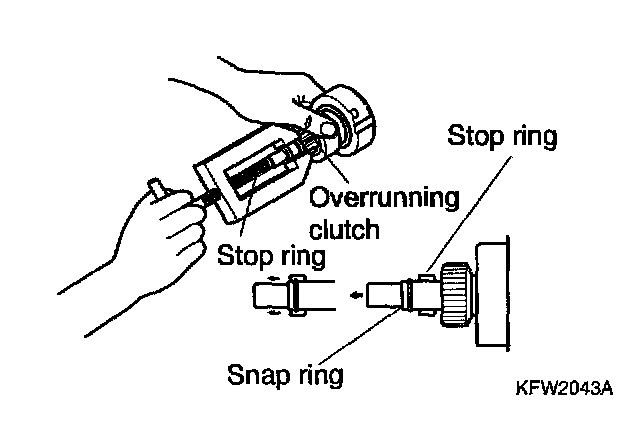
7. Fitting stop ring and snap ring
Pull up the overrunning clutch stop ring over the snap ring with a suitable tool.