Rear
Service tool:18G672-Piston clamp
REMOVE CALIPER
1. Loosen the rear road wheel nuts and jack up the rear of the vehicle, lower onto axle stands and remove the wheels.
2. Using a recognized hose clamp, clamp the flexible brake hose above the rear axle, to prevent loss of fluid.
Rear Brake Caliper:
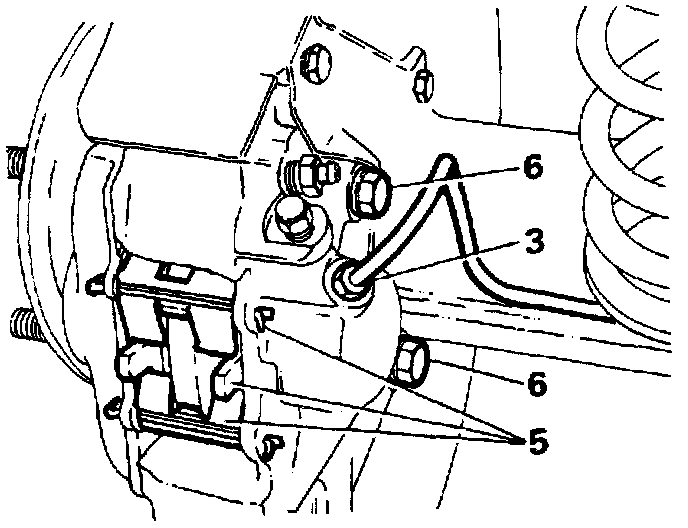
3. Remove the brake pipe(s) from the rear brake caliper(s). Seal the ends of the pipe to prevent ingress of dirt.
4. Rear right hand caliper only, disconnect the pad wear indicator.
5. Remove the retaining pins and springs and withdraw the pads. If the same pads are to be refitted, identify them for assembly to their original locations.
6. Remove the two bolts and withdraw the caliper from the axle.
NOTE: Do not separate the caliper halves
Dismantle and Overhaul
7. Clean the outer surfaces of the caliper with aerosol brake cleaner.
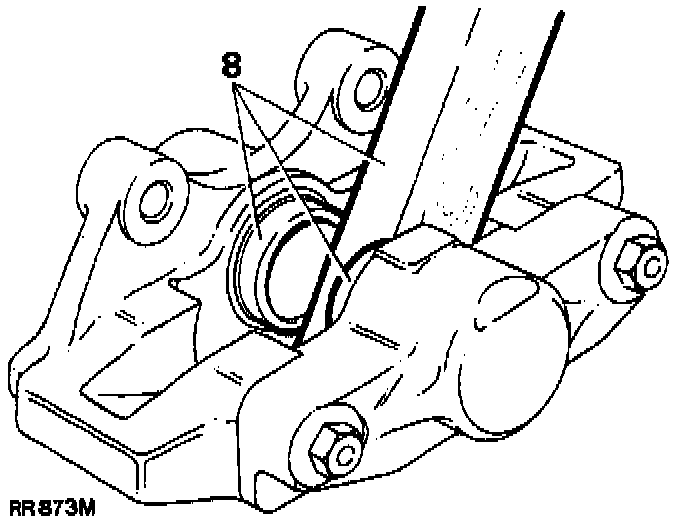
8. Carefully expel the pistons from their bores by applying air pressure to the fluid inlet port. Since it is unlikely that both pistons will expel at the same time, regulate the rate with a suitable piece of wood inserted between the two pistons.
9. Finally, remove the pistons keeping them identified with their respective bores.
10. Remove the wiper seal retainer by inserting a blunt screwdriver between the retainer and the seal and pry the retainer carefully from the mouth of the bore.
11. Taking care not to damage the seal grooves, extract the wiper seal and fluid seal.
12. Clean the bores, pistons and particularly the seal grooves with clean brake fluid or aerosol brake cleaner only. If the caliper or pistons are corroded or their condition is not perfect new parts must be fitted.
13. Coat a new fluid seal with a suitable disc brake lubricant. Ease the seal into the groove in the bore using only the fingers and ensure that it is properly seated. The fluid seal and the groove are not the same that when the seal is seated it feels raised to the touch at the edge furthest away from the mouth of the bore.
14. Coat the appropriate piston with a suitable disc brake lubricant and insert it squarely into the bore by hand only. Do not tilt the piston during insertion and leave approximately 8mm (0.312 inch) projecting from the bore.
15. Coat a new wiper seal with a suitable disc brake lubricant and fit it to a new seal retainer. Slide the assembly, seal first, over the protruding piston and into the bore recess.
16. Using special tool 1 8G672-piston clamp, press home the seal retainer and piston.
Mounting Inboard Piston
17. Carry out the same procedure as for removing and fitting the outboard piston and seals, instructions 8 to 16.
FIT CALIPERS AND PADS TO VEHICLE
18. Fit the caliper to the axle and secure with the two bolts tightening evenly to 65-80 Nm (48-59 ft lb).
19. Connect the brake pipes to the calipers and remove the clamp from the flexible brake hose above the rear axles. Tighten to 12 Nm (9ft lb).
20. Lightly coat the back and edges of the pads with disc brake lubricant carefully avoiding the friction material.
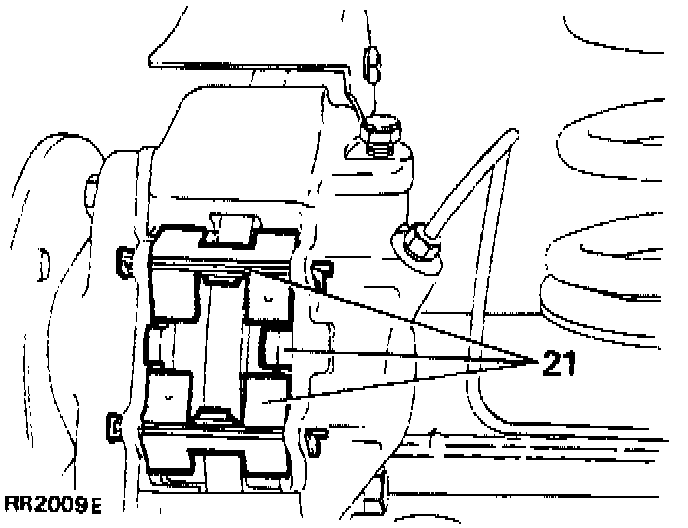
21. Insert the pads and retaining springs, secure in position with new retaining pins and spread the ends. Note the correct position of the retaining springs.
NOTE: Ensure that the friction pad with the wear indicator is fitted to the inboard side of the rear right hand, brake caliper.
22. Reconnect the pad wear indicator electrical multi-plug.
23. Bleed the secondary brake system at the rear calipers, starting at the caliper furthest away from the master cylinder.
24. When the foregoing instructions have been completed on both calipers, press the brake pedal firmly several times to locate the friction pads.
25. Fit the road wheels, remove the axle stands and finally tighten the road wheel nuts to 122-129 Nm (90-95 ft lb).
26. Road test the vehicle, remembering that if new friction pads have been fitted they are not bedded-in and may take several hundred miles before the brakes are at maximum efficiency.