Evaporator Core: Service and Repair
REMOVALNOTE:
- Replacement of the suction accumulator/drier is not required when repairing the air conditioning system except when there is physical evidence of system contamination from a failed A/C compressor or damage to the suction accumulator/drier.
- If an A/C evaporator core leak is suspected, the A/C evaporator core must be leak tested before it is removed from the vehicle.
1. Disconnect the battery ground cable.
2. Perform the Refrigerant Discharging and Recovery Procedure.
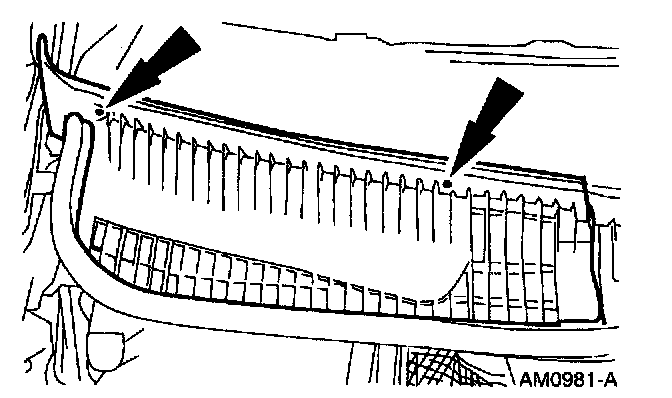
3. Remove the screws and the RH cowl vent screen.
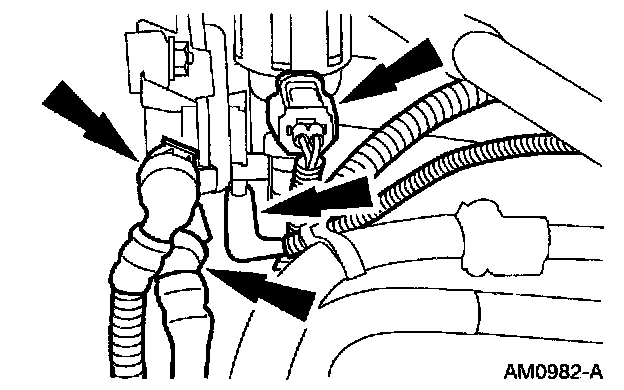
4. Disconnect the vacuum hoses and the wire harness connector from the evaporative emission canister purge valve (EVAP canister purge valve).
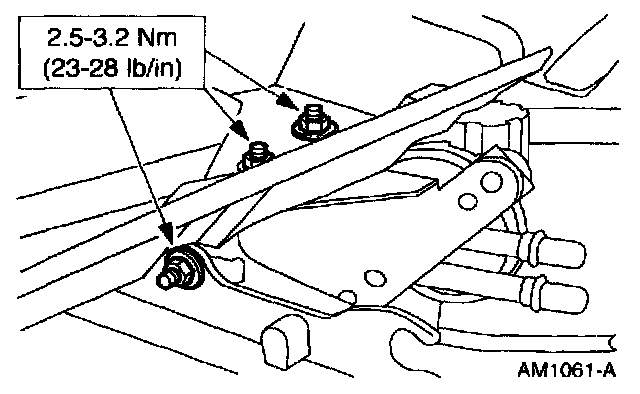
5. Remove the nuts and remove the evaporative emission canister purge valve.
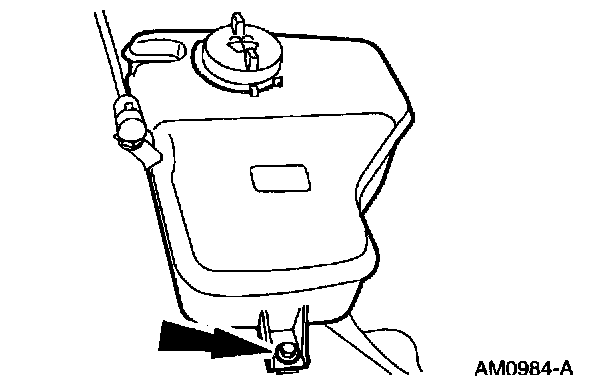
6. Remove the screw and reposition the windshield washer fluid reservoir.
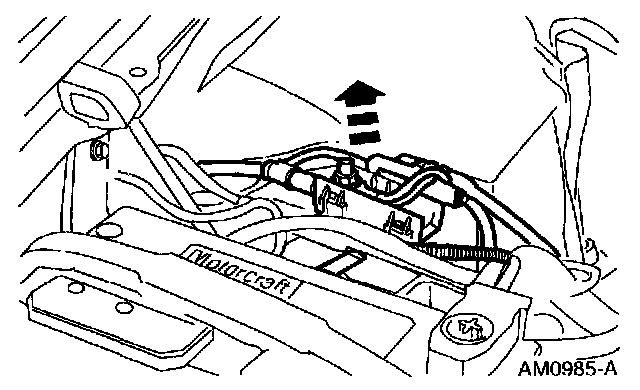
7. Disengage the four wire harness retainers from the top of the RH fender apron.
8. Remove the RH front wheel and tire.
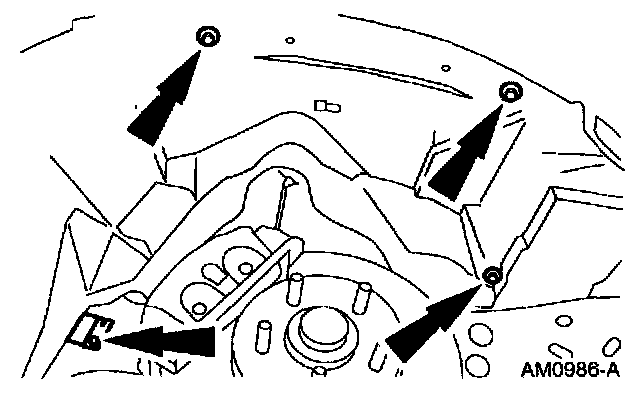
9. Remove the screws from the RH fender apron and remove the fender apron.
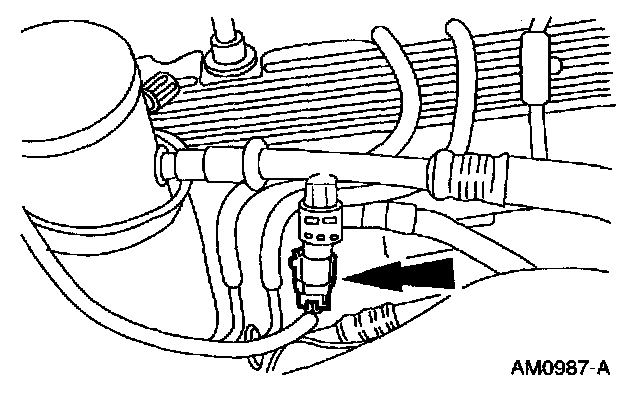
10. Disconnect the wire harness connector from the A/C cycling switch.
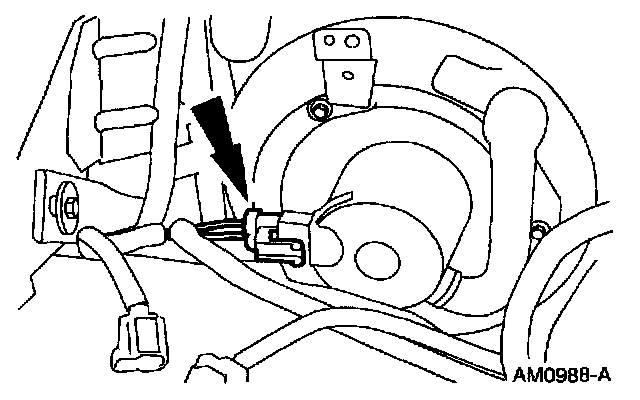
11. Disconnect the wire harness connector from the blower motor.
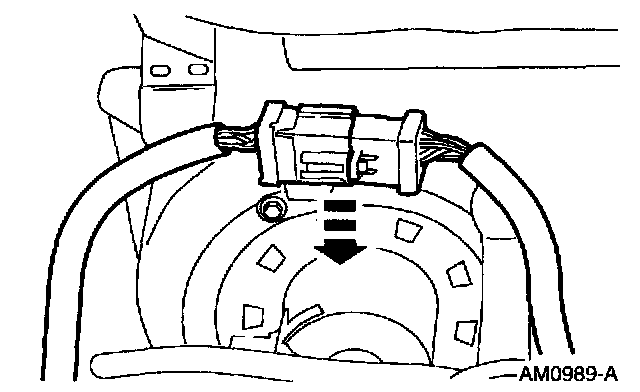
12. Disengage the wire harness connector from the retainer.
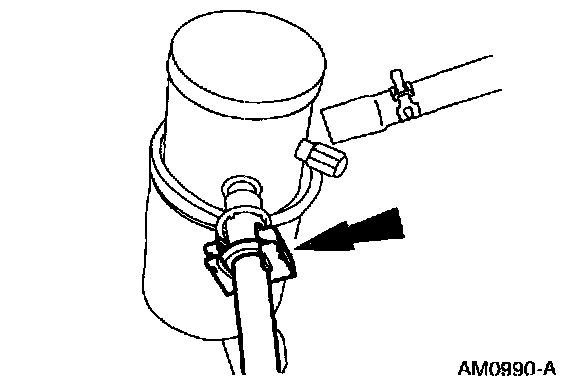
13. Disconnect the evaporator to compressor suction line from the suction accumulator/drier. Refer to spring lock couplings disconnect and connect general procedure. Spring Lock Coupling Connect and Disconnect Procedure
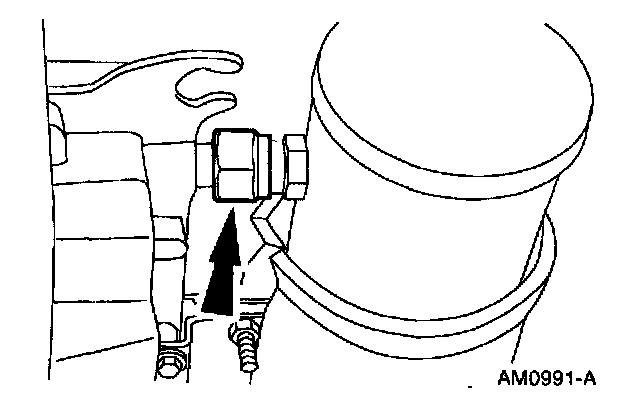
14. Disconnect the suction accumulator/drier from the A/C evaporator core.
CAUTION: To prevent damage to the fitting and the tube, use a backup wrench when removing the suction accumulator/drier.
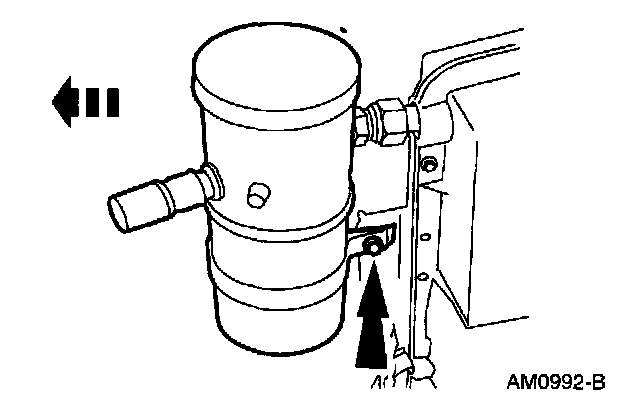
15. Remove the clamp screw retaining the A/C accumulator mounting bracket to the A/C evaporator core housing and remove the suction accumulator/drier.
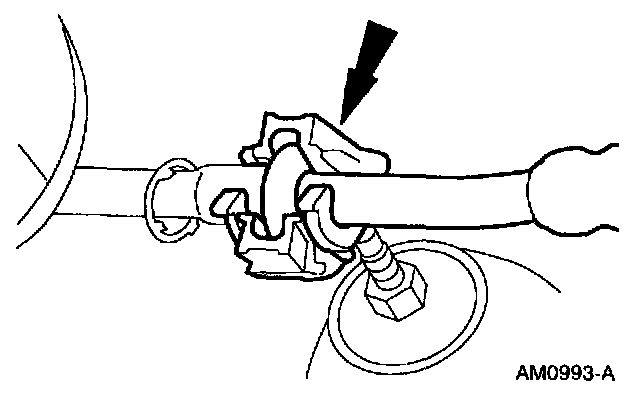
16. Disconnect the condenser to evaporator tube from the A/C evaporator core. Refer to spring lock couplings disconnect and connect general procedure. Spring Lock Coupling Connect and Disconnect Procedure
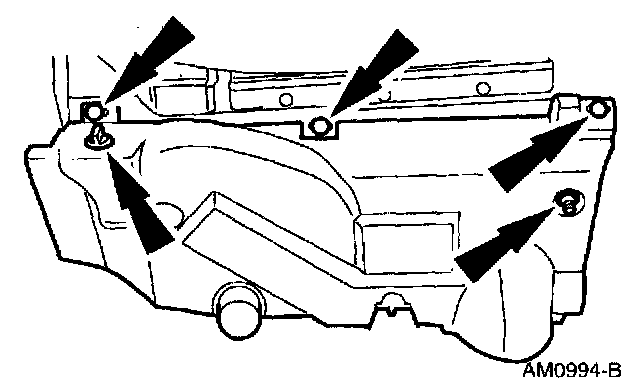
17. Remove the RH instrument panel insulator.
- Remove the pushpins.
- Disengage the courtesy lamp holder.
- Disconnect the power point wire harness
connector and remove the RH instrument panel insulator.
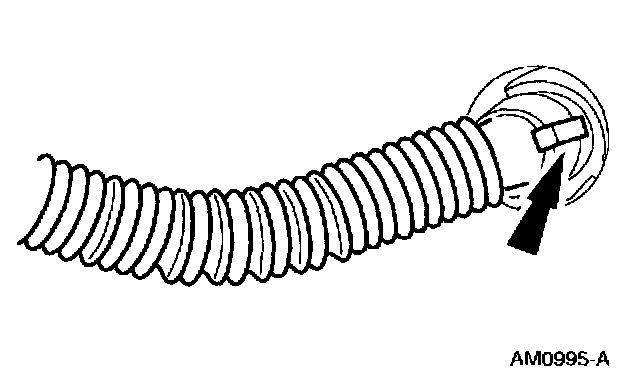
18. Remove the in-car temperature sensor hose and elbow from the evaporator housing.
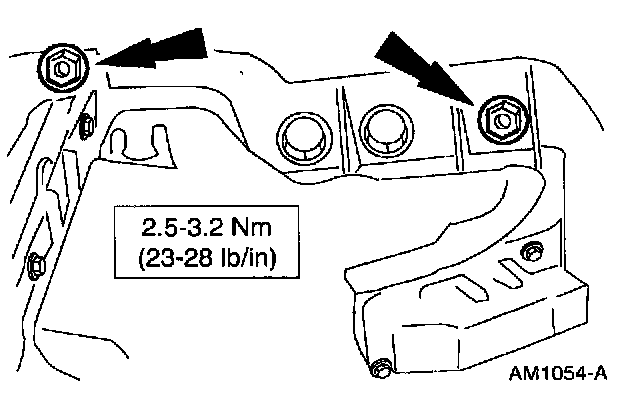
19. Remove the nuts at the top of the evaporator housing.
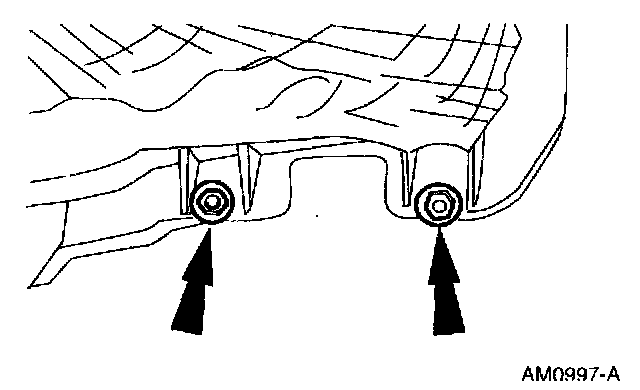
20. Remove the nuts at the bottom of the evaporator housing.
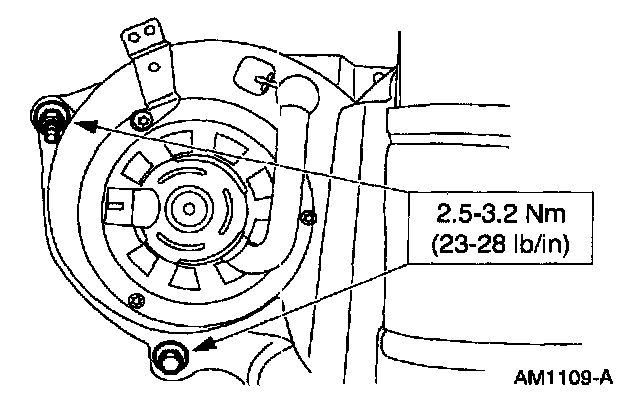
21. Remove the screw and nut near the blower motor.
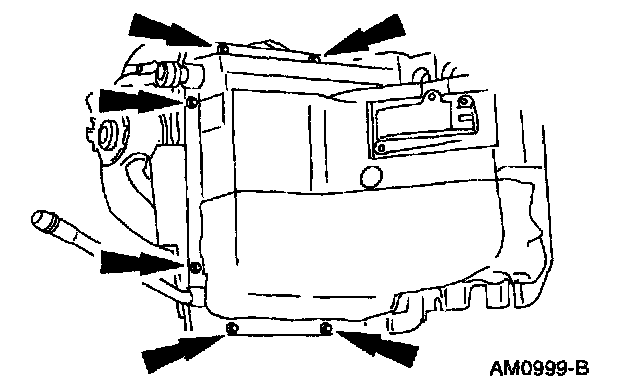
22. Remove the screws.
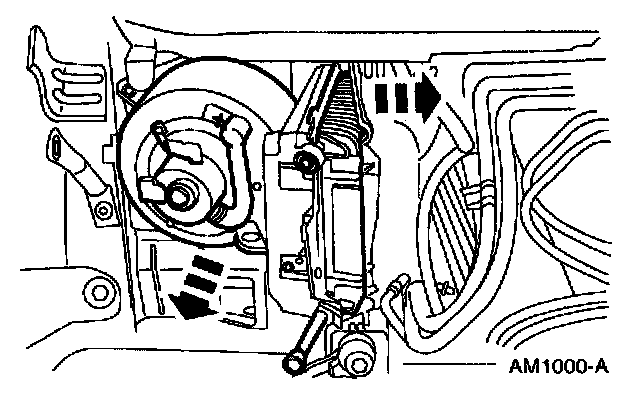
23. Separate the housing and remove the blower motor and A/C evaporator core.
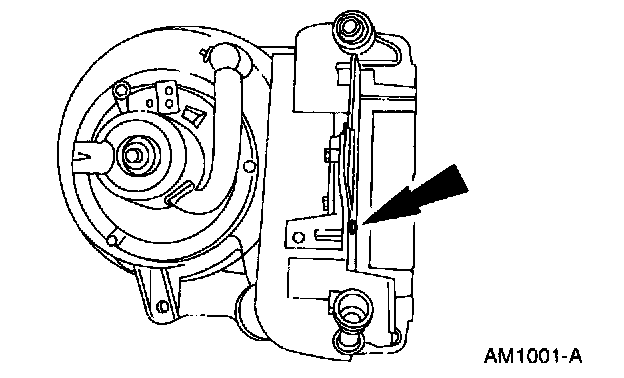
24. Remove the A/C evaporator core screw.
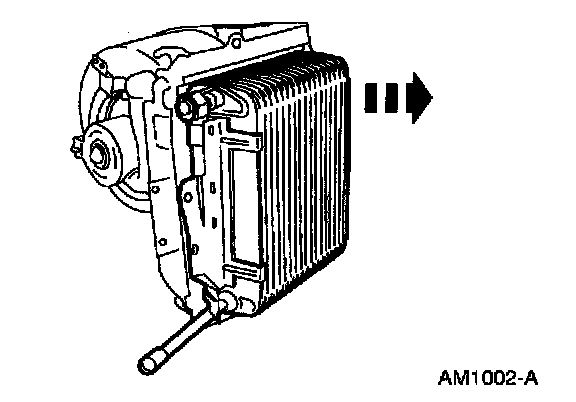
25. Remove the A/C evaporator core from the housing.
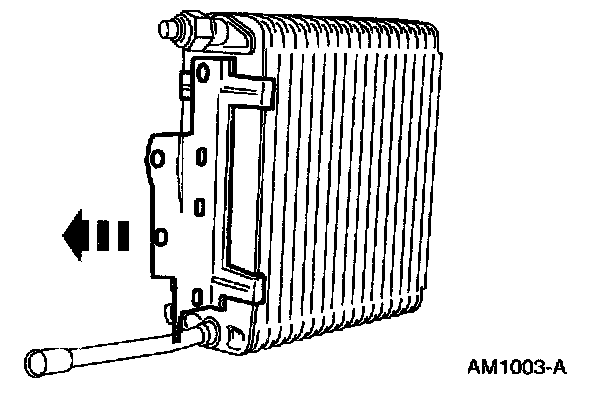
26. Remove the bracket from the A/C evaporator core.
INSTALLATION
1. Service the replacement A/C evaporator core with the proper amount of PAG refrigerant compressor oil F7AZ-19589-DA or Motorcraft YN-12c or equivalent meeting Ford specification WSH-M1C231-B. Refer to Refrigerant Oil Addtion.
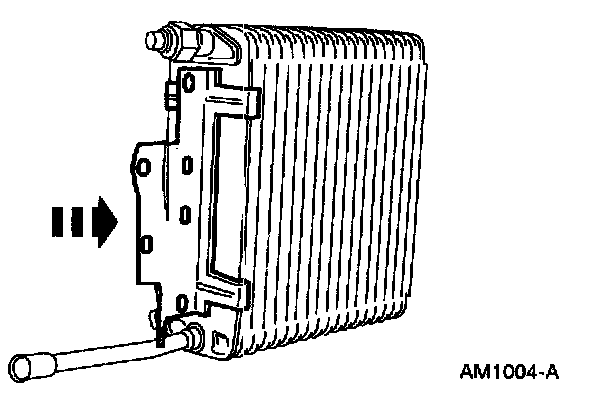
2. Install the bracket on the A/C evaporator core.
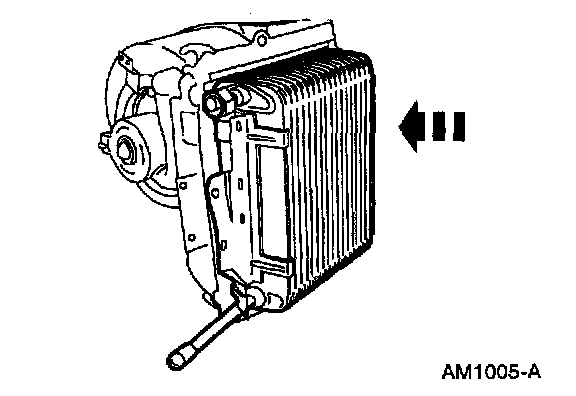
3. Install the A/C evaporator core in the housing.
4. Install the A/C evaporator core screw.
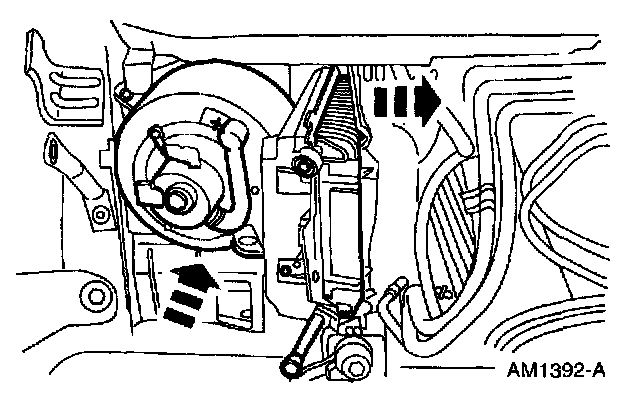
5. Install the blower motor and A/C evaporator core to the evaporator core cover.
6. Install the screws.
7. Install the screws and nuts near the blower motor.
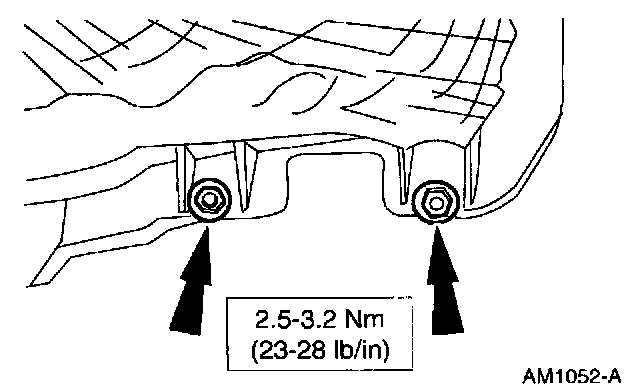
8. Install the nuts at the bottom of the evaporator housing.
9. Install the nuts at the top of the evaporator housing.
10. Install the in-car temperature sensor hose and elbow.
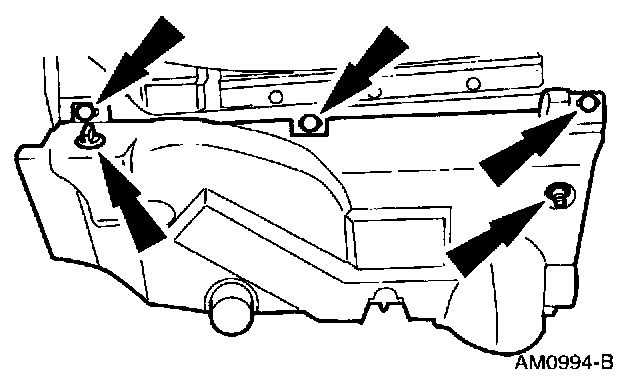
11. Install the RH instrument panel insulator.
- Connect the power point wire harness connector.
- Install the courtesy lamp holder and the pushpins.
12. Connect the condenser to evaporator tube to the A/C evaporator core. Refer to spring lock couplings disconnect and connect general procedure. Spring Lock Coupling Connect and Disconnect Procedure
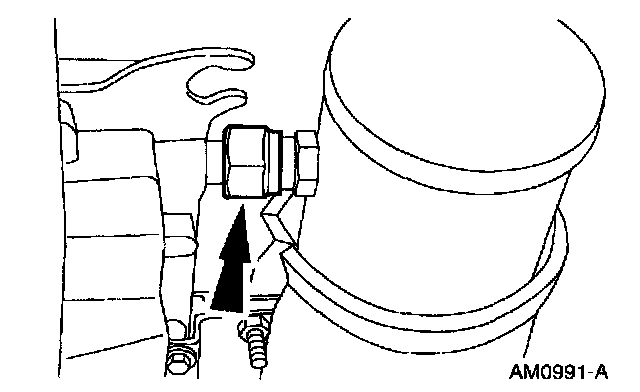
13. Install the suction accumulator/drier to the A/C evaporator core.
- Lubricate the O-ring seal with PAG refrigerant compressor oil F7AZ-19589-DA or Motorcraft YN-12c or equivalent meeting Ford specification WSH-M1C231-B.
CAUTION: To prevent damage to the fitting and tube, use a backup wrench when tightening the nut.
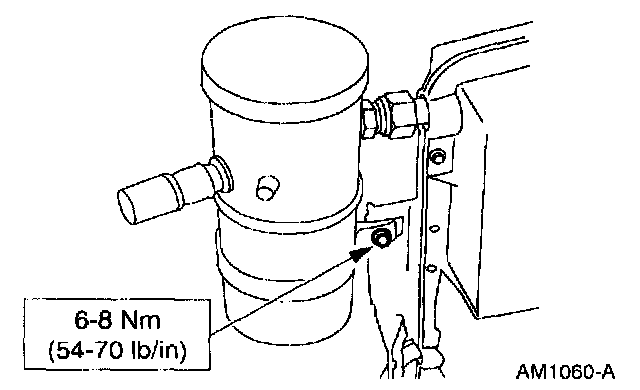
14. Install the screw retaining the A/C accumulator mounting bracket to the A/C evaporator core housing.
15. Connect the evaporator compressor suction line to the suction accumulator/drier. Refer to spring lock couplings disconnect and connect general procedure. Spring Lock Coupling Connect and Disconnect Procedure
16. Connect the wire harness connector to the blower motor.
17. Connect the wire harness to the A/C cycling switch.
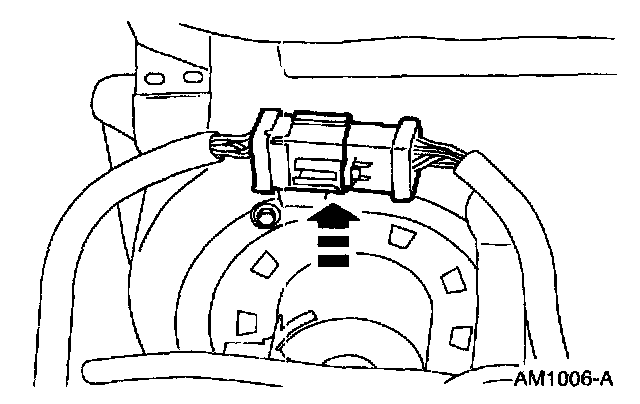
18. Install the wire harness to the retainer.
19. Install the RH fender apron.
20. Install the RH front wheel and tire.
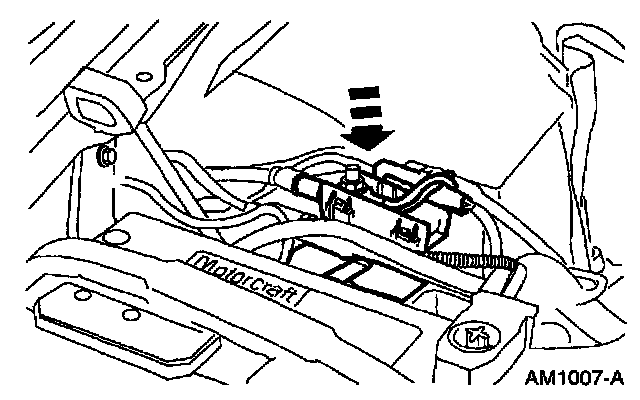
21. Install the wire harness connectors to the top of the RH fender apron.
22. Install the windshield washer reservoir.
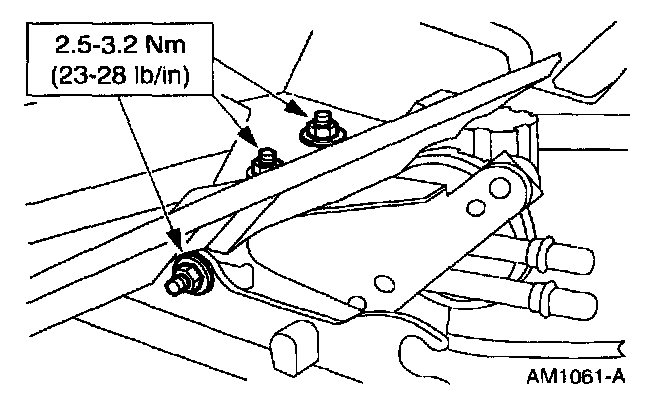
23. Install the evaporative emission canister purge valve.
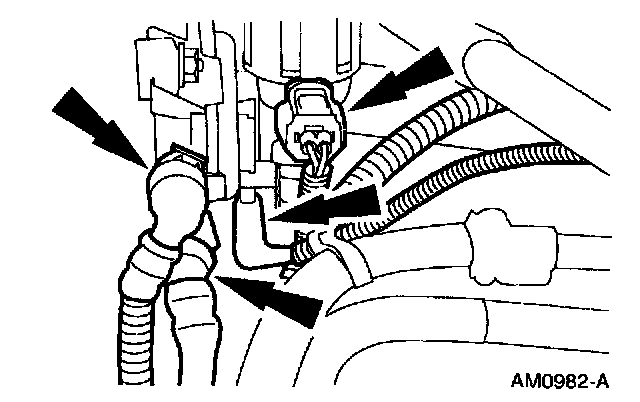
24. Connect the vacuum hoses and wire harness connector to the evaporative emission canister purge valve.
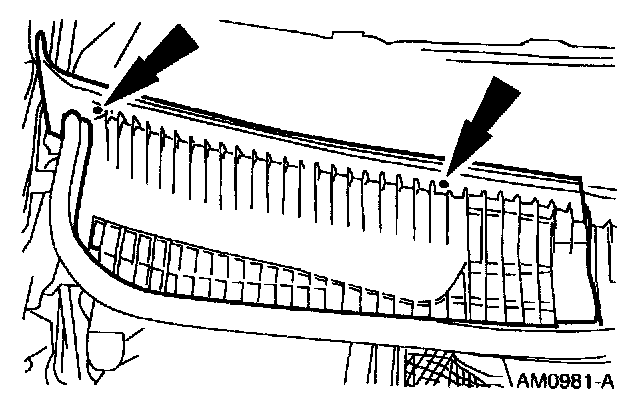
25. Install the RH cowl vent screen.
26. Connect the battery ground cable.
27. Perform the Evacuation and Charging Procedure. Evacuation and Charging Procedure
28. Fill the cooling system; refer to Cooling System.