Removal
1. Disconnect the negative battery cable.2. Oil level ground, raise the vehicle and support it evenly on safety stands.
3. Drain the transaxle oil into a suitable container.
4. Remove in the order shown in the image, referring to Removal Note.
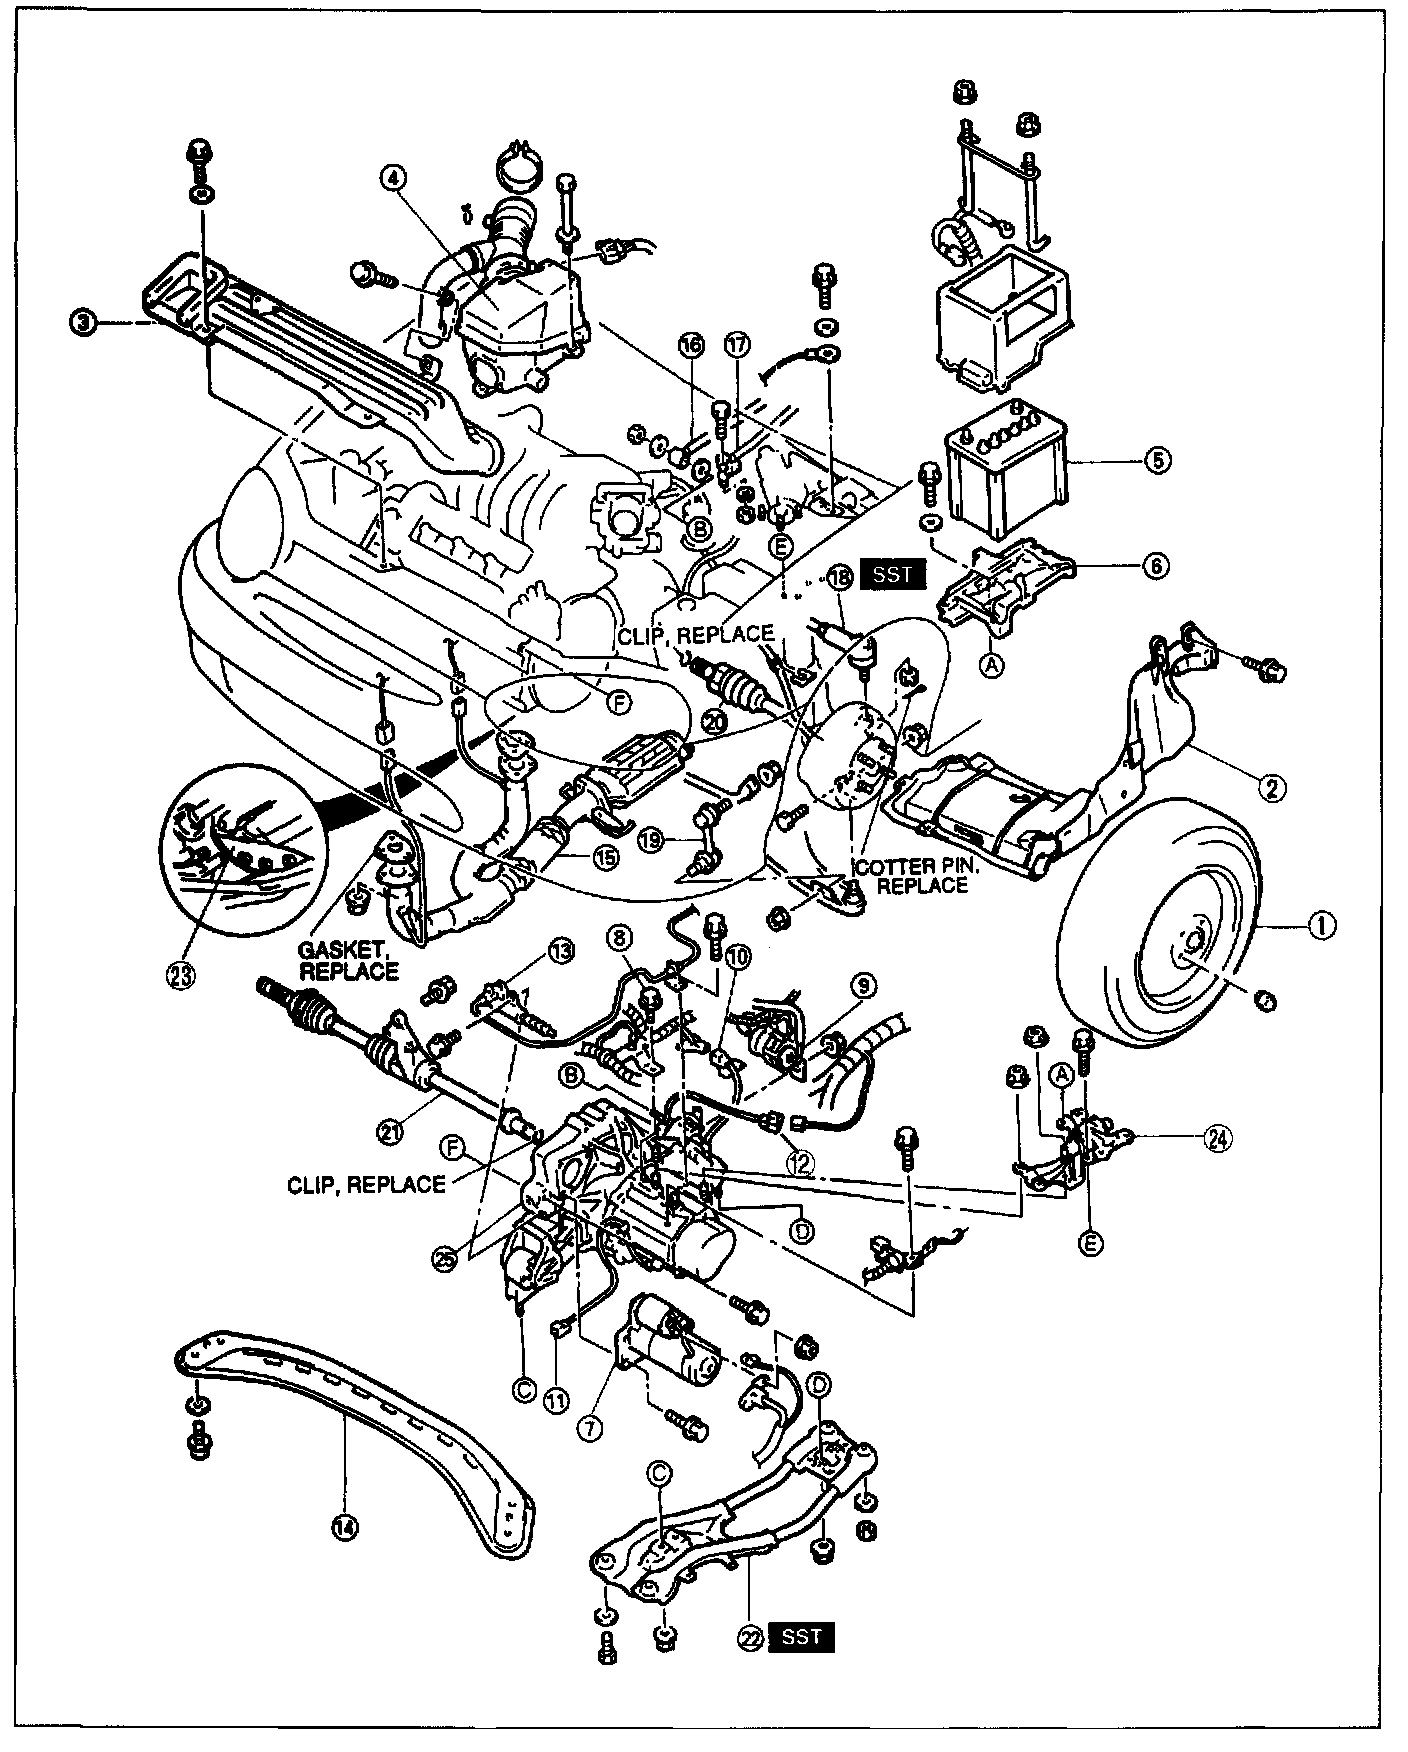
1. Wheel and tire
2. Splash shield
3. Resonance duct
4. Air cleaner housing assembly
5. Battery
6. Battery carrier
7. Starter
8. Harness bracket
9. Fuel filter
10. Neutral switch connector
11. Back-up light switch connector
12. Vehicle speedometer sensor (speedometer driven gear) connector
13. Clutch release cylinder
14. Transverse member
15. Exhaust pipe
16. Extension bar
17. Change control rod
18. Tie rod end
19. Stabilizer control link
20. Drive shaft
21. Joint shaft
22. Engine mount member
23. Undercover
24. No.4 engine mount
25. Transaxle
Removal Note
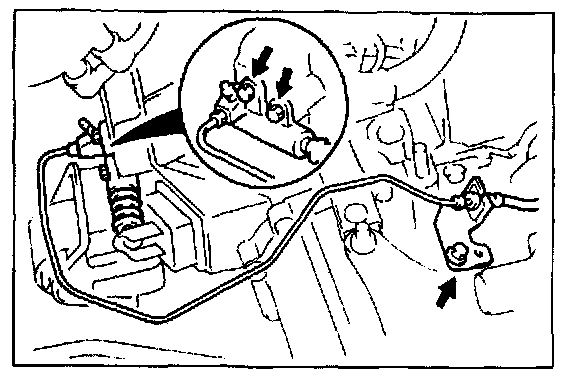
Clutch release cylinder
1. Remove the bolts shown.
2. Put the clutch release cylinder and the clutch pipe in a place where they will not interfere with transaxle removal.
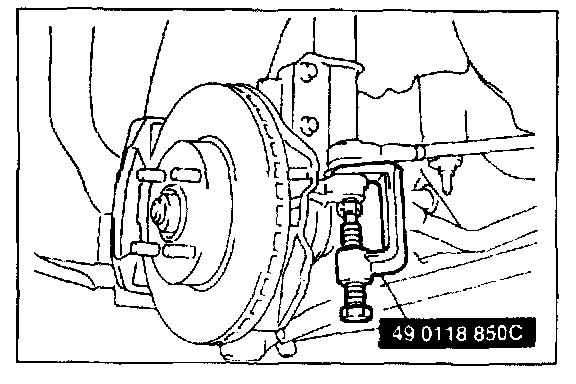
Tie rod end
1. Remove the cotter pin.
CAUTION: The sharp edges of the SST can slice the tie rod end dust boot. Install the SST so that the sharp edges are between the dust boot and the knuckle.
2. Loosen the nut until it is flush with the end of the ball stud. Disconnect the tie rod end from the knuckle by using the SST.
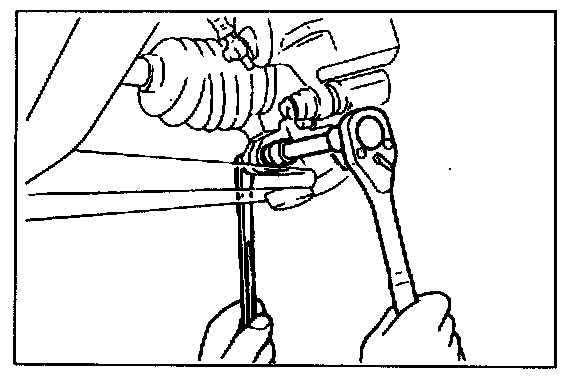
Drive shaft
1. Remove the clinch bolt from the lower arm ball joint.
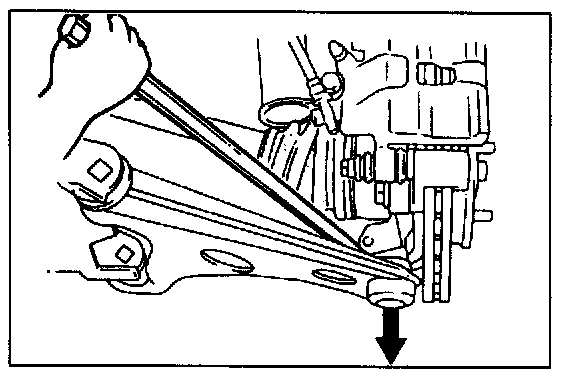
2. Wrap a rag around the ball joint dust seal.
3. Pry the lower arm out of the knuckle.
CAUTION: The sharp edges of the drive shaft snap ring can slice or puncture the oil seal. Be careful when removing the drive shaft from the transaxle.
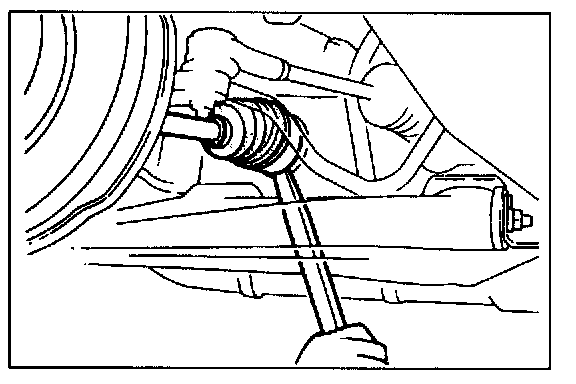
4. Separate the drive shaft from the transaxle by prying with a bar inserted between the outer ring and the transaxle.
5. Suspend the drive shaft with a rope.
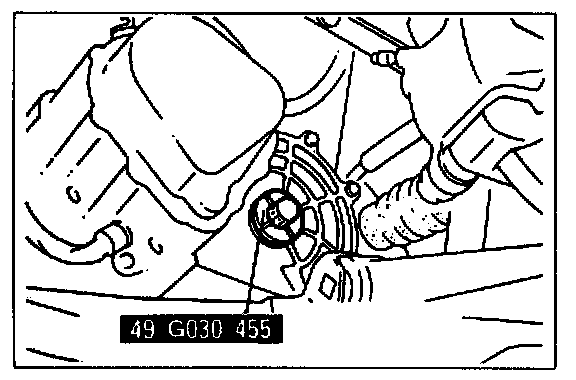
6. Install the SSTs into the transaxle to hold the side gears.
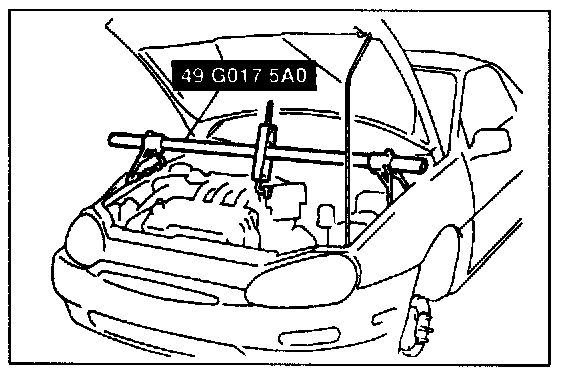
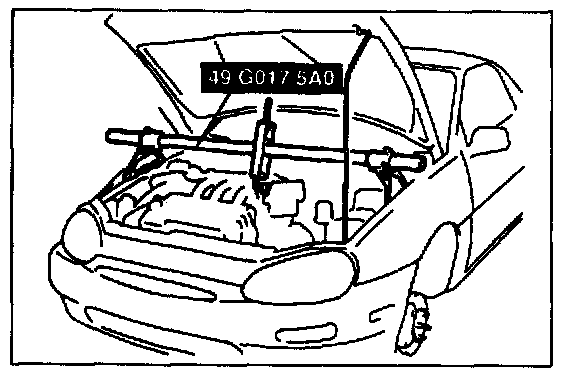
Engine mount member
1. Support the engine by using the SST before removing the engine mount member.
2. Remove the engine mount member.
Transaxle
1. Loosen the SST (engine support) and lean the engine toward the transaxle.
2. Support the transaxle on a lack.
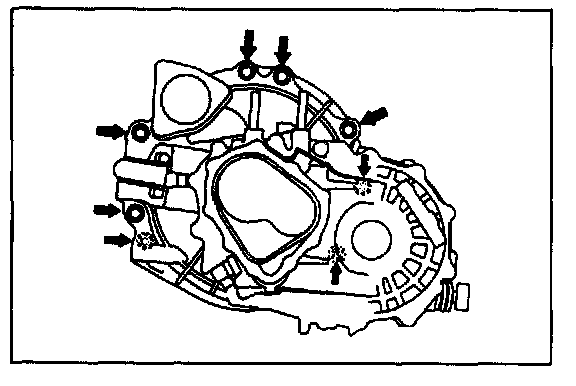
3. Remove the transaxle mounting bolts.
4. Remove the transaxle.