Evaporator Core: Service and Repair
Removal / Installation
1. Discharge the refrigerant from the system.
2. Remove the undercover, glove compartment, and glove compartment cover.
3. Remove the stay.
4. Remove the passenger-side air bag module.
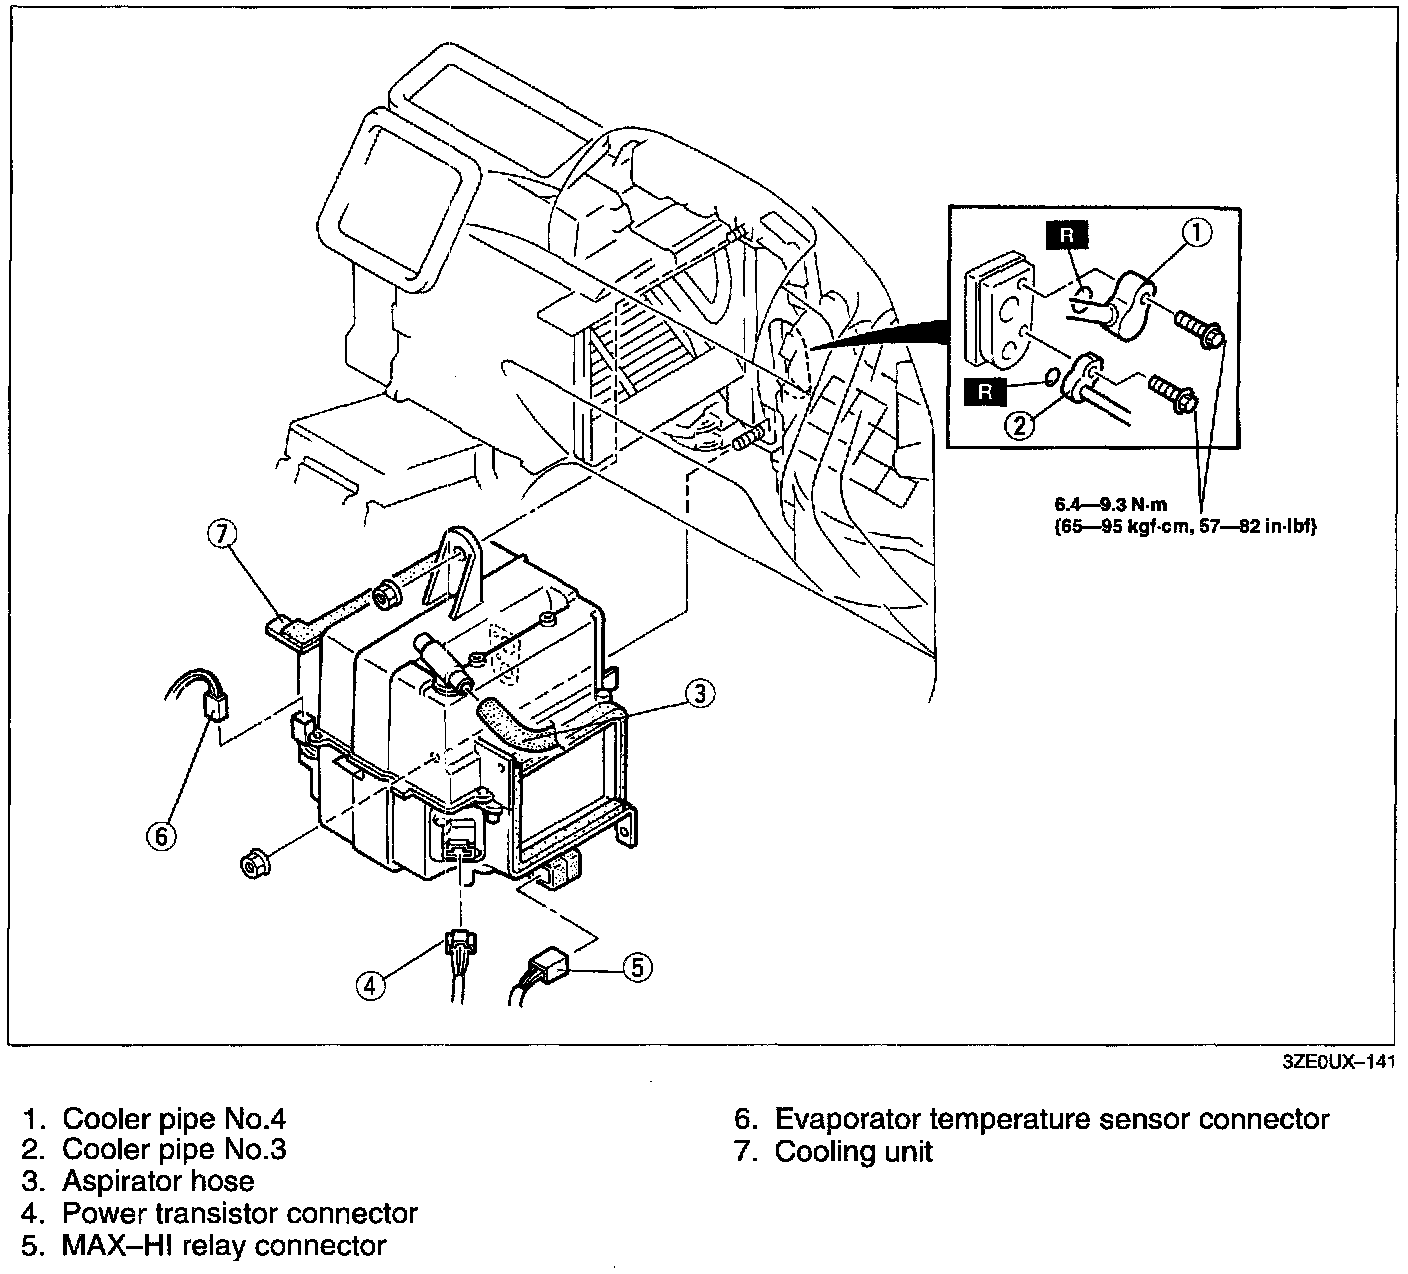
5. Remove in the order shown in the figure. Do not allow compressor oil to spill. Immediately plug all open fittings to keep moisture and dirt out of the system.
6. Install in the reverse order of removal.
7. Charge the system and test its performance.
NOTE: When installing a new cooling unit (evaporator), add 50 ml (1.7 fl oz) of compressor oil through the high-pressure side of the A/C compressor.
Disassembly / Assembly
1. Disassemble in the order shown in the figure.
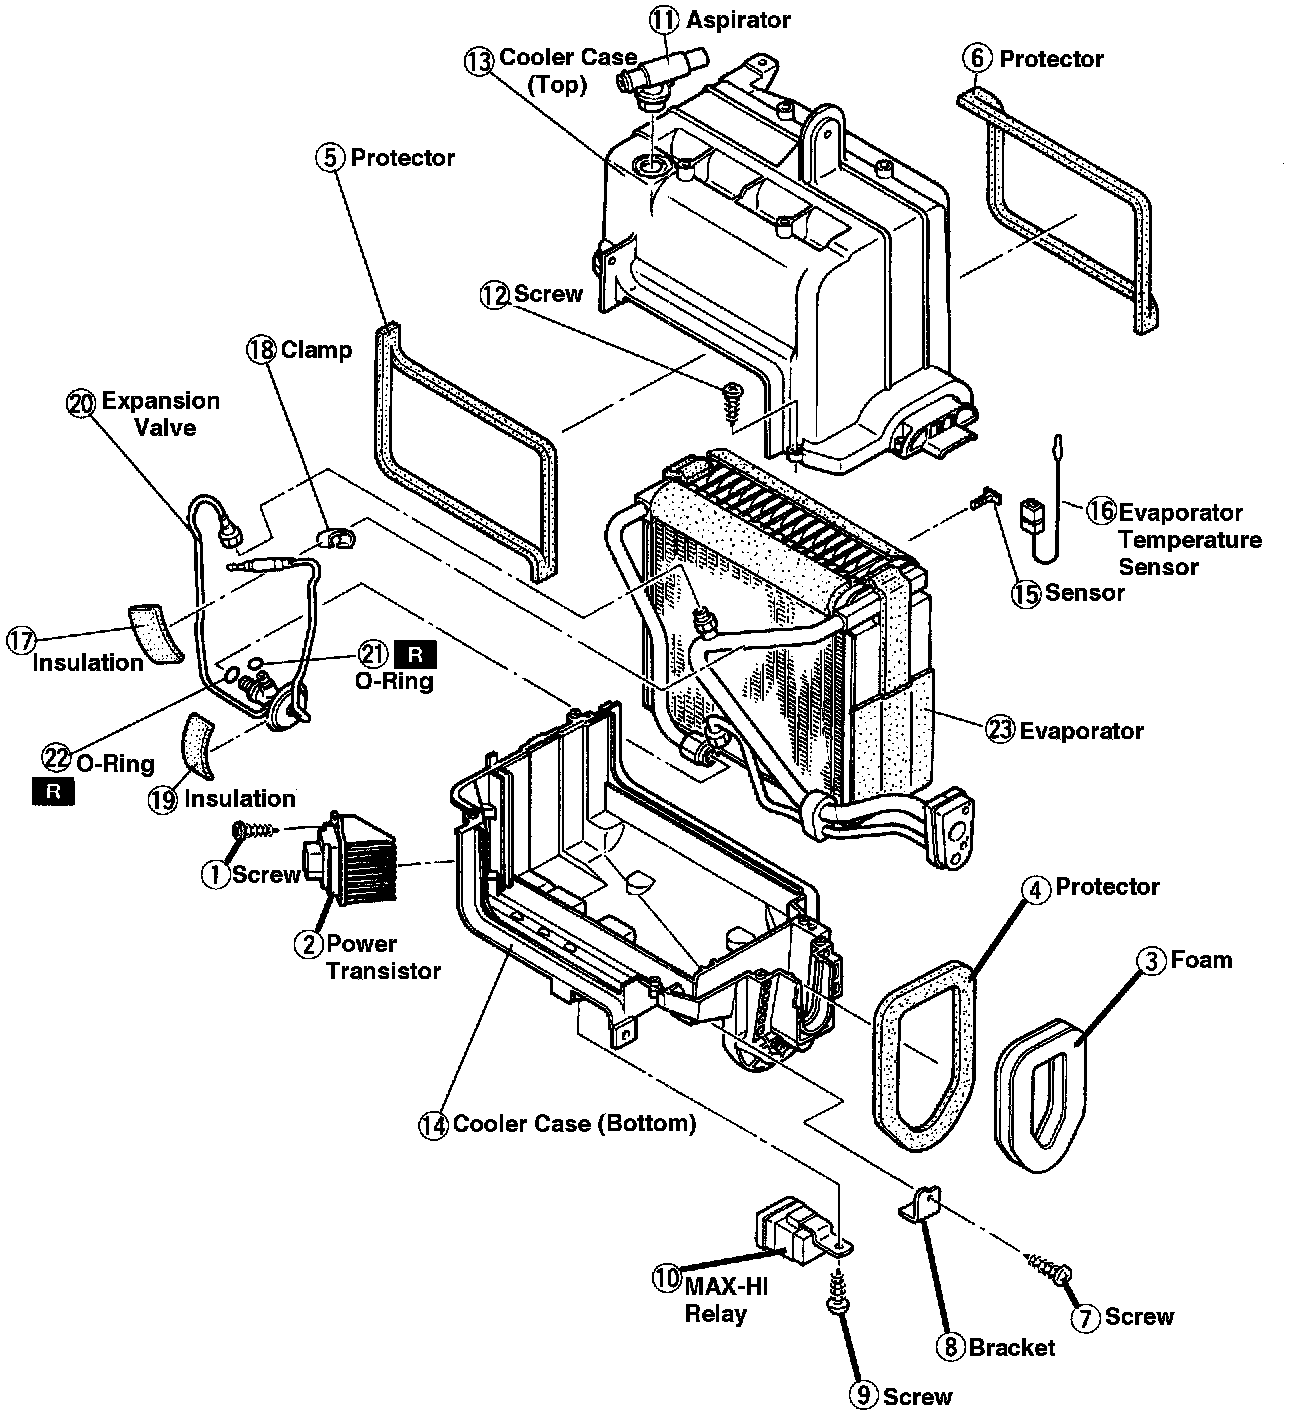
2. Assemble in the reverse order.
Assembly Notes
Expansion Valve
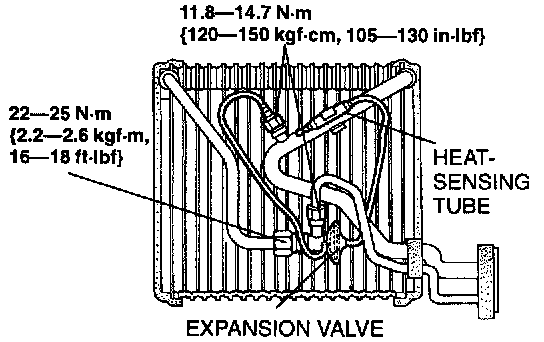
1. Replace the O-rings at the expansion valve joints.
2. Apply compressor oil to the O-rings and connect the joints.
3. Tighten the joint to the specified torque by using two open-end wrenches.
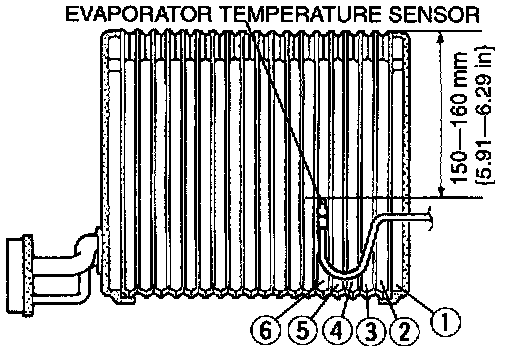
4. Assemble the heat-sensing tube as shown in the figure.
Evaporator Temperature Sensor
Assemble the evaporator temperature sensor as shown in the figure.
Evaporator Inspection
1. Disassemble the cooling unit.
2. Check for cracks, damage, and oil leakage. Repair or replace the evaporator if necessary.
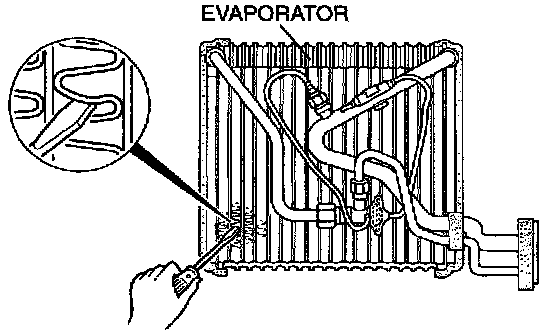
3. Check for bent fins. If they are bent, use a flathead screwdriver to straighten them.