Rear Cross-Member: Service and Repair
REAR CROSSMEMBER REMOVAL/INSTALLATION1. Remove the rear stabilizer.
2. Remove the rear lower lateral link.
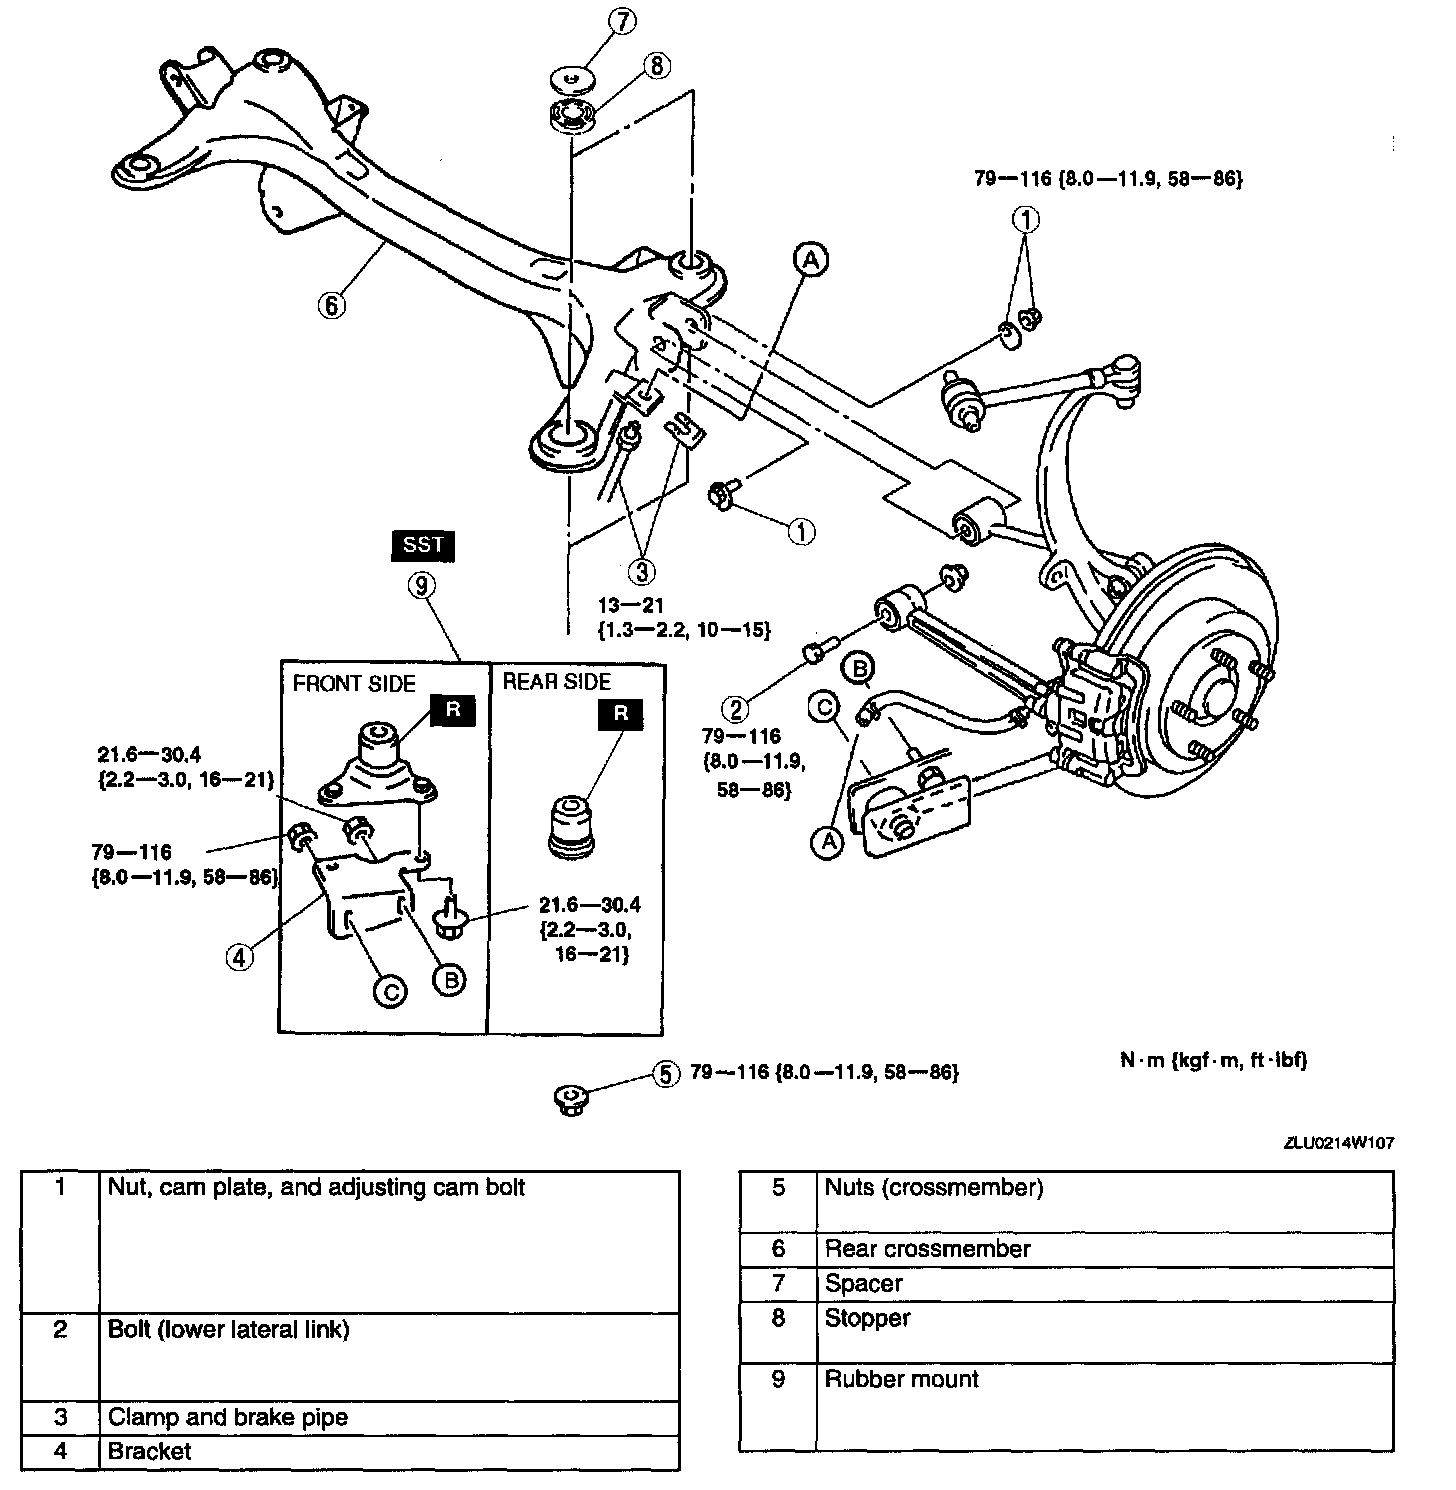
3. Remove in the order indicated in the table.
4. Install in the reverse order of removal.
5. Adjust the rear wheel alignment.
Bolt (Lower Lateral Link) Removal Note
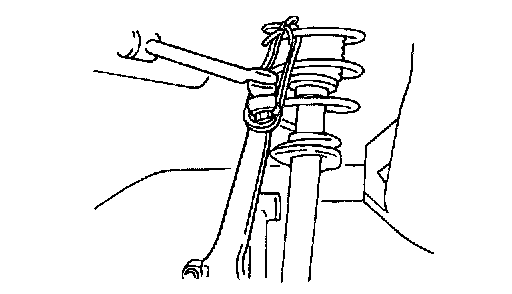
1. Suspend the axle component using a rope.
Nuts (Crossmember) Removal Note
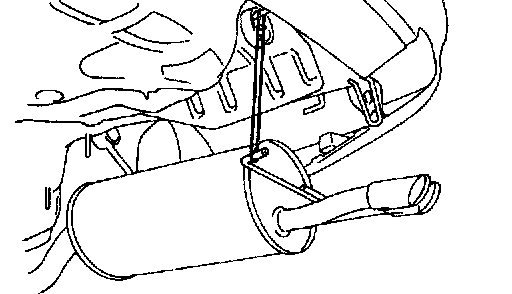
1. Suspend the main silencer using a rope.
Rubber Mount Removal Note Front side
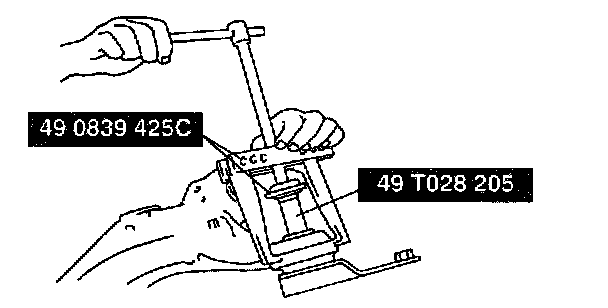
1. Remove the rubber mount using the SSTs.
Rear side
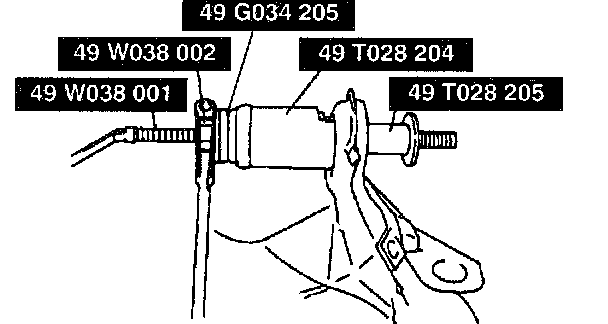
1. Remove the rubber mount using the SSTs.
Rubber Mount Installation Note Front side
1. Apply soapy water to the new bushing.
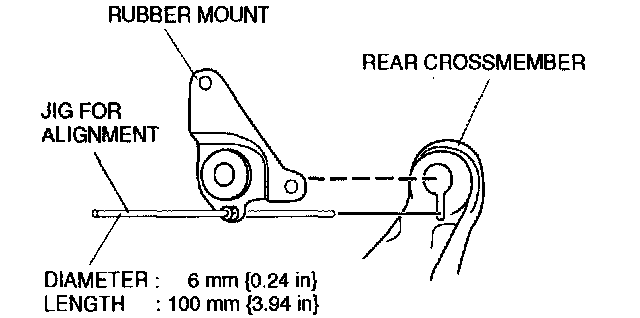
2. Align the rubber mount using a jig as shown.
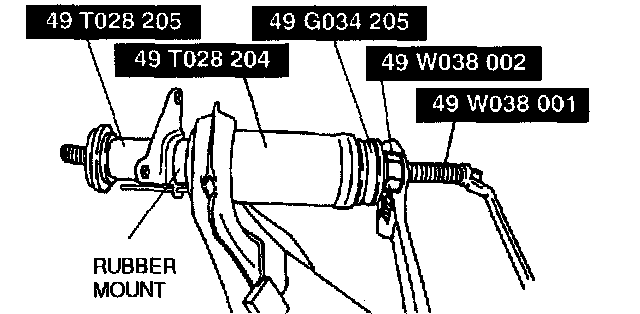
3. Set the SSTs as shown.
4. Press the rubber mount into the crossmember using the SSTs.
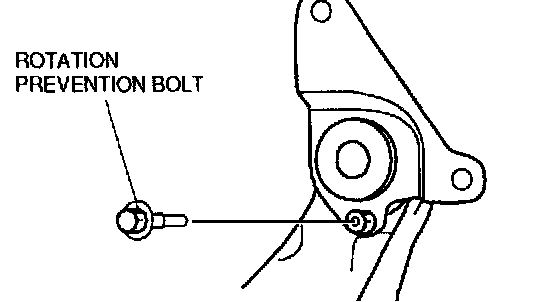
5. Remove the jig for alignment, and install the rotation prevention bolt (M8 x 1.25).
6. After installing the rear crossmember to the body, remove the rotation prevention bolt.
Rear side
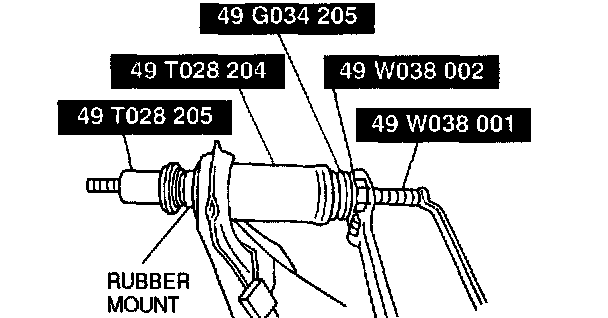
1. Set the SSTs as shown.
2. Press the rubber mount into the crossmember using the SSTs.
Stopper Installation Note
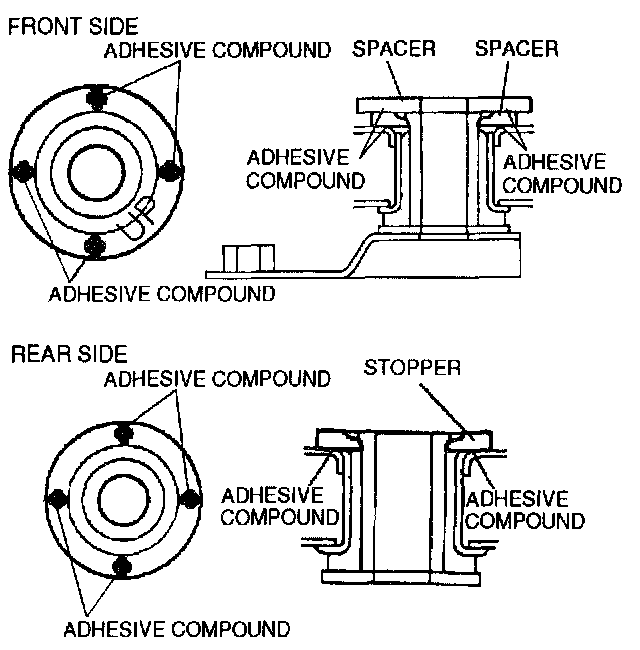
1. Apply adhesive compound onto the stopper as shown in the figure.
2. Install the stopper onto the rear crossmember. When installing the front side stopper, face UP mark upward.