Repair Procedure
FIGURE 1:
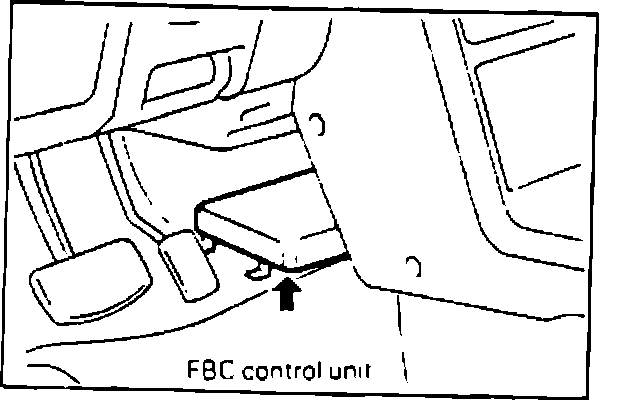
1. Disconnect the large connector from the FBC Control Unit which is located under the heater unit in the passenger compartment (Figure 1).
FIGURE 2:
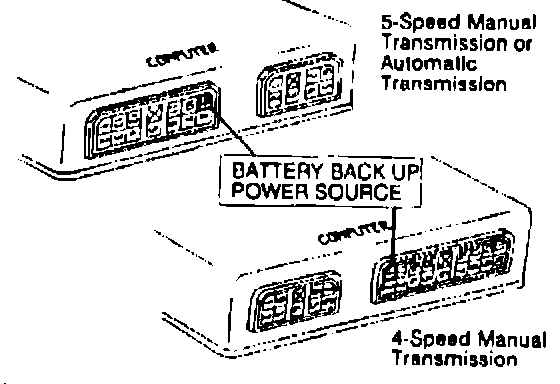
2. Cut the Red/Blue wire at the back side of the removed connector (Figure 2). This is the battery back up power source circuit. Wrap the cut wire with vinyl electricians tape. Make sure no bare wire is showing since this wire is always "hot".
3. Reconnect the control unit connector.
FIGURE 3:
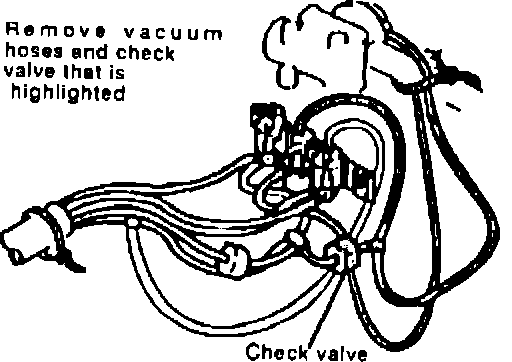
4. Open the hood and remove the vacuum hoses and check valve that are highlighted in Figure 3.
FIGURE 4:
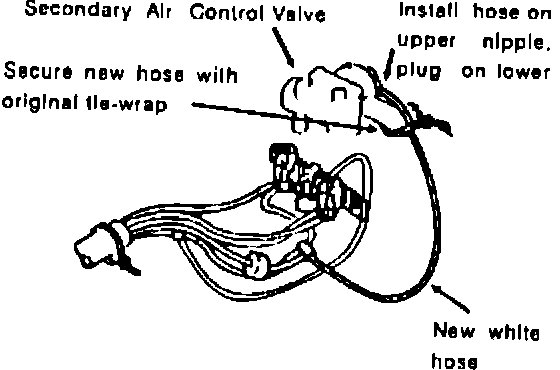
5. Install the white hose from the service kit between the upper nipple of the Secondary Air Control Valve and the vacuum hose junction as shown in Figure 4. Secure the now hose with the original tie-wrap at the Secondary Air Control Valve
6. Install the rubber plug from the kit over the remaining (lower) nipple of the Secondary Air Control Valve.
FIGURE 5:
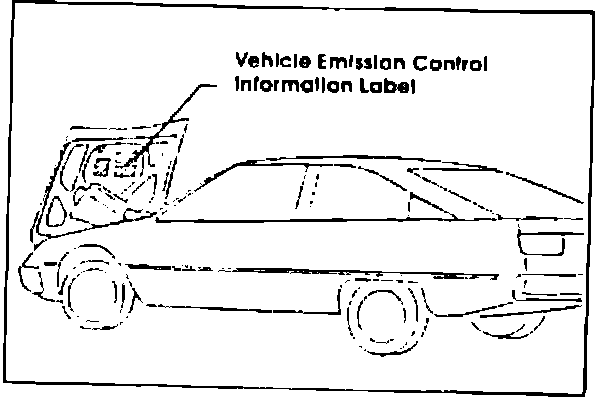
7. Install the new vacuum hose routing label over the old label on the underside of the hood (Figure 5).
8. Remove the carburetor as follows.
A. Install locking clamp pliers on the coolant hose from the intake manifold to the choke thermo wax housing to prevent excessive coolant leakage. Then twist and disconnect the hose from the carburetor.
B. Disconnect the accelerator cable and wire harness connector from the carburetor, then remove the fuel lines and hose connections.
C. Remove the four carburetor through bolts and washers, and nut and lock washer at the left rear corner of the carburetor near the sub-EGR valve (Figure 7).
D. Lift the carburetor off the intake manifold.
NOTE: Usually a quick, hard pull will separate the carburetor from the intake manifold. Cover the exposed intake manifold ports with a shop towel.
E. Support the carburetor. Take caution not to damage the throttle linkage that extends below the base of the carburetor.
9. Install a choke shim to the thermo wax plunger as described below:
A. Remove the throttle return spring.
B. Using the fast idle release driver special tool included with this bulletin, spread the choke linkages to create a gap between the choke adjust screw and the plunger of the thermo wax element. Make sure not to interfere with the throttle lever
C. With the linkages spread, use needle nose pliers to install the choke shim (cap) from the service kit onto the threaded end of the choke adjust screw. The shim should be inserted between the plunger and the choke adjust screw. Move the throttle lever to the fully open position for easier shim installation.
D. Remove the tool and confirm that the shim is still in place. Install the throttle return spring.
10. While the carburetor is off the engine, remove and clean the sub-EGR valve from the carburetor as described below.
FIGURE 10:
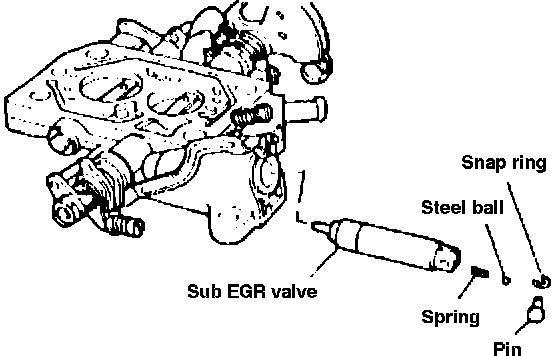
A. Remove the snap ring from the sub-EGR valve pin (Figure 10). Then carefully remove the pin and the link, taking care not to lose the spring and steel ball from the valve
B. Remove the valve from the carburetor.
C. Wet a piece a fine emery cloth and cup it in the palm of your hand. Clean the valve by twisting it on the emery cloth.
NOTE: Do not clean the valve with a wire brush as it may scratch the valve. The scratches will allow carbon to build up on the valve quickly.
D. Clean the plunger hole in the carburetor with carburetor cleaner. You may want to use a small screwdriver to loosen any carbon deposits from the holes in the bottom side of the carburetor.
E. Dry the valve and plunger hole thoroughly and reinstall the valve in the carburetor. Install the spring and steel ball, connect the linkage and install the pin. Install new snap ring from the service kit.
FIGURE 13:
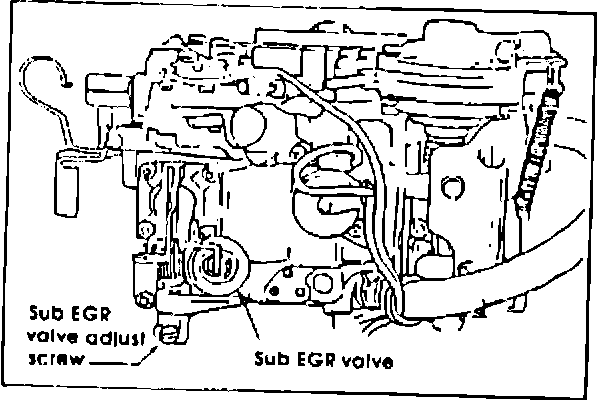
11. Adjust the sub-EGR valve by turning the adjustment screw 1-5 turns clockwise (Figure 13). After adjustment is made, apply a small quantity of white paint to the threaded portion of the adjustment screw.
12. Reinstall the carburetor using the reverse order of the removal procedure. Use the new carburetor gasket from the service kit. Remove the locking clamp pliers from the coolant hose and check all vacuum hose routings and carburetor fastener torques.