Fuel Injector Cleaning Instructions
MODEL NO. MST-4743-C/T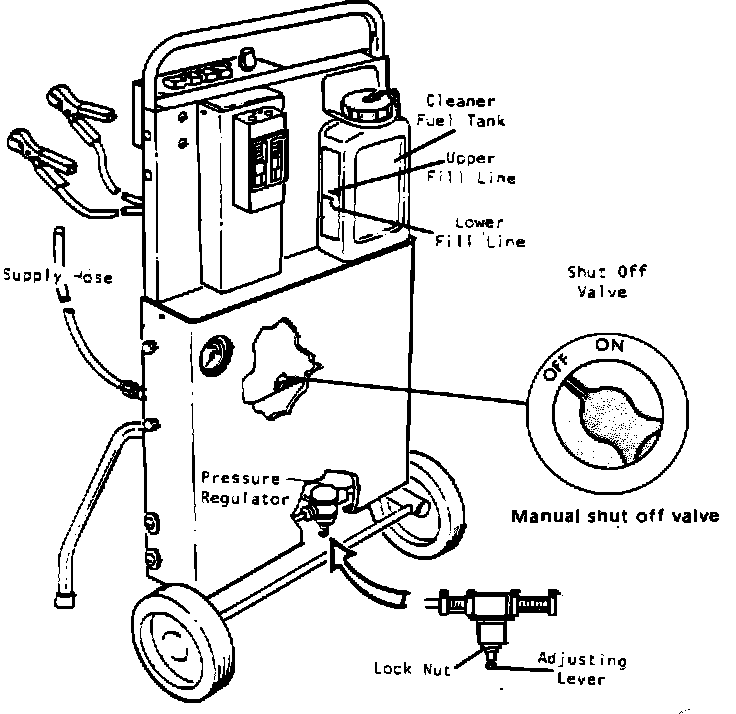
1. Turn manual shut off valve at the back of test stand to ON position (Fig. 1).
2. Pour clean gasoline into the cleaner fuel tank and fill to LOWER FILL LINE, Fig. 1. Add Datsun fuel injector cleaner solvent from LOWER FILL LINE to UPPER FILL LINE (3 ounces). Reinstall fuel tank cap snugly and back off one turn.
CAUTION: Use Nissan solvent only, Part No. 99990-10017, available from NMC Parts Department.
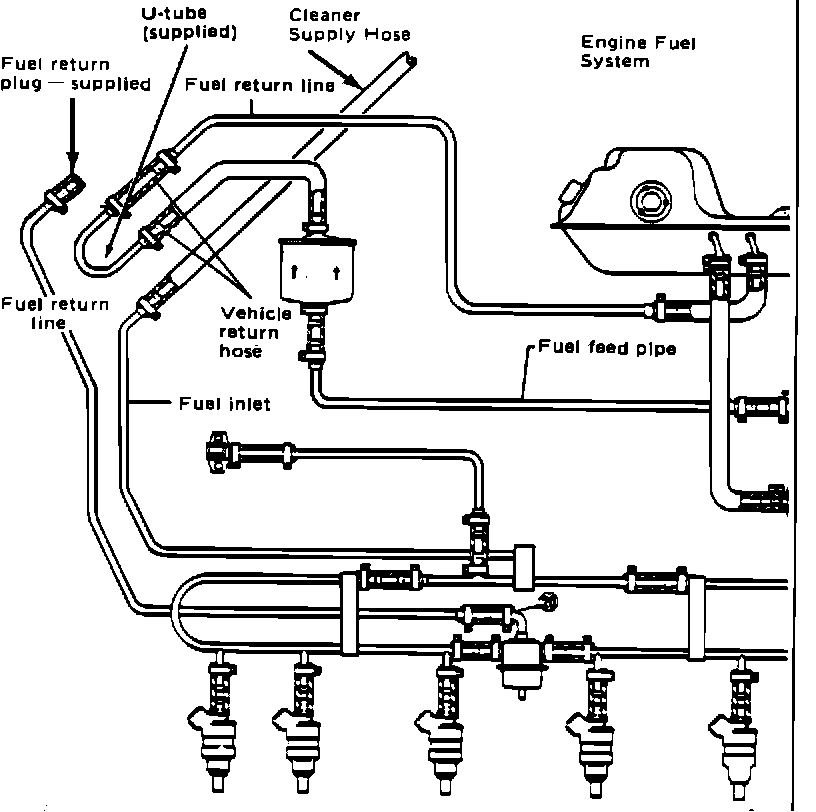
3. Disconnect vehicle fuel hose between filter and fuel injector loop at the fuel inlet. Connect the supply hose from cleaning equipment to the fuel inlet, Fig. 2.
4. Disconnect vehicle return hose from fuel return line. Plug the return line. Install the U-tube (supplied) between the vehicle fuel supply hose and the fuel return hose (Fig. 2).
5. Install the turnbuckle (supplied) loosely between throttle control rod and suitable hook-up point on car fender wall.
6. Connect power supply line to car battery (red terminal-positive; black terminal-negative). Turn power switch on (red button). Activate 10-minute timer (green button), Fig. 1. Start the engine and check for leaks.
7. When the engine speed has stabilized, set the idle speed to 2000 rpm with the turnbuckle. Check that the pressure gauge reads 35 psi (preset at factory). If pressure requires adjustment, loosen lock nut and turn adjustment lever, Fig. 1, until 35 psi is obtained. Retighten lock nut.
8. After the fuel pump and the engine shut off in 10 minutes, turn ignition switch to OFF. Remove turnbuckle.
9. Disconnect the cleaner supply hose from the fuel inlet line. Drain and discard remaining mixture from cleaner fuel tank.
10. Turn power switch off and disconnect power supply. Re-install vehicle fuel lines. Start the engine and check for leaks.
FUEL INJECTOR CLEANER/TESTER
MST 4743 C/T
Procedure for
PERIODIC FLOWMETER CALIBRATION
(OR NEW UNIT CHECK)
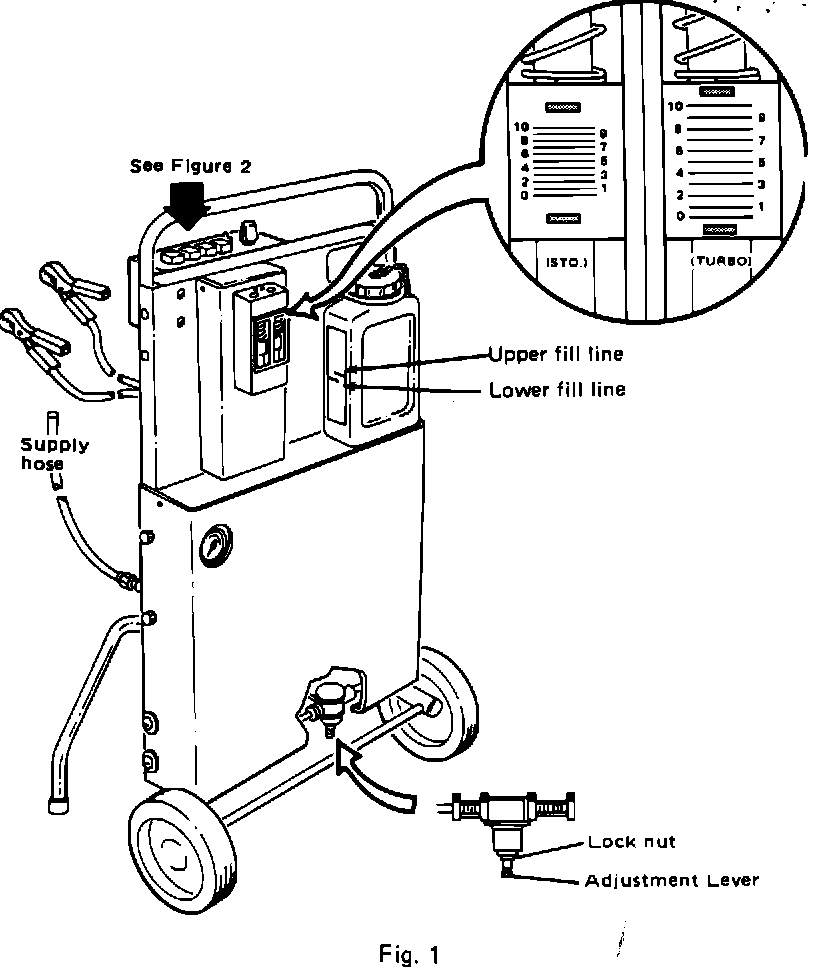
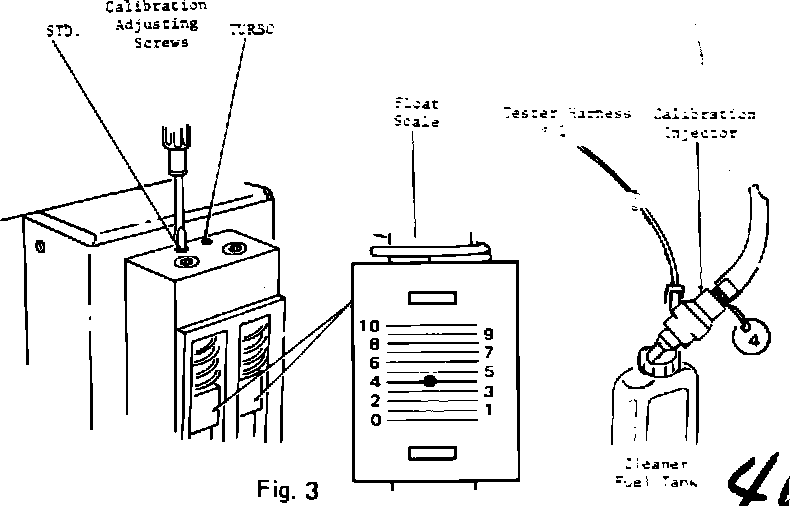
1. Pour clean gasoline into the tester fuel tank up to LOWER FILL LINE. Connect calibration injector (green-standard or brown-turbo injector) to the fuel supply hose and using tester harness, plug wire marked No. 1 into the injector (see Figs. 1 and 3).
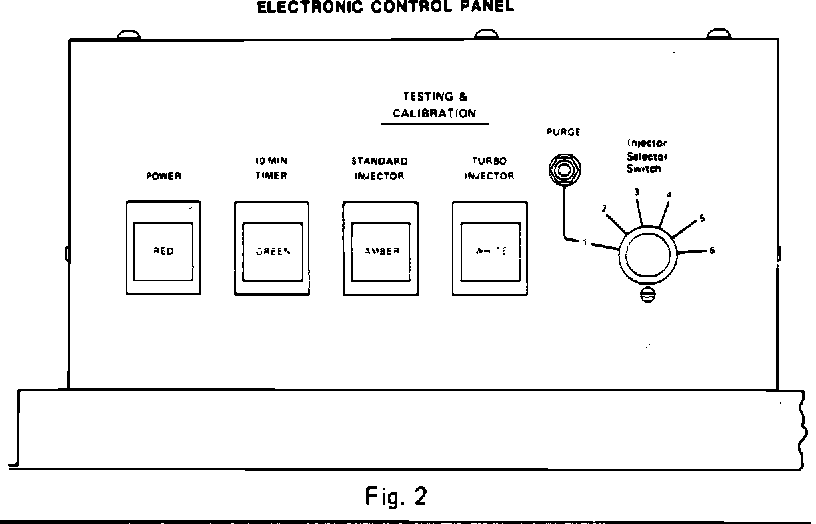
2. Connect power supply line to car battery. Press power and 10-minute timer switches to ON. Turn Injector Selector Switch to No. 1 position, (see Fig. 2).
3. Direct injector nozzle into the cleaner fuel tank. Check that the pressure gauge reading is 35 psi, If adjustment is required, loosen locknut and turn adjustment lever as required (see Fig. 1). Retighten locknut.
4. Press injector test button (amber for standard injector or white for turbo injector) and purge button at the same time. Observe fuel supply hose for air bubbles. After purging (no bubbles in lines), release purge button.
NOTE Presence of air in the system will give erroneous readings.
5. Operate the calibration injector for a period of three minutes. Observe the float level on the flowmeter. The float position on the scale should correspond with the calibration number on the injector (Fig. 3). If an adjustment is necessary, turn adjustment screw on top of flowmeter housing to move the scale as required (see Fig.3). Calibration is now complete. Turn off power switch. Disconnect power supply line.
6. Remove calibration injector from the supply hose.