Procedure E: (If Needed)
PROCEDURE E: (if needed)^ COLLECT / SEND OIL SAMPLE FOR ANALYSIS
^ ENGINE OIL FLUSH
^ INSTALL NEW OIL PAN
Collect / Send Oil Sample for Analysis
1. Run the engine at idle until it is at operating temperature.
NOTE:
^ The oil sample should be collected while the engine is warm.
^ If you have just finished the Crank Case Pressure Test, the engine is at operating temperature.
2. Turn the ignition OFF.
NOTE:
^ You will be collecting the oil sample from the stream of oil as it drains from the oil pan.
^ The collection bottle should be ready to use before removing the drain plug.
3. Prepare the oil sample bottle for oil collection (remove the lid and set the bottle in a convenient place).
NOTE: Don't put the label on the bottle at this time.
4. Clean the area around the drain plug.
5. Remove the oil drain plug.
6. Allow oil to drain for about 2 seconds.
NOTE:
The oil sample should not be taken from the first oil to drain from the pan.
7. Hold the sample bottle in the stream of oil.
8. Completely fill the sample bottle.
9. Install cap and thoroughly clean the bottle.
10. Prep and mail the sample bottle to the laboratory.
NOTE:
Don't get oil on the label or other paper documentation.
a. Apply the "Peel and Stick" label - from the Owner Notification Letter - on the top of the blank label supplied in the oil sample kit.
^ If the Owner Notification Letter "Peel and Stick" label is not available, fill in all required information on the blank label. Please print legibly.
b. Stick the prepared label to the outside of the sample bottle.
c. Give the bottle to the appropriate dealer staff for mailing.
Oil Sample Kit contents:
^ Blank label
^ Sample bottle
^ Laboratory address label
^ Mailing envelope (postage pre-paid)
^ One of the following: plastic bag, box, or larger bottle
Additional Oil Sample Kits are available - at no cost - from TECH-MATE.
Engine Oil Flush
11. After collecting the oil sample, finish draining the engine oil and reinstall the drain plug.
12. Install a new oil filter.
13. Refill the engine with oil.
14. Start the engine and run it at idle until it is at operating temperature.
15. Drain engine oil again.
16. Remove the oil filter again.
NOTE:
Do not refill the engine oil at this time.
Install New Lower Oil Pan
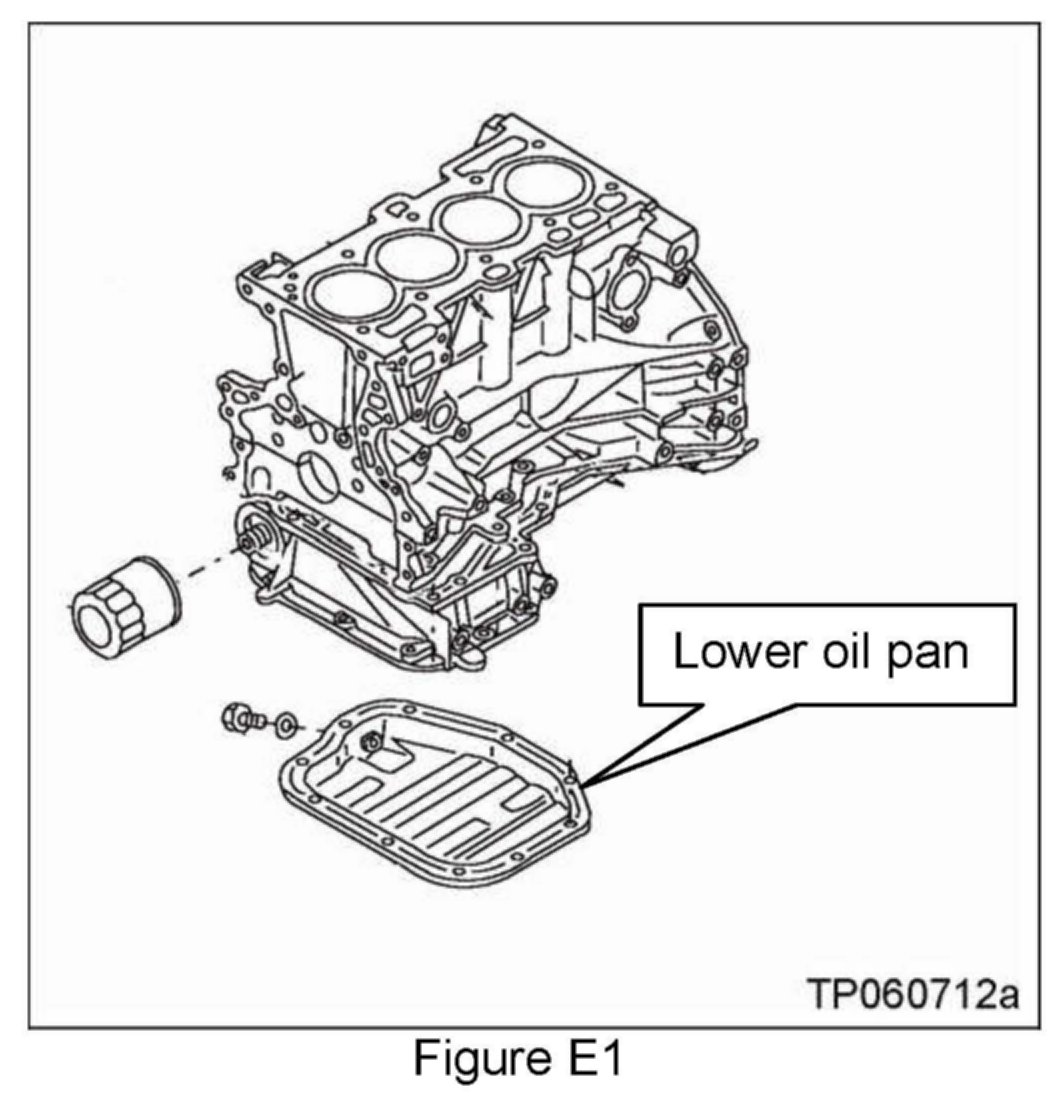
17. Remove the bolts from the lower engine oil pan.
NOTE:
Pan bolts will be reused.
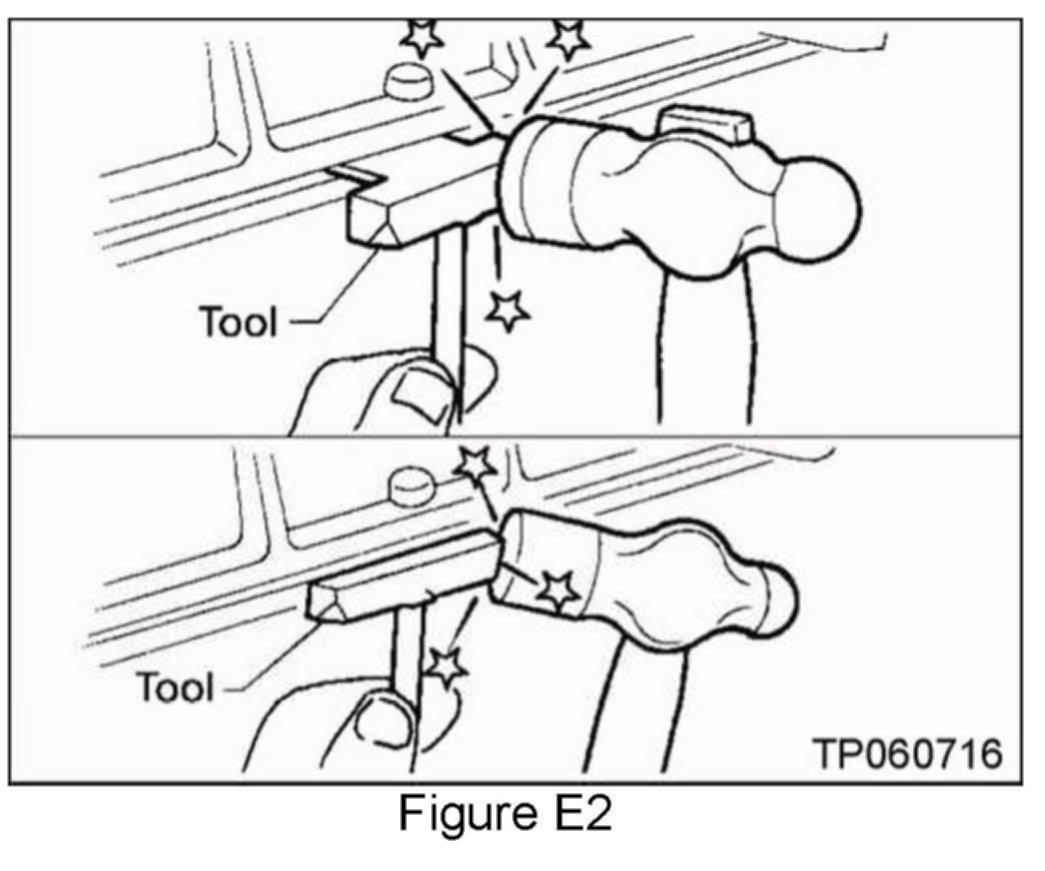
18. Use special tool to cut pan sealant.
^ Special tool J-37228 is available from TECH-MATE.
19. Completely clean all of the old sealant off of the upper oil pan.
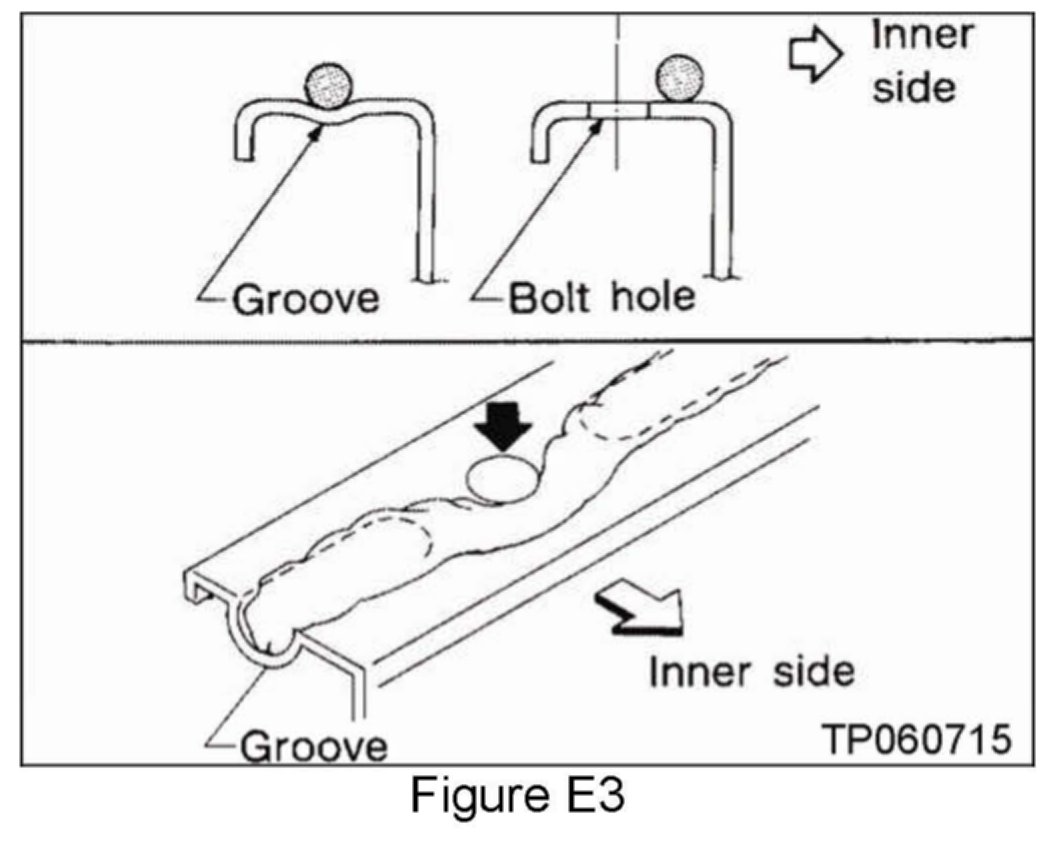
20. Apply sealant to the new lower oil pan as shown.
^ Use RTV Silicone (Ultra Gray) Nissan P/N 999MP-AM003P or equivalent.
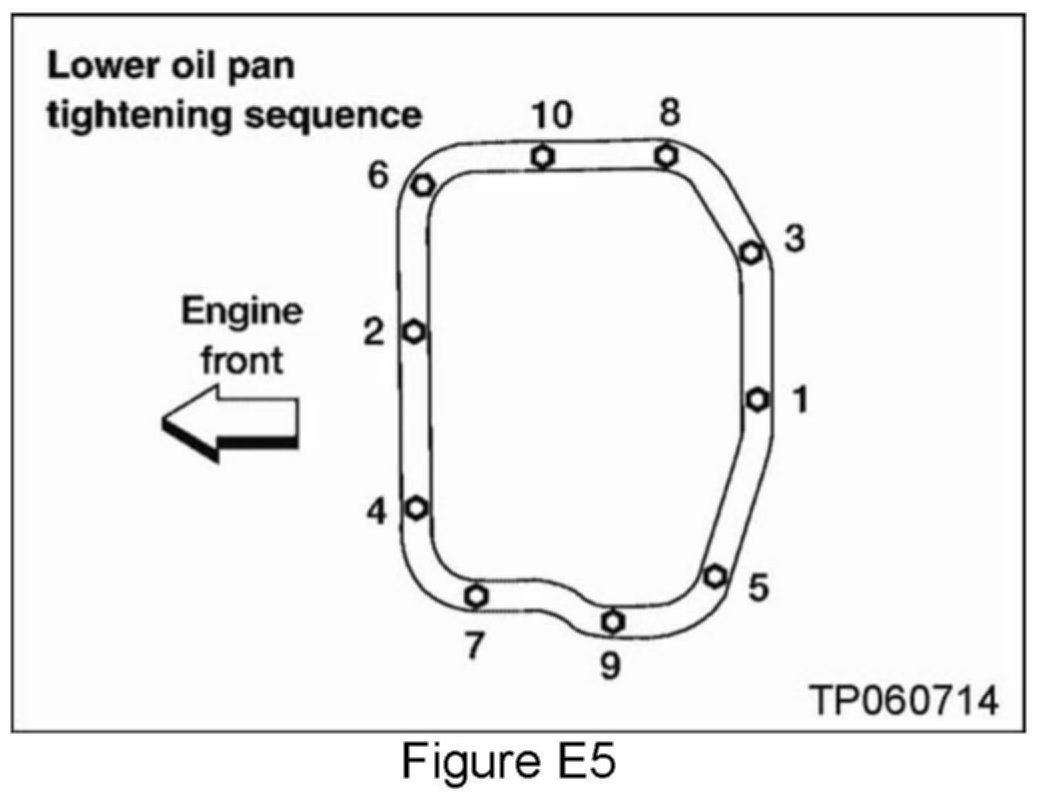
21. Install the new lower oil pan; tighten the bolts in the order shown.
Torque spec:
6.4 - 7.5 N.m (0.65 - 0.76 kg-m, 57 - 66 in-lb)
22. Important: Wait more than 1 hour before refilling the engine oil.
23. Refill the engine oil.
24. Install a new oil filter.
25. Return the vehicle to the customer.