Hydraulic Control Assembly - Antilock Brakes: Service and Repair
REMOVAL PROCEDURECaution: For safety reasons, the Brake Pressure Modulator Valve (BPMV) must not be repaired, the complete unit must be replaced. With the exception of the Electronic Brake Control Module/Electronic Brake Traction Control Module (EBCM/EBTCM), no screws may be loosened. If screws are loosened, It will not be possible to get the brake circuits leak-tight and personal injury may result.
Notice: The use of rubber hoses or parts other than those specified for the ABS may lead to functional problems requiring major overhaul.
1. Turn the ignition switch to the OFF position.
2. Remove the air cleaner assembly and the Powertrain Control Module (PCM) cover.
3. Disconnect the following connectors:
^ The EBCM/EBTCM harness connector
^ The BPMV motor ground cable connector
Important: Note the locations of the brake pipes in order to aid in installation.
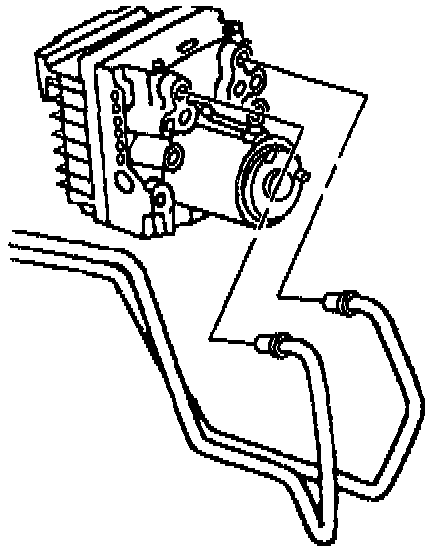
4. Remove the brake pipe fittings from the master cylinder (front).
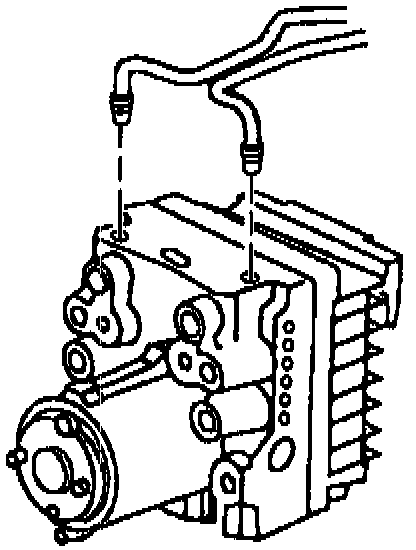
5. Remove the brake pipe fittings from the master cylinder (top).
6. Remove the brake pipe fittings from the wheels.
Notice: When removing the brake pressure modulator valve, protect vehicle exterior from possible brake fluid spillage.
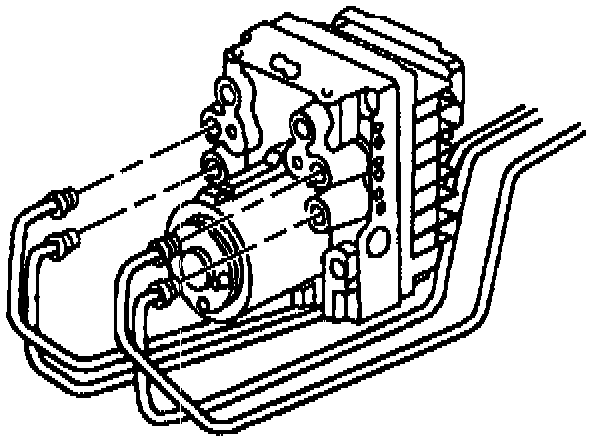
Notice: Reposition brake pipes as necessary to remove brake pressure modulator valve. Excessive bending may cause damage to the pipes.
7. Clean any brake fluid spillage from the BPMV.
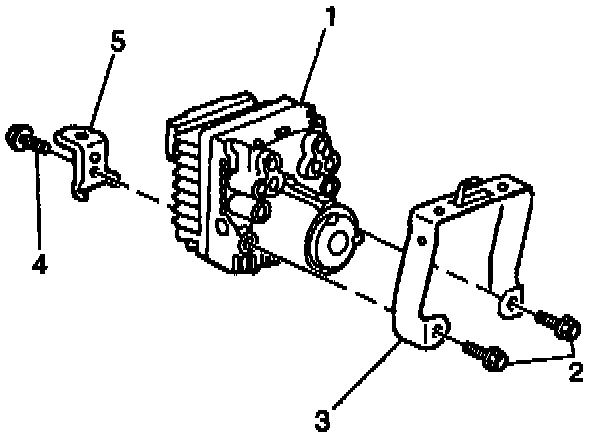
8. Remove the front EBCM/EBTCM bracket mounting bolt (4).
9. Remove the front EBCM/EBTCM bracket from the vehicle (5).
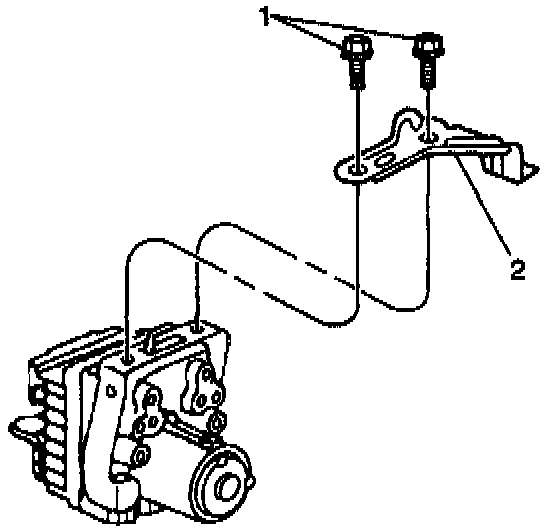
10. Remove the upper BPMV bracket from the frame rail (2).
11. Remove the two upper bracket to BPMV bolts (1).
12. Remove the EBCM/BPMV as an assembly.
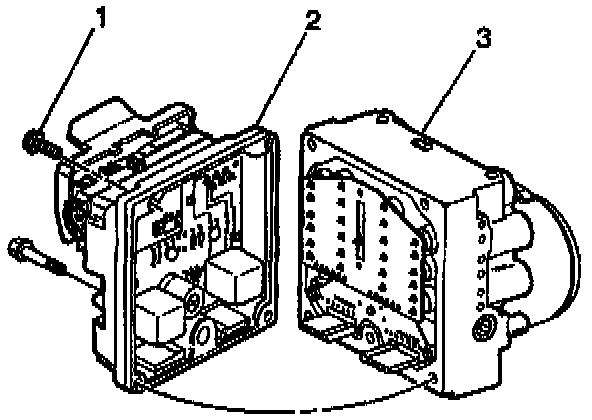
13. Remove the four EBCM/EBTCM to BPMV bolts (1).
Caution: Do not pry EBCM/EBTCM. Be careful not to damage seal (If reusing module). If seal is damaged during removal, repair damaged area using GM silicone sealer or replace EBCM/EBTCM.
14. Pull rearward in order to separate the EBCM/EBTCM from the BPMV.
INSTALLATION PROCEDURE
1. Install the EBCM/EBTCM to the BPMV.
2. Clean the following surfaces with alcohol:
^ The EBCM/EBTCM seal
^ The BPMV gasket
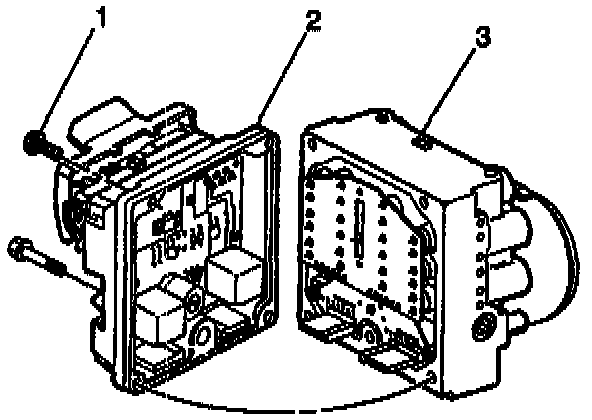
3. Install the EBCM/EBTCM to BPMV screws (1).
^ Tighten the screws to 4.5 Nm (40 inch lbs.).
NOTICE: Always use the correct fastener in the proper location. When you replace a fastener, use ONLY the exact part number for that application. The manufacturer will call out those fasteners that require a replacement after removal. The manufacturer will also call out the fasteners that require thread lockers or thread sealant. UNLESS OTHERWISE SPECIFIED, do not use supplemental coatings (paints, greases, or other corrosion inhibitors) on threaded fasteners or fastener joint interfaces. Generally, such coatings adversely affect the fastener torque and joint clamping force, and may damage the fastener. When you install fasteners, use the correct tightening sequence and specifications. Following these instructions can help you avoid damage to parts and systems.
Important: if a new BPMV is being installed, removing the shipping plugs from the valve openings.
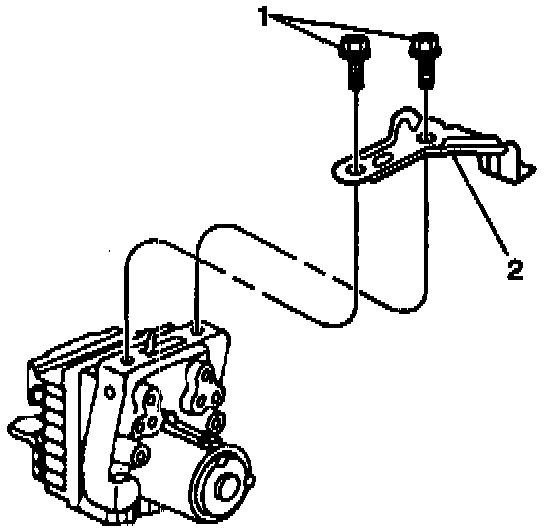
4. Install the upper BPMV bracket to the BPMV(2).
5. Install the EBCM/BPMV into the vehicle.
6. Install the two BPMV frame rail bolts.
^ Tighten the bolts to 12 Nm (106 inch lbs.).
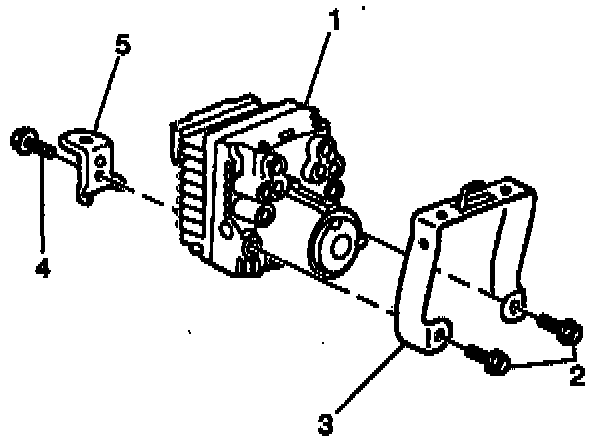
7. Install the front EBCM/EBTCM bracket (5).
8. Install the EBCM/EBTCM to BPMV center bolt (4).
^ Tighten the bolt to 14 Nm (10 ft. lbs.).
Caution: Make auto brake pipes are correctly connected to brake pressure modulator valve. If brake pipes are switched by mistake, wheel lockup can occur and personal injury may result. The only two ways this condition can be detected are by using a Scan Tool or by doing an Antilock stop.
Important: Use the locations noted during removal.
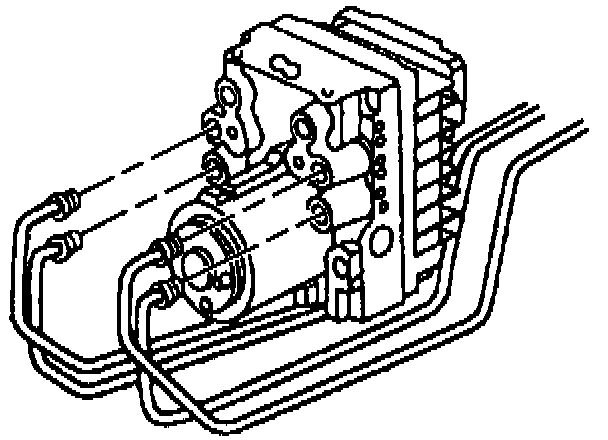
9. Install the brake pipe fittings from the wheels.
^ Tighten the brake pipe fitting at the BPMV to 16 Nm (12 ft. lbs.).
Important: Use the locations noted during removal.
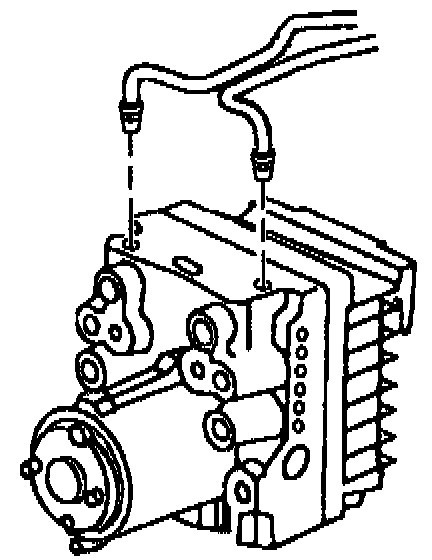
10. Install the brake pipe fittings from the master cylinder (top).
^ Tighten the brake pipe fitting at the BPMV to 16 Nm (12 ft. lbs.).
Important: Use the locations noted during removal.
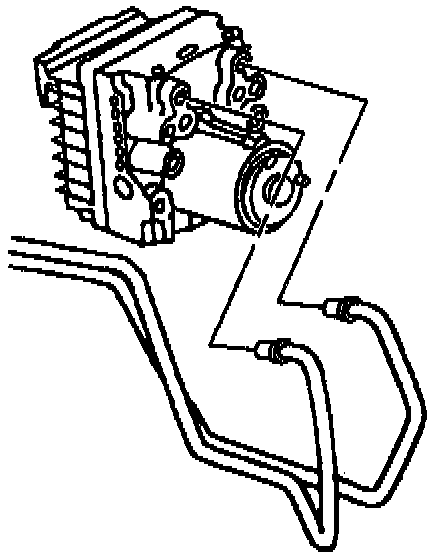
11. Install the brake pipe fittings from the master cylinder (front).
^ Tighten the brake pipe fitting at the BPMV to 16 Nm (12 ft. lbs.).
12. Connect the EBCM/EBTCM harness connector.
13. Connect the BPMV motor ground cable connector.
14. Install the air cleaner assembly and the PCM cover.
15. Fill and bleed the hydraulic brake system. Refer to Pressure Bleeding in Hydraulic Brakes.
16. Turn the ignition switch to the RUN position, engine Off.
17. Perform the Auto Bleed Procedure.
Notice: Be sure to reconnect all harness retaining clips that may have been disconnected during the removal procedure in their original positions. Then perform a visual inspections of the entire harness checking to make sure all retaining clips are properly connected.
18. Perform the ABS Diagnostic System Check.