Procedure
Use the following procedure to install the insulators:1. Open the decklid. Release and fold the rear seat back (if equipped).
2. Remove the rear seat bottom cushion by releasing the two tabs at the bottom front of the cushion.
3. If equipped with non-folding rear seat, remove the rear seat back retaining bolts from the U-clips. Lift the seat back off the T-clips.
4. Remove the left and right rear seat back side trim panels. There is (1) 13 mm bolt per side located at the bottom of the panel (if equipped).
5. Remove the left and right outboard rear seat belt comfort clip push-pins from the side trim.
6. Remove the left and right upper sail panel trim. There is (1) push-pin retainer and (2) metal clips per side.
7. Remove the speaker grilles and rear seat back striker plates.
8. Remove the left and the right rear speakers. There are (4) 7 mm bolts and (1) electrical connector per speaker.
9. Remove the electrical connector from the Center High Mounted Stop Lamp (CHMSL).
10. Remove rear window trim shelf from the vehicle.
Notice:
On some vehicles, the urethane sealer used to install the back window glass may have expanded during window installation to the point that contact was made with the rear compartment shelf.If this has happened, use a razor knife or cutting tool to cut the urethane where it contacts the shelf. Do not cut into the urethane bead. Use caution not to score or scratch the glass. In most cases, the trimmed area of the package shelf will not be damaged and any rough edge will be concealed by the shaded masking on the rear window.
11. Measure 230 mm (9-1/8 in) out from the outboard edge of the shelf and remove any insulation that is past that point.
Important:
230 mm (9 1/8 in) is an approximate measurement. The removal of the glued-in insulation on the underside of the shelf is to assure that no interference takes place between the new insulators and the original insulation. If interference exists, the rear compartment shelf will not install flat. Ensure during the installation step that the shelf lays flat.
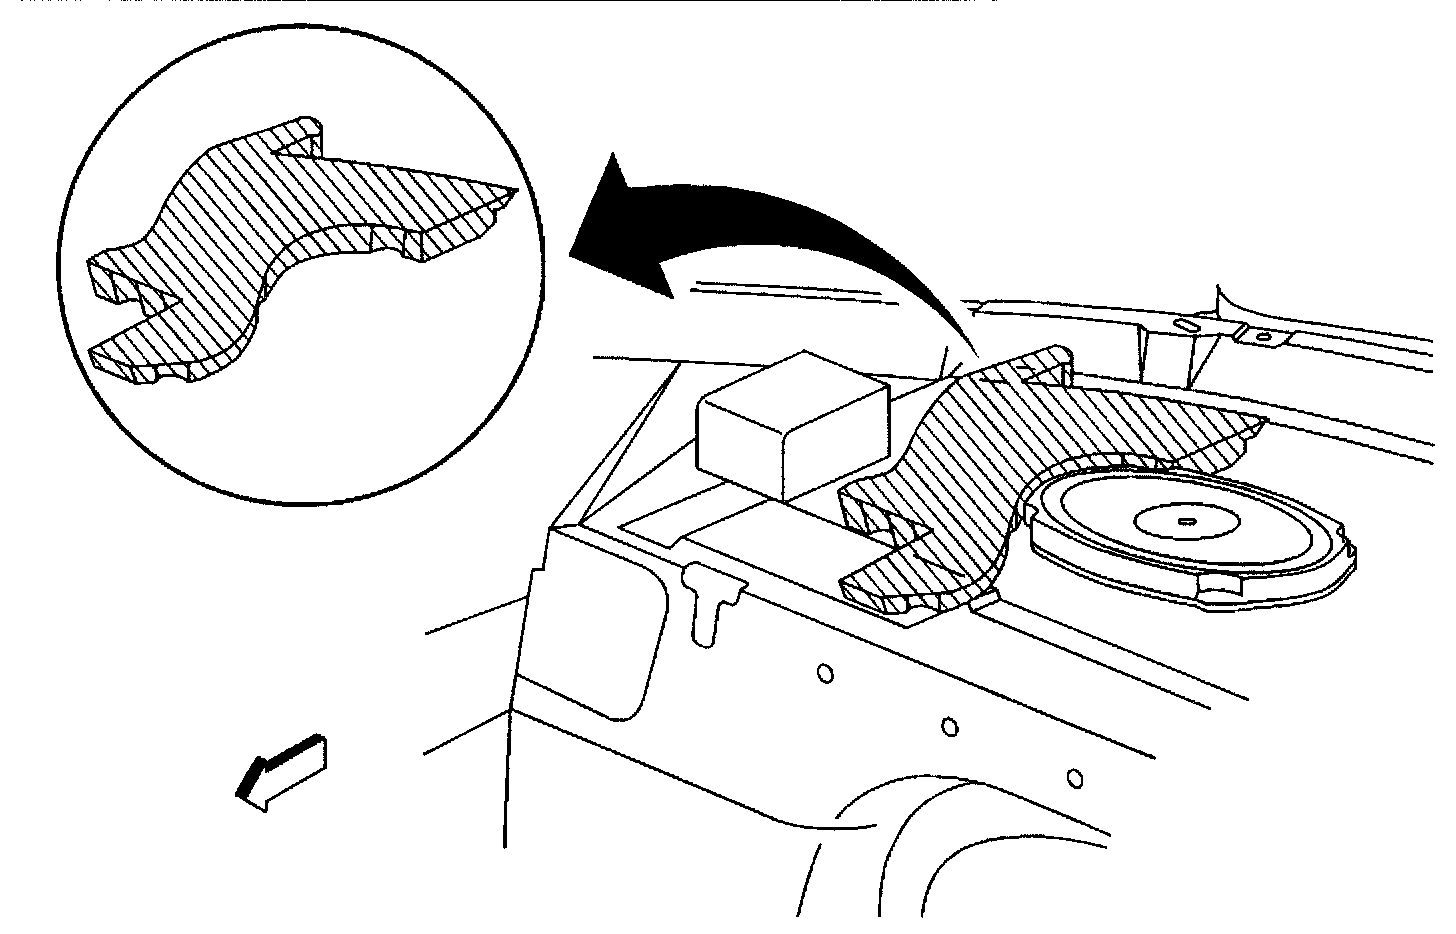
12. Install insulator pads to the vehicle. Refer to figure.
13. The rear shelf area contains several cut-outs. Observe the position of the insulator relative to the speaker hole. Insert the projections on the insulator into the cut-outs in the rear shelf. If the insulator projections are not inserted into the shelf, the road noise will not be effectively eliminated.
14. Install the rear shelf to the vehicle.
15. Install the electrical connector to the CHMSL.
16. Install the left and right rear speakers. There are (4) 7 mm bolts and (1) electrical connection per speaker.
17. Install the speaker grilles and the rear seat back striker plates.
18. Install the left and the right upper sail panel trim. There is (1) push-pin retainer and (2) metal clips.
19. Install the left and the right outboard rear seat belt comfort clip push-pins to side trim.
20. Install the left and the right rear seat back side trim panels. There is (1) 13 mm bolt located at the bottom of the panel (if equipped).
21. Install the rear seat back by engaging the T-hooks into the slotted holes.
Tighten
Tighten the retaining bolts to 12 N-m (106 lb in).
22. Install the rear seat cushion making sure that the insulation blanket under the seat is not bunched up under the cushion. You may use double sided foam tape to aid in keeping the insulation blanket from sliding with the seat cushion during installation. Apply pressure to the seat cushion until fasteners are seated.
23. Raise the rear seat back (if equipped) and close the decklid.