Body/Frame - Water Leaks
Number 86-2-8 Date 6/86Subject: WATER LEAKS - "T" CAR FRONT END
- DIAGNOSIS AND REPAIR
1986 AND PAST MODELS - T1000
This bulletin covers the possible causes of front end water leaks on past and present model "T" Cars along with the diagnosis and repair procedure necessary to correct them.
SYMPTOMS
Front end water leaks may be indicated by:
- water on top or under the front carpet
- water in the glove box
- water in the rear floor area
- a musty odor in the vehicle
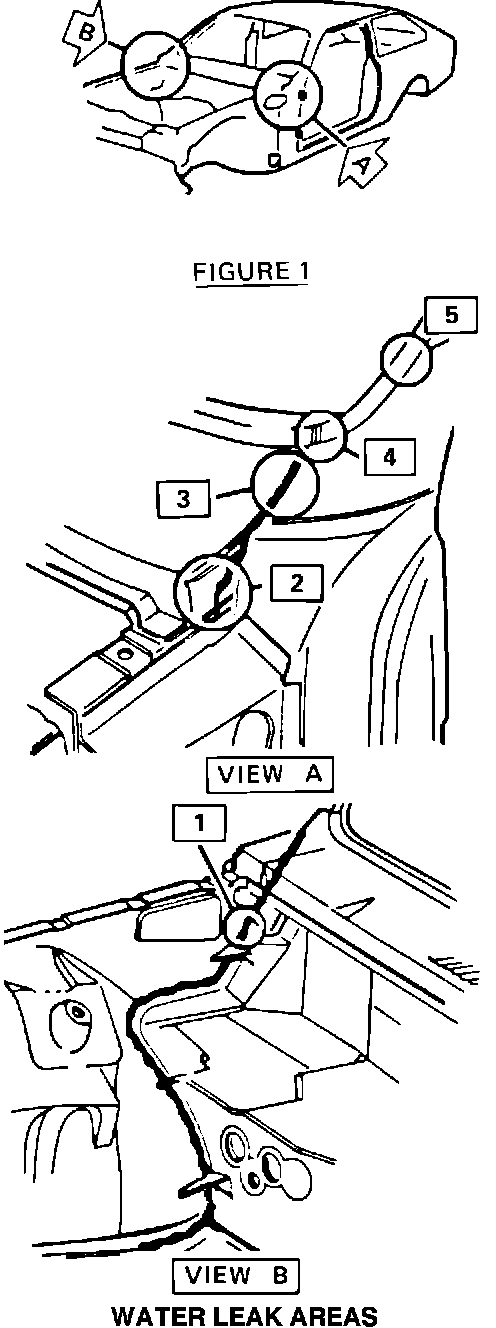
FIGURE 1 - WATER LEAK AREAS:
CAUSE
Front end water leaks may be caused by various items. Figure 1 illustrates the locations of the following area:
1.. Sealer skip at the inner fender
to cowl seam.
2. Poor sealer adhesion at the windshield pillar to cowl joint flange.
3. Cracked sealer at the coach joint.
4. A bridge in the MIG weld at the windshield opening lower corner.
5. Sealer skip under the windshield reveal mouldings.
DIAGNOSIS
More than one leak may be present on a vehicle in any or all of the areas detailed in Figure 1. In order to ensure that a satisfactory repair is performed the first time, the following procedure is recommended:
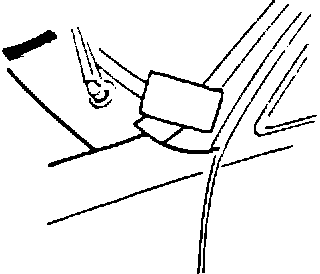
FIGURE 2 - COACH JOINT:
1. Loosen the sill plate, remove the kickpad and fold back the carpet on the affected side of the vehicle. Inspect for signs of leaking.
2. Seal off the coach joint and lower windshield by placing a piece of tape over the coach joint and windshield reveal moulding on the affected side. (See Figure 2)
FIGURE 3 - TEST FOR WATER LEAKS:
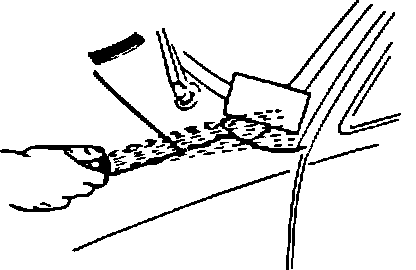
3. Use an Unrestricted water flow directed into the gap between the fender and the hood. This will duplicate driving in a heavy rain. (See Figure 3)
If no water enters the vehicle, the inner fender to cowl seam and the w/s pillar to cowl joint flange are OK, proceed to Step 5.
OR
FIGURE 1 - WATER LEAK AREAS:
If water enters the vehicle, it is probably due to poor sealer adhesion at the windshield pillar to cowl joint flange or sealer skip at the inner fender to cowl seam (See Figure 1). In order to isolate the exact cause of the leaks, proceed as follows:
FIGURE 4 - DIE RELIEF HOLE:
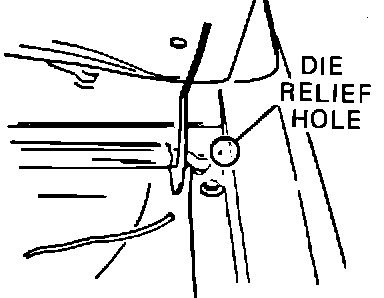
4. Seal the die relief hole (Figure 4) with a piece of strip caulk.
FIGURE 3 - TEST FOR WATER LEAKS:
Retest for leaks as shown in Figure 3.
If the leak now stops, it is probably due to a sealer skip at the inner fender to cowl seam. Follow repair procedure "A" as described below:
- Retest for water leaks as shown in Figure 3, then proceed to Step 5.
OR
RETEST FOR WATER LEAKS:
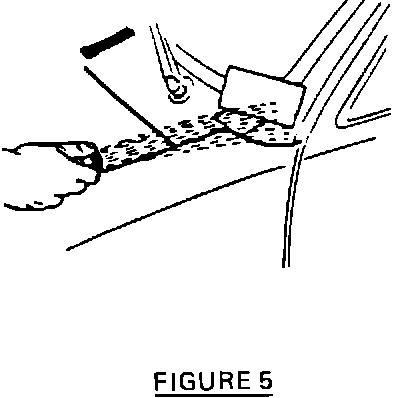
If water still enters the vehicle, the leak is probably due to poor sealer adhesion at the windshield pillar to cowl joint flange. Follow repair procedure 'B' as described below:
- Retest for water leaks as shown in Figure 5, then proceed to Step 5.
UNRESTRICTED WATER FLOW:
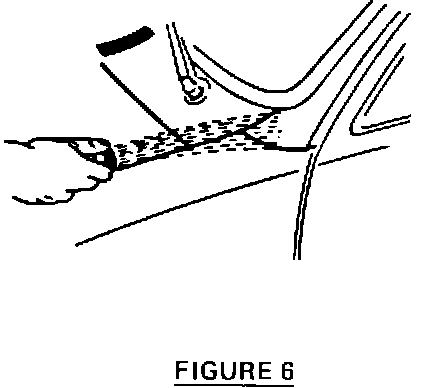
5. Remove the tape from coach joint and retest for leaks with an unrestricted water flow as shown in Figure 6.
If no water enters the vehicle, the coach joint and lower windshield opening MIG weld are OK, proceed to Step 8 and water test the windshield for leaks.
AIR NOZZLE:
OR
If water is now entering the vehicle, it may be due to a poor seal at the coach joint, or a gap in the MIG weld at the windshield lower corner. Proceed as follows to locate the problem.
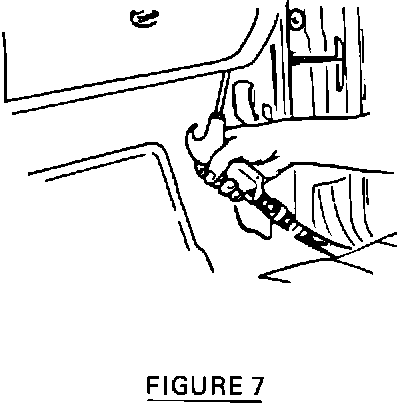
6. Insert an air nozzle into one of the upper access holes behind the kick pad and apply low pressure air (less than 205 KPA/30 PSI). (See Figure 7)
It may be helpful to attach a length of copper tubing to the air gun.
FIGURE 8 - GLASS CLEANER:
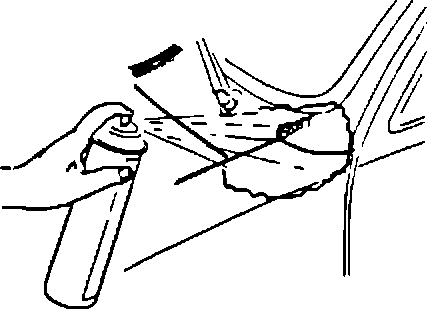
7. Place a bubble solution or glass cleaner (GM P/N 992727 or equivalent) over the coach joint and lower corner of the W/S (See Figure 8) and bubble test the area.
- Repair the coach joint or weld leaks as described below in Part "C" and "D" of the repair procedure as required.
- Retest with water only and proceed to Step 8. (Air pressure at this stage might damage the repair.)
UNRESTRICTED WATERFLOW:
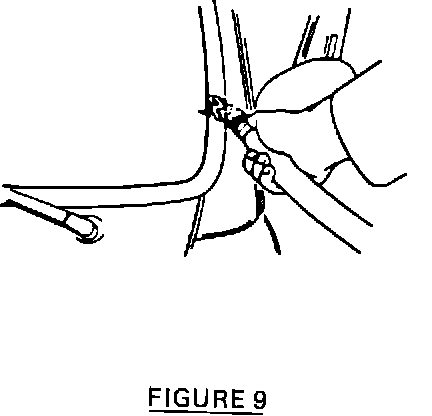
8. Use an unrestricted waterflow to leak test the windshield sealant (See Figure 9). Start at the base of the test area and work upwards.
If leaks are detected at this point, refer to the body section of the Service Manual.
SEAL THE INNER FENDER:
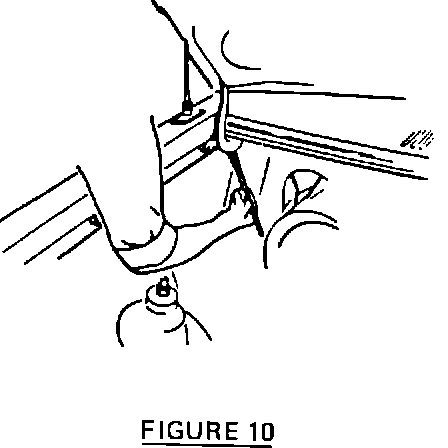
Repair Procedure (See Table 1 for materials list)
A. Inner Fender to Cowl Seam
- Seal the inner fender to cowl seam (Figure 10) with a brushable seam sealer or an aerosol rubberized undercoating.
- Seal seam as far up on cowl as possible.
NOTE: When using a brushable sealer, it may be necessary to use a brush with an extended handle in order to reach hidden areas.
FIGURE 4 - DIE RELIEF HOLE:
- Fill in the die relief hole with
a thumb grade sealer (See Figure 4).
UNRESTRICTED WATER FLOW:
AIR NOZZLE:
FIGURE 11 - FLANGE AREA:
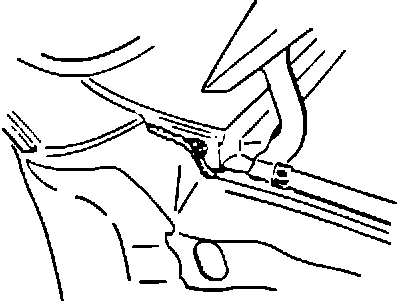
- Re water test.
- Continue diagnosis at Step 5 above.
B. Windshield Pillar To Cowl Joint Flange
- Loosen the fender by removing the top five and two rear screws.
- Pull back the fender to expose the W/S pillar to cowl joint.
- Bubble test the flange area as per Steps 6-7 of the diagnosis. (See Figures 6, 7, and 11)
- Remove existing sealer using a suitable tool.
- Repair area by applying a brushable medium body sealer.
- Re water test.
- Reinstall fender and continue diagnosis at Step 5.
C. Coach Joint Leak
- Dig out and remove as much of the existing sealer as possible using a suitable tool.
NOTE: Loosening of the fender may be required as per windshield pillar to cowl joint flange repair procedure (B).
- Apply a flow grade paintable sealer to the joint and force the sealer into the gap.
- Refinish area as required after testing is complete.
- Retest with water only and continue diagnosis at Step 8.
FIGURE 12 - MIG WELD:
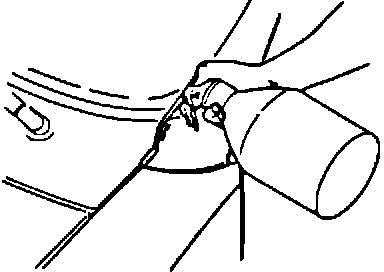
D. MIG Weld Windshied Opening Lower Corner
- Slide the escutheon located at the lower centerline of the vinyl reveal moulding to one side.
- Pry one edge of the moulding out of the urethane.
- When the moulding is removed about 75 mm (3 in.), grasp the moulding by hand and slowly pull away from the body.
- DO NOT remove the entire moulding but stop about 75 mm (3 in.) up from the bottom of the windshield opening.
- Cut away any loose urethane that is exposed in the MIG weld area.
- At this point, inspect for any corrosion or damaged metal around the MIG weld area and repair as necessary using established procedures.
- Clean and reprime exposed areas with the primer supplied in the windshield repair kit (GM P/N 9636067 or equivalent).
FIGURE 13 - MOLDING:
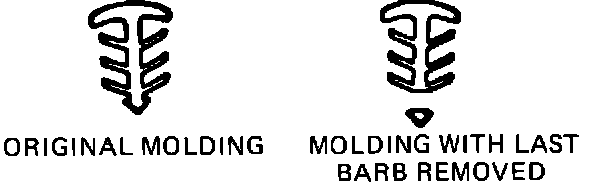
- Trim the lower barb off the reveal moulding using a sharp knife. (See Figure 13)
- Apply enough urethane in exposed areas to fill gap and to retain the reveal moulding.
- Force the moulding back into place.
NOTE: Tape may be required to hold the moulding in place until the urethane cures.
- Flood the area with lukewarm water in order to cure the urethane.
- Slide the escutcheon back into place.
E. Windshield Water Leak
- Repair windshield leaks as described in body section of the Service Manual.
MATERIALS
LOCATION DESCRIPTION 3M KENT DOMINION SURE SEAL
Inner Fender Paintable Joint & Seam Quick Leak Seam & Joint SEALER
to Cowl Seam Medium Body Sealer (Black) Chek Cartridge (Black)
Windshield Sealer 08648 Wet/Dry CSB
Pillar 10510
to Cowl Joint Flange
Rubberized Undercoating Aerosol 08883
Coach Joint Paintable Drip Chek Black Sure Mastic PBM/PWM
Flo Grade Sealer Mastic
Body Sealer 08521 SM-1 104300
Windshield Urethane Windo-Weld Wet/Dry Resealant (Pump
+ GM P/N Resealant Resealant Grade) PRS
Windshield 9636067 08633 Pump Grade
Opening MIG (RWD) 10590
Weld
Die Relief Thumb Grade Strip Caulk Seal "N" Strip Caulk Black
Hole Sealer (Black) 08578 Caulk BSC1
(Strips) Black (SP-1) 10310
Diagnosis GM Glass or Soap Solution
Cleaner P/N 992727
TABLE I