Canister Purge Control Valve: Service and Repair
Removal ProcedureNotice: The EVAP canister may have released carbon particles which caused this part to fail and may cause damage to other components. Check the EVAP canister for loose carbon before returning the vehicle to service.
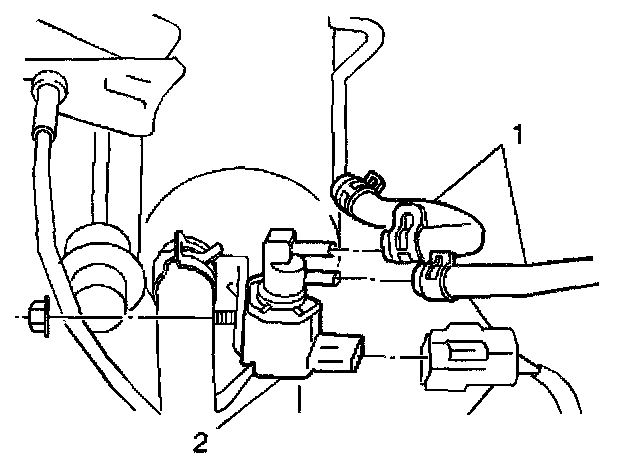
1. Disconnect the two vacuum hoses (1) from the EVAP canister purge valve (2).
2. Disconnect the EVAP canister purge valve electrical connector.
3. Remove the one nut from the EVAP canister purge valve bracket.
4. Remove the EVAP canister purge valve.
5. Inspect the EVAP canister purge valve and the EVAP purge system for carbon particle contamination before replacing the EVAP canister purge valve.
Installation Procedure
1. Inspect the EVAP purge system for carbon particle contamination before installing a new EVAP canister purge valve. Refer to EVAP System Cleaning.
2. Install the EVAP canister purge valve (2) to the bracket on the intake plenum.
3. Secure the EVAP canister purge valve with the one nut.
4. Connect the EVAP canister purge valve electrical connector.
Important: Refer to the Vehicle Emissions Control Information Label for the proper routing of the EVAP hoses.
5. Connect the two vacuum hoses (1) to the EVAP canister purge valve (2).