Canister Purge Control Valve: Testing and Inspection
Tools Required^ J 39200 Digital Multimeter
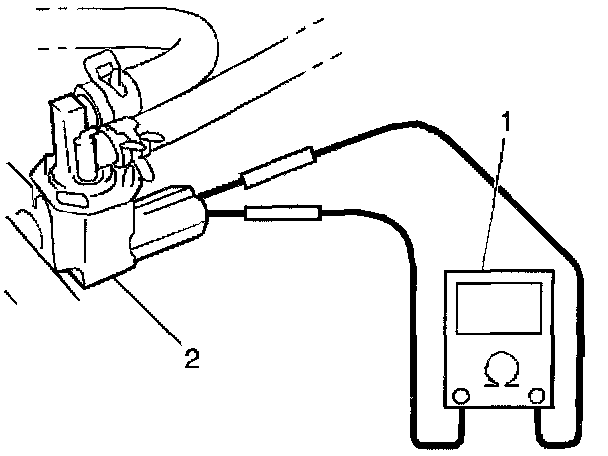
1. Disconnect the EVAP canister purge valve electrical connector.
2. Measure the resistance between the electrical terminals of the EVAP canister purge valve (2) with the DMM (1). The resistance should be 30 to 34 ohms at 20°C (68°F).
3. Replace the EVAP canister purge valve if the resistance is not 30 to 34 ohms at 20°C (68°F). Proceed to step 4 if the resistance is within the specification. Refer to EVAP Canister Purge Valve Replacement.
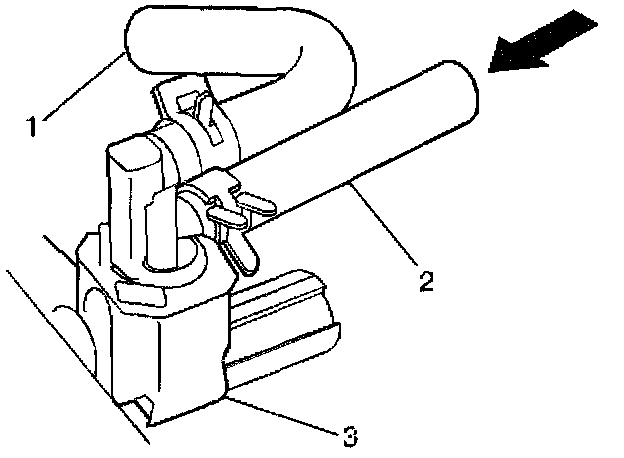
4. Disconnect the EVAP canister purge valve vacuum hose (1) from the intake manifold pipe.
5. Disconnect the EVAP canister purge valve vacuum hose (2) from EVAP canister purge pipe.
6. Blow air into the EVAP canister purge valve vacuum hose (2) that was disconnected from the EVAP canister purge pipe. Air should not pass through the EVAP canister purge valve (3) and exit from the intake manifold hose (1).
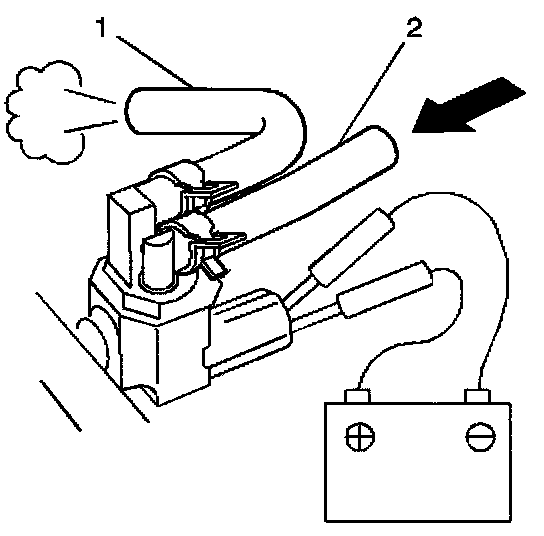
7. Connect 12 volts DC to the EVAP canister purge valve electrical terminals.
8. Blow air into the EVAP canister purge valve vacuum hose (2) that was disconnected from the EVAP canister purge pipe. Air should pass through the EVAP canister purge valve and exit from the intake manifold hose (1).
9. Replace the EVAP canister purge valve if the EVAP canister purge valve failed this inspection. Refer to EVAP Canister Purge Valve Replacement.
10. Connect the EVAP canister purge valve vacuum hoses.
11. Connect the EVAP canister purge valve electrical connector.