Vertical
Lower Control Arm Bushings Replacement (Vertical)- Tools Required
- J 21474 Control Arm Bushing Installer
- J 21474-01 Control Arm Bushing Set
- J 21474-2 Bushing Installer
- J 21474-4 Nut
- J 21474-13 Control Arm Bushing Installer
- J 21474-27 Puller Bolt Thrust Bearing
- J 34126 Driven Sprocket Support Bearing Installer
- J 35379 Front Knuckle Support
Removal Procedure
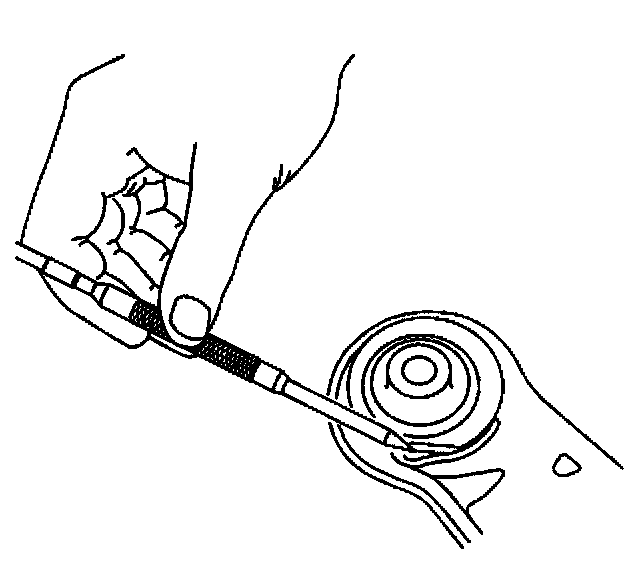
1. Remove the lower control arm.
2. Secure the lower control arm in a vice.
3. Mark the lower control arm along the flat edge of the bushing flange.
Important: Apply J 23444-A (or equivalent high pressure lubricant) to the threads of J21474-27.
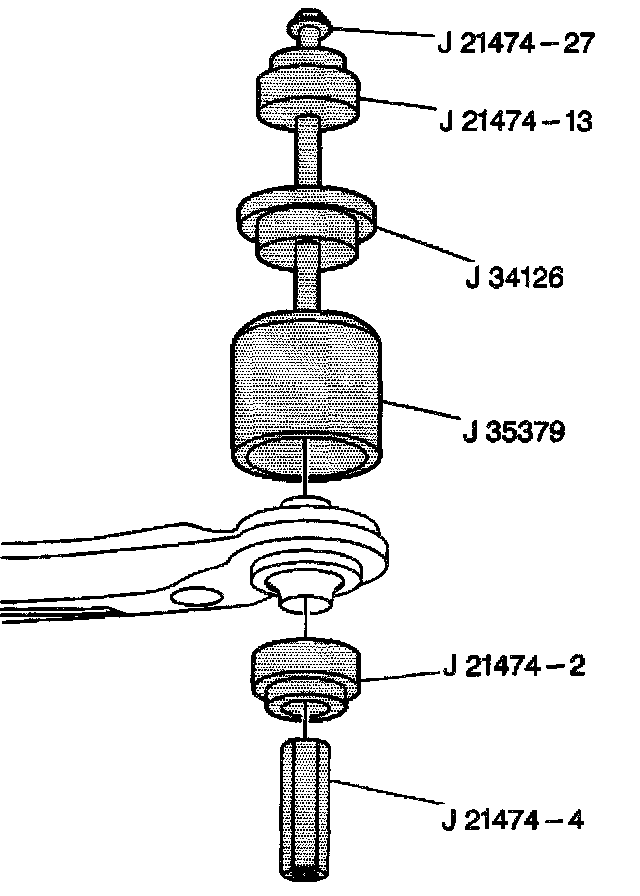
4. Assemble the following bushing removal tools as shown:
4.1. J 21474-27
4.2. J 21474-13
4.3. J34126
4.4. J35379
4.5. J 21474-2
4.6. J 21474-4
5. Tighten J21474-4.
6. Disassemble the bushing removal tools.
Installation Procedure
Important: The lower control arm vertical bushing MUST be installed in the same position which it was removed in order to maintain the original vehicle ride, handling and road feel.
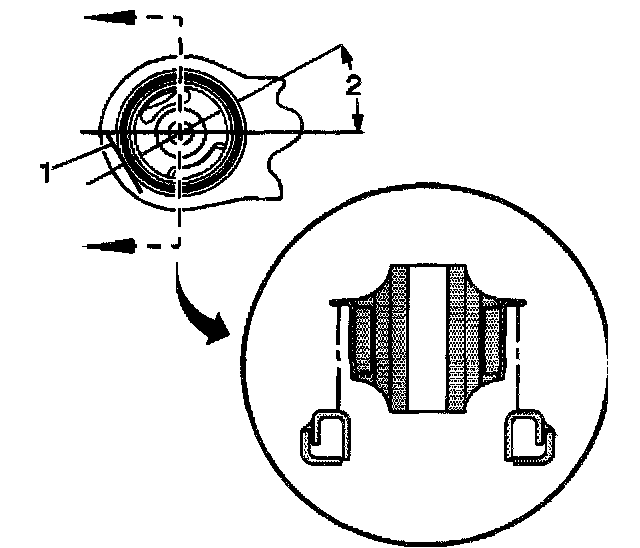
1. Align the flat edge of the bushing flange to the mark in the control arm (1). Ensure that the flat edge of the bushing flange is 30 degrees (2) from the centerline of the lower control arm. Ensure that the thin slot in the bushing is facing outboard.
2. Insert the bushing into the control arm.
Important: Apply 123444-A (or equivalent high pressure lubricant) to the threads of J21474-27.
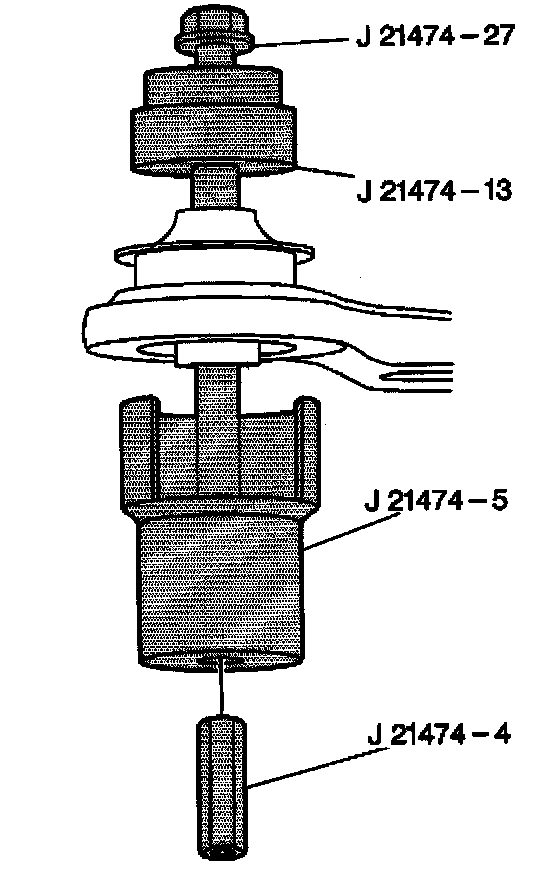
3. Assemble the following bushing installation tools as shown:
3.1. J21474-27
3.2. J 21474- 13
3.3. J 21474-5
3.4. J 21474-4
4. Tighten J 21474-27.
5. Disassemble the bushing installation tools.
6. Install the lower control arm.