Oil Pan: Service and Repair
Oil Pan ReplacementRemoval Procedure
1. Raise the vehicle. Refer to Vehicle Lifting.
2. Remove the right front tire and wheel assembly.
3. Remove the right engine splash shield.
4. Drain the engine oil.
5. Remove the starter and lay it aside.
6. Remove the engine mount strut bracket.
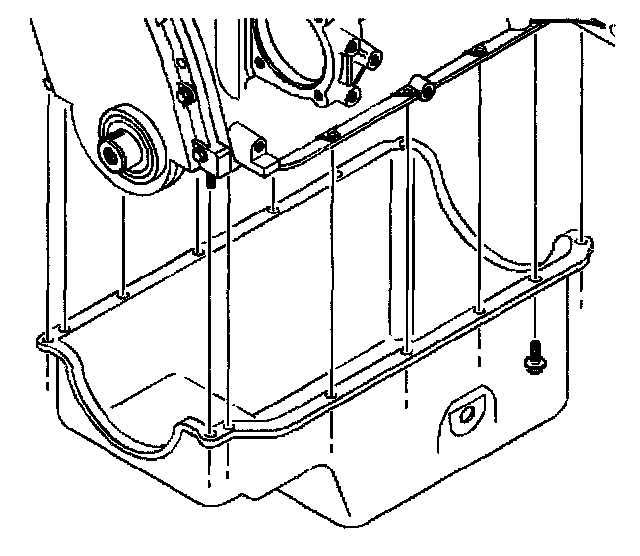
7. Remove the oil pan bolts.
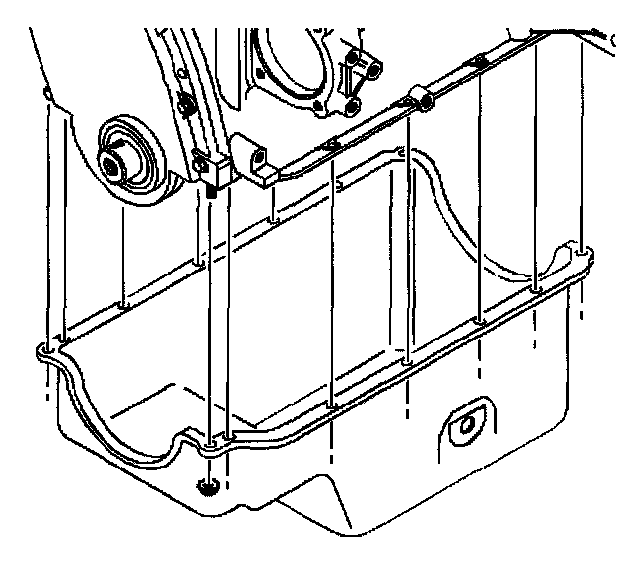
8. Remove the oil pan nuts.
9. Remove the oil pan.
10. Clean the sealing surfaces on the pan, cylinder case and front cover. Make sure that the old RTV is removed from the blind attaching holes.
Installation Procedure
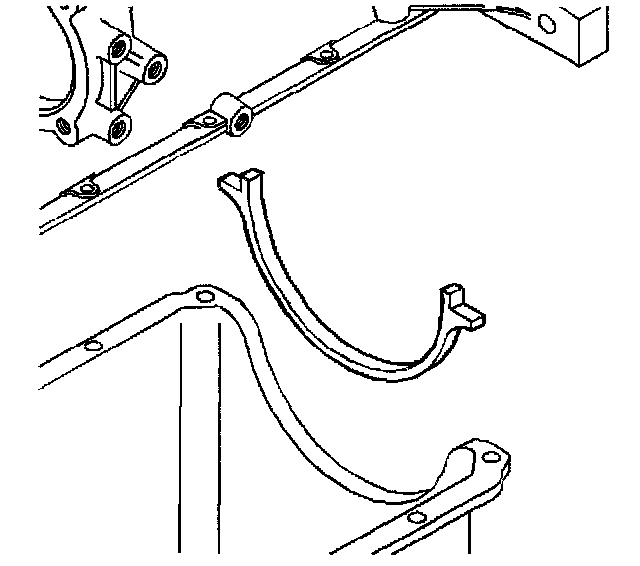
1. Place a 2-mm diameter bead of GM P/N 12346286 Loctite 5900 or equivalent to the oil pan sealing surface, except at the rear seal mounting surface.
2. Using a new oil pan rear seal, apply a thin coat of GM P/N 12346286 Loctite 5900 or equivalent on the ends down to the ears.
3. Install the oil pan.
Notice: Refer to Fastener Notice in Service Precautions.
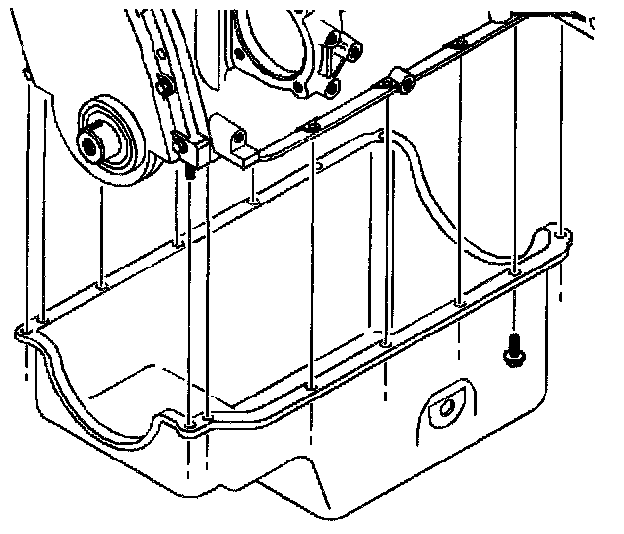
4. Install the oil pan bolts.
Tighten the bolts to 10 Nm (89 inch lbs.).
5. Install the oil pan nuts.
Tighten the nuts to 10 Nm (89 inch lbs.).
6. Install the engine mount strut bracket.
7. Install the starter.
8. Install the right engine splash shield.
9. Install the right front tire and wheel assembly.
10. Lower the vehicle.
11. Fill the crankcase with engine oil.