Condenser HVAC: Service and Repair
CONDENSER REPLACEMENTTOOLS REQUIRED
J 39400-A Halogen Leak Detector
REMOVAL PROCEDURE
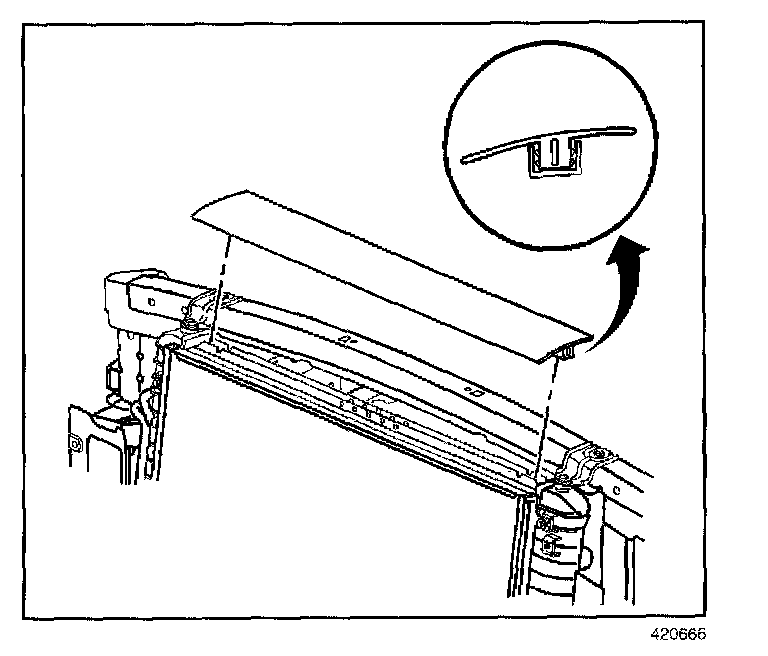
1. Recover the refrigerant. Refer to Refrigerant Recovery and Recharging.
2. Remove the upper tie bar support brace bolts at the upper tie bar
3. Loosen the upper tie bar support brace bolts at the headlamp and bumper fascia mounting panel and position the braces out of the way.
4. Remove the upper radiator seal.
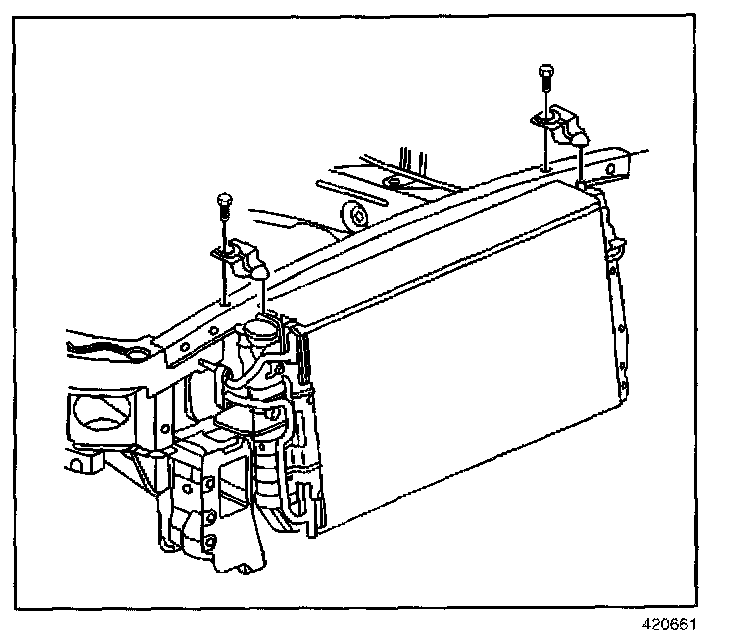
5. Remove the upper radiator mounting brackets.
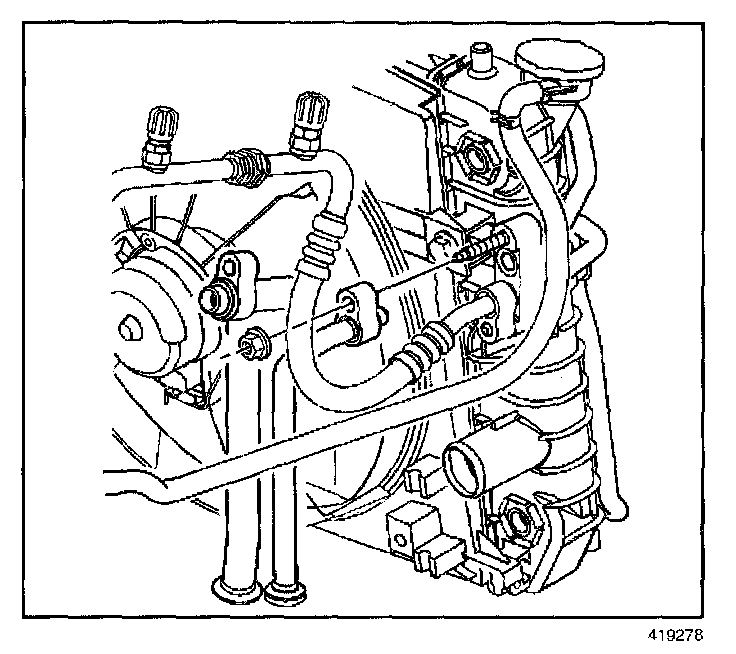
6. Disconnect the compressor hose from the condenser.
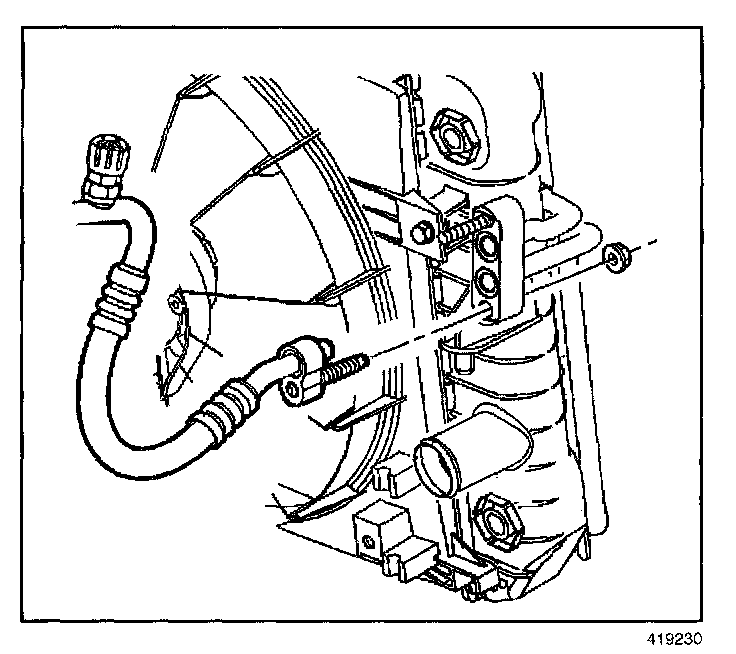
7. Remove the front headlamps.
8. Remove the evaporator hose nut.
9. Disconnect the evaporator hose from the condenser.
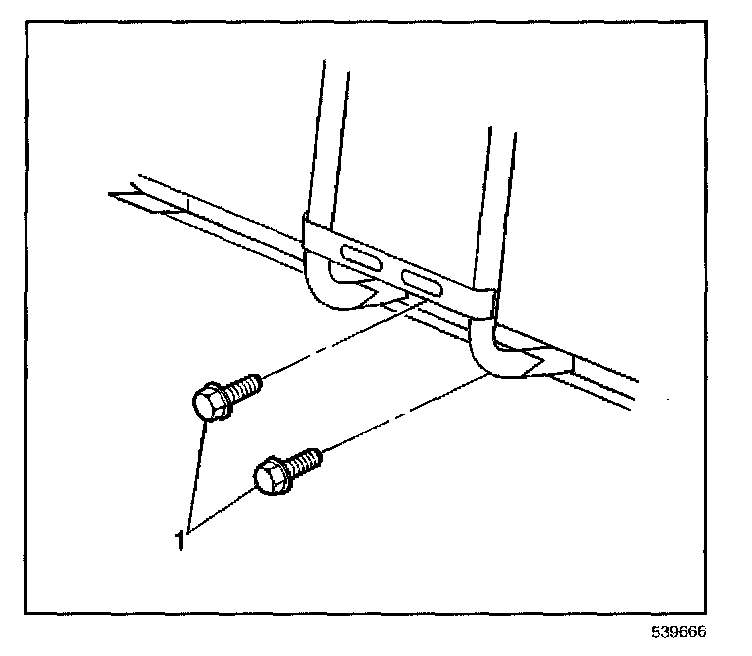
10. Remove the lower hood latch support bolts (1).
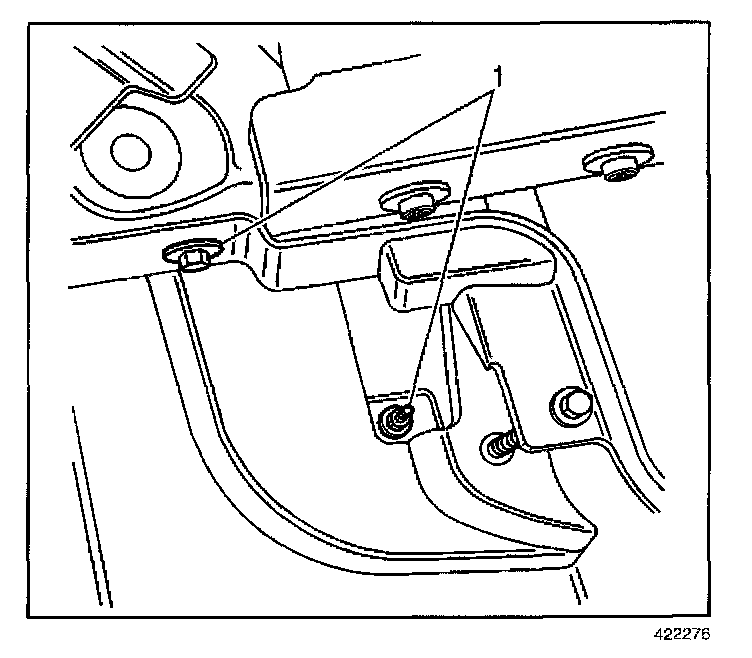
11. Remove the fasteners (1) from the left and right sides of the front fascia support.
12. Lift and pull forward on the headlamp and bumper fascia support to obtain access to the condenser mounting bolts.
IMPORTANT: The bolt retaining the condenser to the radiator end tank is a special length and should be the ONLY bolt used upon reinstallation. The use of a longer bolt will damage the radiator end tank.
13. Remove the two condenser to radiator mounting bolts.
14. Separate the condenser from the radiator by lifting out of the lower mounting tabs.
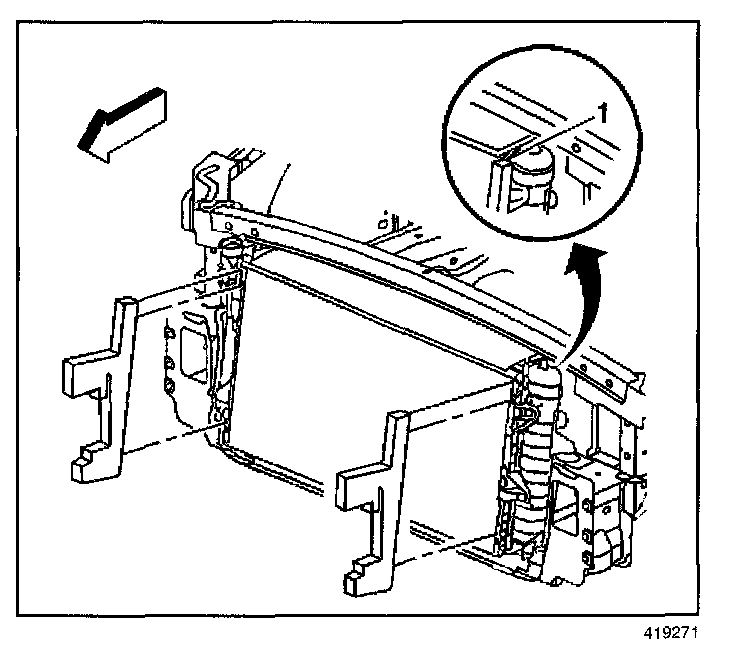
15. Remove the A/C condenser side seals (1)
16. Remove the condenser from the vehicle.
INSTALLATION PROCEDURE
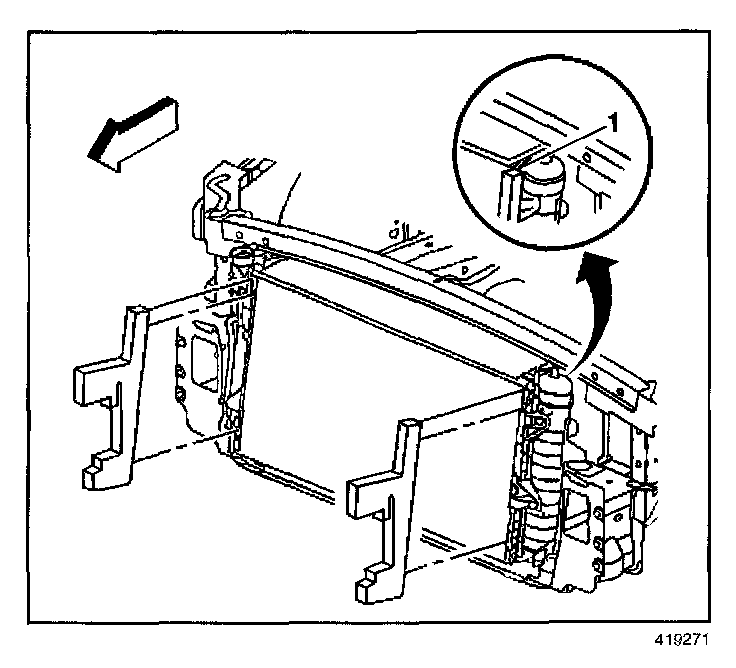
1. Add the proper amount of refrigerant oil to the new condenser. Refer to Refrigerant System Capacities.
IMPORTANT: Install the condenser into the lower radiator mounting tabs.
2. Install the condenser into the vehicle.
NOTE:
^ The bolt retaining the condenser to the radiator end tank is a special length and should be the ONLY bolt used upon reinstallation. The use of a longer bolt will damage the radiator end tank.
^ Refer to Fastener Notice in Service Precautions.
3. Install the condenser mounting bolts.
Tighten
Tighten the bolts to 6 N.m (53 lb in).
4. Install the new A/C condenser side seals (1).
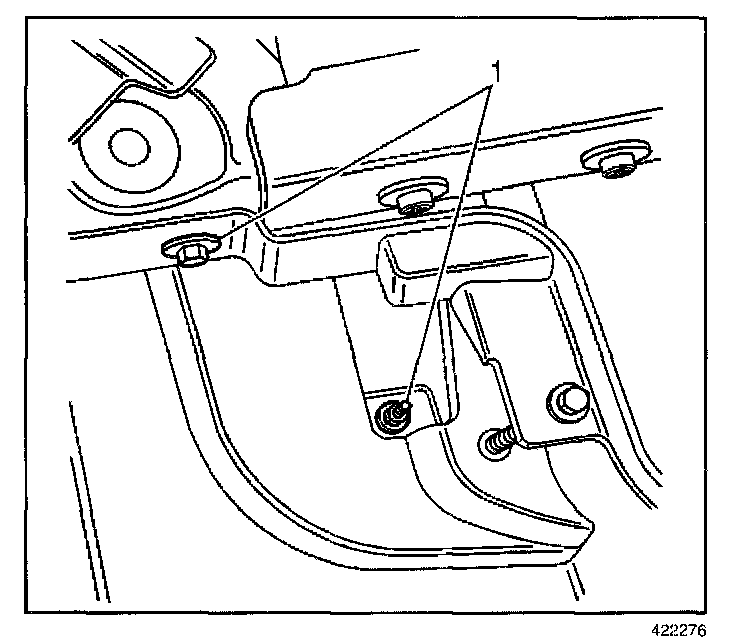
5. Reposition the headlamp and bumper fascia support and install the fasteners (1).
Tighten
Tighten the bolt and the nut to 9 N.m (80 lb in).
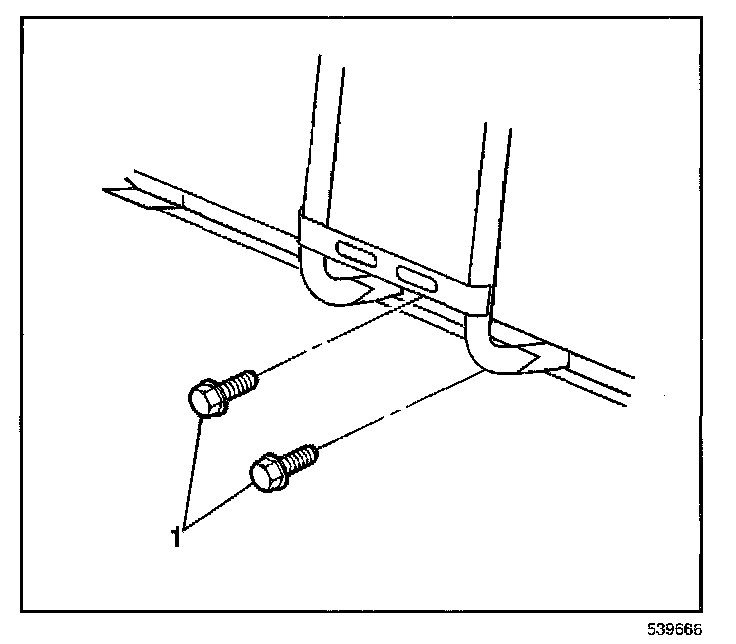
6. Install the lower hood latch support bolts (1).
Tighten
Tighten the bolts to 9 N.m (80 lb in).
IMPORTANT: Inspect the seal washers for damage before reinstalling the A/C lines and hoses.
If any damage is noted during inspection, the suspect seal must be replaced.
Flat washer type seals do not require lubrication.
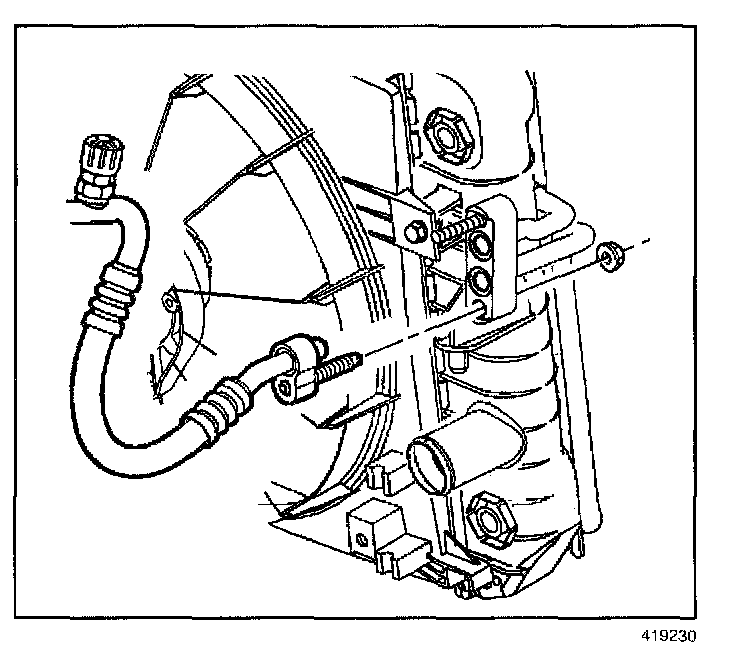
7. Install the evaporator hose to condenser.
8. Install the evaporator hose nut.
Tighten
Tighten the nut to 20 N.m (12 lb ft).
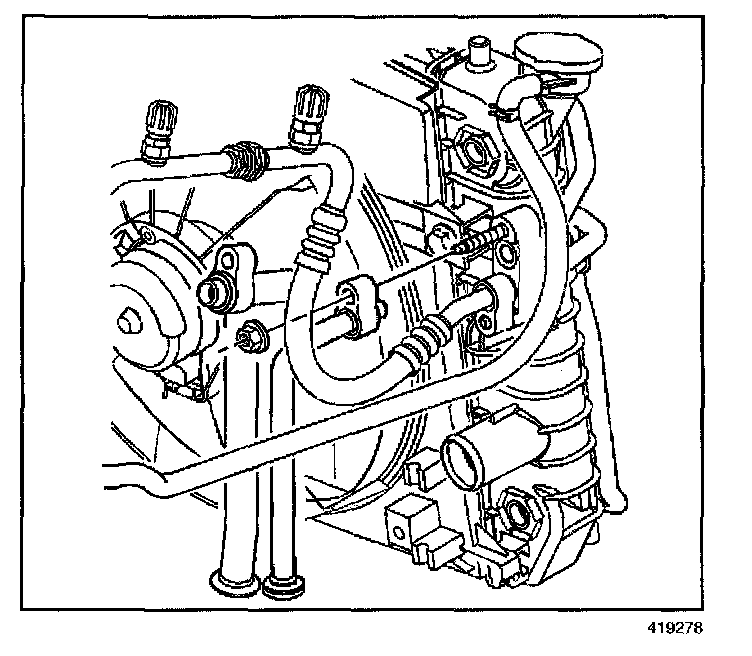
9. Install the compressor hose to the condenser.
10. Install the condenser nut.
Tighten
Tighten the nut to 20 N.m (15 lb ft).
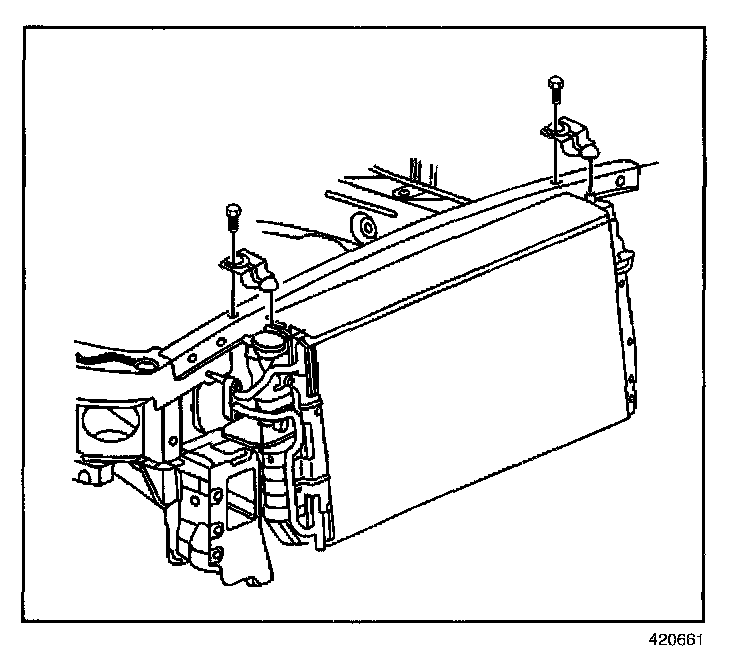
11. Install the upper radiator mounting brackets.
12. Install the upper radiator mounting bracket bolts.
Tighten
Tighten the bolts to 9 N.m (7 lb ft).
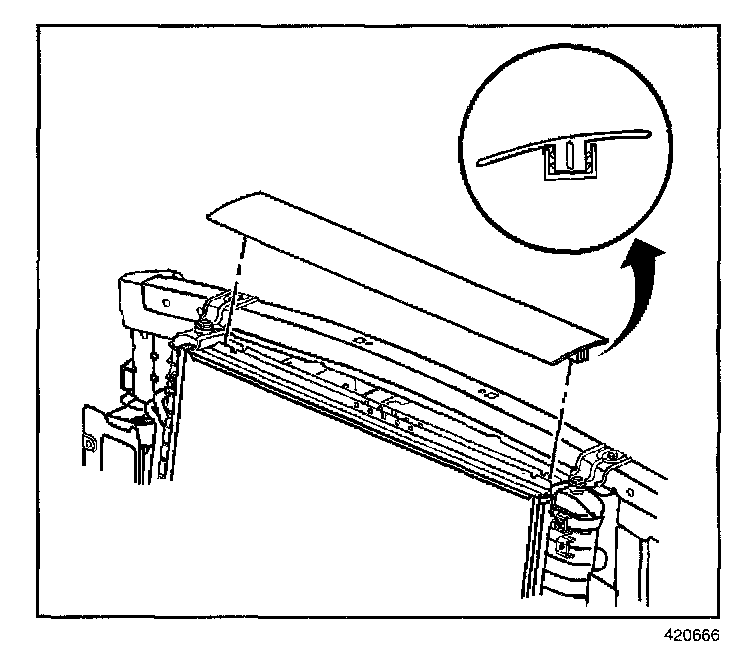
13. Install the upper radiator seal.
14. Install the headlamp and bumper fascia mounting panel support bracket bolts.
Tighten
Tighten the bolts to 9 N.m (80 lb in).
15. Install the front headlamps.
16. Recharge the A/C system. Refer to Refrigerant Recovery and Recharging
17. Leak test the fittings of the component using the J 39400-A.