Air Conditioner
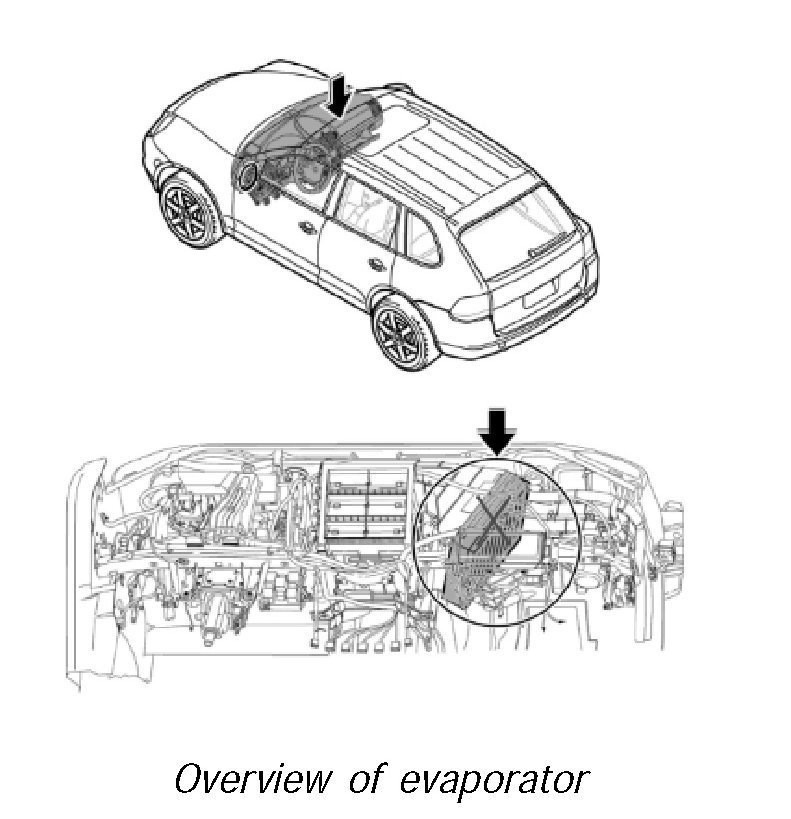
Removing And Installing Front Evaporator
Removing evaporator
Removing electric line for heater/air-conditioning unit
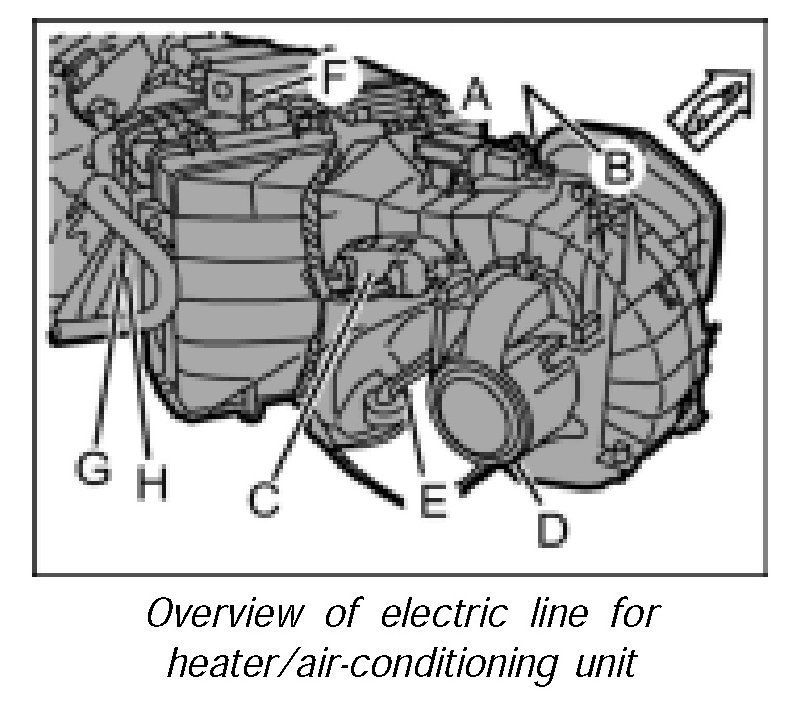
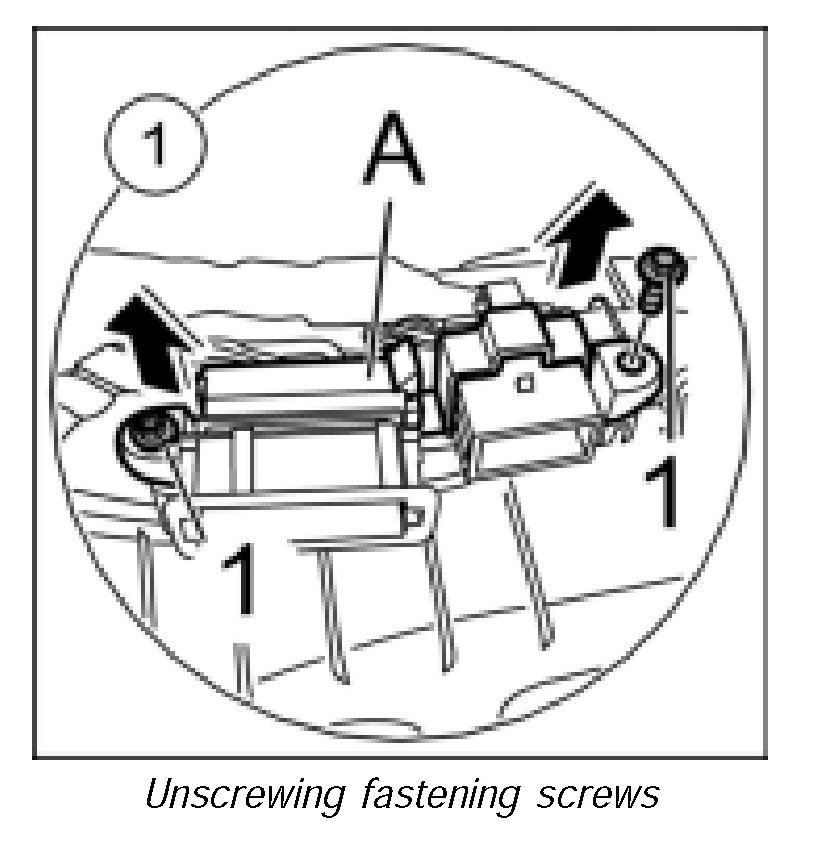
1. Undo both fastening screws -1- and remove central plug housing -A-.
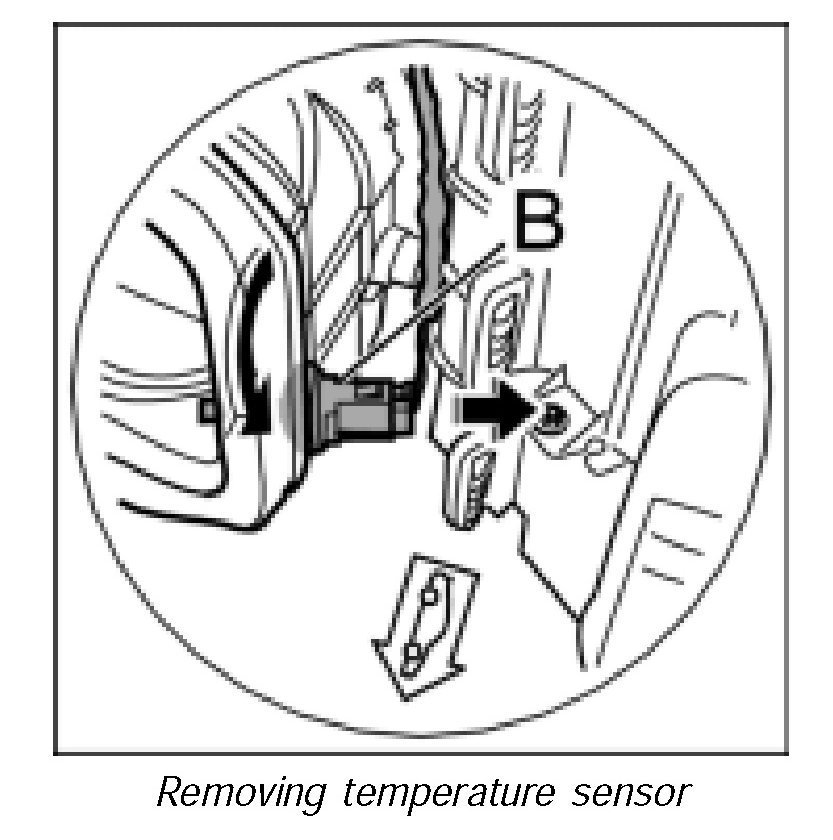
2. Turn temperature sensor -B- 90 degrees and remove from heater/air-conditioning unit.
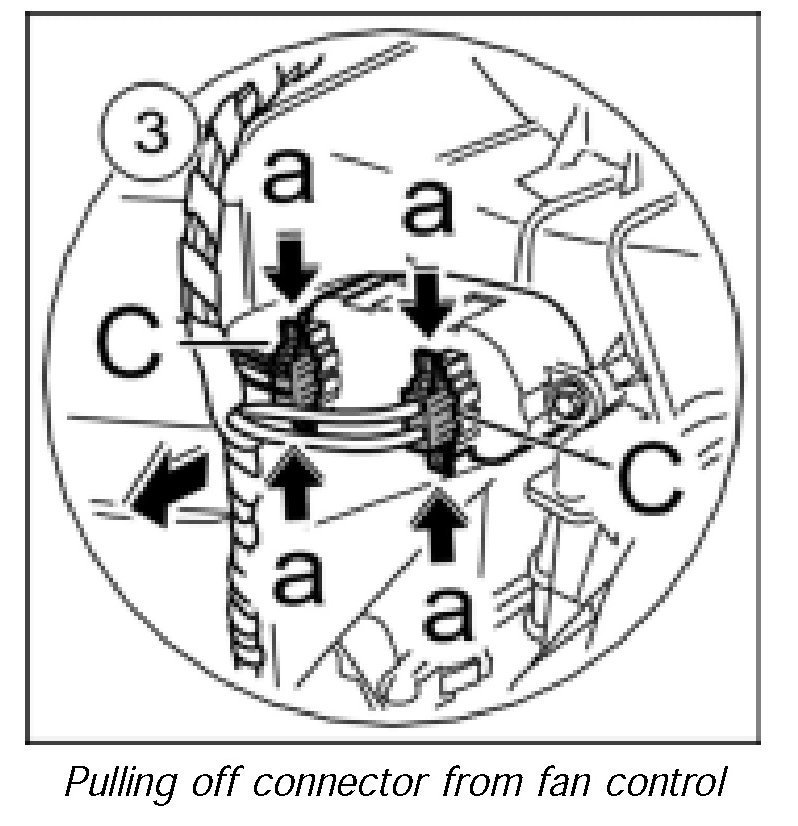
3. Press latch on electric connector for fan control -C- -Arrows a- and pull off the connector.
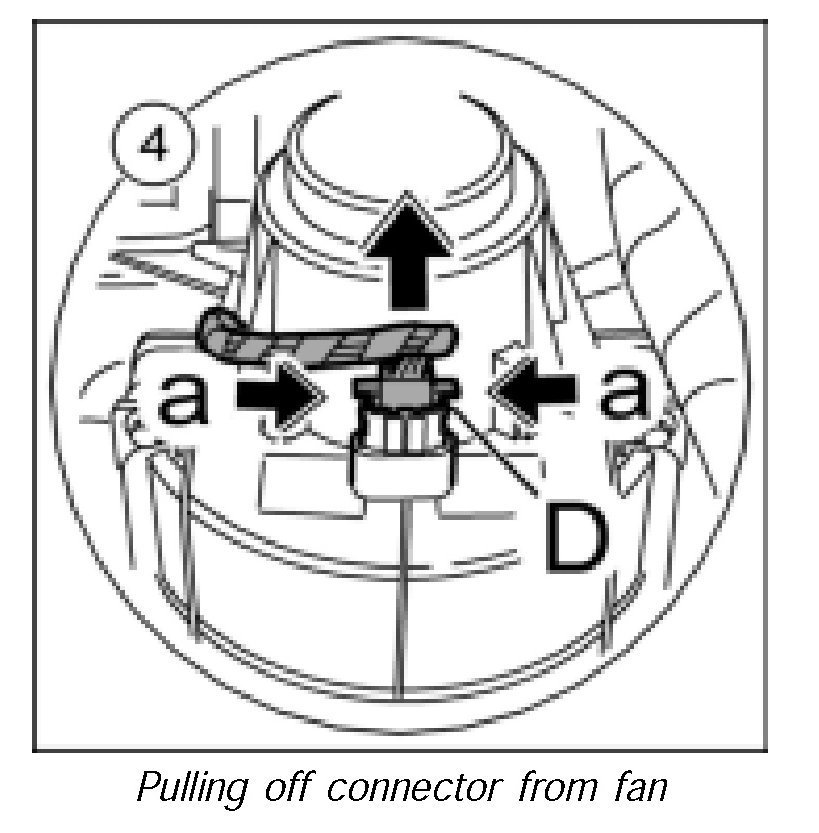
4. Press latch on electric connector for fan -D- -Arrows a- and pull off the connector.
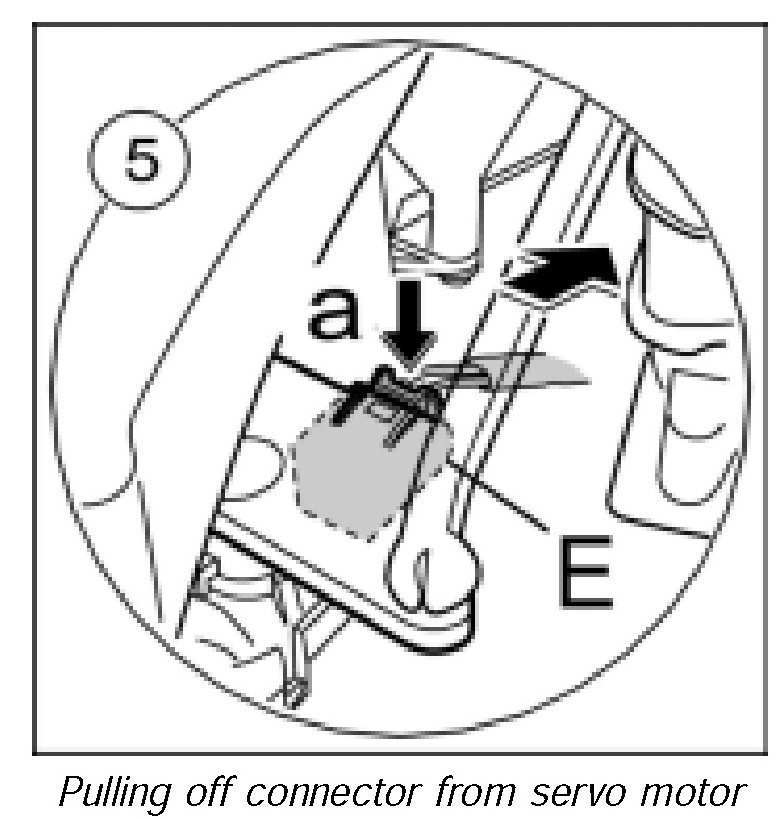
5. Press latch on electric connector for servo motor -E- -Arrow a- and pull off the connector.
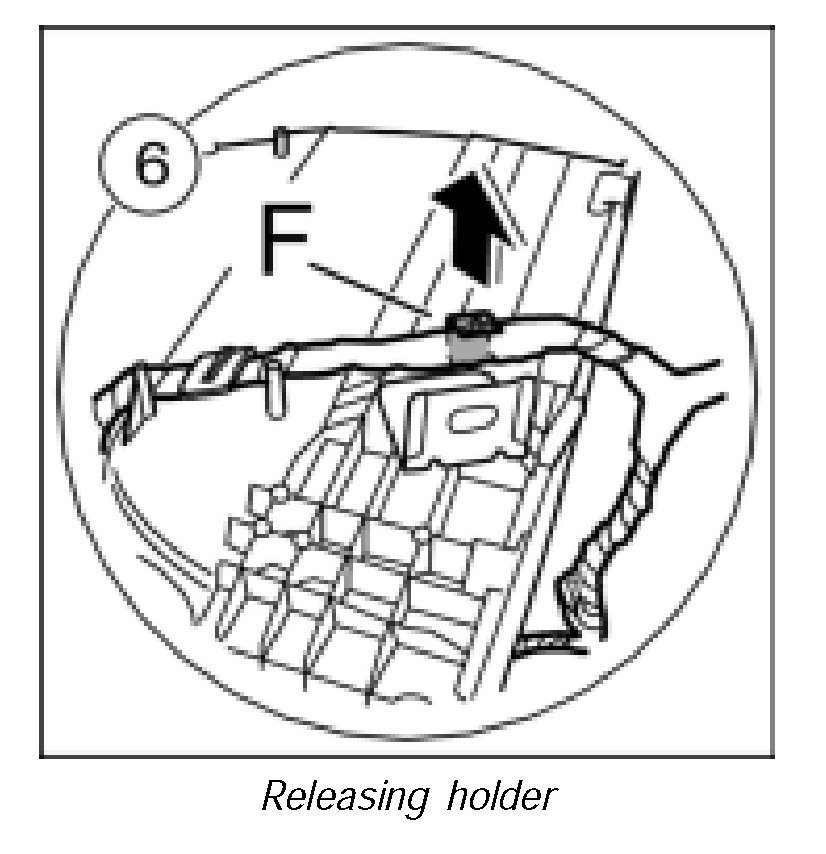
6. Lever off the holder -F- for the wiring harness from the heater/air-conditioning unit with a screwdriver.
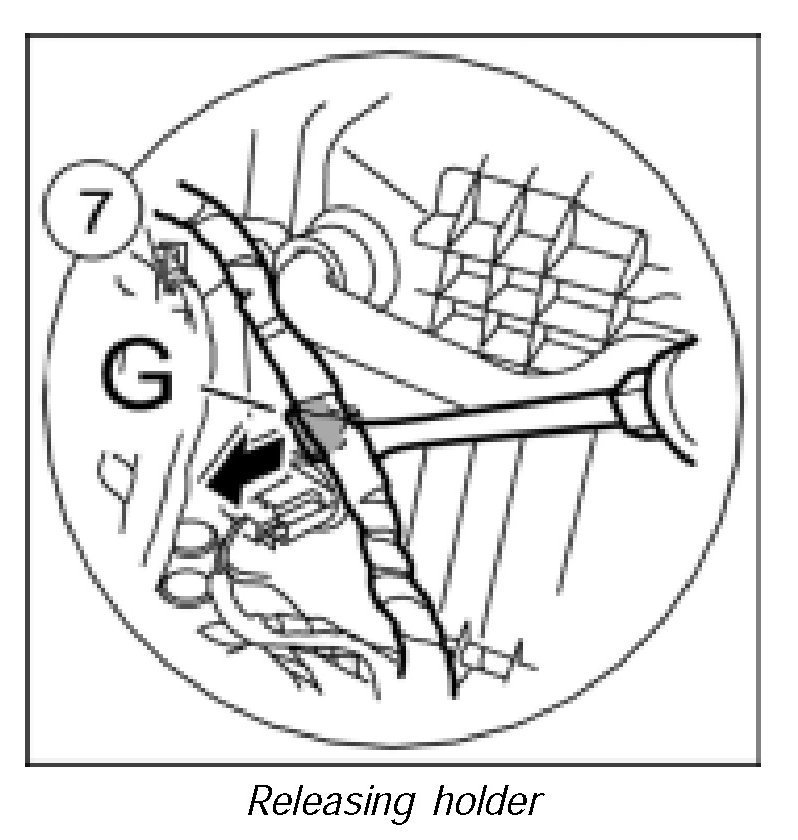
7. Lever off the holder -G- for the wiring harness from the heater/air-conditioning unit with a screwdriver.
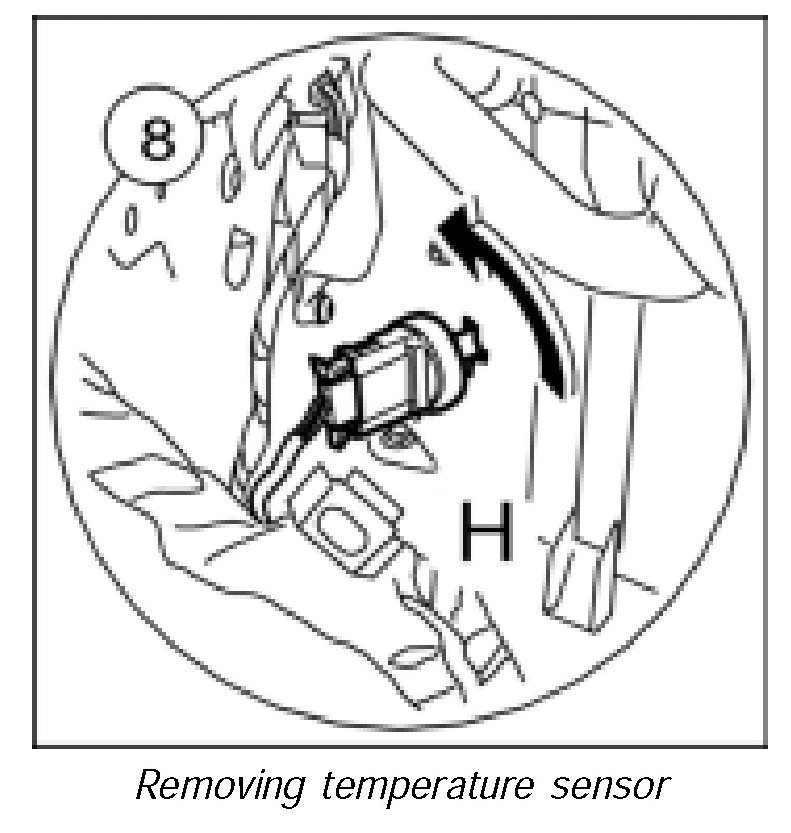
8. Turn temperature sensor -H- 90 degrees and remove from heater/air-conditioning unit. Remove electric wiring harness and place it on the air distributor.
9. Remove heater/air-conditioning unit.
Removing fan housing
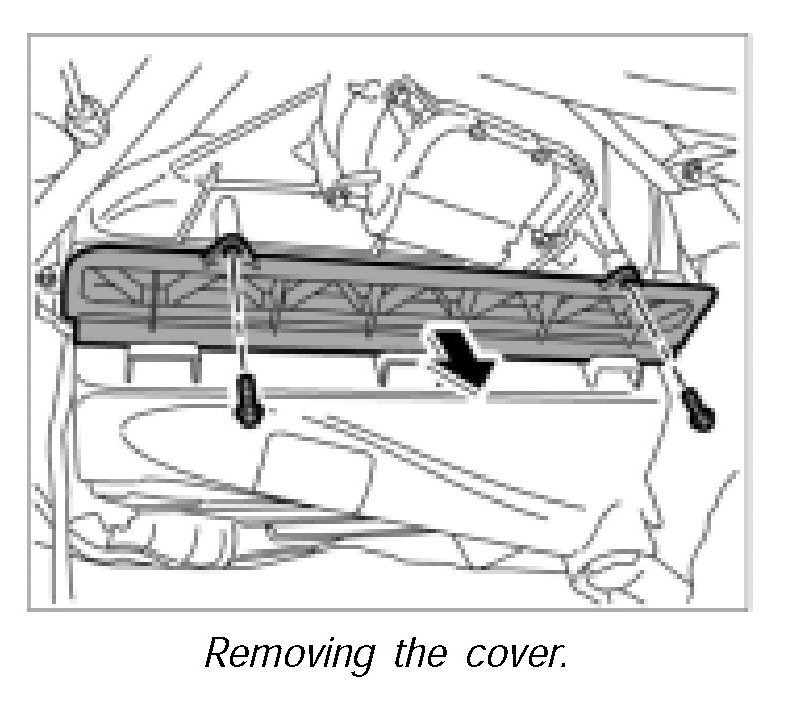
1. Unscrew the two fastening screws and remove cover for the particle filter.
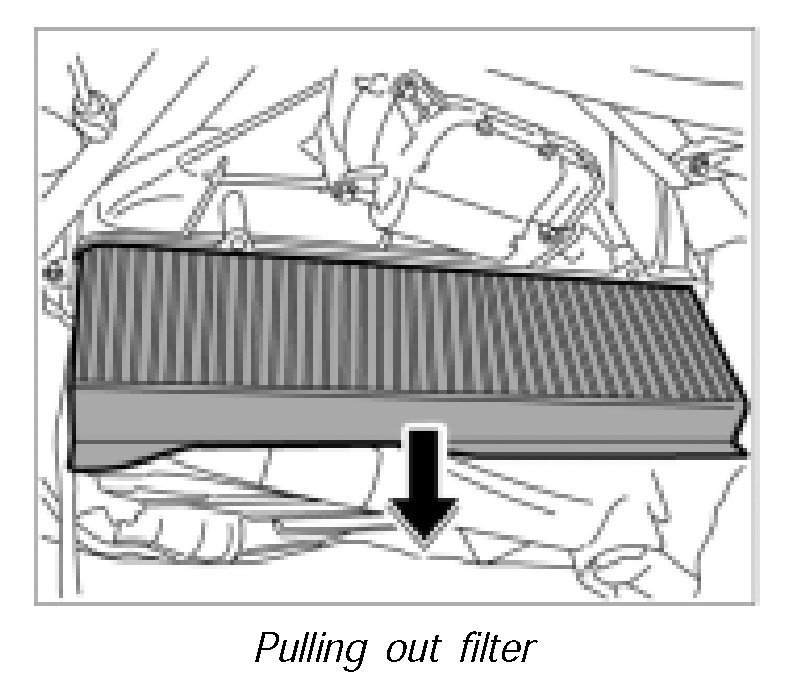
2. Pull out filter downwards.
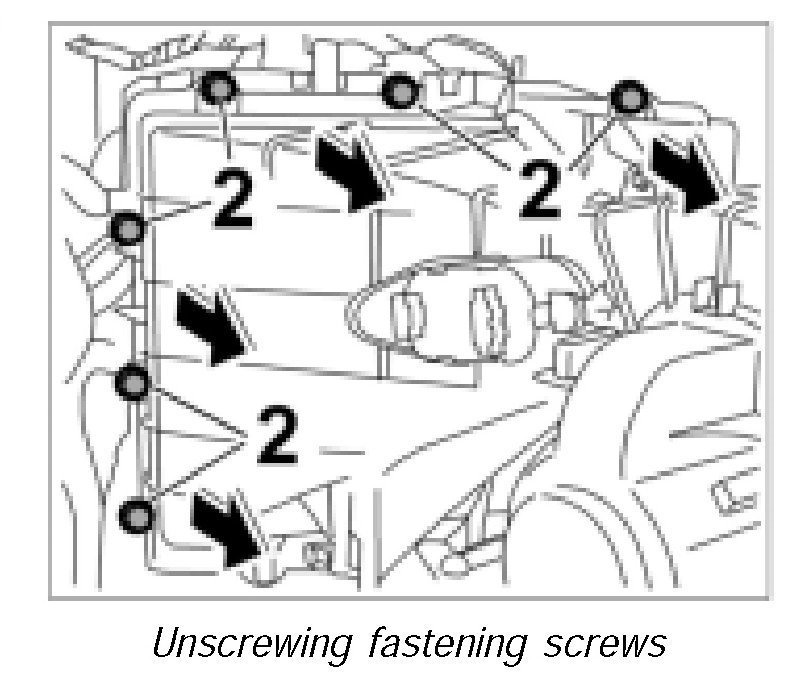
3. Unscrew the six fastening screws -2- for the fan housing. Support housing.
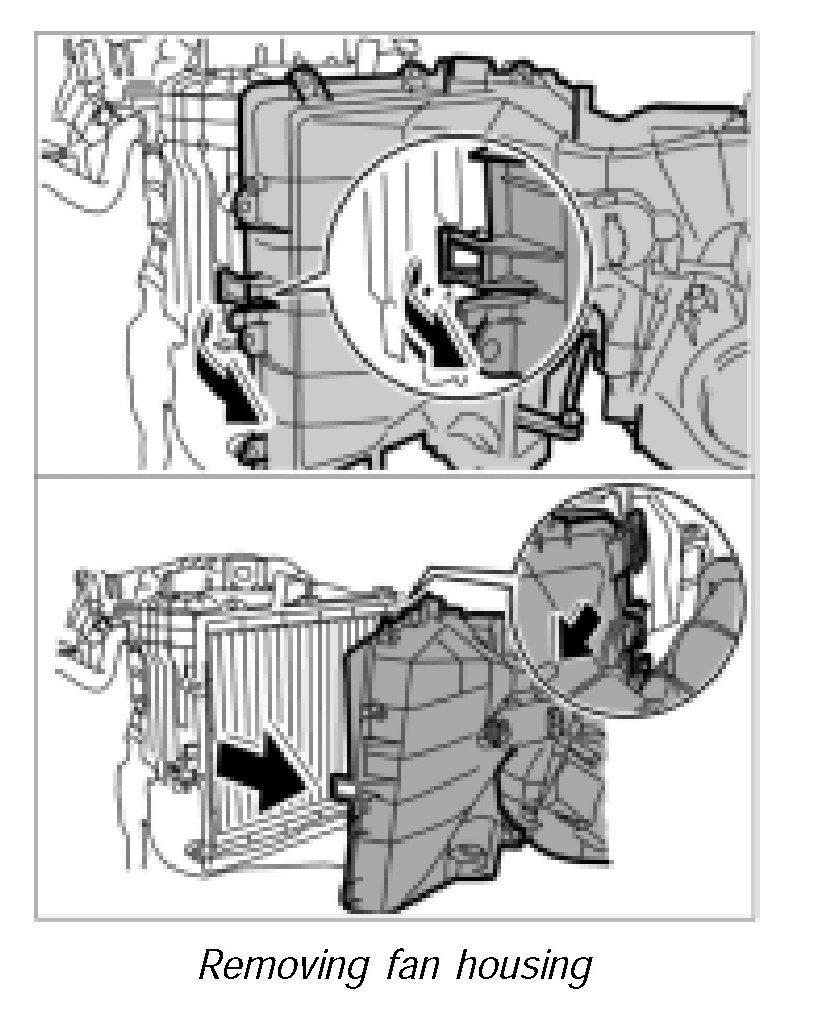
4. Raise retaining clips and remove the fan housing.
Disassembling heater/air-conditioning unit
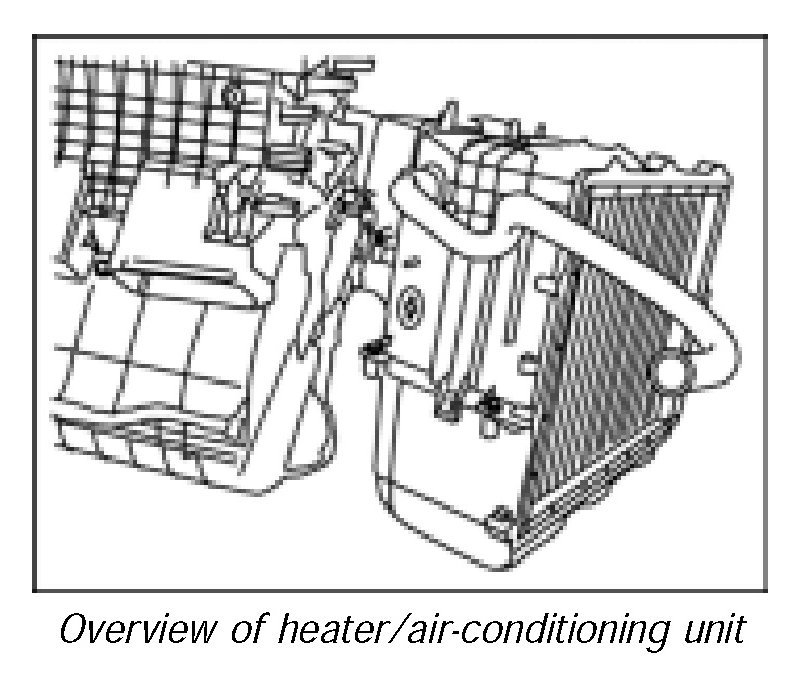
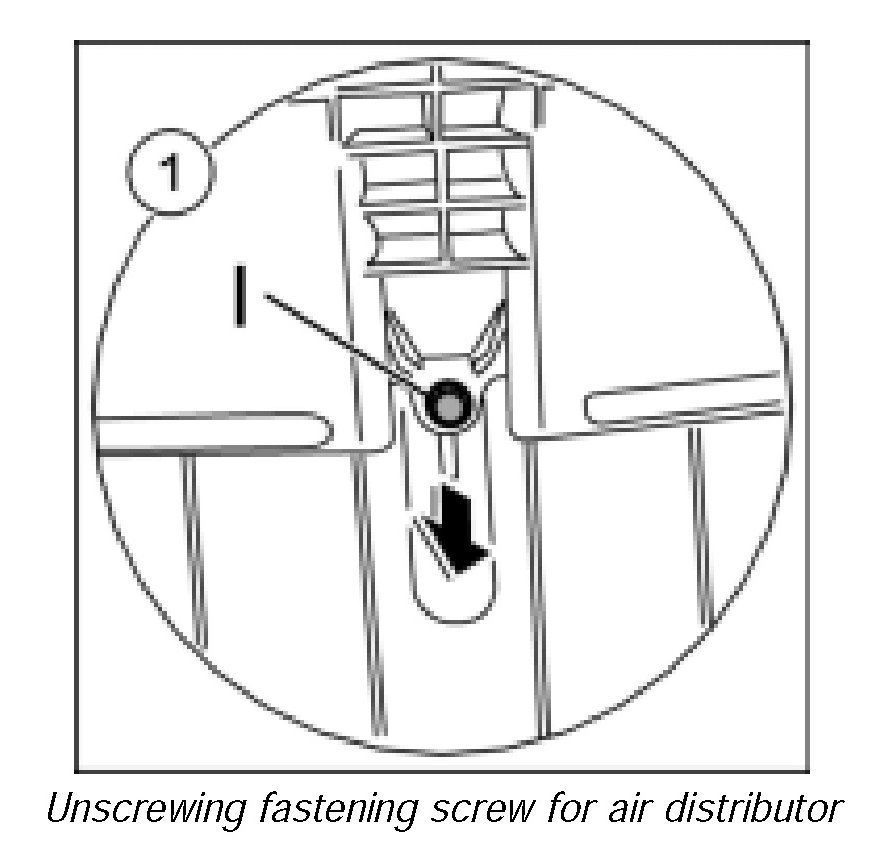
1. Undo fastening screw -I- for air distributor.
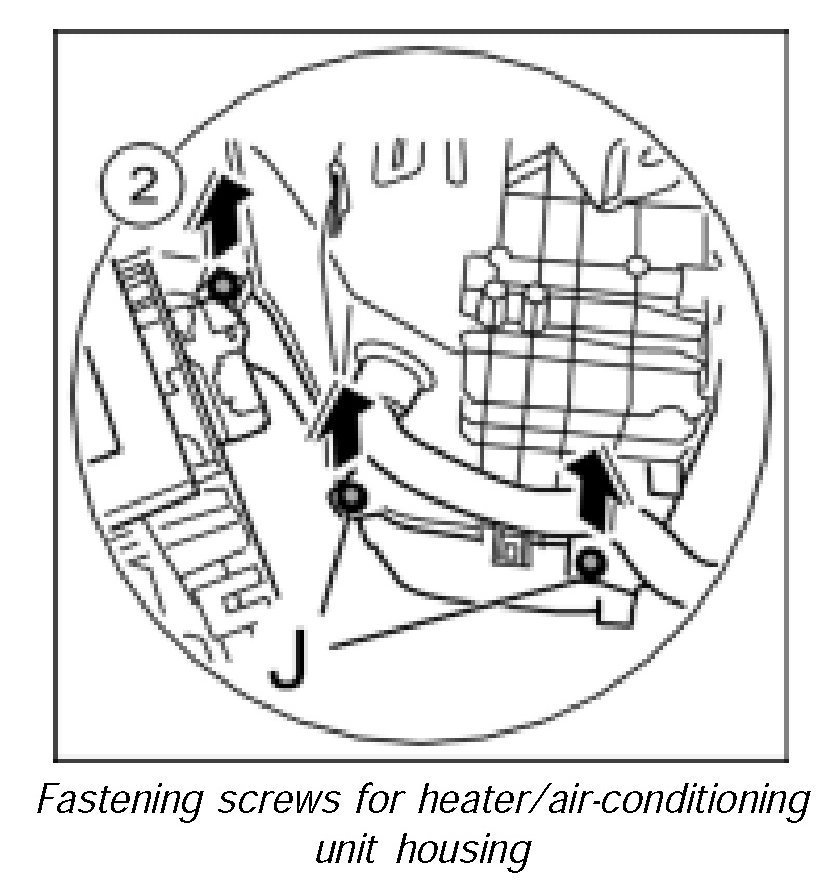
2. Unscrew fastening screws -J- for heater/air-conditioning unit housing.
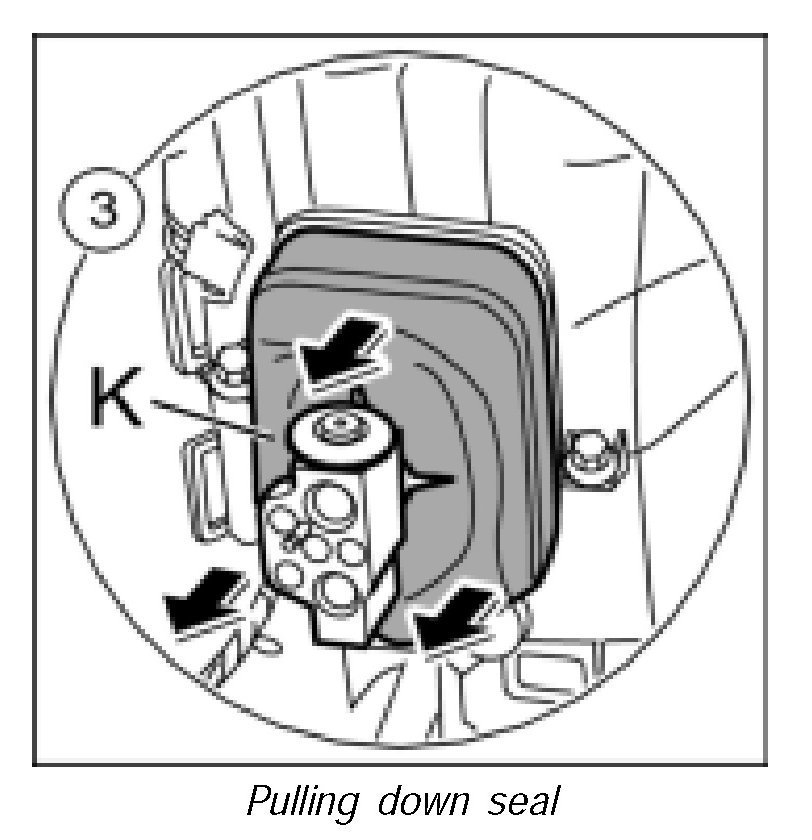
3. Pull down seal -K- over the expansion valve.
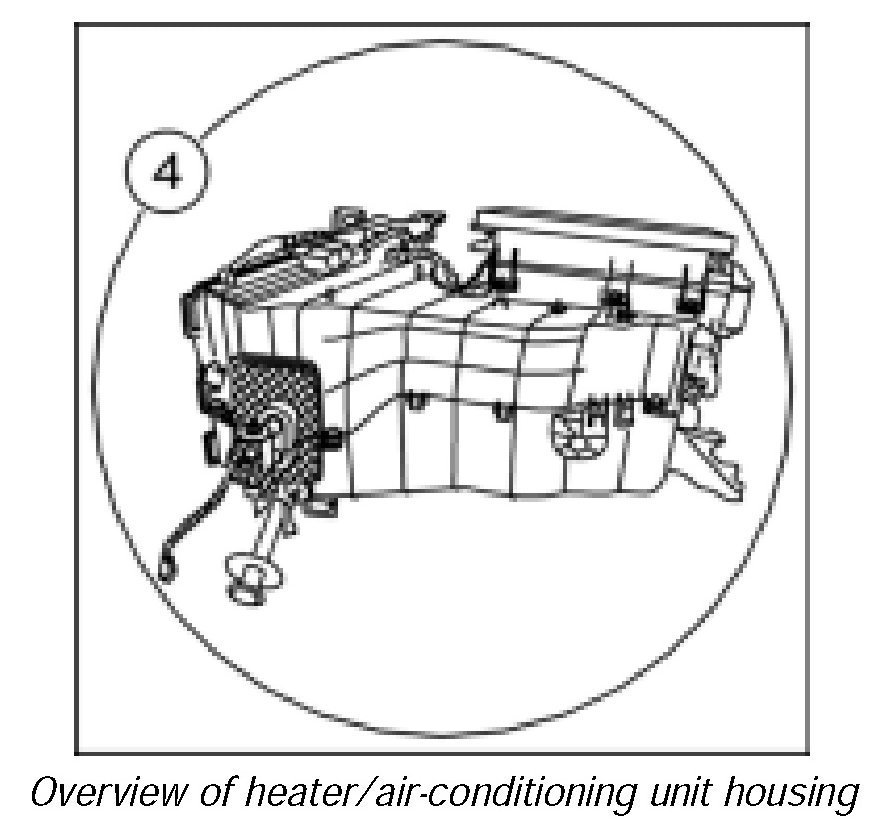
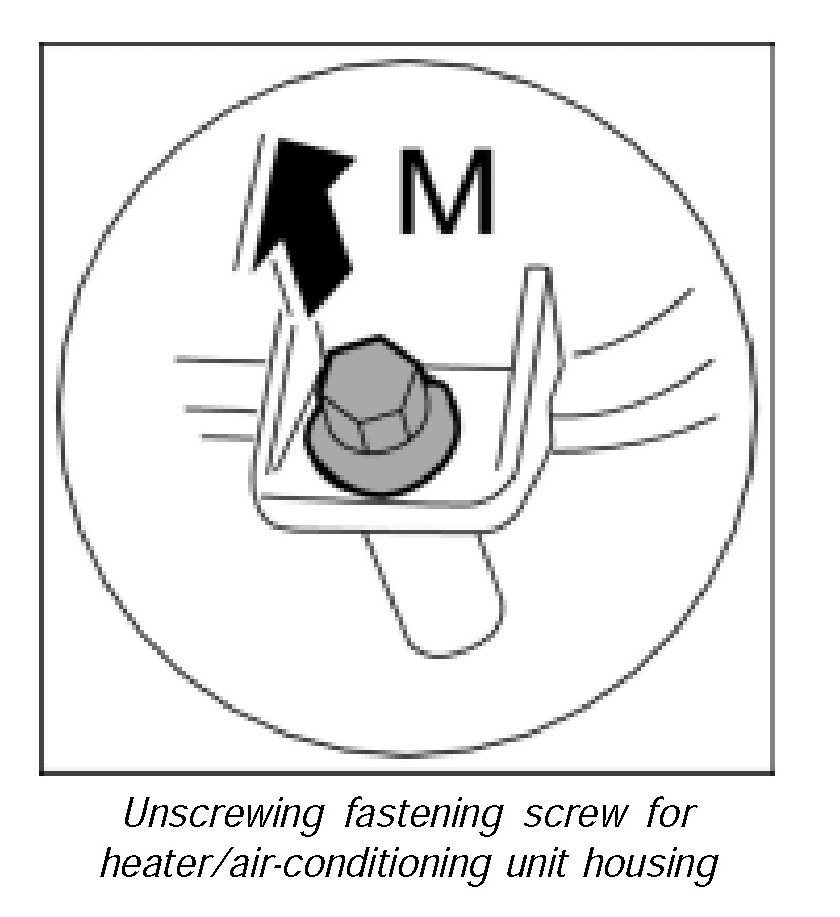
4. Unscrew fastening screw -Arrow M- for heater/air-conditioning unit housing.
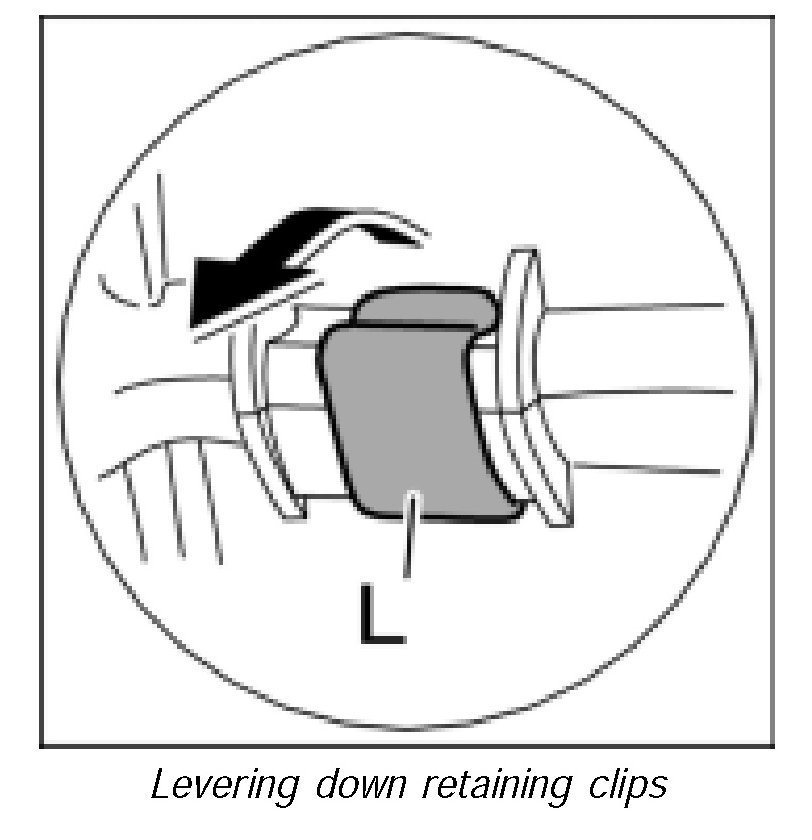
5. Lever down retaining clips with a screwdriver -L-.
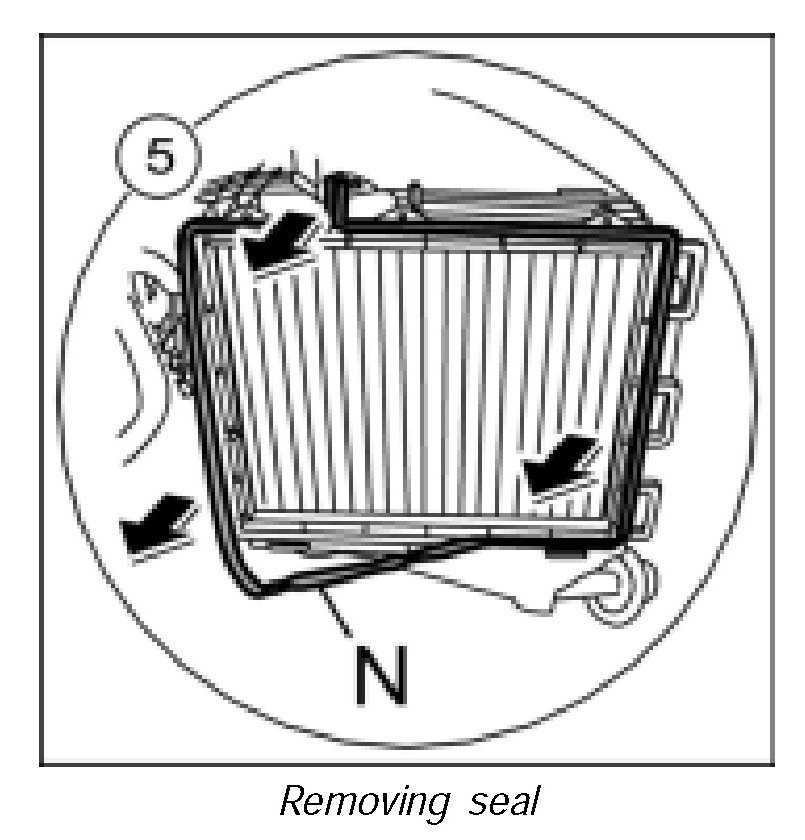
6. Take out the seal -N- from the housing halves.
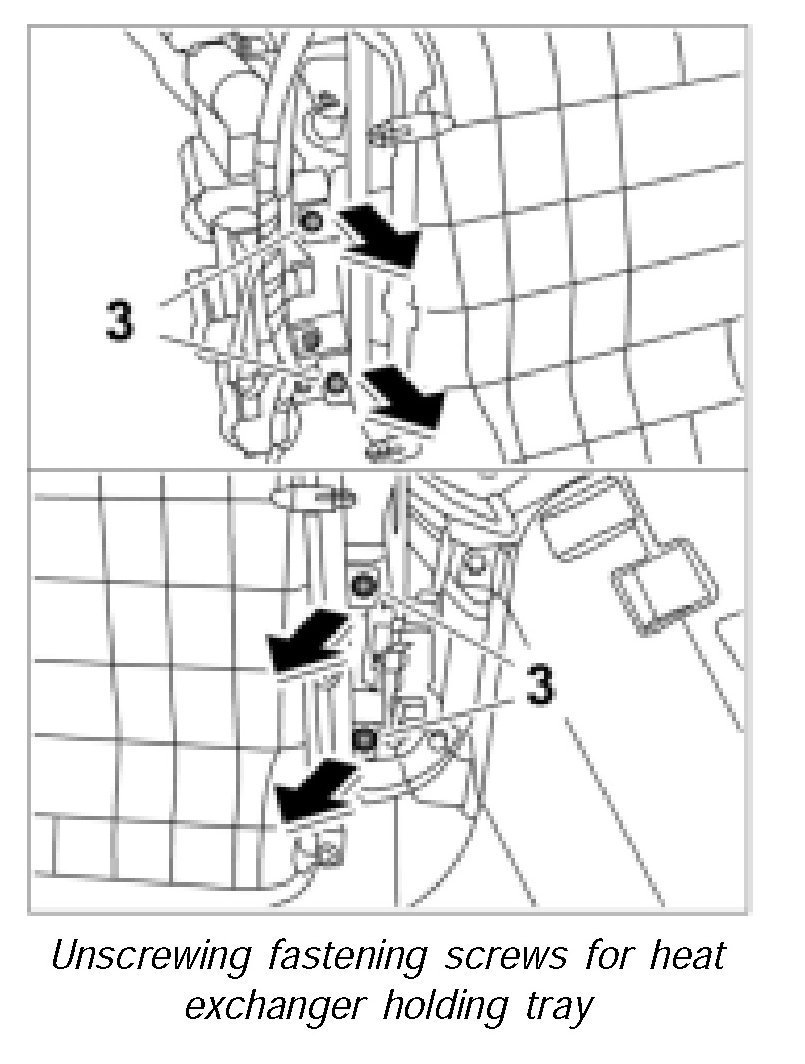
7. Unscrew the four fastening screws -3- in the area of the holding tray for the heat exchanger.
NOTE:
- There is a retaining pin on the left side underneath the heat exchanger which joins the lower holding tray (where the heat exchanger is located) to the air conditioner.
- As soon as the retaining pin has been pulled out, the heat exchanger with the holding tray can be folded down.
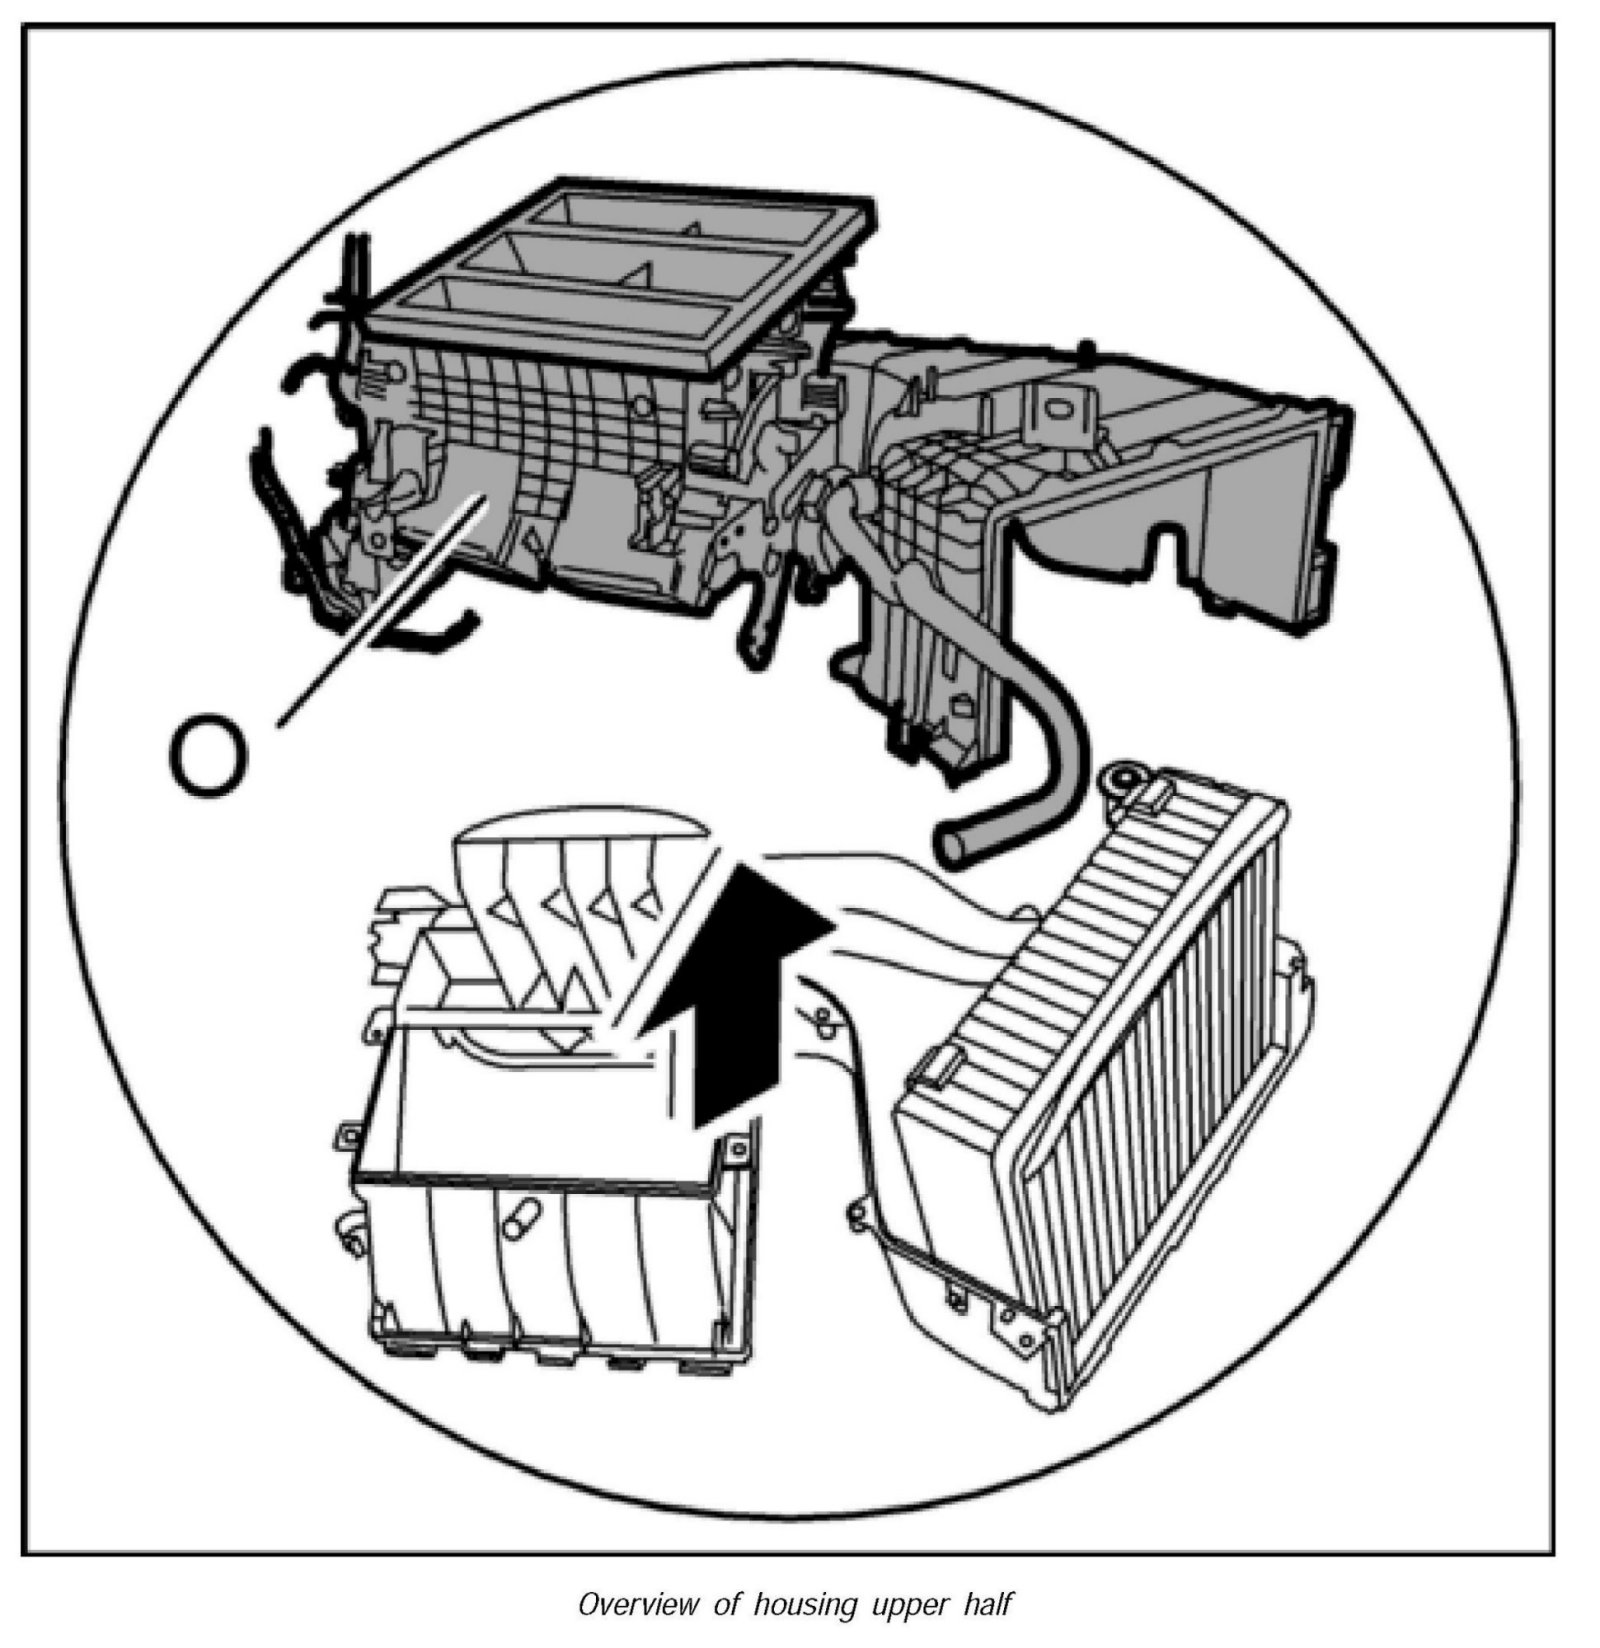
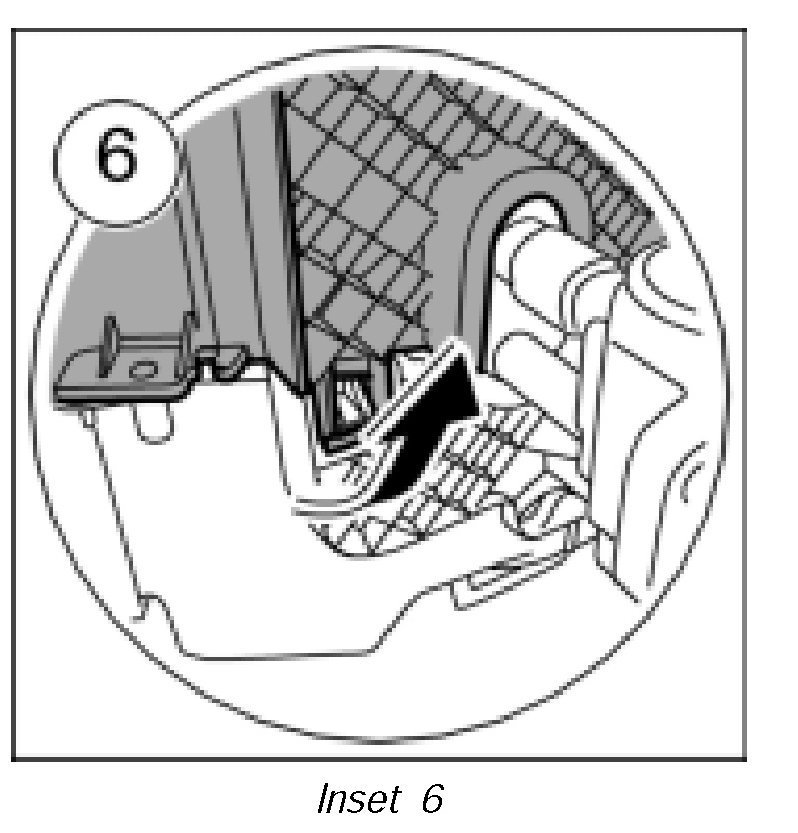
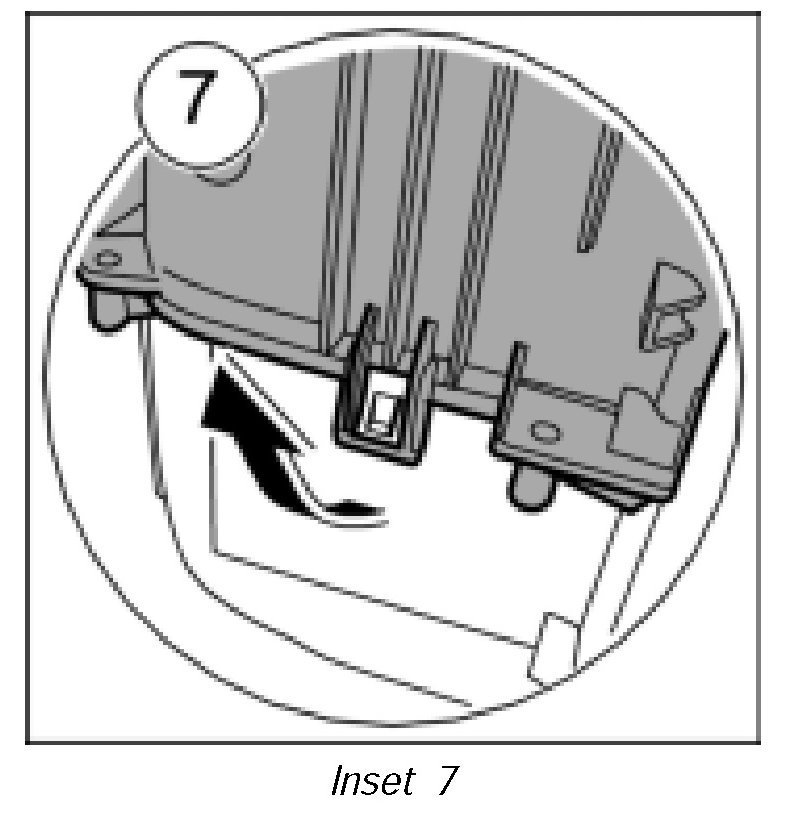
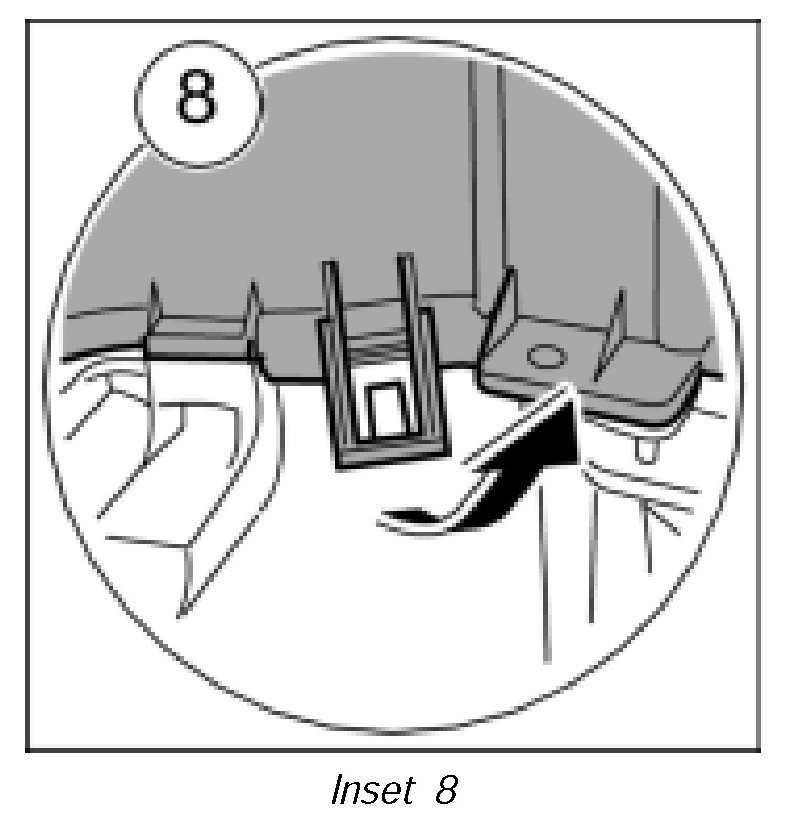
8. Raise retaining clips -6-, -7- and -8- remove the fan housing upper half.
NOTE: Depending on the condition and reasons for replacing the evaporator, unscrew and remove the expansion valve.
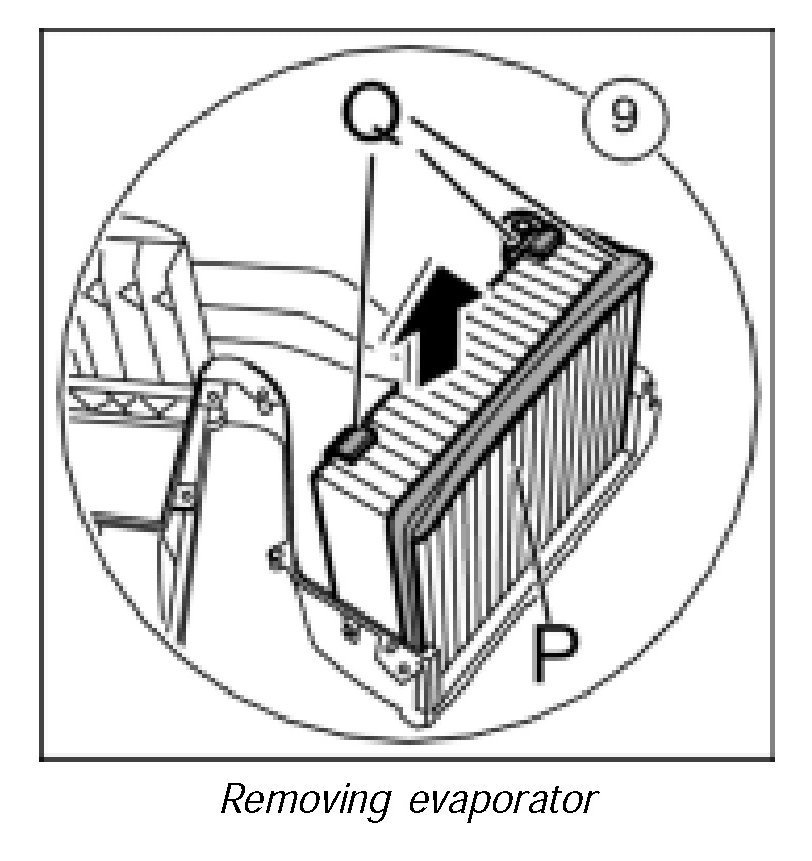
9. Remove evaporator -P-.
Installing evaporator
Assembling heater/air-conditioning unit
1. Fit expansion valve. Tightening torque 6.5 ftlb.
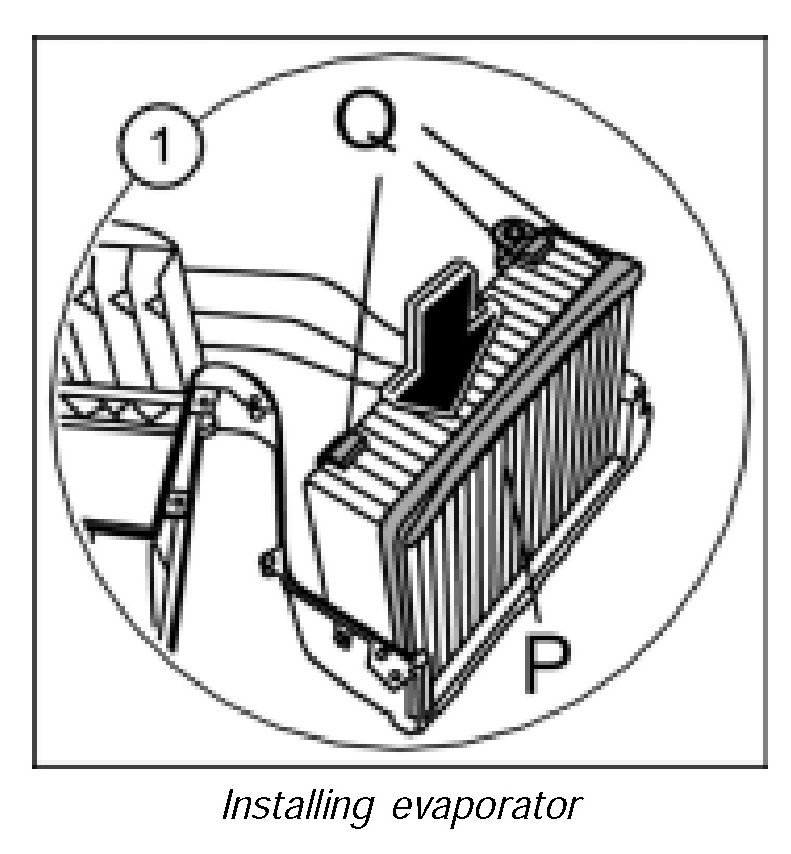
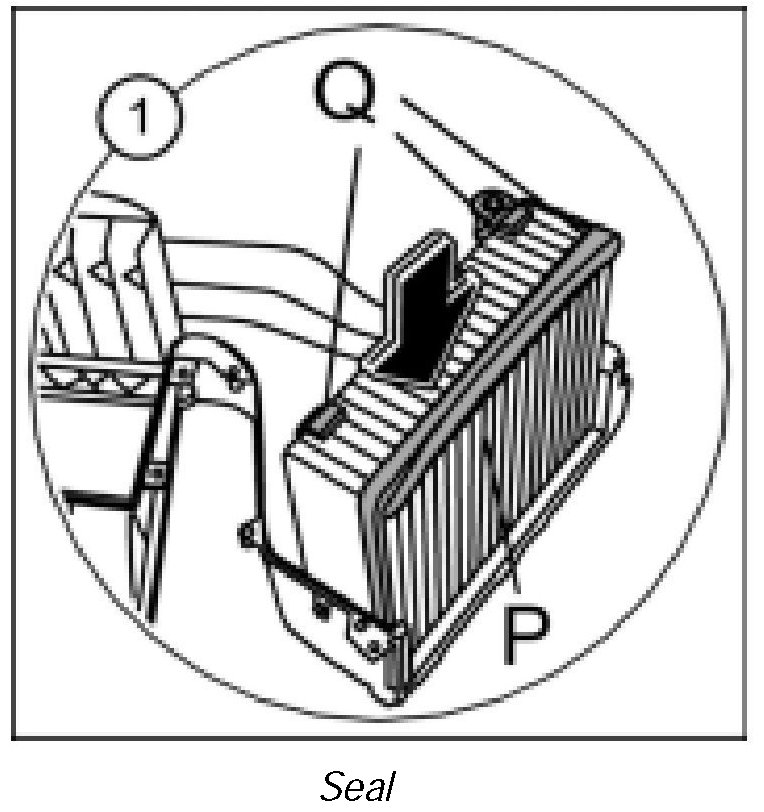
2. Insert evaporator -P- into housing lower half.
NOTE: Make sure that the seal -Q- is not damaged. If in doubt, replace.
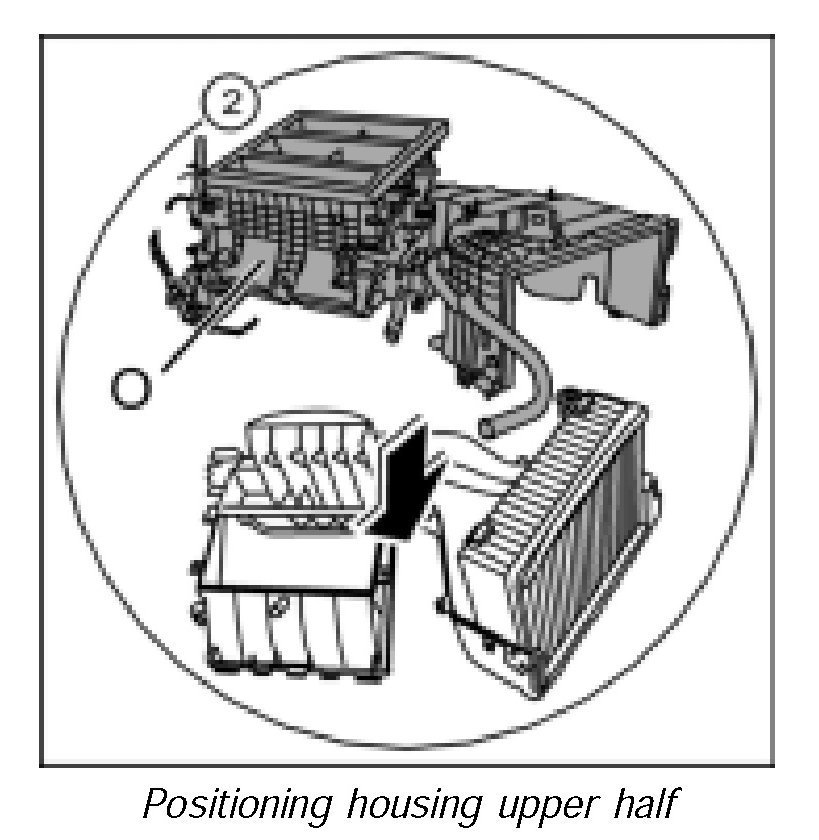
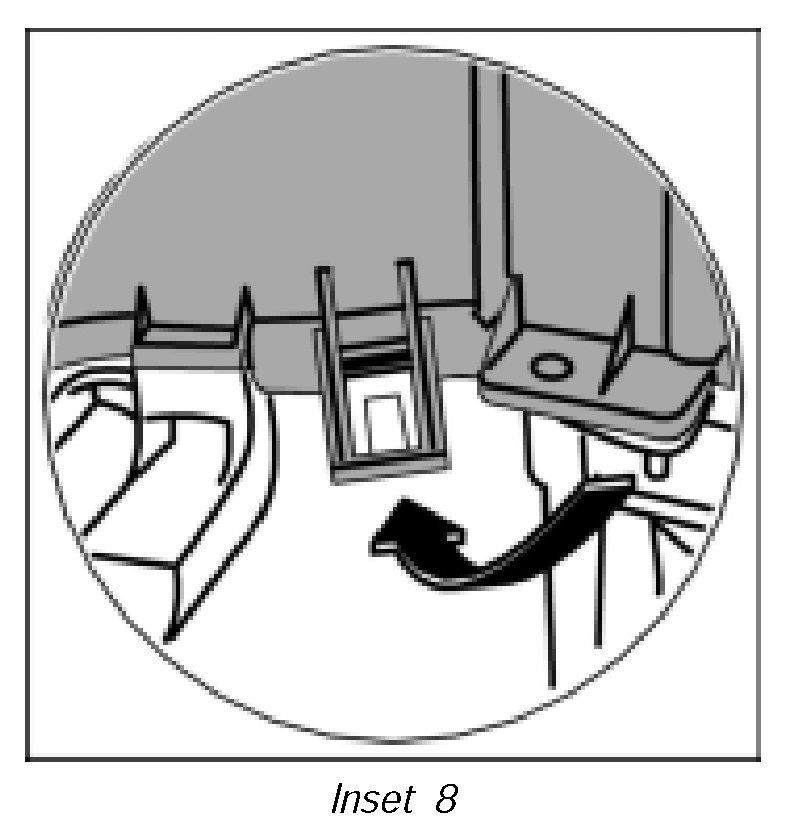
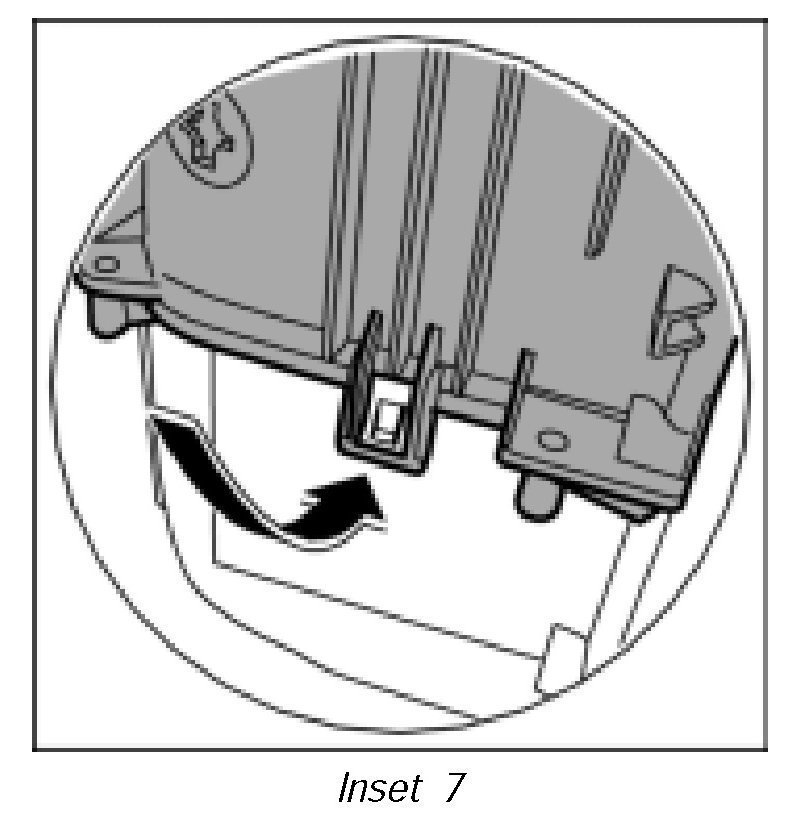
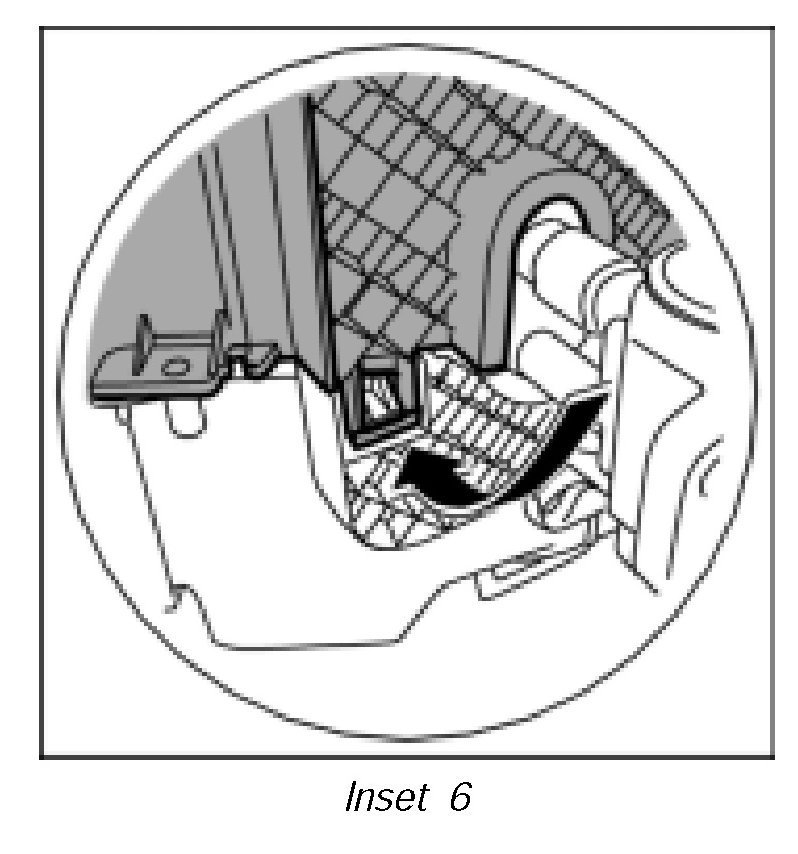
3. Position housing upper half, press it on, making sure all three retaining clips engage.
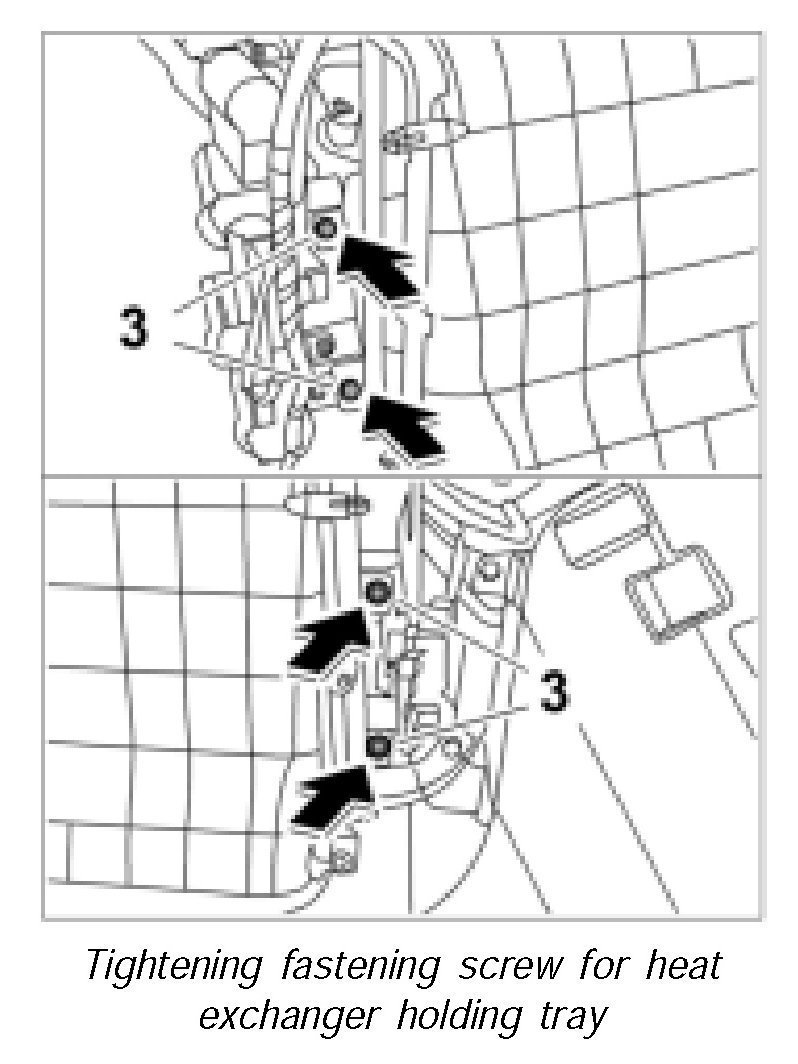
4. Unscrew the four fastening screws -3- in area of holding tray for heat exchanger. Tightening torque 1 ftlb.
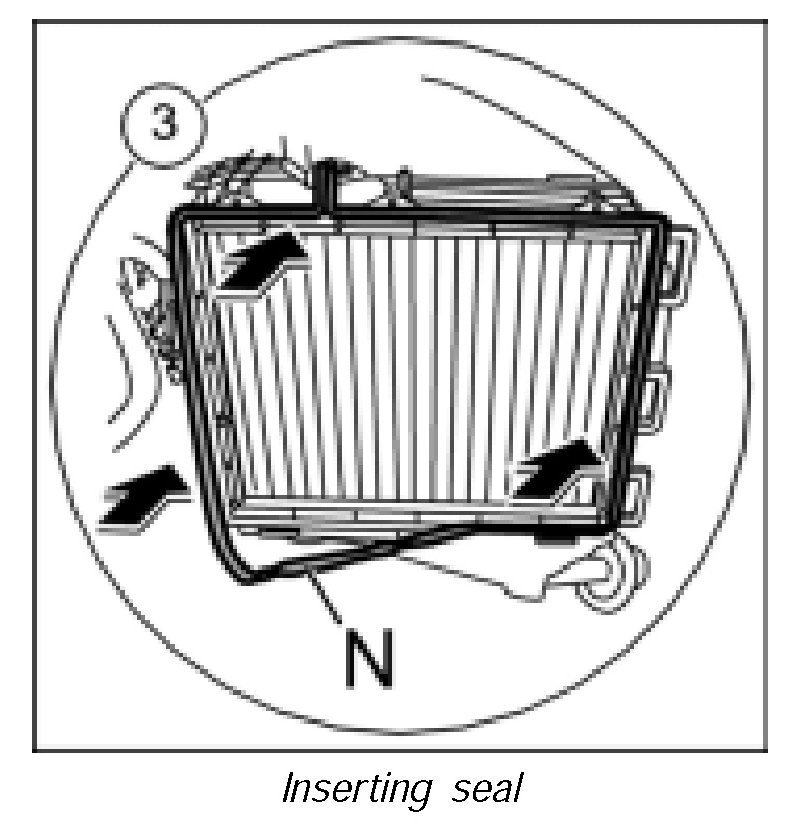
5. Insert seal -N- into guide of housing halves. Replace seal if in doubt.
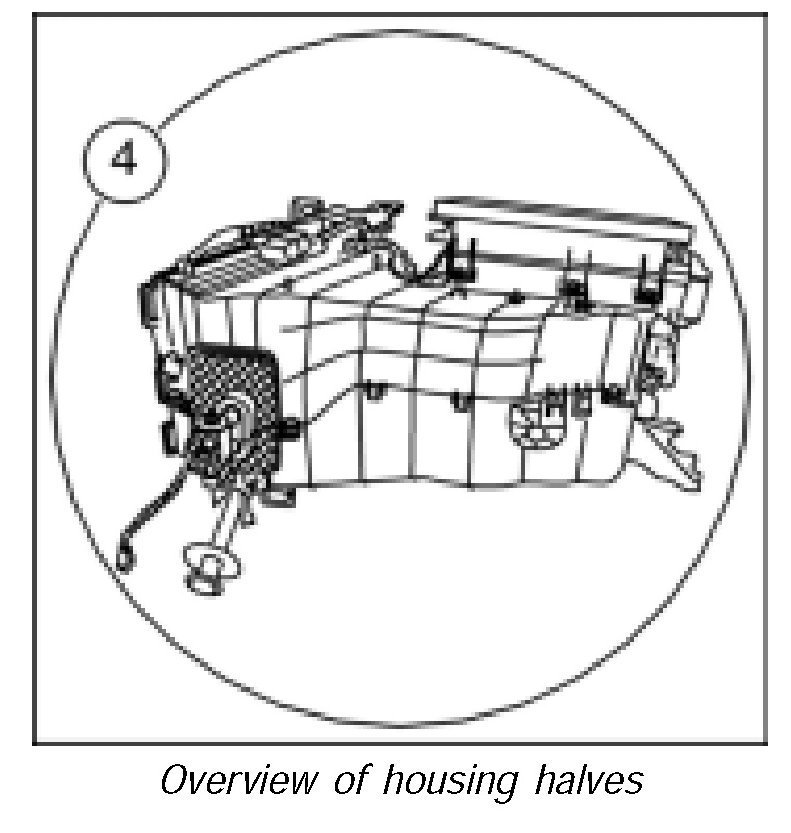
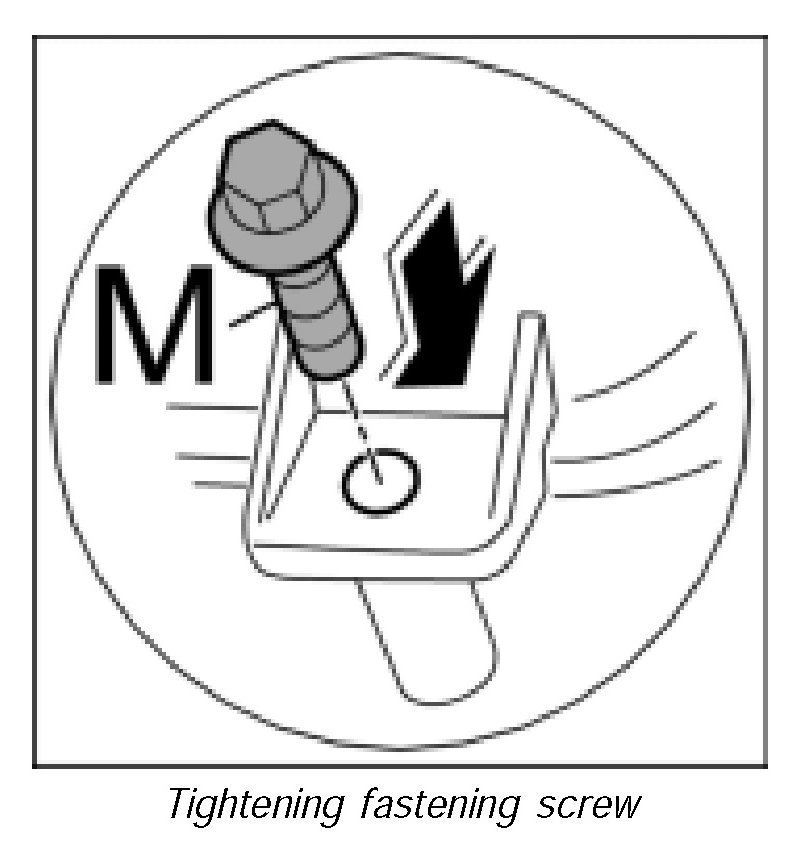
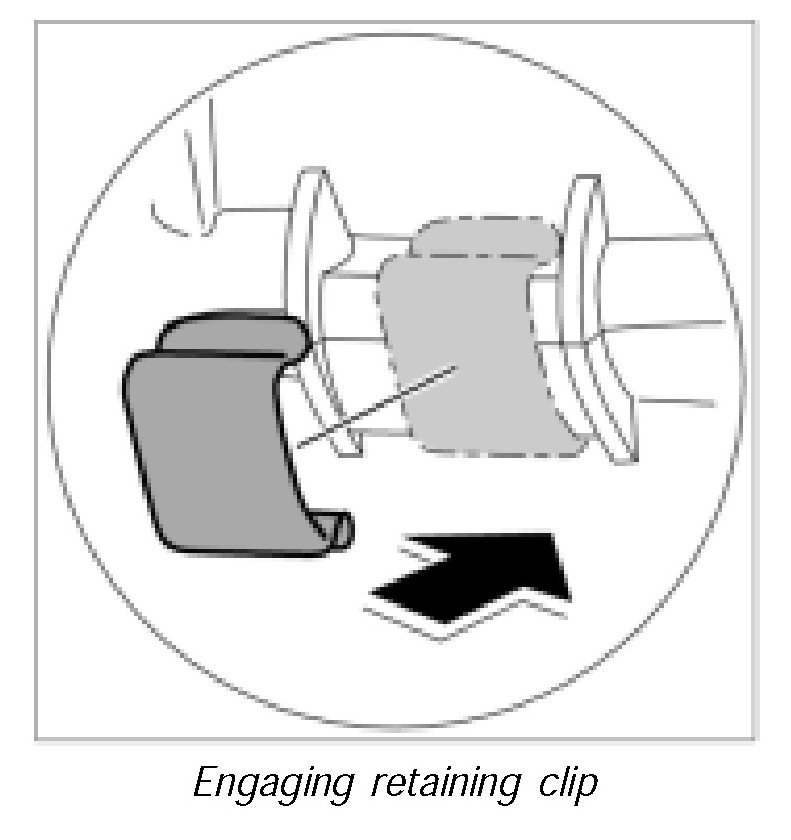
6. Connect retaining clips to housing halves and engage. Screw in fastening screws -M- for heater/air-conditioning unit housing. Tightening torque 1 ftlb.
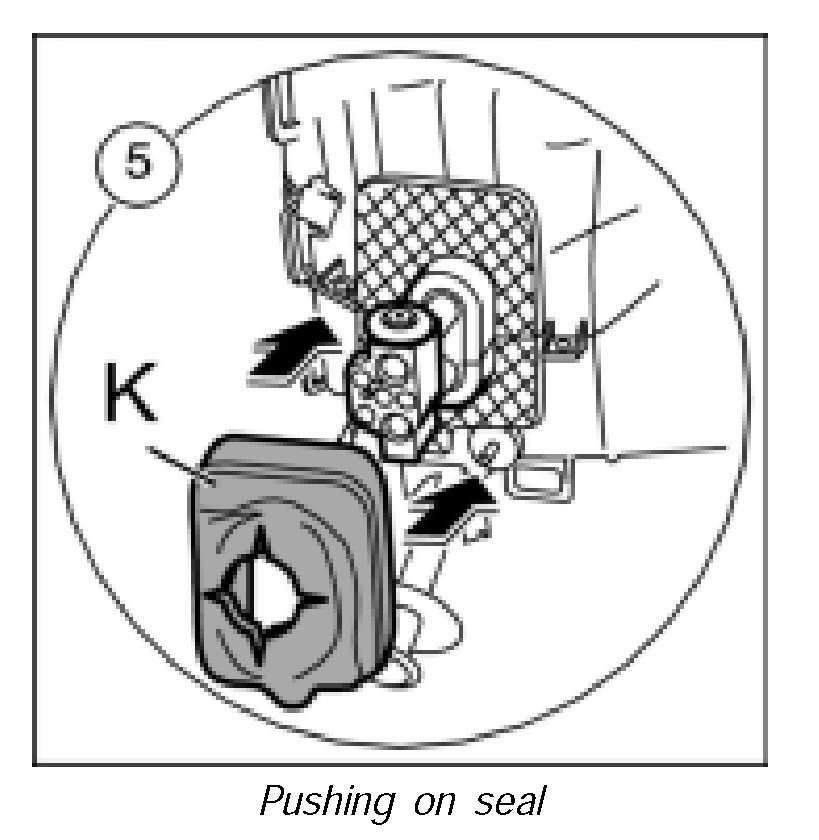
7. Push on seal -K- over expansion valve. The seal must not show any signs of damage; replace if in doubt.
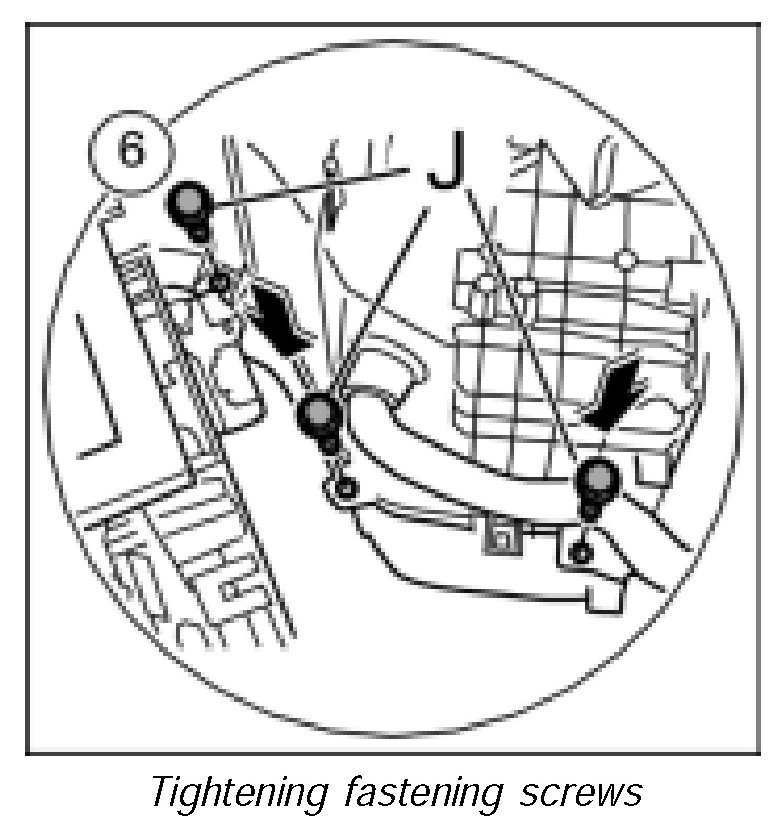
8. Screw in fastening screws -J- for heater/air-conditioning unit housing. Tightening torque 1 ftlb.
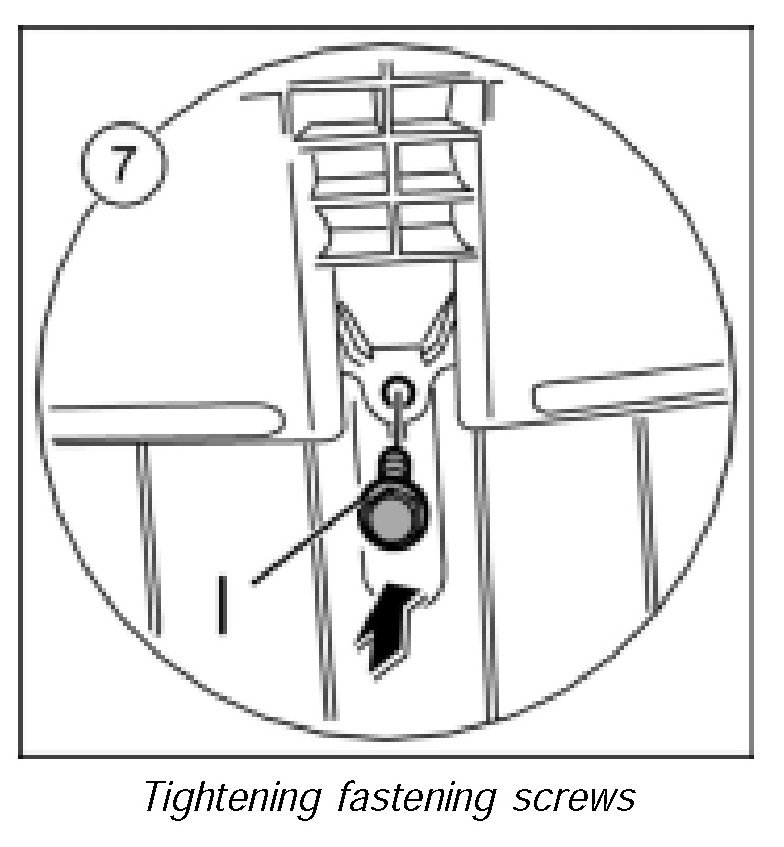
9. Screw in fastening screw -I- for air distributor. Tightening torque 1 ftlb.
Mounting the fan housing
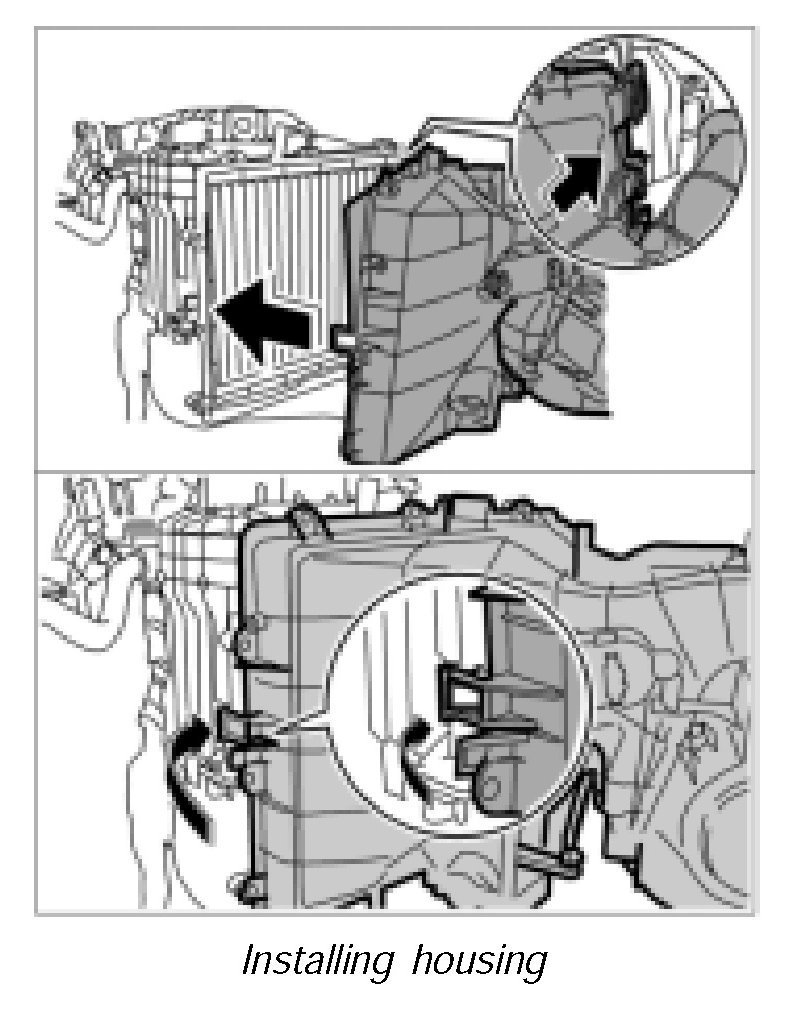
1. Position fan housing on the heater/air-conditioning unit housing and press on. Both retaining clips must engage -arrow-.
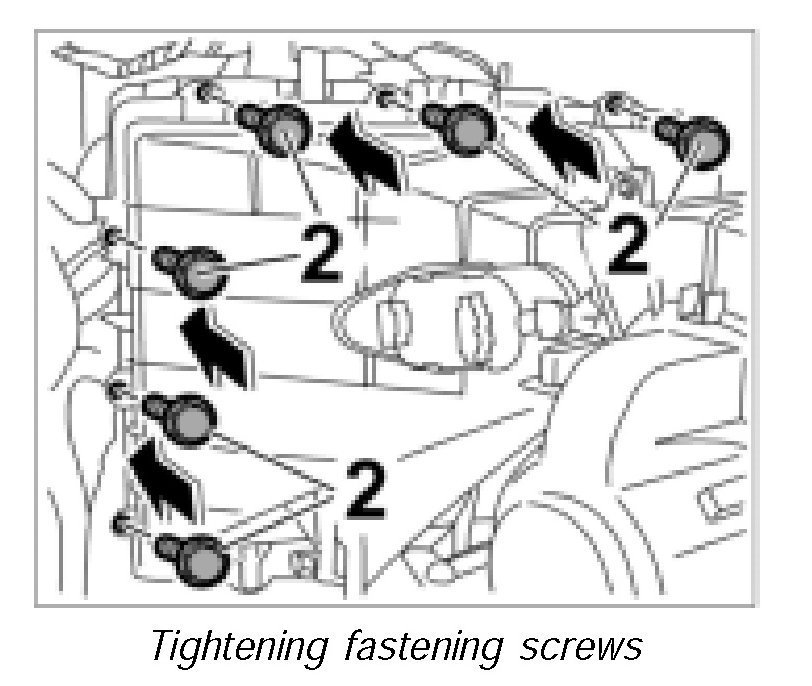
2. Screw in the six fastening screws -2- and tighten. Tightening torque 1 ftlb.
3. Position filter from below and carefully push it into the heating unit.
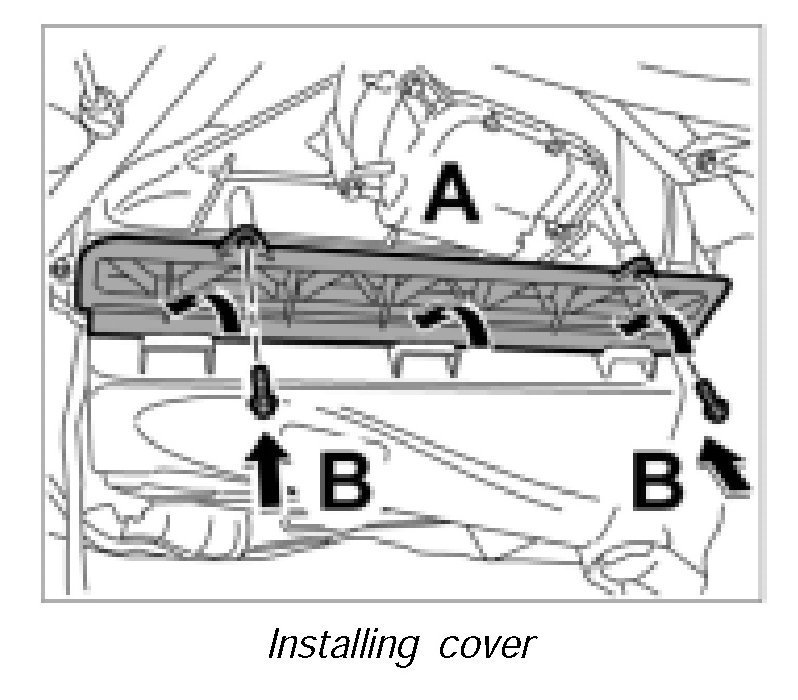
4. Engage cover -Arrows A- and screw in fastening screws -Arrow B-. Tightening torque 1 ftlb.
Installing electric line for heater/air-conditioning unit
1. Route electric wiring harness from air distributor down along the-heater/air-conditioning unit.
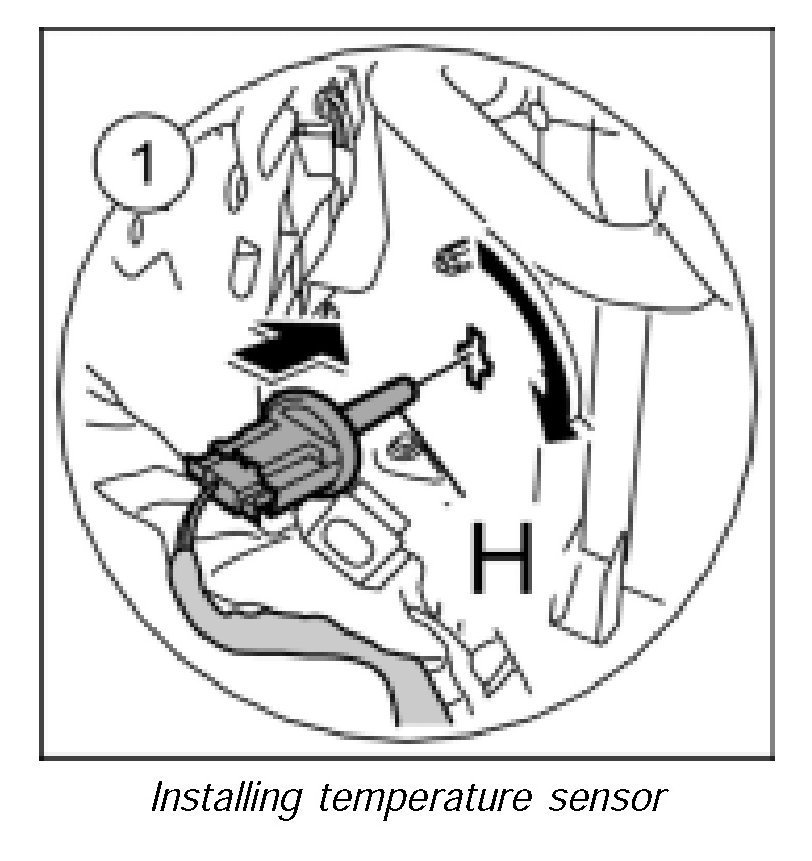
2. Insert temperature sensor -H- into heating/air-conditioning unit and turn 90 degrees.
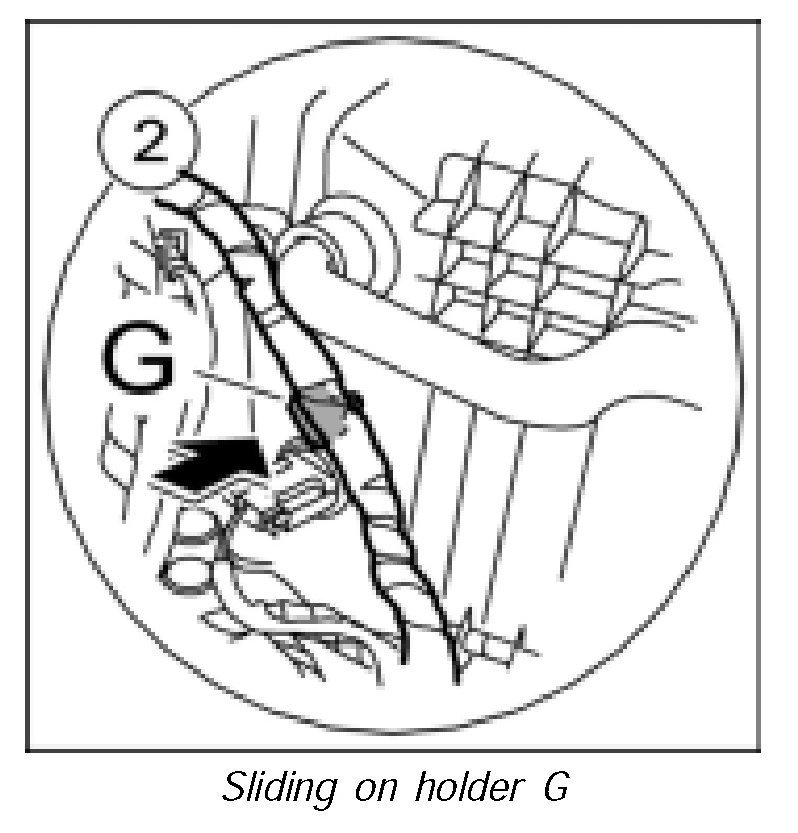
3. Slide holder -G- for wiring harness onto heater/air-conditioning unit.
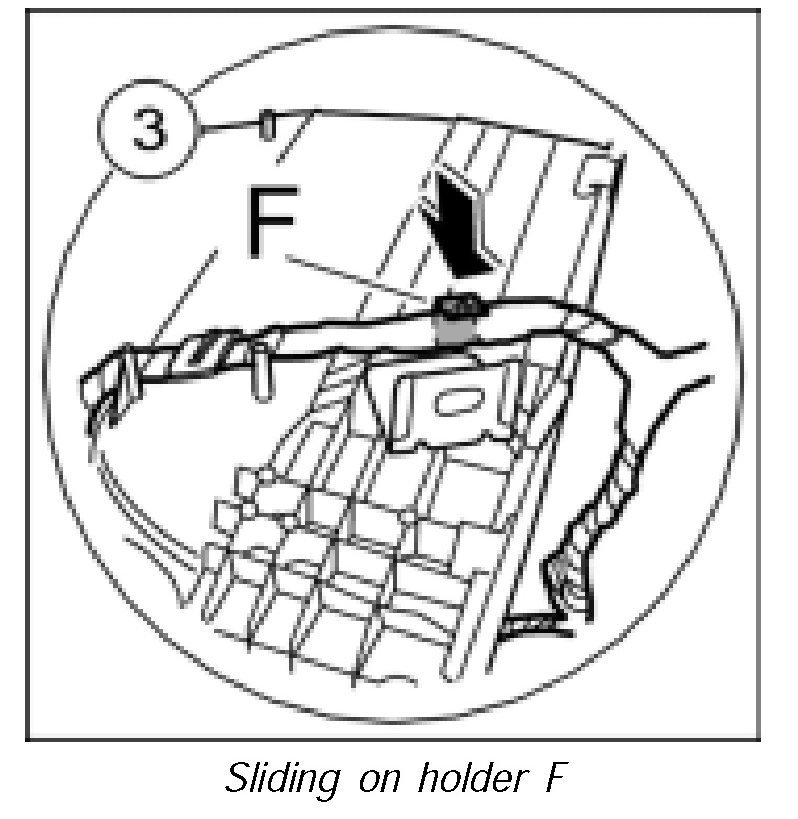
4. Slide holder -F- for wiring harness onto heater/air-conditioning unit.
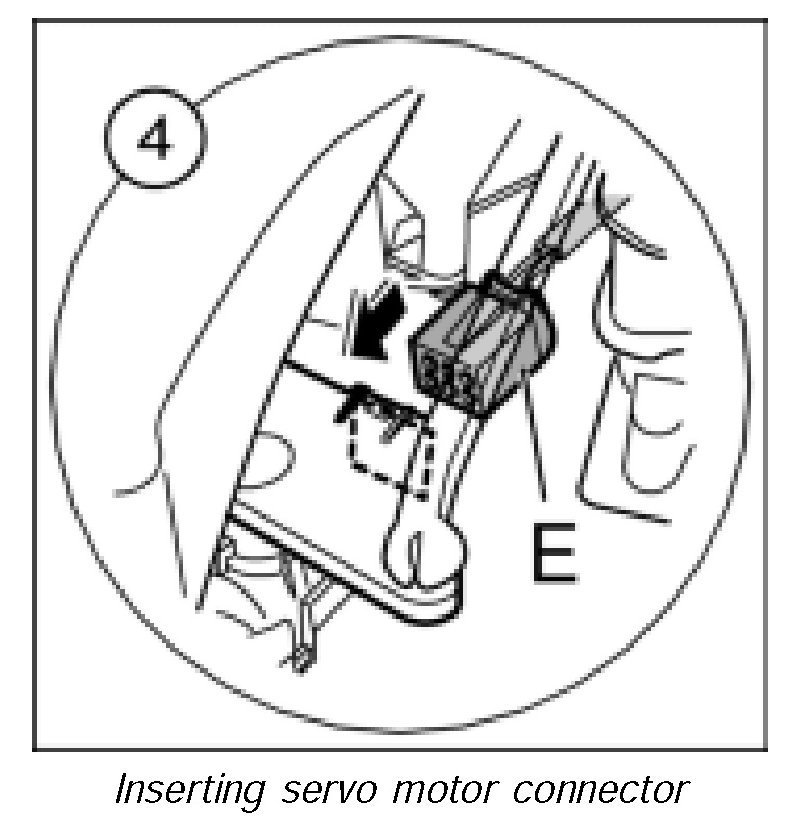
5. Insert electric connector into servo motor -E- until it is felt to engage.
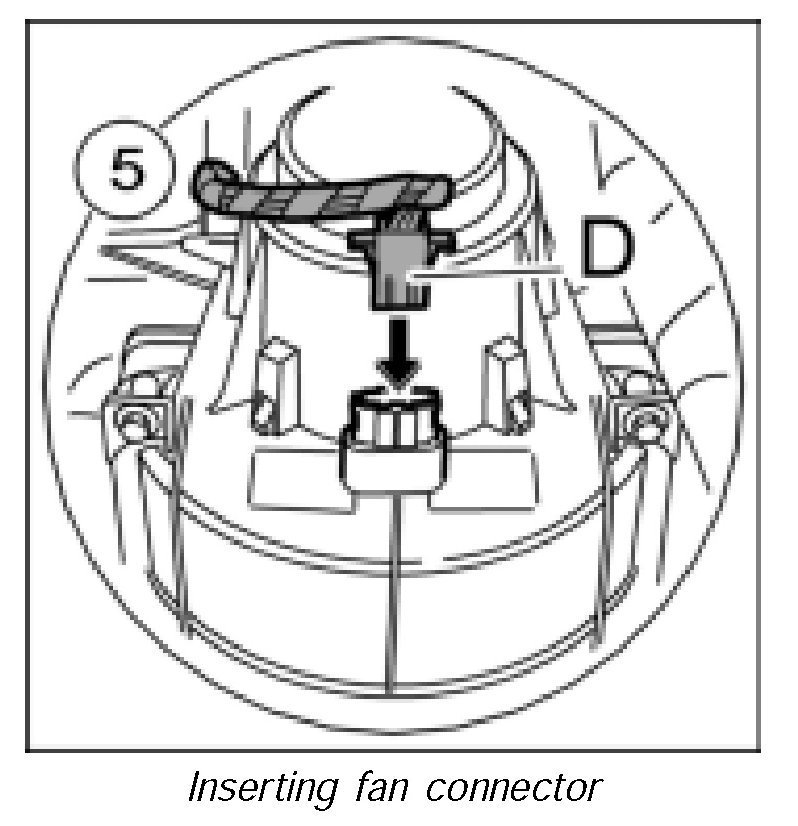
6. Insert electric connector into fan-D- until it is felt to engage.
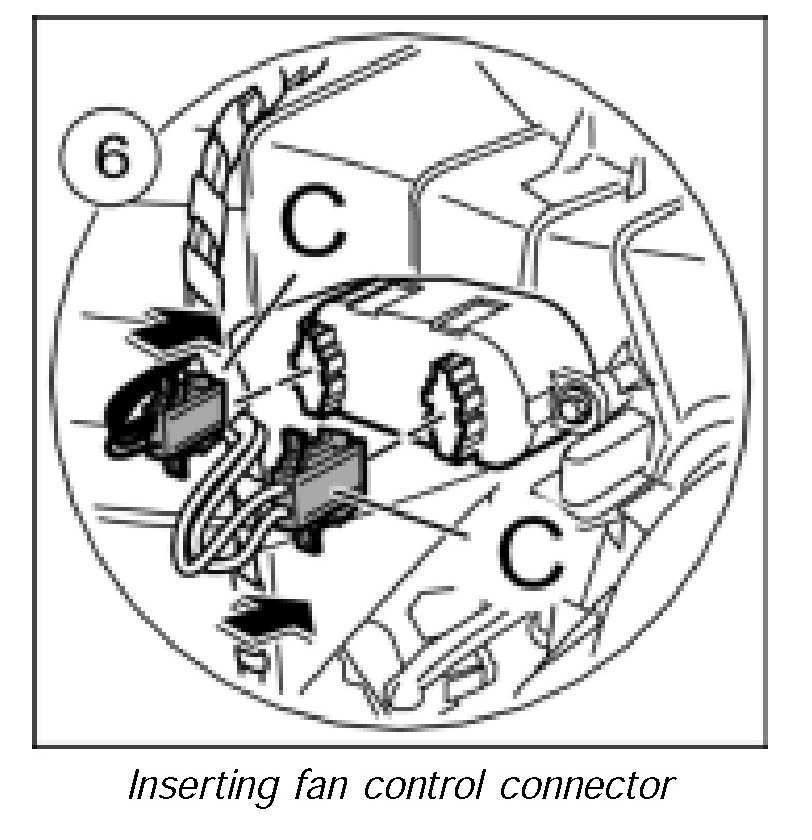
7. Insert electric connector into fan control -C- until it is felt to engage.
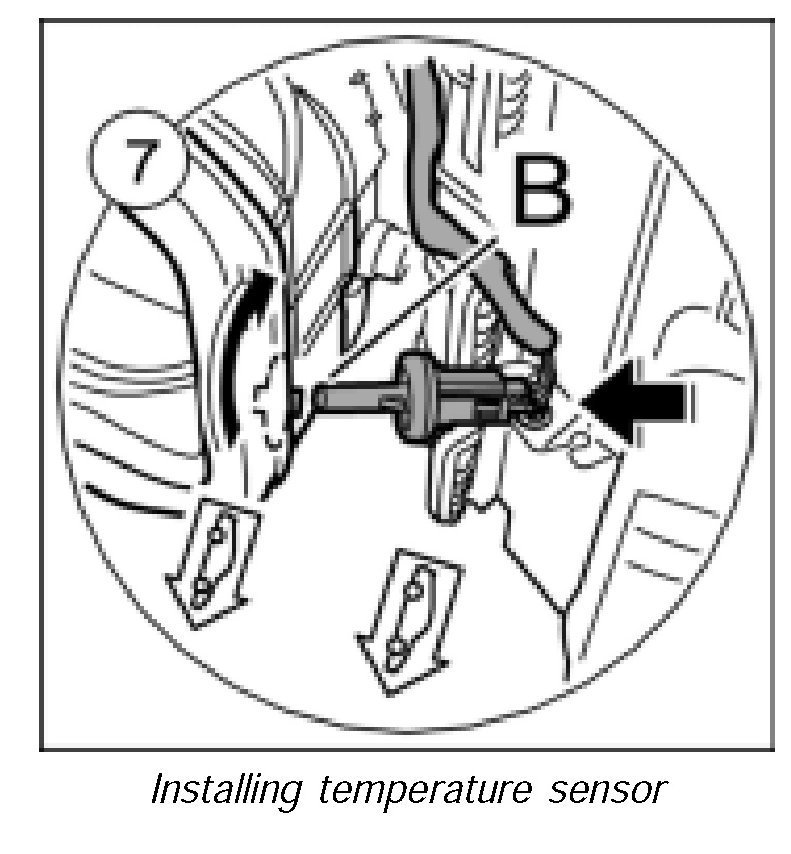
8. Insert temperature sensor -B- into heating/air-conditioning unit and turn 90 degrees.
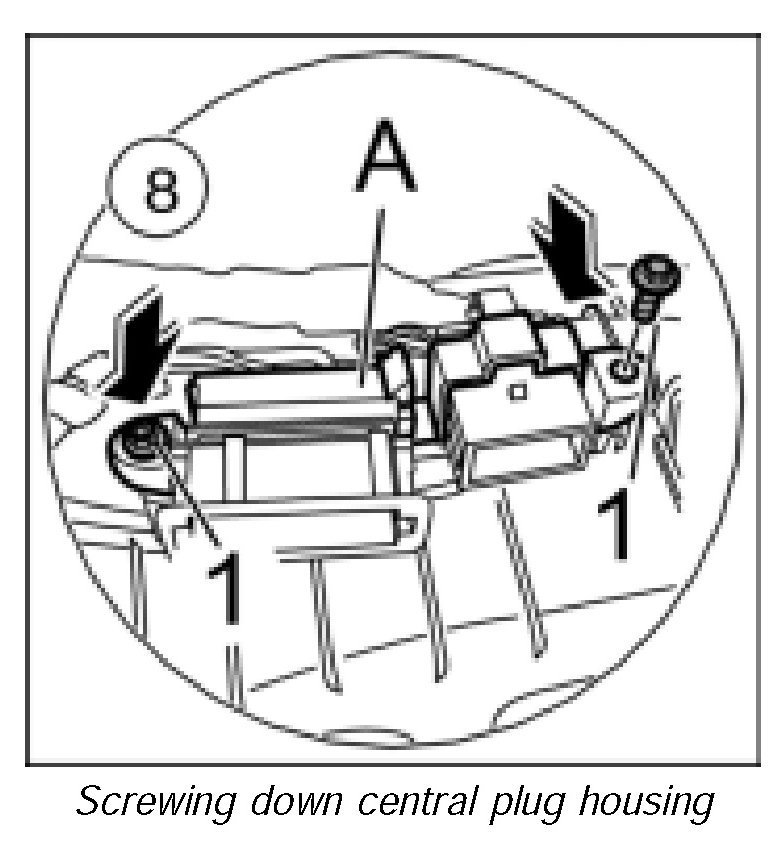
9. Position central plug housing -A- and screw down with two fastening screws -1-. Tightening torque 1 ftlb.