Procedures
202519 Removing And Installing Carbon Canister
Tools

Preliminary work for carbon canister
1. Disconnect ground strap from battery.
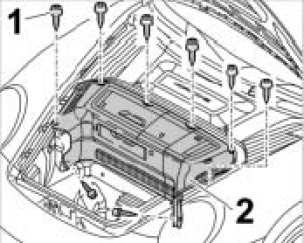
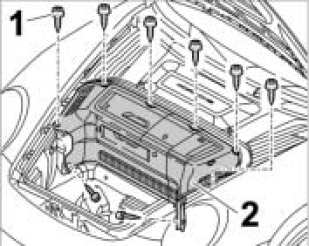
2. USA version: Remove luggage-compartment lining -2- by unscrewing the eight sheetmetal screws -1-.
Luggage-Compartment Cover:
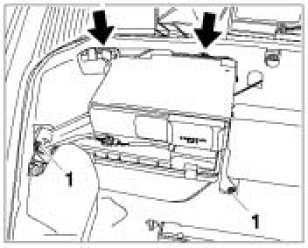
3. Unscrew fastening screws for CD changer support -1-. The support is also fixed on the body side by two retaining clips -arrows-.
CD Changer Support For USA:
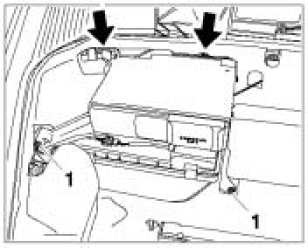
4. Lift up support together with CD changer and disengage retaining clips at the plenum panel -arrows-.
CD Changer Support At Plenum Panel:
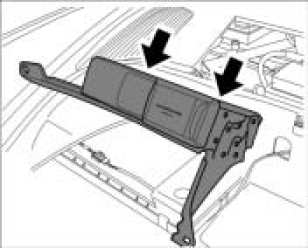
5. Disconnect cable plug to CD changer.
6. RoW Version: Remove right front wheel using socket-wrench insert 300.
7. Remove rear part of right front wheel housing liner.
Removing carbon canister
Removing carbon canister - RoW Version
1. Unscrew collar nut M6 -1-. Carefully pull carbon canister out of body mounting points in direction of travel.
Carbon Canister For ROW:
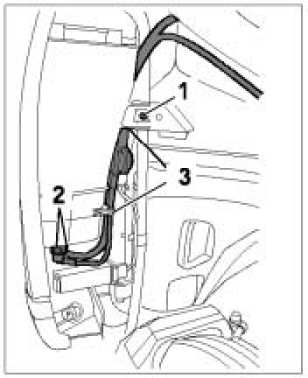
2. Release and remove plug-in couplings on the underside of the canister -2-. Unclip lines from the mountings on the canister -3-.
Removing carbon canister - USA Version
1. Unclip cable plug from canister -1- and then disconnect.
Carbon Canister For USA:
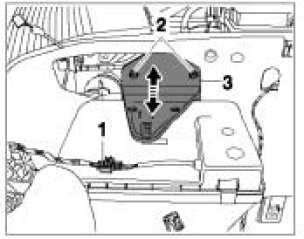
2. Unscrew two Torx screws M6 -2- from plastic holder for the carbon canister and press holder -3- from guide in direction of travel.
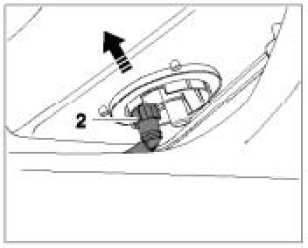
3. Lift carbon canister, release the small plug-in coupling -2- and pull it down and off.
Small Plug-in Coupling:
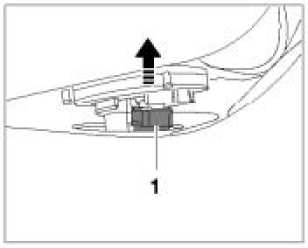
4. Lift carbon canister, release the large plug-in coupling -1- and pull it down and off.
Large Plug-in Coupling:
Installing Carbon Canister
Installing carbon canister - RoW Version
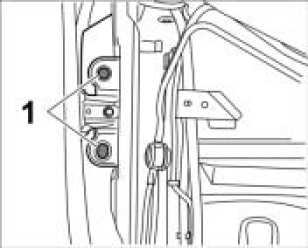
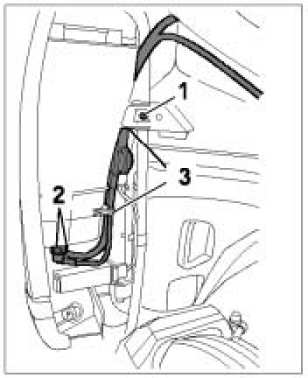
1. Wet rubber sleeves with water. Press canister into the body bores -1-.
Body Mounting Point For ROW Canister:
2. Connect plug-in couplings to the underside of the canister and clip in the lines. Screw in collar nut M6 on the holder and tighten.
Tightening torque 7.5 ftlb.
Carbon Canister For ROW:
Installing Carbon Canister - USA Version
Plug-in couplings in the vehicle
View Of Plug-in Couplings:
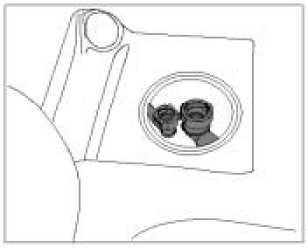
1. Insert canister and connect the plug-in couplings which must engage audibly.
2. Slide plastic holder for the canister -3- into the guide and fix to the plenum panel. Screw in two Torx screws M6 -2- and tighten.
Tightening torque 7.5 ftlb.
Carbon Canister For USA:
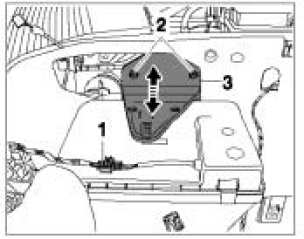
3. Connect cable plug and clip into the cable guide on the canister -1-.
Subsequent work for carbon canister
1. USA version: Disconnect cable plug from CD changer.
2. Engage support together with CD changer on the plenum panel by means of the retaining clips -arrows-.
CD Changer Support At Plenum Panel:
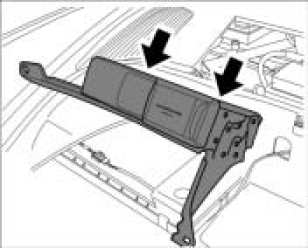
3. Screw in and tighten fastening screws M6 -1- for CD changer support.
Tightening torque 7.5 ftlb.
CD Changer Support For USA:
4. Install luggage-compartment lining -2- by screwing in the eight sheetmetal screws -1-.
Luggage-Compartment Cover:
5. RoW Version: Remove rear part of right front wheel housing liner.
6. Fit right front wheel using socket-wrench insert 300.
7. Connect ground strap to battery.