Intake Air Duct: Service and Repair
244620 Removing And Installing Intake-Air Distributor
Preliminary work for removing intake-air distributor
1. Place protective covers on the vehicle to avoid damaging the body.
2. Remove engine compartment lid.
3. Remove throttle housing and distributor pipe.
4. If the intake-air distributor for cylinders 1 - 3 is removed, the air-cleaner element must also be removed.
Removing intake-air distributor
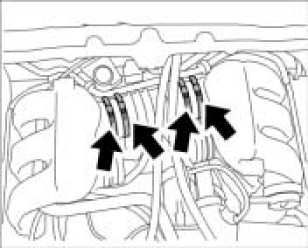
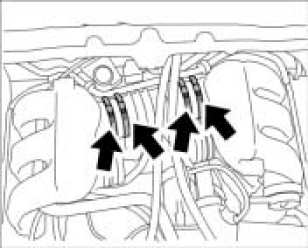
1. Undo four screw-type hose clamps -arrows- on resonance tube.
Intake-air Distributor:
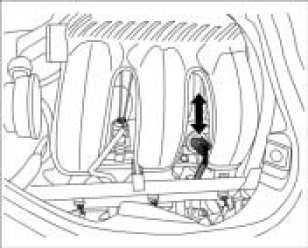
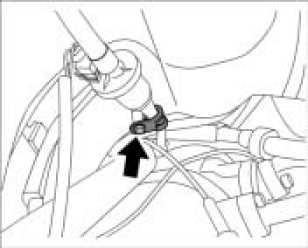
2. Pull engine compartment temperature sensor and rubber sleeve from the bracket (only if removing intake-air distributor on cylinders 4 - 6).
Engine Compartment Temperature Sensor:
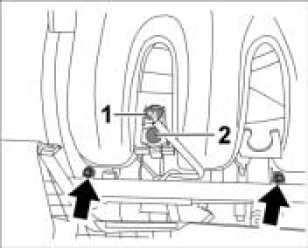
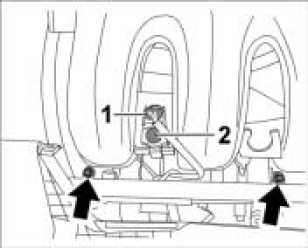
3. Disconnect and remove cable plug -1- from solenoid valve -2-.
4. Unclip solenoid valve -2- from intake-air distributor. The vacuum lines need not be removed.
5. Unscrew two Torx screws (M6 x 12) -arrows- on fuel collection pipe.
Solenoid Valve:
6. Pull fuel injectors with collection pipe out of the bores in the intake-air distributor.
7. Disconnect plug connection for supply lead to air-conditioning compressor (only if intake-air distributor for cylinders 1 - 3 is removed).
8. Unscrew six Torx screws on intake-air distributor (M6 x 35).
9. Pull intake-air distributor out of rubber sleeve on resonance tube.
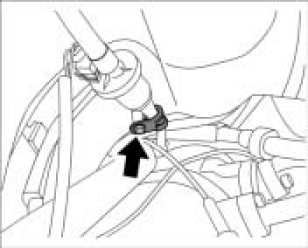
10. Lift intake-air distributor and unscrew tapping screw -arrow- (only if intake-air distributor on cylinders 1 - 3 is removed).
Support For Cycle Valve:
11. Guide intake-air distributor out of the engine compartment.
Installing Intake-air Distributor
1. Clean sealing surfaces on cylinder head and intake-air distributor (use a clean, lint-free cloth that has been soaked in acetone or solvent naphtha).
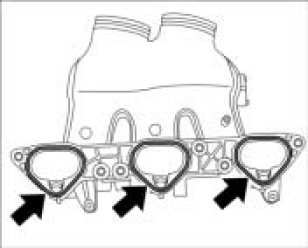
2. Replace seals -arrows-. Observe position of sealing lugs.
Intake Distributor Gasket:
3. Position intake-air distributor in engine compartment.
4. Lift intake-air distributor and screw in tapping screw -arrow- (only if intake-air distributor on cylinders 1 - 3 is installed).
Support For Cycle Valve:
5. Position six Torx screws (M6 x 35) of the intake-air distributor and tighten them.
Tightening torque 7.5 ftlb.
6. Plug in cable plug of supply lead for air-conditioning compressor and clip connector housing into the bracket provided (only if intake-air distributor on cylinders 1 - 3 is installed).
7. Replace O-rings on fuel injectors.
8. Push fuel injectors with collection pipe into the bores in the intake-air distributor.
9. Position Torx screws (M6 x 12) -arrows- and tighten them.
Tightening torque 7.5 ftlb.
10. Clip solenoid valve -2- into intake-air distributor.
11. Connect cable plug -1- to AGR solenoid valve -2-.
AGR Solenoid Valve:
12. Push engine compartment temperature sensor and rubber sleeve into bracket (only if removing intake-air distributor on cylinders 4 - 6). Grease rubber sleeve lightly with Optimal MP3 or silicon spray.
Engine Compartment Temperature Sensor:
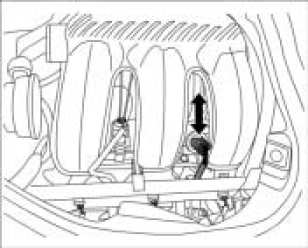
13. Position rubber sleeves with screw-type hose clamps.
Installation Position For Intake-air Distributor Screw-type Hose Clamps:
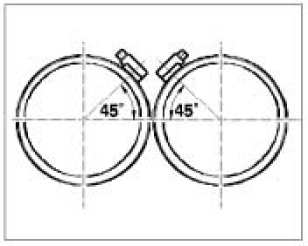
14. Tighten screw-type hose clamps -arrows- on resonance tube.
Intake-air Distributor:
Work subsequent to installing intake-air distributor
Subsequent work for installing intake distributor
1. If the intake-air distributor for cylinders 1 - 3 was removed, the air-cleaner element must be installed.
2. Install throttle housing with distributor pipe.
3. Install engine compartment lid.
4. Read out fault memory and correct any faults that are present. Erase fault memory.