Fluid Pan: Service and Repair
Removing and installing ATF pan
Preliminary work
Preliminary work for ATF pan
1. Remove engine guard.
Removing ATF pan
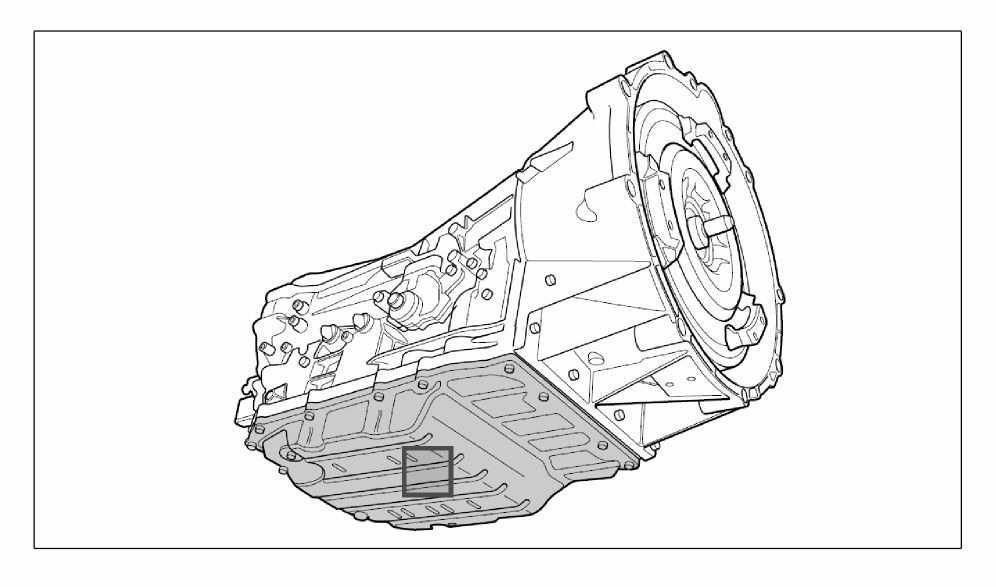
Overview of ATF pan
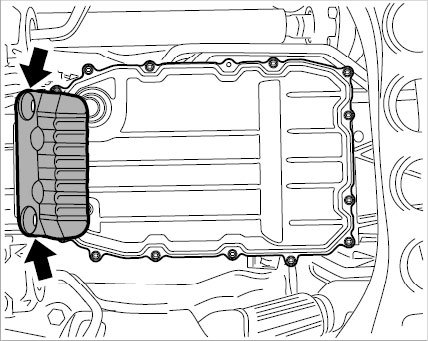
1. Remove cover of ATF pan. To do this, loosen the two fastening screws -arrows-.
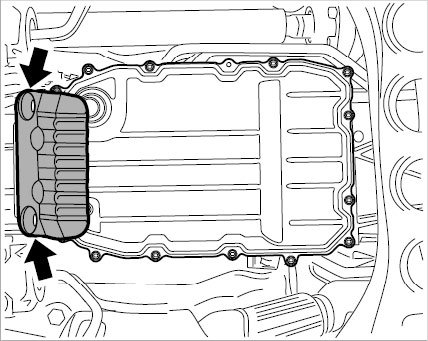
Shield on transmission
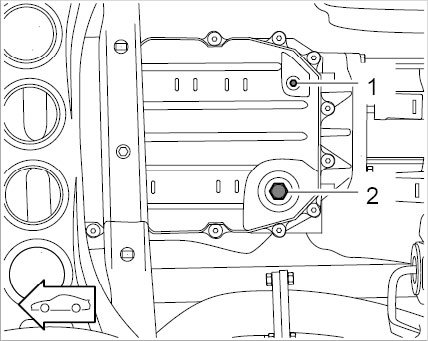
2. Place collection pan under the transmission. Unscrew oil drain plug -1- and drain ATF.
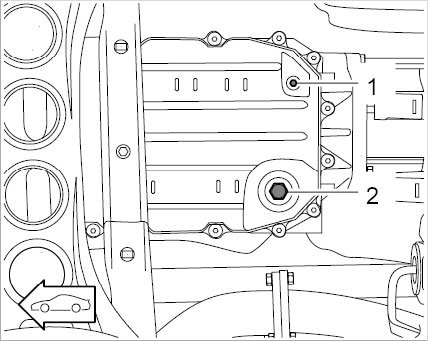
Oil drain plug and oil inspection plug
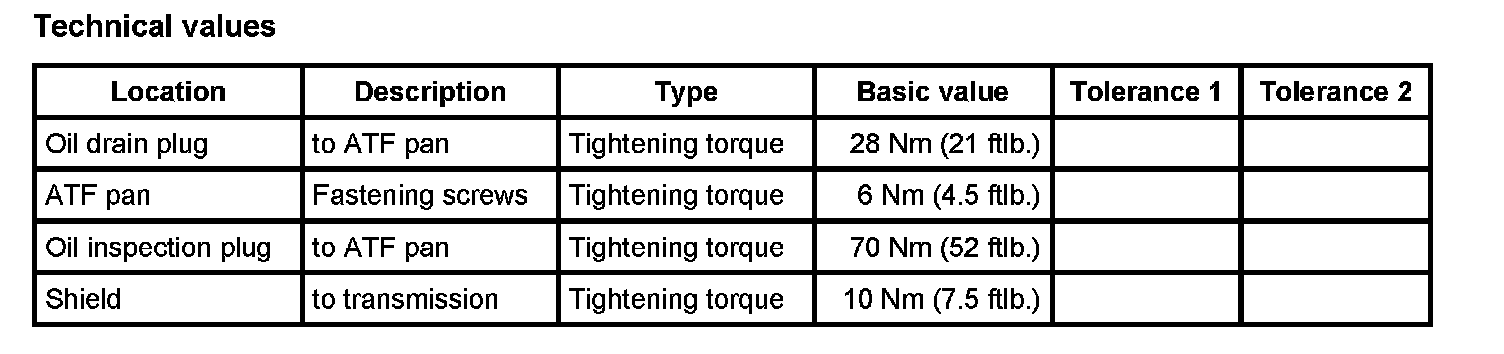
3. Screw in oil drain plug -1- with a new sealing ring. -> Tightening torque: 28 Nm (21 ftlb.)
4. Unscrew screws -arrows- on the ATF pan and remove pan.
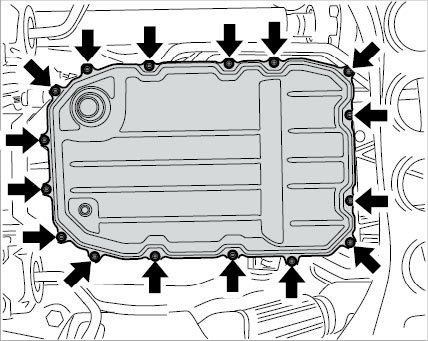
ATF pan
Installing ATF pan
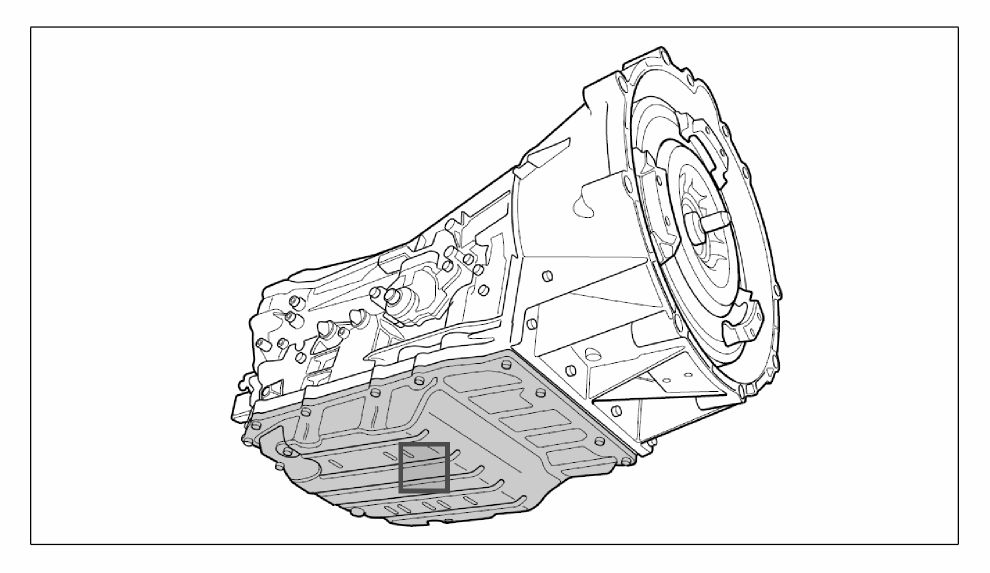
Overview of ATF pan
Information:
^ Make sure that the gasket has been positioned correctly on the bulb of the oil pan edge.
1. Place new gasket on the ATF pan.
2. Check position of the magnets -arrows- in the oil pan.
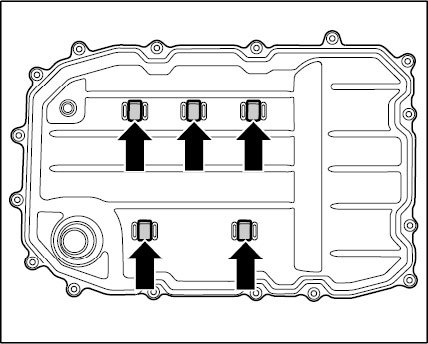
Magnets in ATF pan
3. Insert ATF pan and screw in screws -arrows-. -> Tightening torque: 6 Nm (4.5 ftlb.)
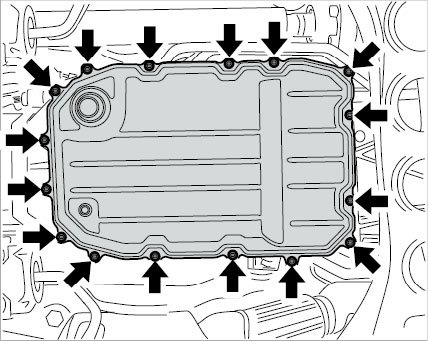
ATF pan
Warning:
Hot fluid
^ Danger of scalding
-> Let the fluid cool down.
-> Wear personal protective gear.
Warning:
Hot fluid
^ Danger of scalding
-> Let the fluid cool down.
-> Wear personal protective gear.
4. Unscrew oil inspection plug -2- and fill in ATF until a constant discharge is visible.
Oil drain plug and oil inspection plug
5. Screw in oil inspection plug -2- again with a new sealing ring. -> Tightening torque: 70 Nm (52 ftlb.)
Subsequent work
Reworking ATF pan
Information:
^ Modified ATF filling capacities in the transmission in combination with new control units.
^ Observe numbers on transmission and control unit.
1. Check and if necessary, top up the ATF.
2. Install shield on ATF pan. To do this, tighten the two fastening screws -arrows-. -> Tightening torque: 10 Nm (7.5 ftlb.)
Shield on transmission
3. Fit engine guard.