Overhaul
Removing and installing timing-case cover on V6 DFI engines

Preliminary work
Preliminary work for removing upper timing-case cover
1. Remove intake-air distributor.
2. Remove bar ignition modules.
3. Remove cylinder head cover.
4. Remove accessories from upper timing-case cover.
4.1. Remove rear engine cable carrier.
4.2. Pull off connector for camshaft controller hydraulic valves.
4.3. Pull off connector for camshaft hall senders - 2 -.
Do not remove camshaft hall senders.
4.4. Remove tank vent from timing-case cover.
4.5. Pull off hose for vacuum pump and unscrew the fastening screws - 3 -
Then carefully pull the vacuum pump - 1 - out of its guide.
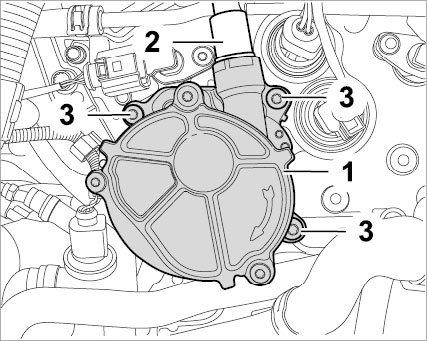
Installation position of vacuum pump
4.6. Remove sheet metal holder for additional coolant pump - 2 - and press the hose assembly aside.
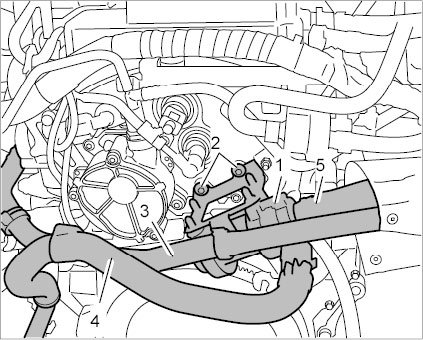
Sheetmetal holder for additional coolant pump
Preliminary work for removing lower timing-case cover
1. Remove engine.
2. Remove transmission
2.1. For vehicles with automatic transmission, refer to Removing and Installing Transmission.
2.1.1. Remove flywheel.
2.2. For vehicles with automatic transmission, refer to Removing and Installing Transmission.
2.2.1. Remove drive plate for torque converter.
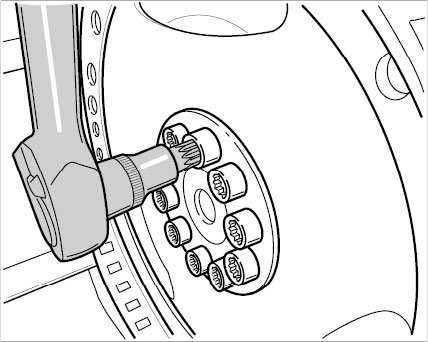
Drive plate
3. Remove oil pan.
Information
Component overview
Upper timing-case cover
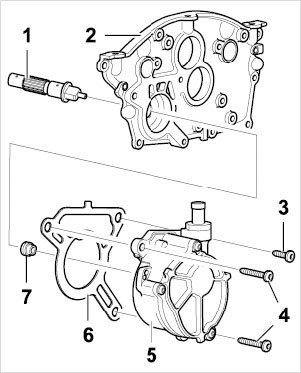
Upper timing-case cover with vacuum pump
1 - Drive shaft
2 - Upper timing-case cover
3 - Short fastening screw
4 - Long fastening screw
5 - Vacuum pump
6 - Seal for vacuum pump
7 - Sealing ring
Lower timing-case cover
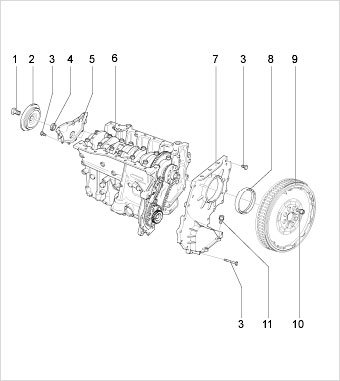
Cylinder block and lower timing-case cover
1 - Fastening screw for vibration damper
2 - Vibration damper
3 - Fastening screw M6
4 - Sealing ring
5 - Joint flange
6 - Cylinder block
7 - Lower timing-case cover
8 - Sealing ring
9 - Double-mass flywheel
10 - Fastening screw for double-mass flywheel, M10 x 20
11 - Fastening screw, M8 x 28
Removing upper timing-case cover
Caution:
Do not turn crankshaft against the running direction of the engine.
^ Risk of engine damage.
-> Proceed with extreme care while working.
-> Never turn the crankshaft against the running direction of the engine when the timing chains are fitted.
-> Always turn the engine at the crankshaft and at the camshaft.
-> After working on the camshaft, the timing must be set again.
1. Remove upper timing-case cover.
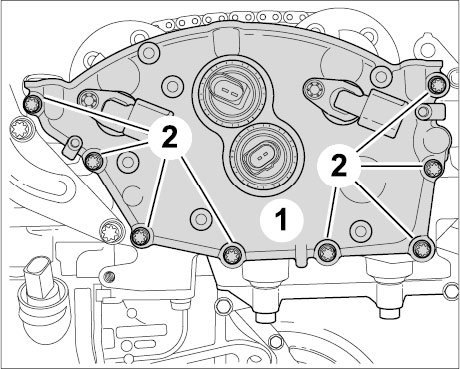
Upper timing-case cover
1.1. Do not remove camshaft hall senders.
1.2. Unscrew fastening screws - 2 - for the upper timing-case cover.
1.3. Detach securely bonded timing-case cover by knocking carefully with a rubber hammer.
1.4. Clean sealing faces on engine block, timing-case cover and cylinder head gasket.
1.5. Check sealing rings on camshaft controller hydraulic valves.
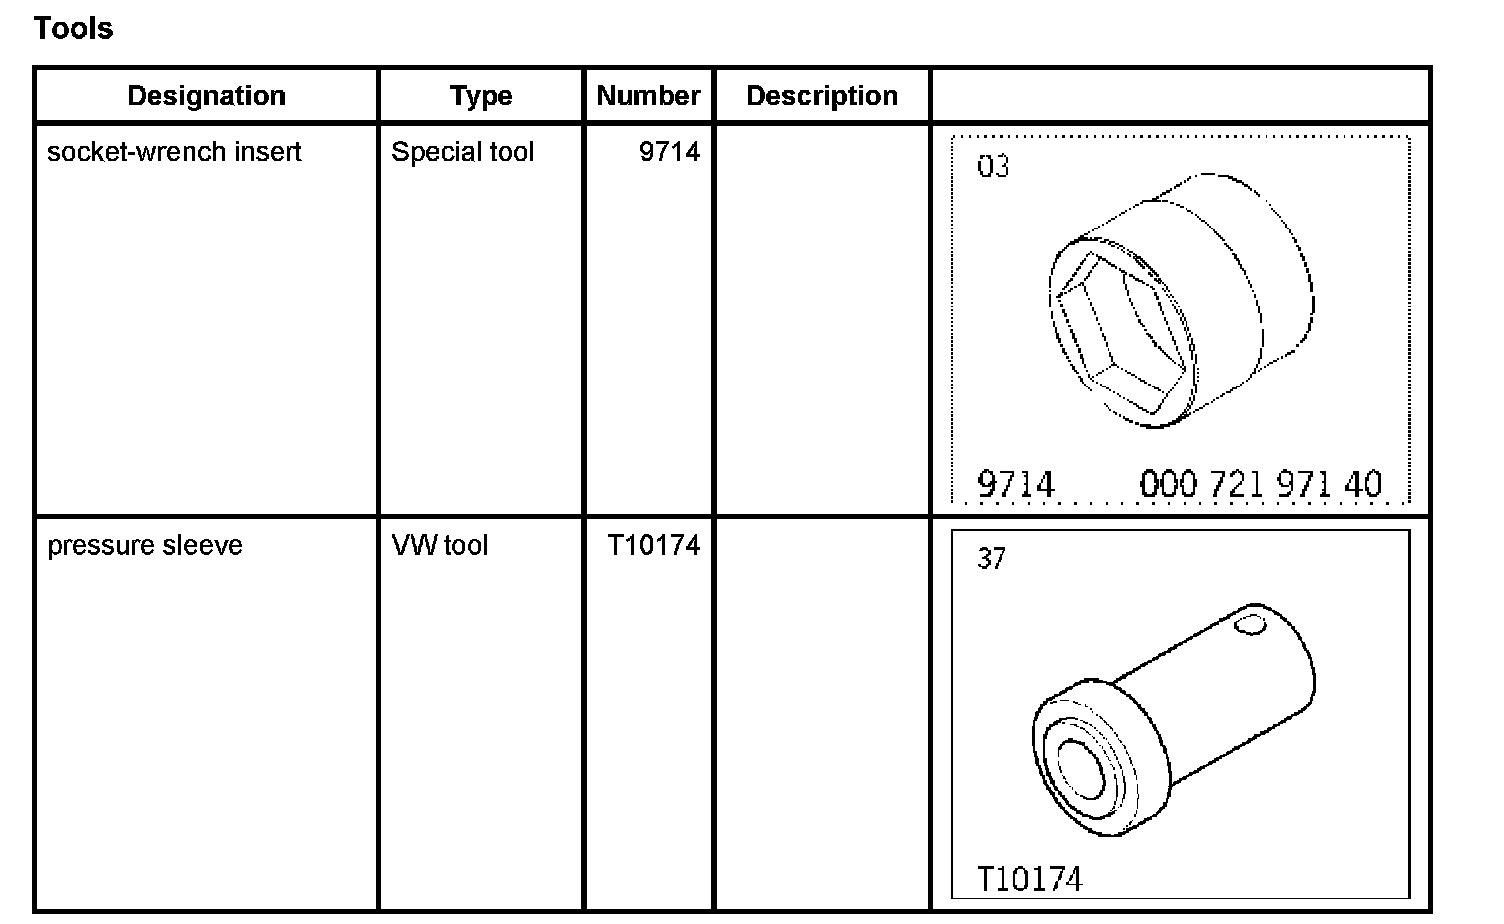
If the sealing rings are damaged, place the timing-case cover on a level surface and drive out the rings using a socket wrench insert socket-wrench insert 9714.
Fit new sealing rings using the pressure sleeve pressure sleeve T10174.
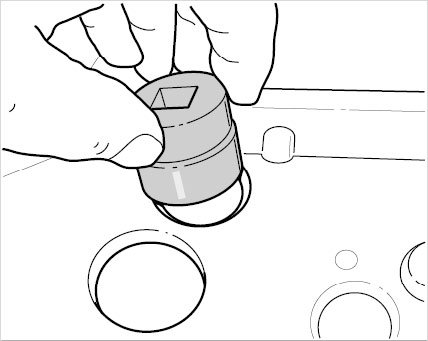
Socket-wrench insert (9714)
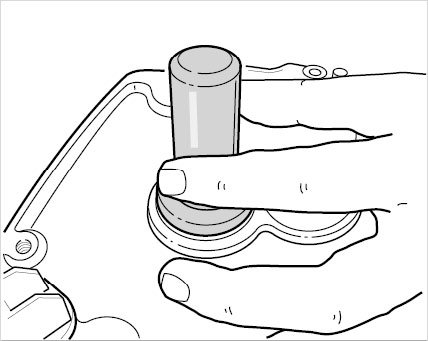
Pressure sleeve (T10174)
Removing lower timing-case cover
Caution:
Risk of damage to engine by turning crankshaft against the rotation direction of the engine (engine assembled)!
-> Never rotate crankshaft against the operating direction if the timing drive mechanism is fitted (timing chain jumps over).
-> Proceed carefully while working as otherwise the engine can be damaged.
-> Always turn the engine at the crankshaft and never at the camshaft as the timing chain may jump over.
-> The timing must be set after working on the camshaft timing gears.
-> Please observe the general warning notes and working regulations!
Information:
^ If a crankshaft stub is dirty or slightly rusted, this will damage the new sealing ring when it is fitted.
^ The crankshaft stub must be cleaned before the old sealing ring is removed so that no particles of dirt can get into the engine.
^ Use a metal-polishing pad (e.g. Never Dull) for this.
1. Remove and replace crankshaft sealing ring.
2. Remove lower timing-case cover.
2.1. Unscrew fastening screws for the timing-case cover.
2.2. Detach securely bonded timing-case cover by knocking carefully with a rubber hammer.
2.3. Clean sealing faces on engine block, crankshaft and timing-case cover thoroughly.
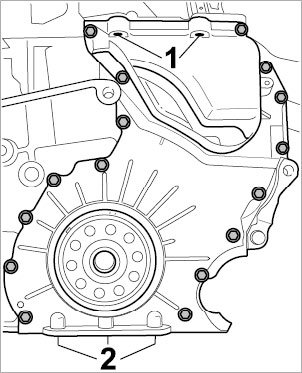
Lower timing-case cover
Installing upper timing-case cover
Caution:
Leaks due to insufficiently or differently tempered components!
^ If cold or differently tempered components are sealed to each other by applying a sealant, adhesion problems or leaks can result because of condensed water forming or components becoming distorted.
-> All components must be at least 17°C.
-> Components must not be too hot (distortion).
-> Make sure spare parts are at the same temperature before installation ideally room temperature 20°C.
1. Apply a thin coating of sealing compound to the sealing faces of the upper timing-case cover.
1.1. Seal face between upper timing-case cover and cylinder head cover.
1.2. Tighten fastening screws - 2 - for timing-case cover by hand.
1.3. Tighten fastening screws - 2 - -> Tightening torque: 10 Nm (7.5 ftlb.) for the timing-case cover.
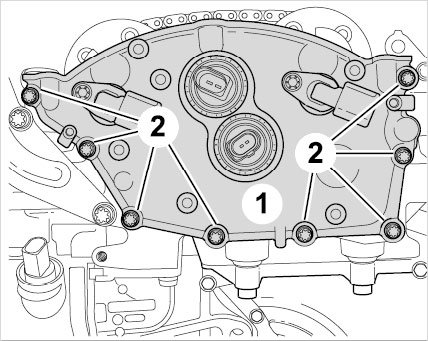
Upper timing-case cover
Installing lower timing-case cover
Caution:
Leaks due to components being at too low a temperature or at different temperatures!
^ If components that are cold or at different temperatures are sealed together by the application of sealant, adhesion problems and leaks can arise due to the build-up of condensation water or component distortion.
-> Components must have reached at least 17°C. throughout.
-> Components must not be too hot (distortion).
-> Spare parts that are stored in the cold or heat (strong sunlight), must be brought to room temperature or the same temperature as other parts before installation.
1. Apply sealing compound to the sealing faces of the lower timing-case cover.
1.1. Seal face between timing-case cover and cylinder head gasket.
1.2. The face between the timing-case cover and the oil pan is not sealed until the oil pan is installed.
1.3. Seal face between timing-case cover and engine block.
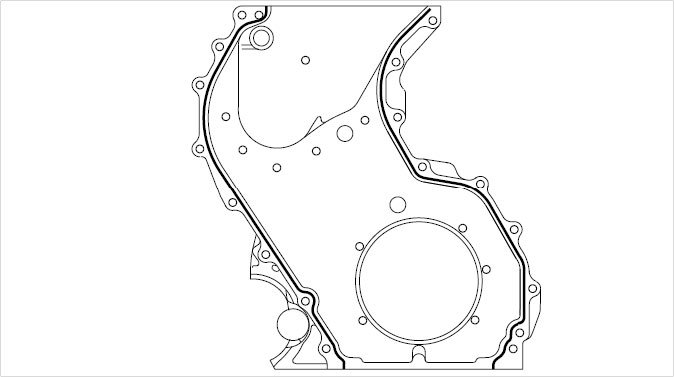
Applying sealing compound
2. Carefully place timing-case cover on the engine block. When positioning the timing-case cover, make sure that the sealing compound is not displaced by the cylinder head gasket.
3. Fit and then tighten fastening screws for the timing-case cover.
3.1. Tighten fastening screws - 1 - between the lower timing-case cover and cylinder head -> Tightening torque: 10 Nm (7.5 ftlb.).
3.2. Tighten fastening screws between the timing-case cover and crankcase -> Tightening torque: 10 Nm (7.5 ftlb.).
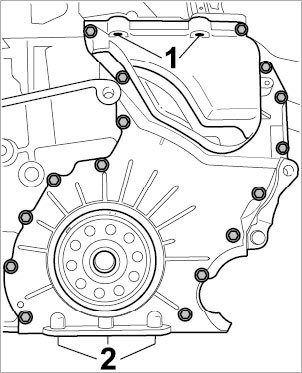
Fastening screws
4. Replace crankshaft sealing ring on flywheel side.
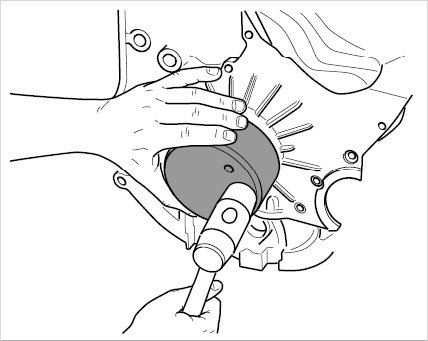
Crankshaft sealing ring
Subsequent work
Subsequent work for upper timing-case cover
1. Fit accessories for upper timing-case cover.
1.1. Fit sheet metal holder for additional coolant pump.
1.2. Fit vacuum pump together with vacuum hose.
1.3. Fit tank vent.
1.4. Fit connector for camshaft hall senders.
1.5. Fit connector for camshaft controller hydraulic valves.
1.6. Fit engine cable carrier and replace the tie-wraps if necessary.
2. Fit cylinder head cover.
3. Fit bar ignition modules.
4. Install intake-air distributor.
Subsequent work for lower timing-case cover
1. Install oil pan.
2. Mount transmission.
2.1. Install flywheel on vehicles with manual transmission.
2.1.1. Refit manual transmission.
2.2. Install drive plate for torque converter on vehicles with automatic transmission.
2.2.1. Refit automatic transmission.
3. Install engine.