Removing And Installing Primary Catalytic Converters On DFI Engines
Removing And Installing Primary Catalytic Converters On 3.6-Litre V6 DFI Engines
Tools
Technical values
INFORMATION
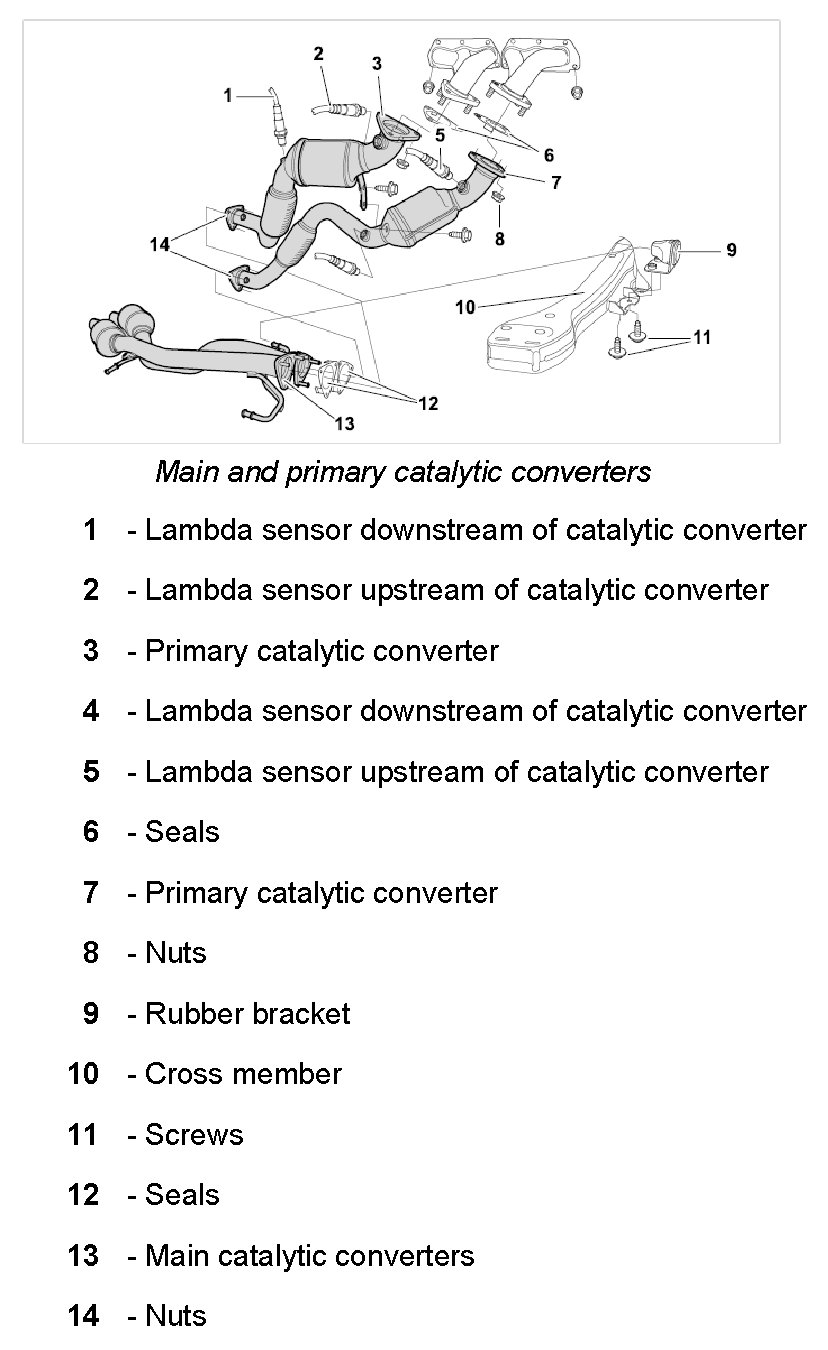
Overview
Preliminary work
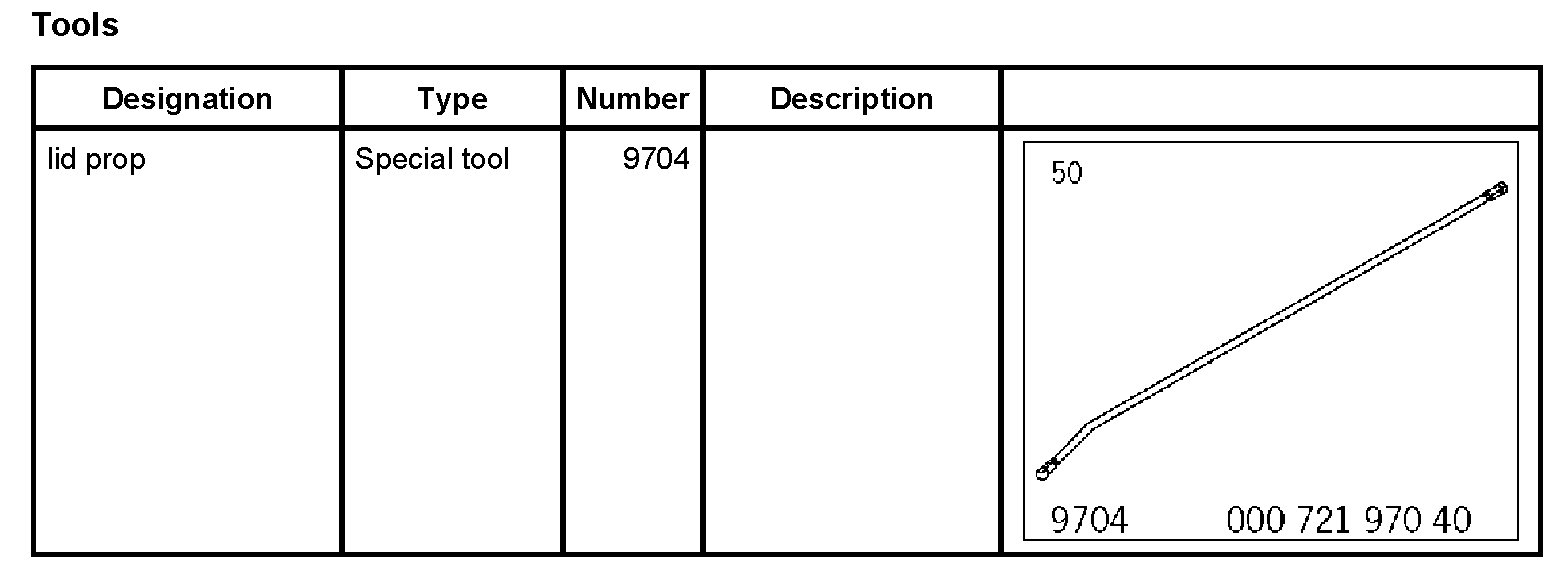
1. Move bonnet to service position using lid prop 9704.
2. Disconnect battery.
3. Remove underbody panelling.
4. Remove engine compartment trim panels on the right.
Removing primary catalytic converters
CAUTION: Danger of burns from hot exhaust system.
- Only remove the exhaust system once it has cooled down.
- Wear protective gloves.
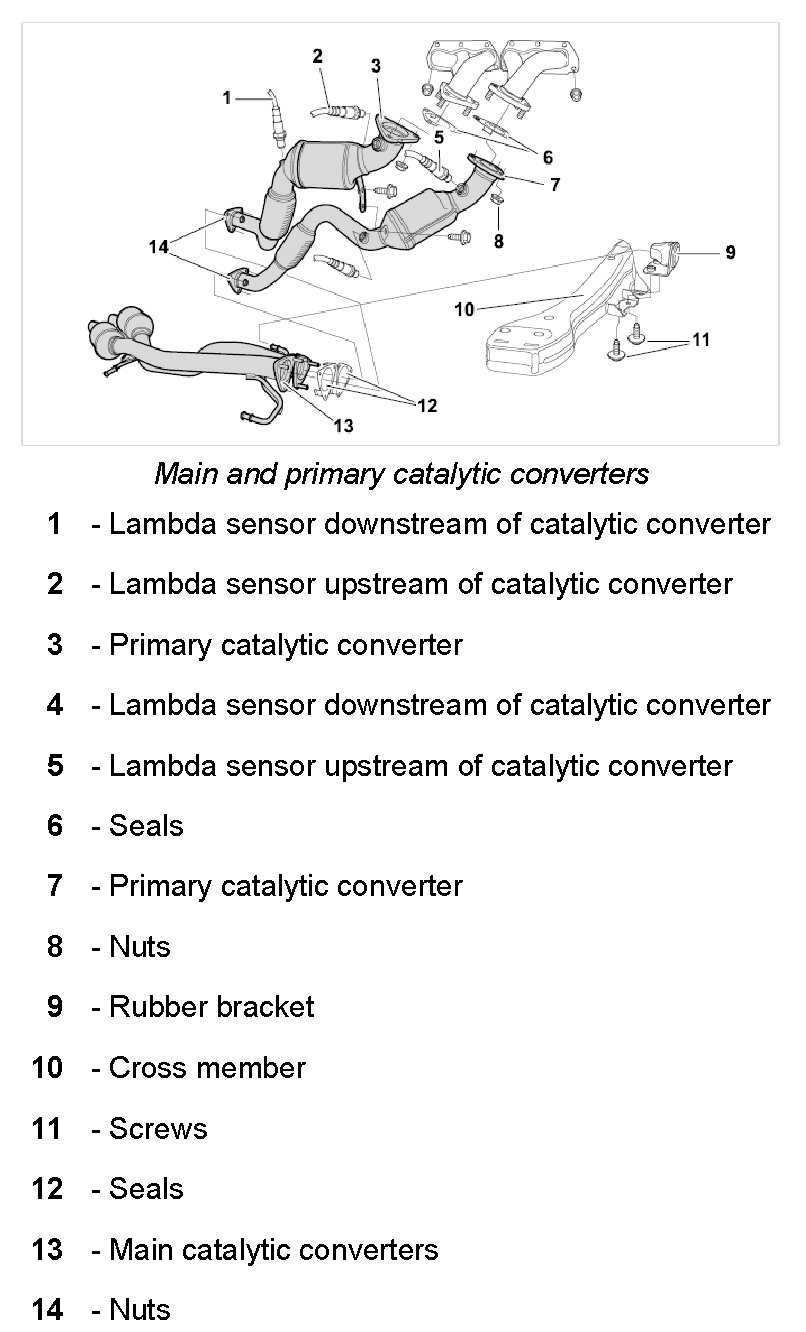
1. Disconnect primary catalytic converters from the main catalytic converters.
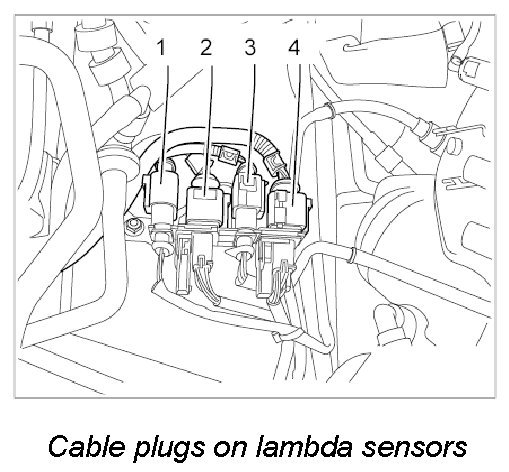
2. Pull off all cable plugs on the lambda sensors. Disconnect cable plugs -1, 2, 3, 4- and release them from the holders.
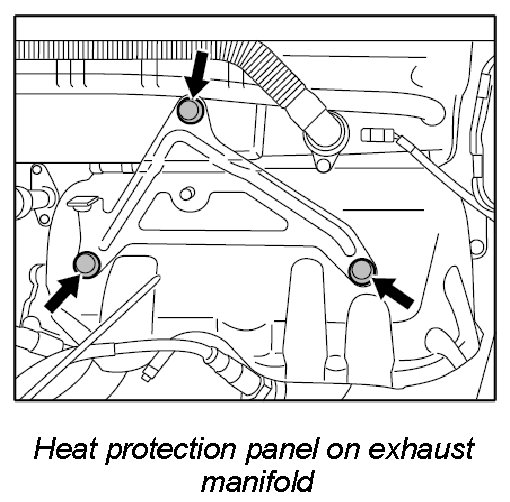
3. Remove heat protection panel on the exhaust manifold. To do this, remove the sheetmetal holders on the heat protection panel and intake manifold -arrows-. Pull heat protection panel out of the upper clamps.
4. Remove primary catalytic converters.
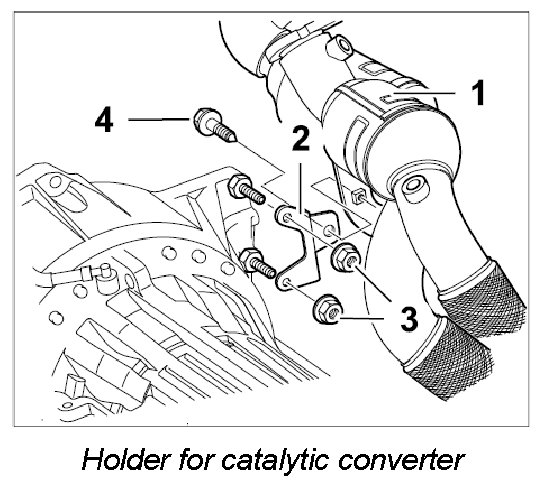
4. 1. Remove M8 fastening screw and sheetmetal holder on the transmission next to the starter -2, 3 and 4-.
INFORMATION: Mark oxygen sensors as you unscrew them so that the oxygen sensors are not confused.
4. 2. Remove the lambda sensors. This gives more space for removal and prevents damage to the lambda sensors.
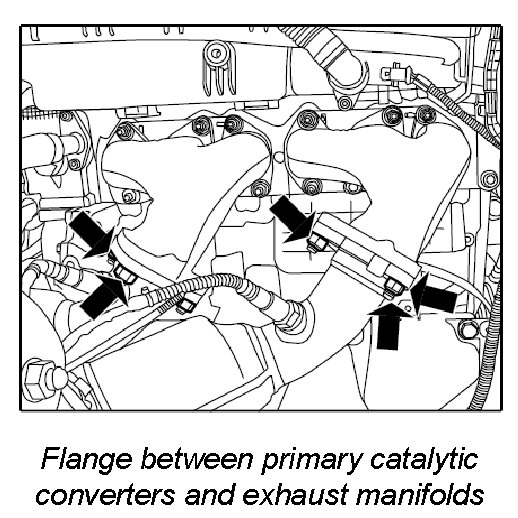
4. 3. Unscrew all fastening nuts between the primary catalytic converter and exhaust manifold. Spray the six nuts securing the exhaust manifold to the catalytic converter with anti-rust agent and leave it to take effect. Loosen catalytic converters on the exhaust manifolds (six nuts) -arrows- and lay catalytic converters aside.
4. 4. Lift the two primary catalytic converters up together and remove them from the engine compartment.
Installing primary catalytic converters
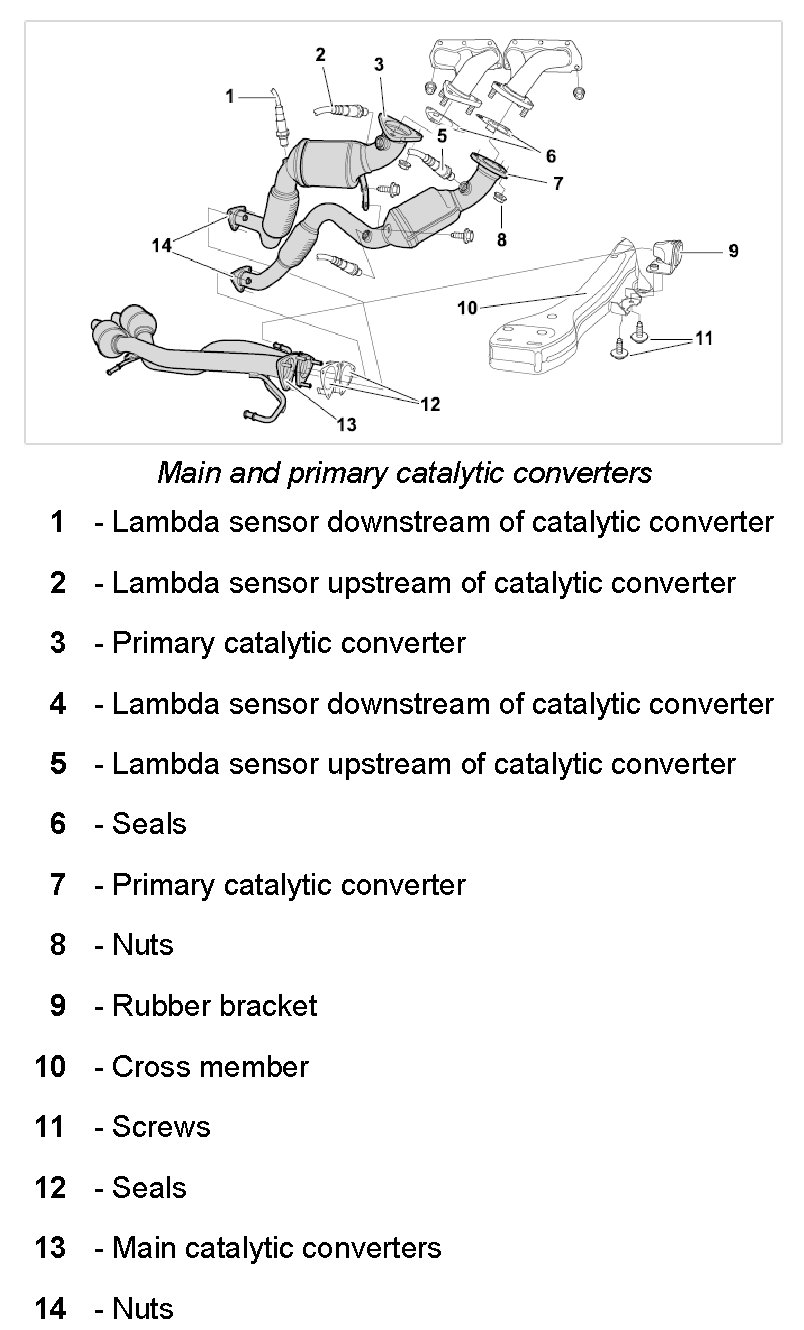
1. Clean all sealing surfaces and replace metal seals. Replace nuts.
2. Install primary catalytic converter. Fit all screws and nuts before finally tightening to the correct tightening torque.
2. 1. Get another person to help you move the two primary catalytic converters together from the engine compartment into installation position. When doing so, make sure that the studs on the exhaust manifolds are inserted into the bores on the primary catalytic converters. Place new fastening nuts on the studs of the exhaust manifolds and an M8 fastening screw on the sheetmetal bracket next to the starter.
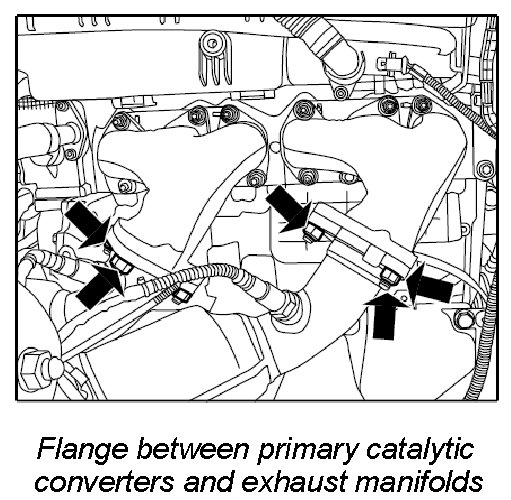
2. 2. Loosely tighten fastening nuts on the studs on the exhaust manifolds hand-tight.
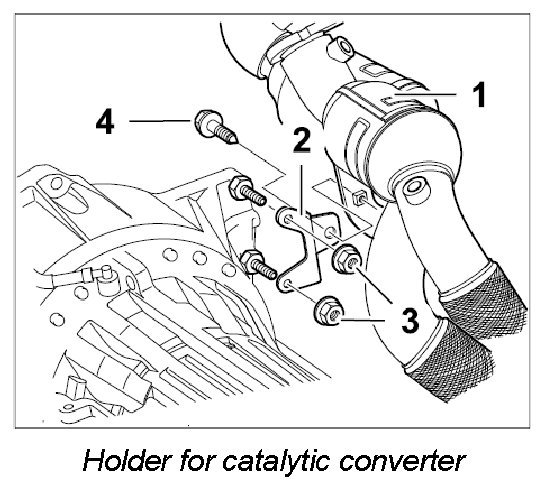
2. 3. Fit fastening screws, nuts and the sheetmetal holder next to the starter.
3. Fit flange between the primary and main catalytic converter using screws.
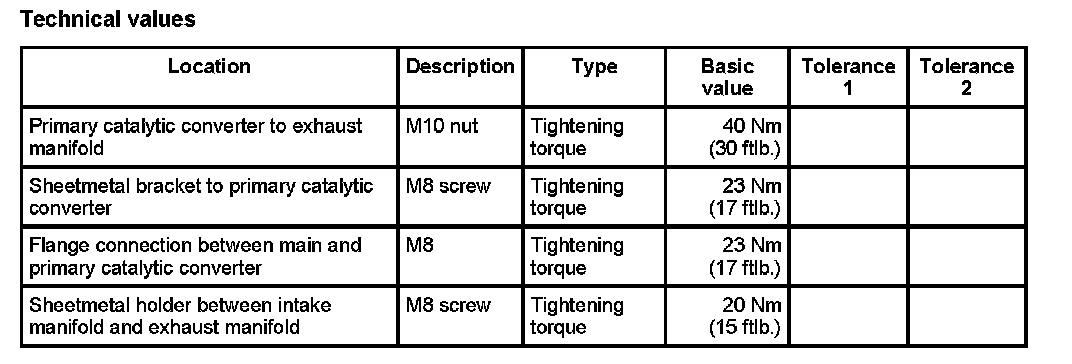
4. Tighten all threaded connections. Primary catalytic converter to exhaust manifold - Tightening torque: 40 Nm (30 ftlb.); sheetmetal bracket to primary catalytic converter - Tightening torque: 23 Nm (17 ftlb.); flange connection between main and primary catalytic converter - Tightening torque: 23 Nm (17 ftlb.)
5. Fit lambda sensors.
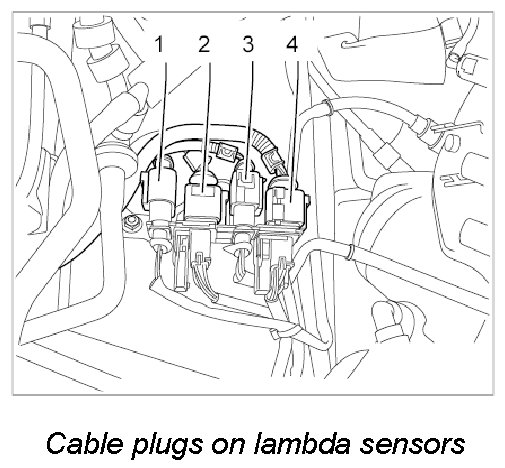
6. Plug in all cable plugs on the lambda sensors. -1, 2, 3, 4- Use PIWIS Tester to check correct assignment to lambda sensors if necessary.
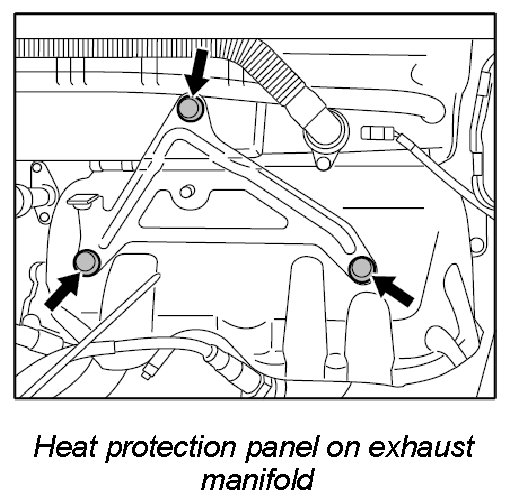
7. Fit heat protection panel on exhaust manifold. Press heat protection panel into the upper sheetmetal clamps. Then fit sheetmetal holder on heat protection panel and on intake manifold -arrows-. - Tightening torque: 20 Nm (15 ftlb.)
Subsequent work
1. Fit underbody panelling.
2. Fit engine compartment trim panels on the right.
3. Connect the battery.