Fluid Line/Hose: Service and Repair
Removing and installing line for ATF cooling
Preliminary work
Preliminary work for line for ATF cooling
1. Remove engine guard.
Removing line for ATF cooling
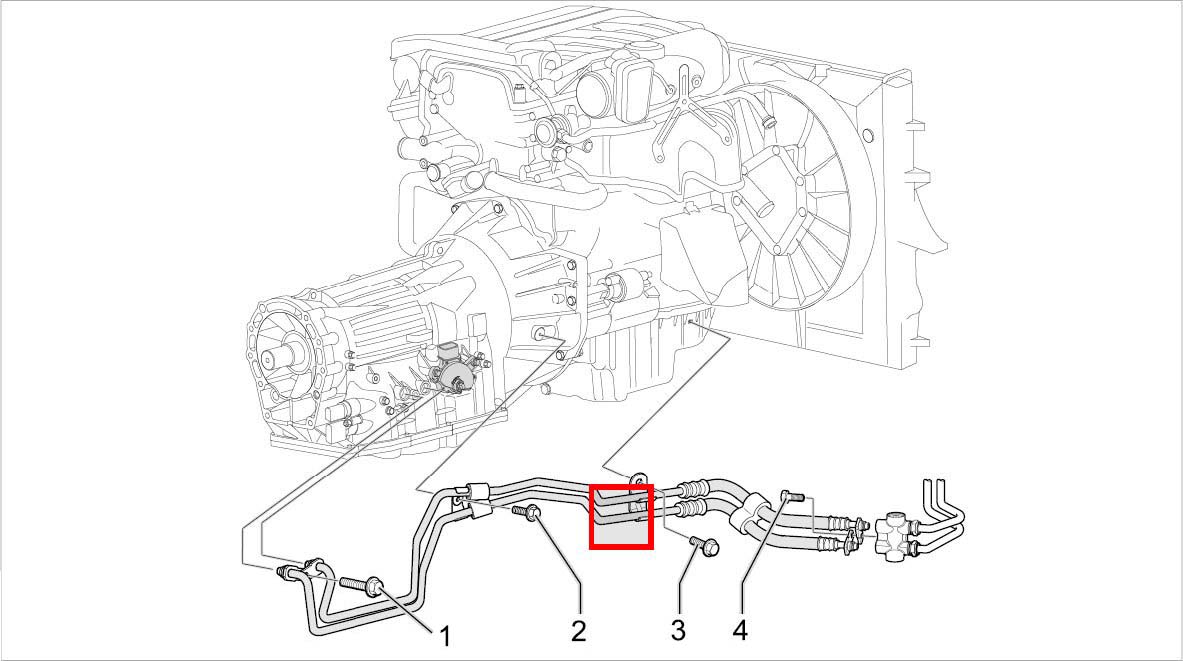
Overview of ATF line
1. Unscrew fastening screws on front apron -arrows-.
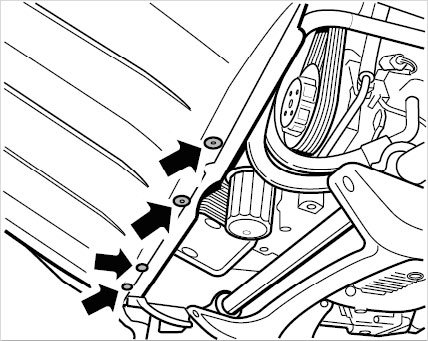
Front apron
2. Remove front transverse strut. To do this, unscrew four screws -arrows-.
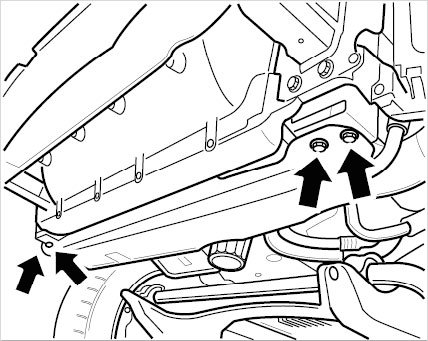
Front transverse strut
3. Unscrew fastening screws which fastens ATF line to the engine.
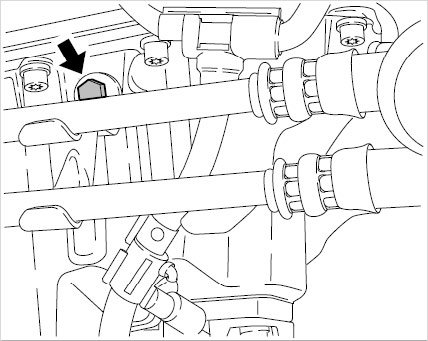
ATF line to engine
4. Unscrew fastening screw securing ATF line to transmission bell housing -arrow-.
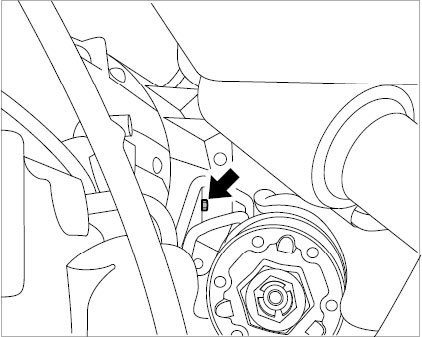
ATF line on transmission
5. Place collecting pan underneath the vehicle.
Warning
Danger of scalding and chemical burns from hot ATF
- Allow ATF to cool down
- Wear personal protective gear (goggles, gloves)
6. Unscrew fastening screw securing ATF line to transmission -arrow- and remove lines.
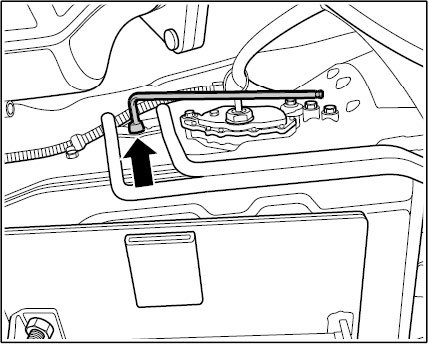
ATF line on transmission
Warning
Danger of scalding and chemical burns from hot ATF
- Allow ATF to cool down
- Wear personal protective gear (goggles, gloves)
7. Unscrew fastening screw securing ATF line to ATF thermostat -2- and remove lines.
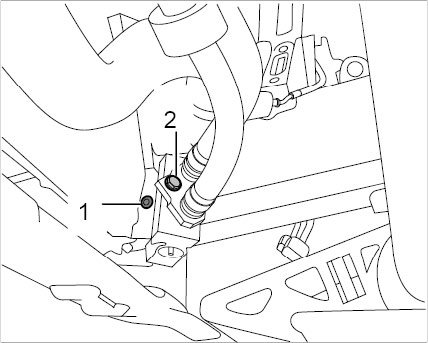
ATF line to thermostat
8. Pull off oil-level sensor cable plug -2-.
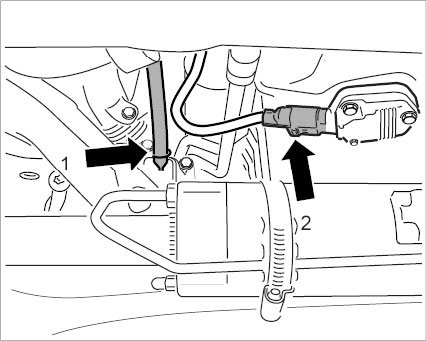
Oil level sensor/ventilation on final all-wheel drive
9. Pull bleeder line off final all-wheel drive -1-.
10. Push the engine up by approx. 10 mm using a transmission jack and wooden support, for example, until the ATF line can be removed.
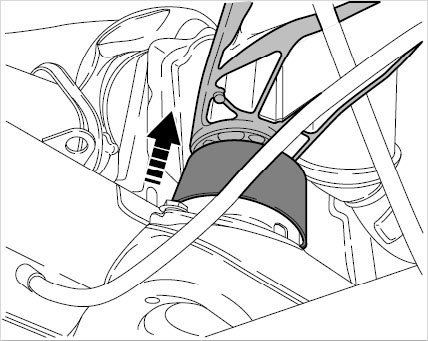
Pushing engine up
Installing line for ATF cooling
Installing ATF line
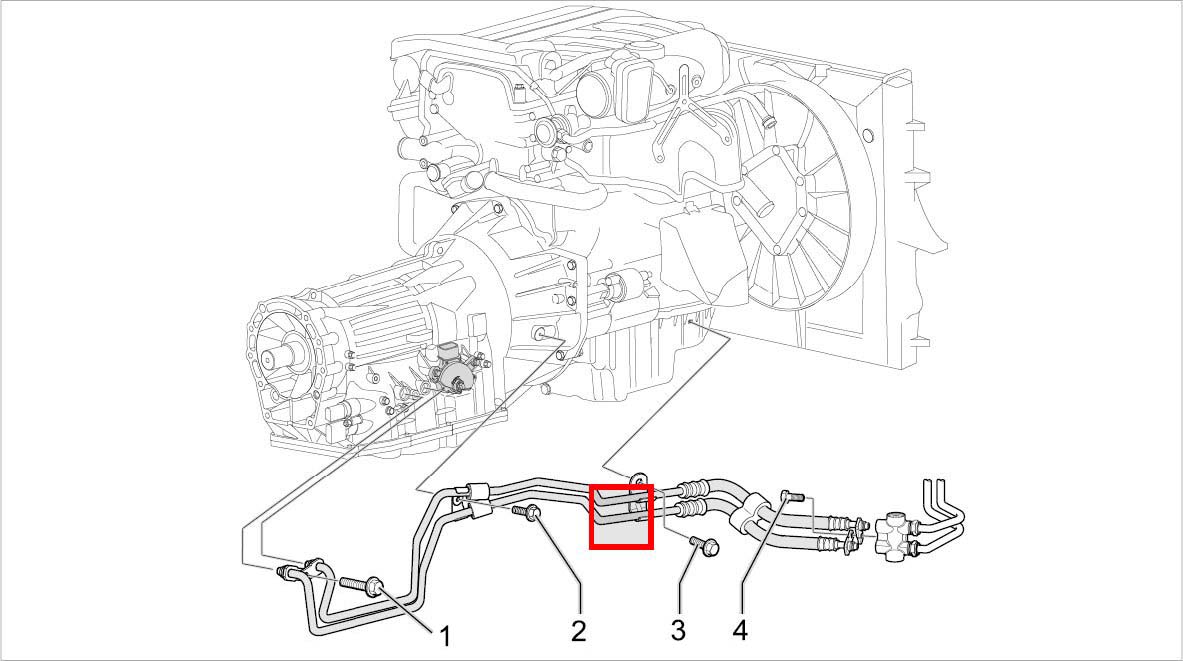
Overview of ATF line
1. Install ATF line. Push the engine up by approx. 10 mm using a transmission jack and wooden support, for example, until the ATF line can be installed.
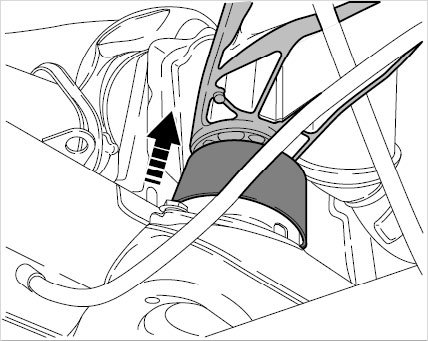
Pushing engine up
2. Push on oil-level sensor cable plug -2-.
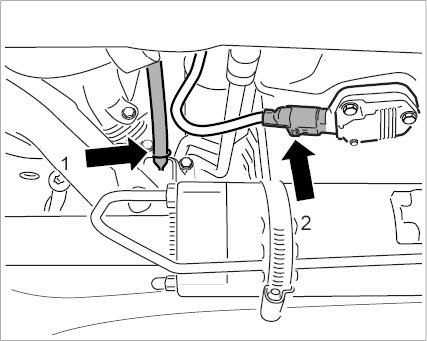
Oil level sensor/ventilation on final all-wheel drive
3. Push bleeder line onto final all-wheel drive -1-.
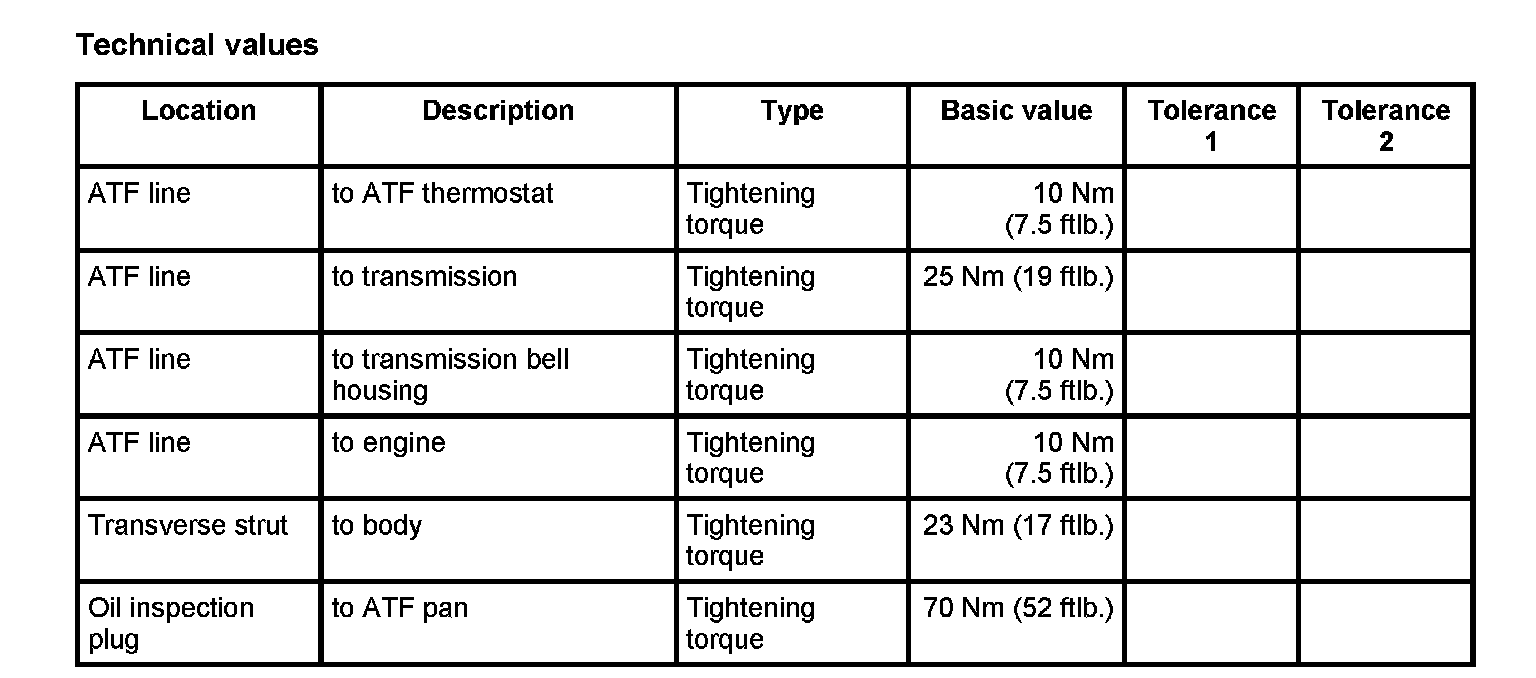
4. Screw in fastening screw securing ATF line to ATF thermostat -arrow-. - Tightening torque: 10 Nm (7.5 ftlb.)
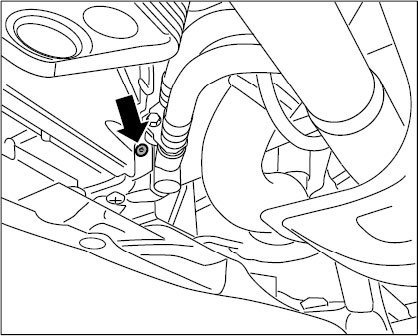
ATF line screw to thermostat
5. Screw in fastening screw securing ATF line to transmission -arrow-. - Tightening torque: 25 Nm (19 ftlb.)
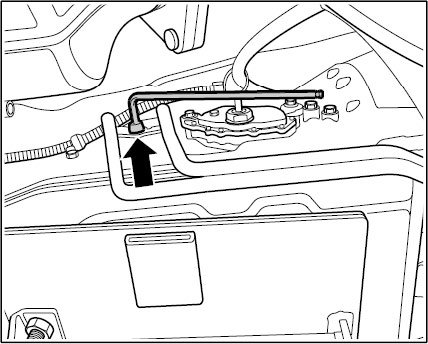
ATF line on transmission
6. Screw in fastening screw securing ATF line to transmission bell housing. - Tightening torque: 10 Nm (7.5 ftlb.)
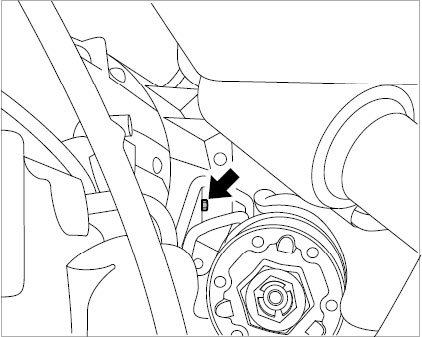
ATF line on transmission
7. Screw in fastening screws securing ATF line to the engine. - Tightening torque: 10 Nm (7.5 ftlb.)
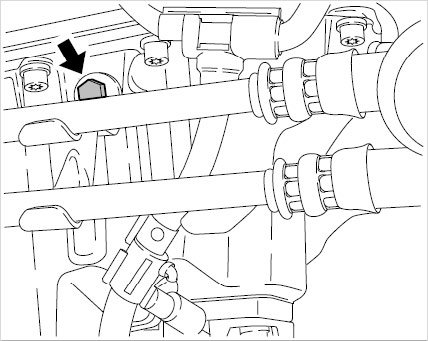
ATF line to engine
8. Install front transverse strut. To do this, screw in four screws -arrows-. - Tightening torque: 23 Nm (17 ftlb.)
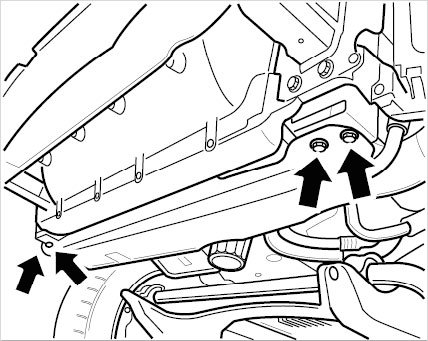
Front transverse strut
9. Screw in front apron fastening screws -arrows-.
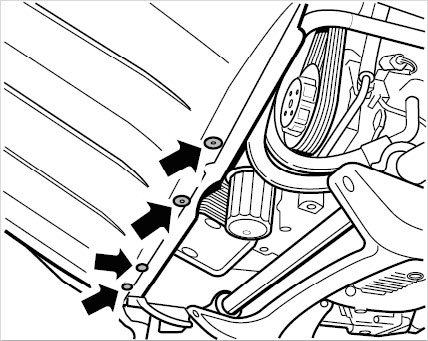
Front apron
10. Unscrew ATF inspection plug -2- and fill in ATF until a constant discharge is visible at the lifting tube.
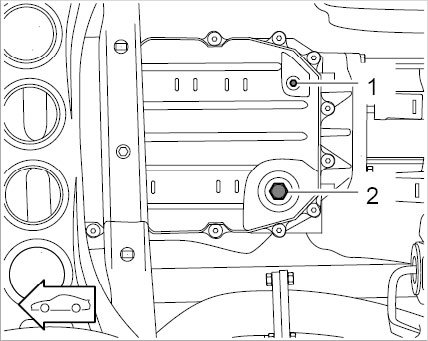
Oil drain and inspection plug
11. Screw in ATF inspection plug -2- with a new sealing ring. - Tightening torque: 70 Nm (52 ftlb.)
Subsequent work
Subsequent work for line for ATF cooling
1. Check and if necessary, top up the ATF.
2. Fit engine guard.