Air Door Cable: Service and Repair
TEMPERATURE CONTROL CABLE REPLACEMENTREMOVAL PROCEDURE
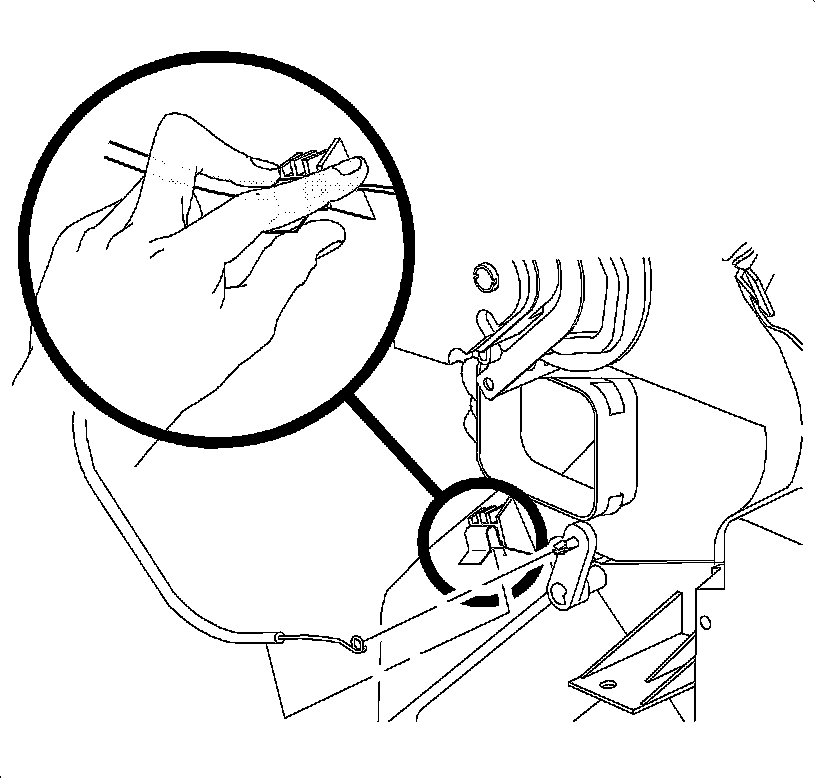
1. Remove the HVAC control module.
2. Remove the right side console closeout panel.
CAUTION: Heater core pipes may be hot!
3. Remove the cable from the module retaining clip using the first 2 fingers to pull outward on the cable while using the thumb to spread the retaining clip.
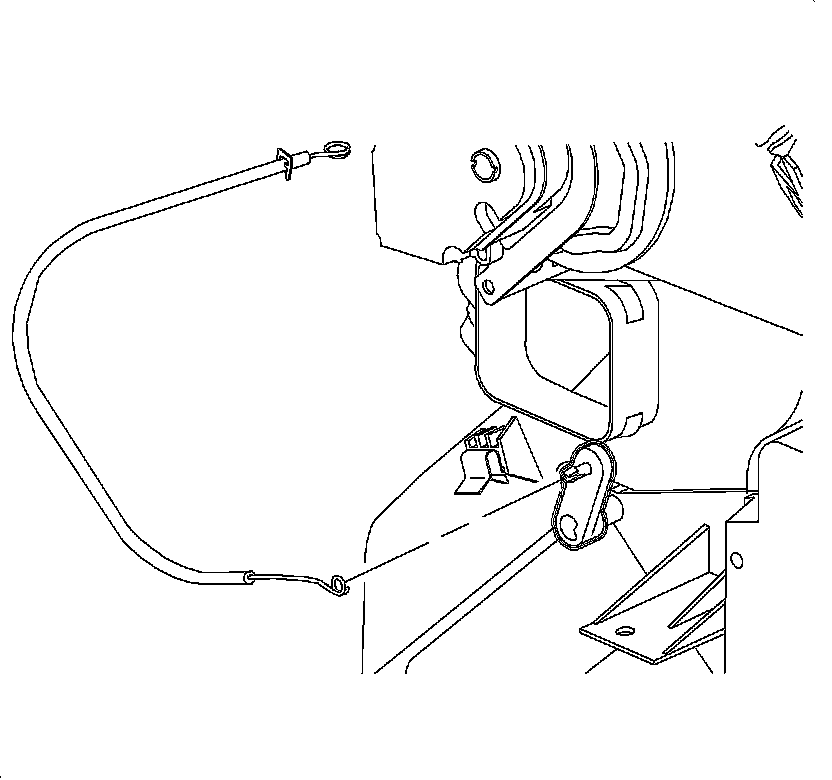
4. Remove the cable from the temperature door lever by squeezing the end of the pin and pulling the cable eyelet outward.
5. Remove the cable from the vehicle.
INSTALLATION PROCEDURE
1. Install the temperature control cable to the vehicle.
2. Route the new cable in through the HVAC control assembly opening in the instrument panel (I/P). The cable housing flag goes to the HVAC control assembly end.
1. Route the new cable in through the HVAC control assembly opening in the I/P.
2. The cable housing flag goes to the HVAC control assembly end.
3. Guide the cable around outside of the I/P support brace.
3. Install the cable eyelet onto the temperature door lever pin.
4. Install the right side console closeout panel.
5. Install the HVAC control module.