Rear Floor
AIR OUTLET REPLACEMENT - REAR FLOORREMOVAL PROCEDURE
1. Move the seat to the full forward position and remove the front seat fasteners.
2. Disable the SIR. Refer to SIR Disabling and Enabling Zone 5 in Restraint Systems.
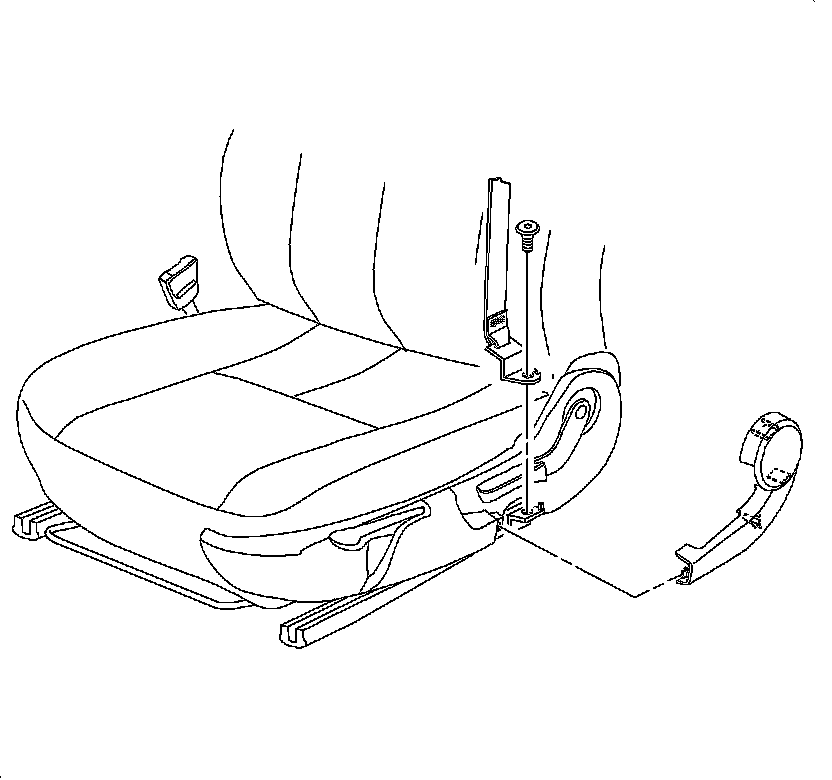
3. Remove the front seat outer shoulder belt outer valance.
4. Remove the shoulder belt from the seat frame.
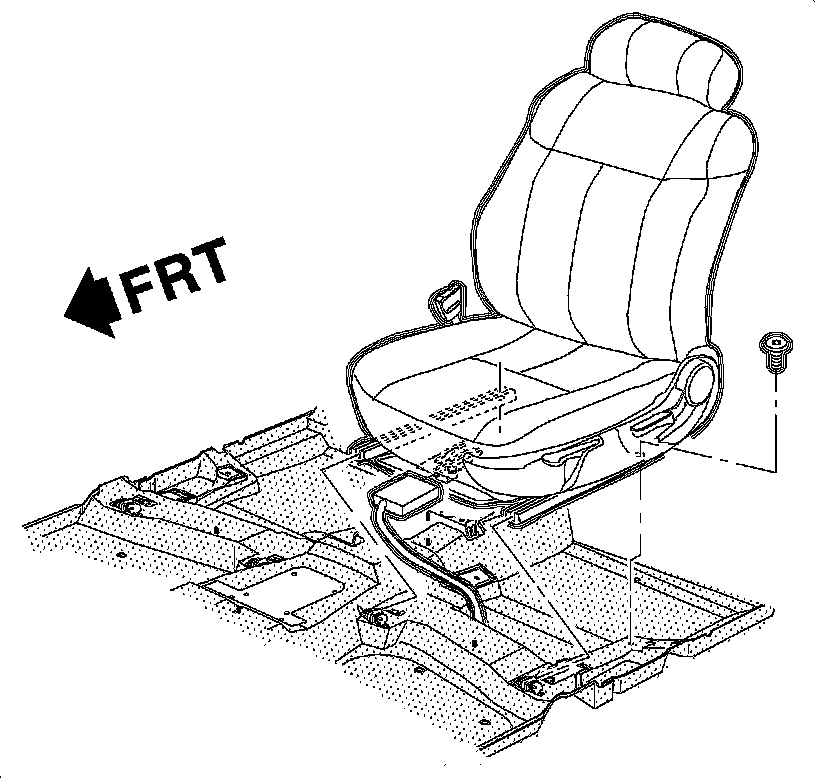
5. Pull the seat assembly slightly rearward to disengage the seat from the front seat track hooks.
6. Tilt the seat rearward and disconnect the seat wiring harnesses.
7. Remove the seat from the vehicle and place the seat on a clean protected work surface.
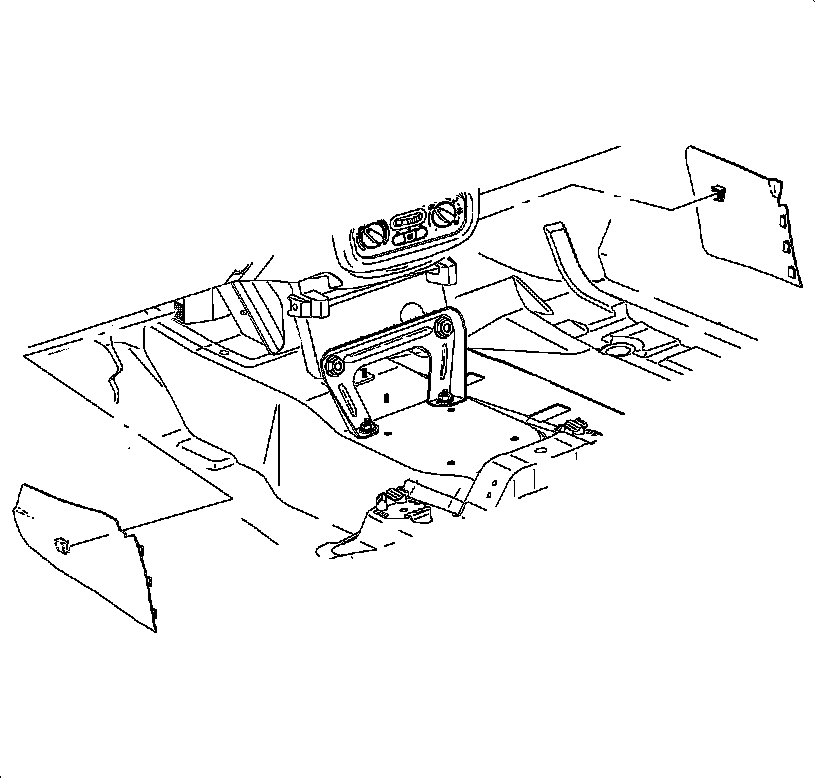
8. Gently pull on the left and right side console extensions to remove the extensions.
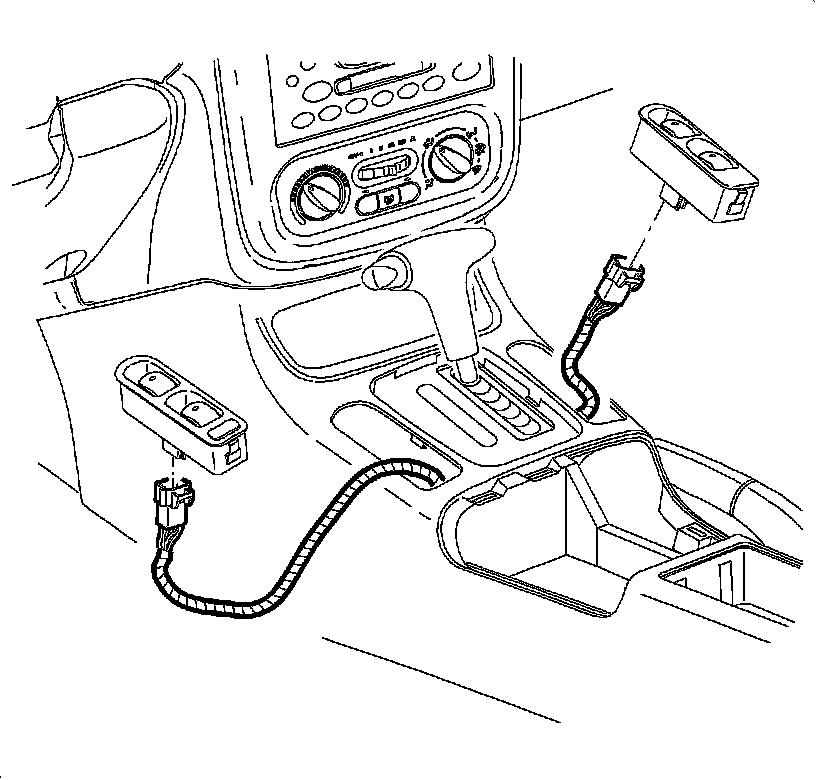
9. Power Window Vehicles Only: Using a small flat-bladed tool, gently pry upward on the rear portion of the power window switch to partially disengage the switch from the console.
10. Disconnect the power window switch harness from the switch and remove the power window switch.
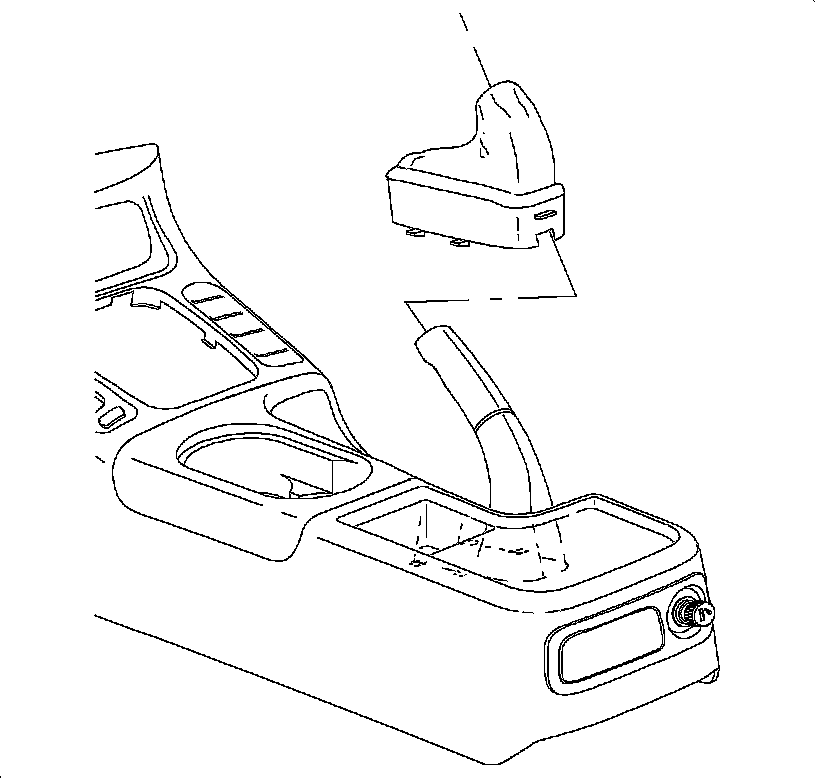
11. Disengage the console park brake boot by squeezing the boot in the locations shown while pulling upward.
12. Lift the park brake boot over the park brake assembly.
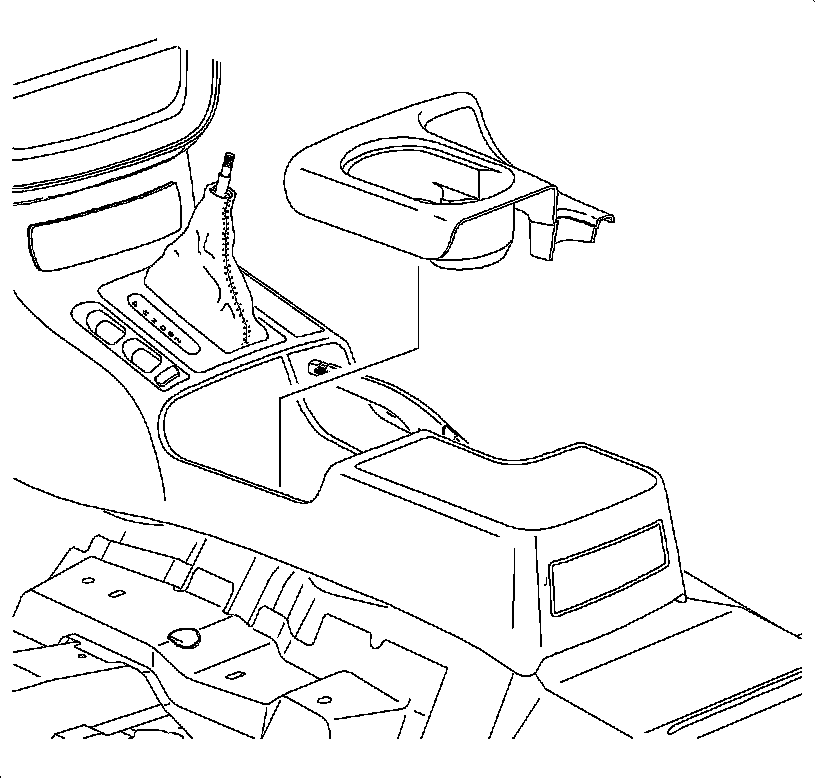
13. Remove the front console tray by pulling upward on the tray assembly.
14. Disconnect the console wiring harness from the main body harness.
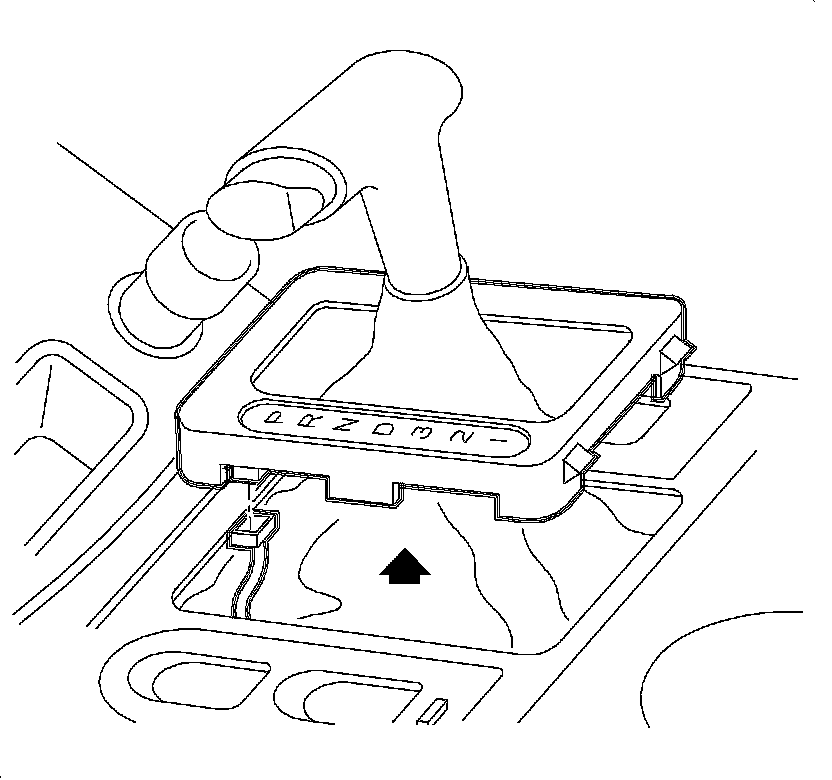
15. Automatic Transaxle Vehicles Only: Pull up on the PRNDL cover to disengage the cover.
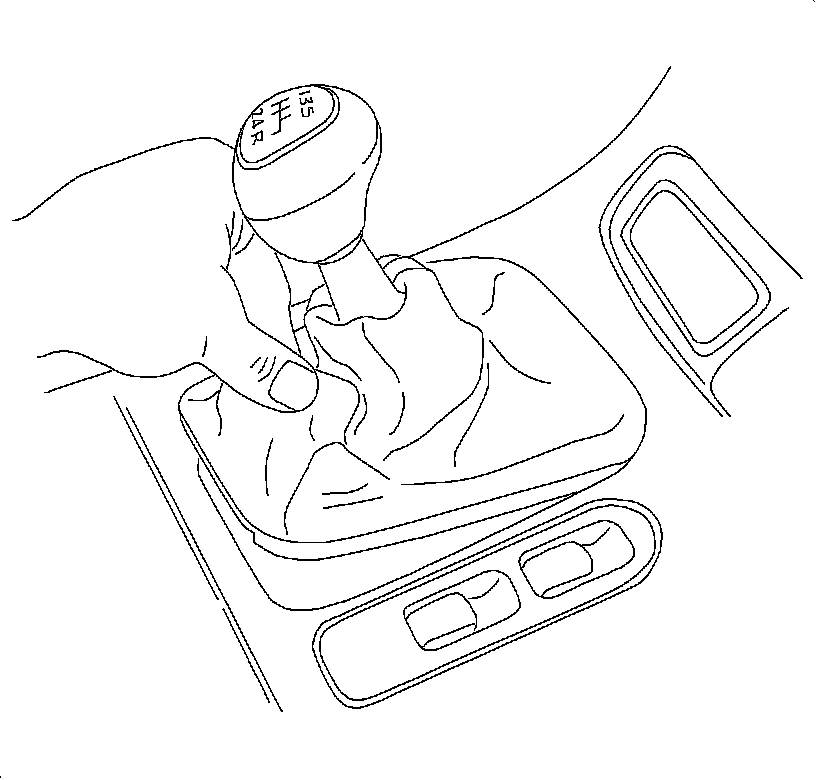
16. For 5-Speed Transaxle Vehicles Only: Pull up on the shifter boot to disengage the boot.
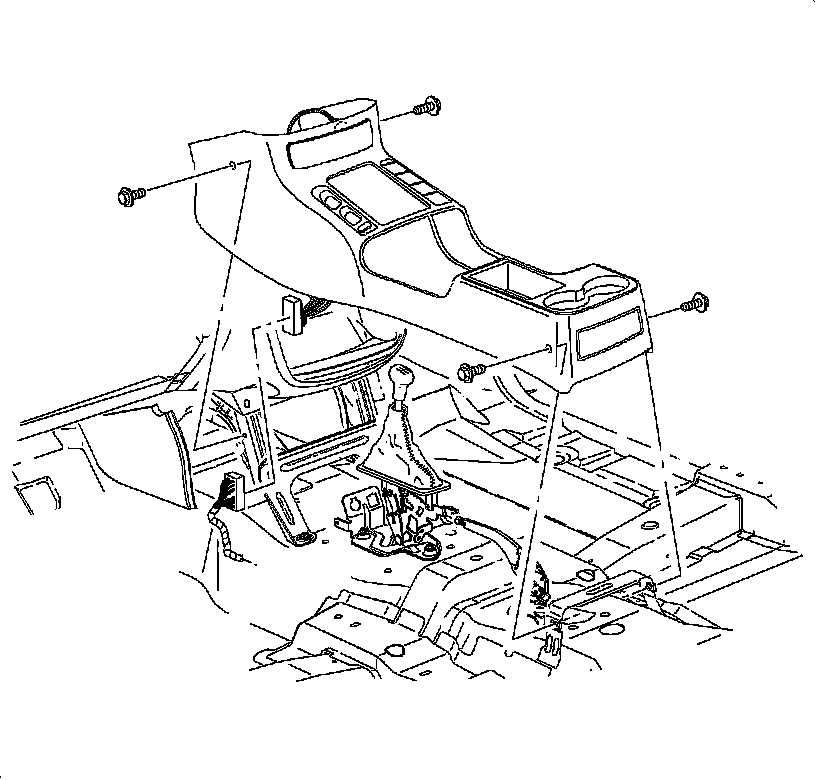
17. Remove the rear console fasteners.
18. Remove the front console fasteners.
19. Gently lift the console up and over the shifter or PRNDL cover and remove the console assembly.
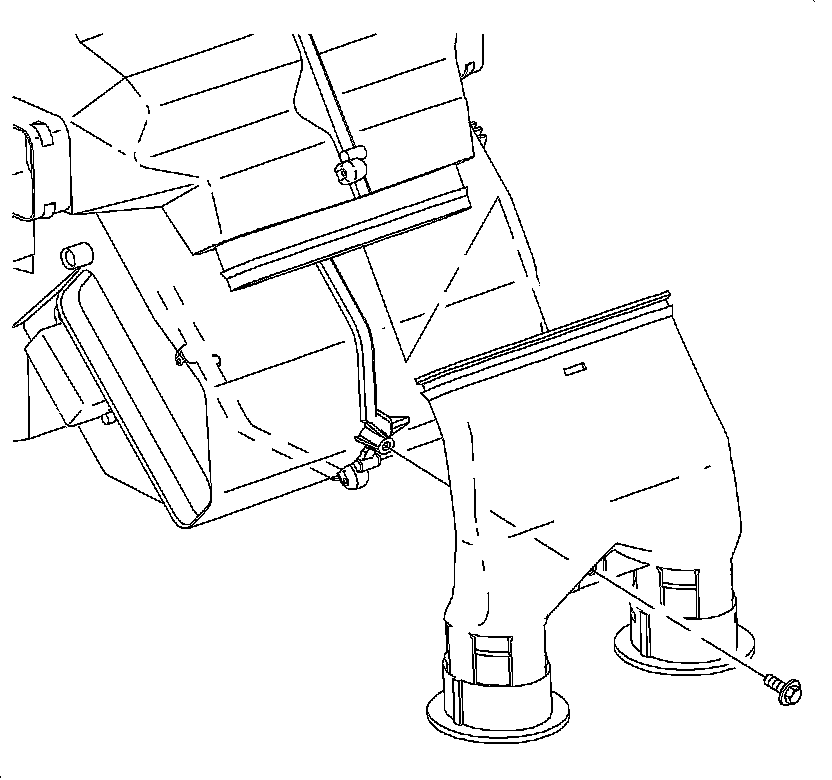
20. Slide the connector duct left/right adapter upward.
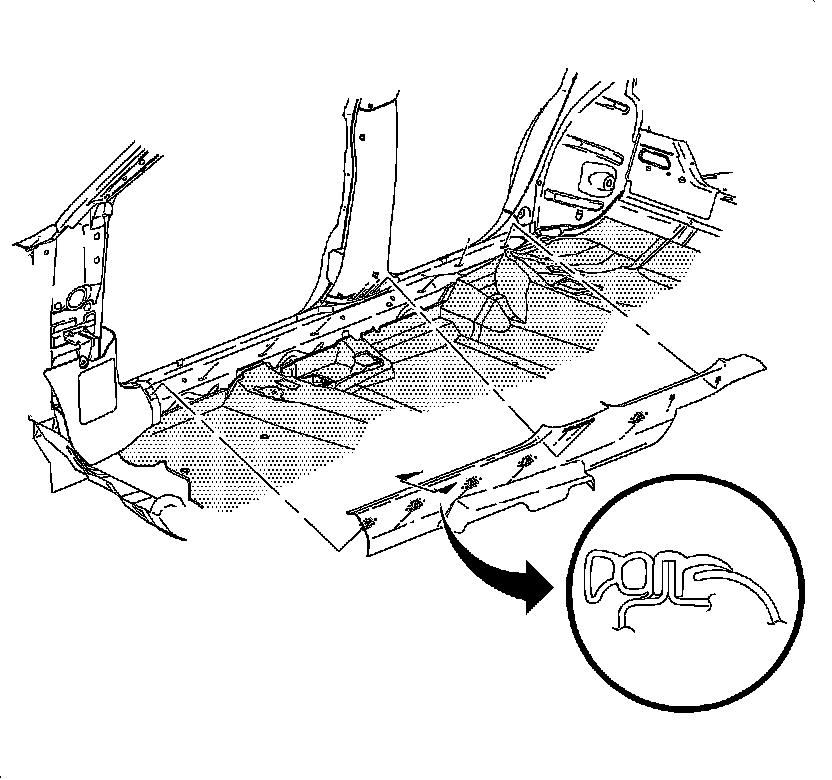
21. Remove the carpet retainer.
22. Pull back the carpet at driver/passenger footwell to expose the duct.
INSTALLATION PROCEDURE
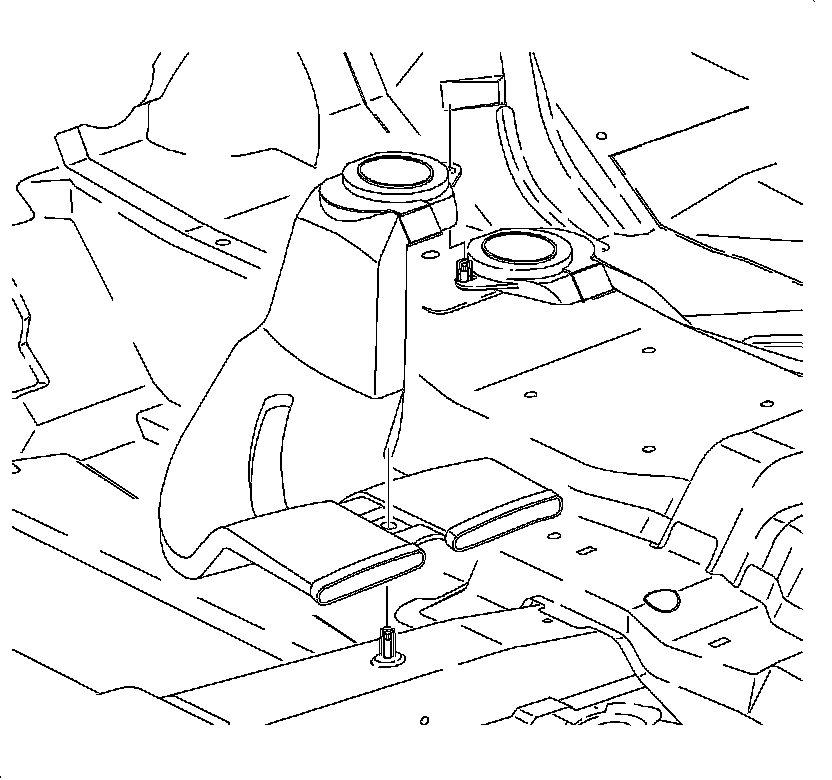
1. Install the duct over the floor studs. Press down to engage the duct onto the studs.
2. Slide the connector duct adapter down to seal against the rear duct.
3. Install the front carpet by tucking the carpet under the HVAC unit and under the shift rod. Ensure the carpet is properly placed to prevent wrinkles.
4. Position the carpet retainer into the vehicle.
5. Starting at rear of the vehicle, snap the carpet retainer into the hinge pillar molding.
6. Position the carpet retainer over the remaining attaching clip locations.
7. Gently push on the attaching clips to install the carpet retainer.
8. Install the weatherstrip over the carpet retainer using a flat bladed tool.
9. Position the console into the vehicle. Route the shifter/PRNDL boot through the console opening.
10. Install the front console fasteners.
NOTE: Refer to Fastener Notice in Service Precautions.
Tighten the fasteners to 2.5 N.m (22 lb in).
11. Automatic Transaxle Vehicles Only: Snap the PRNDL cover into the console opening.
12. 5-Speed Transaxle Vehicles Only: Snap the shifter boot into the console opening.
13. Connect the console wiring harness to the main body harness.
14. Install the tray into the front console and snap the tray into place.
15. Power Window Vehicles Only: Connect the power window harness to the power window switch and snap the switch into place.
16. Install the park brake boot into the console and snap the boot into place.
17. Install the console extensions.
18. Position the seat into the vehicle.
19. Tilt the seat rearward and connect the seat wiring harnesses.
20. Slide the seat into the forward tracks.
21. Apply Loctite 242(R) Threadlocker or equivalent to the seat fasteners.
22. Install the seat fasteners.
Tighten the fasteners to 25 N.m (19 lb ft).
23. Install the shoulder belt to the seat frame.
24. Install the shoulder belt to the seat frame bolts.
Tighten the bolts to 35 N.m (26 lb ft).
25. Install the shoulder belt outer valance.
26. Enable the SIR. Refer to SIR Disabling and Enabling Zone 5 in Restraint Systems.
27. If equipped, operate the electrical seat components to ensure proper operation.