Disassembly/Assembly
Fig. 7 Power rack & pinion steering gear. 1984:
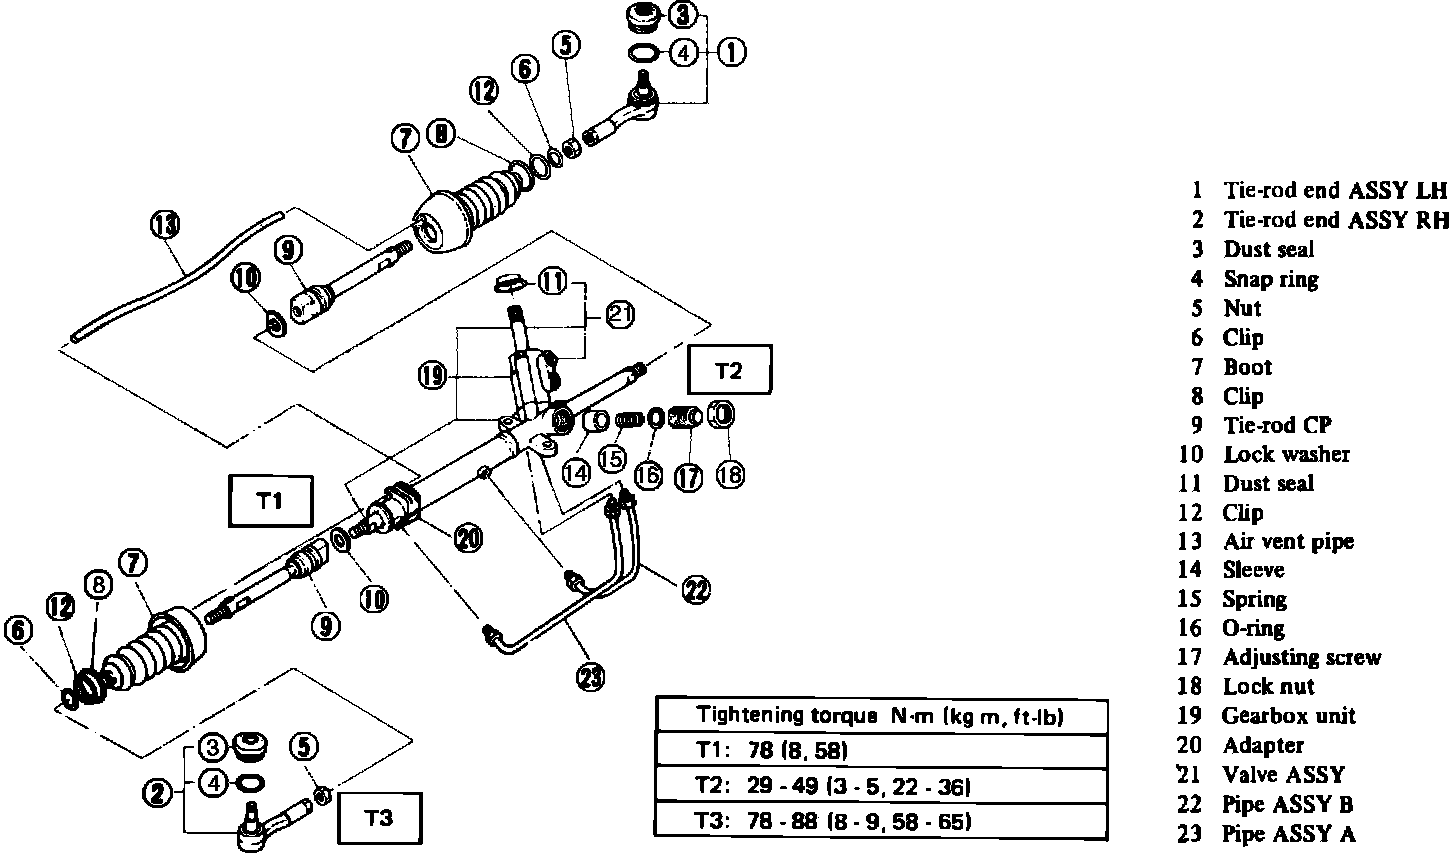
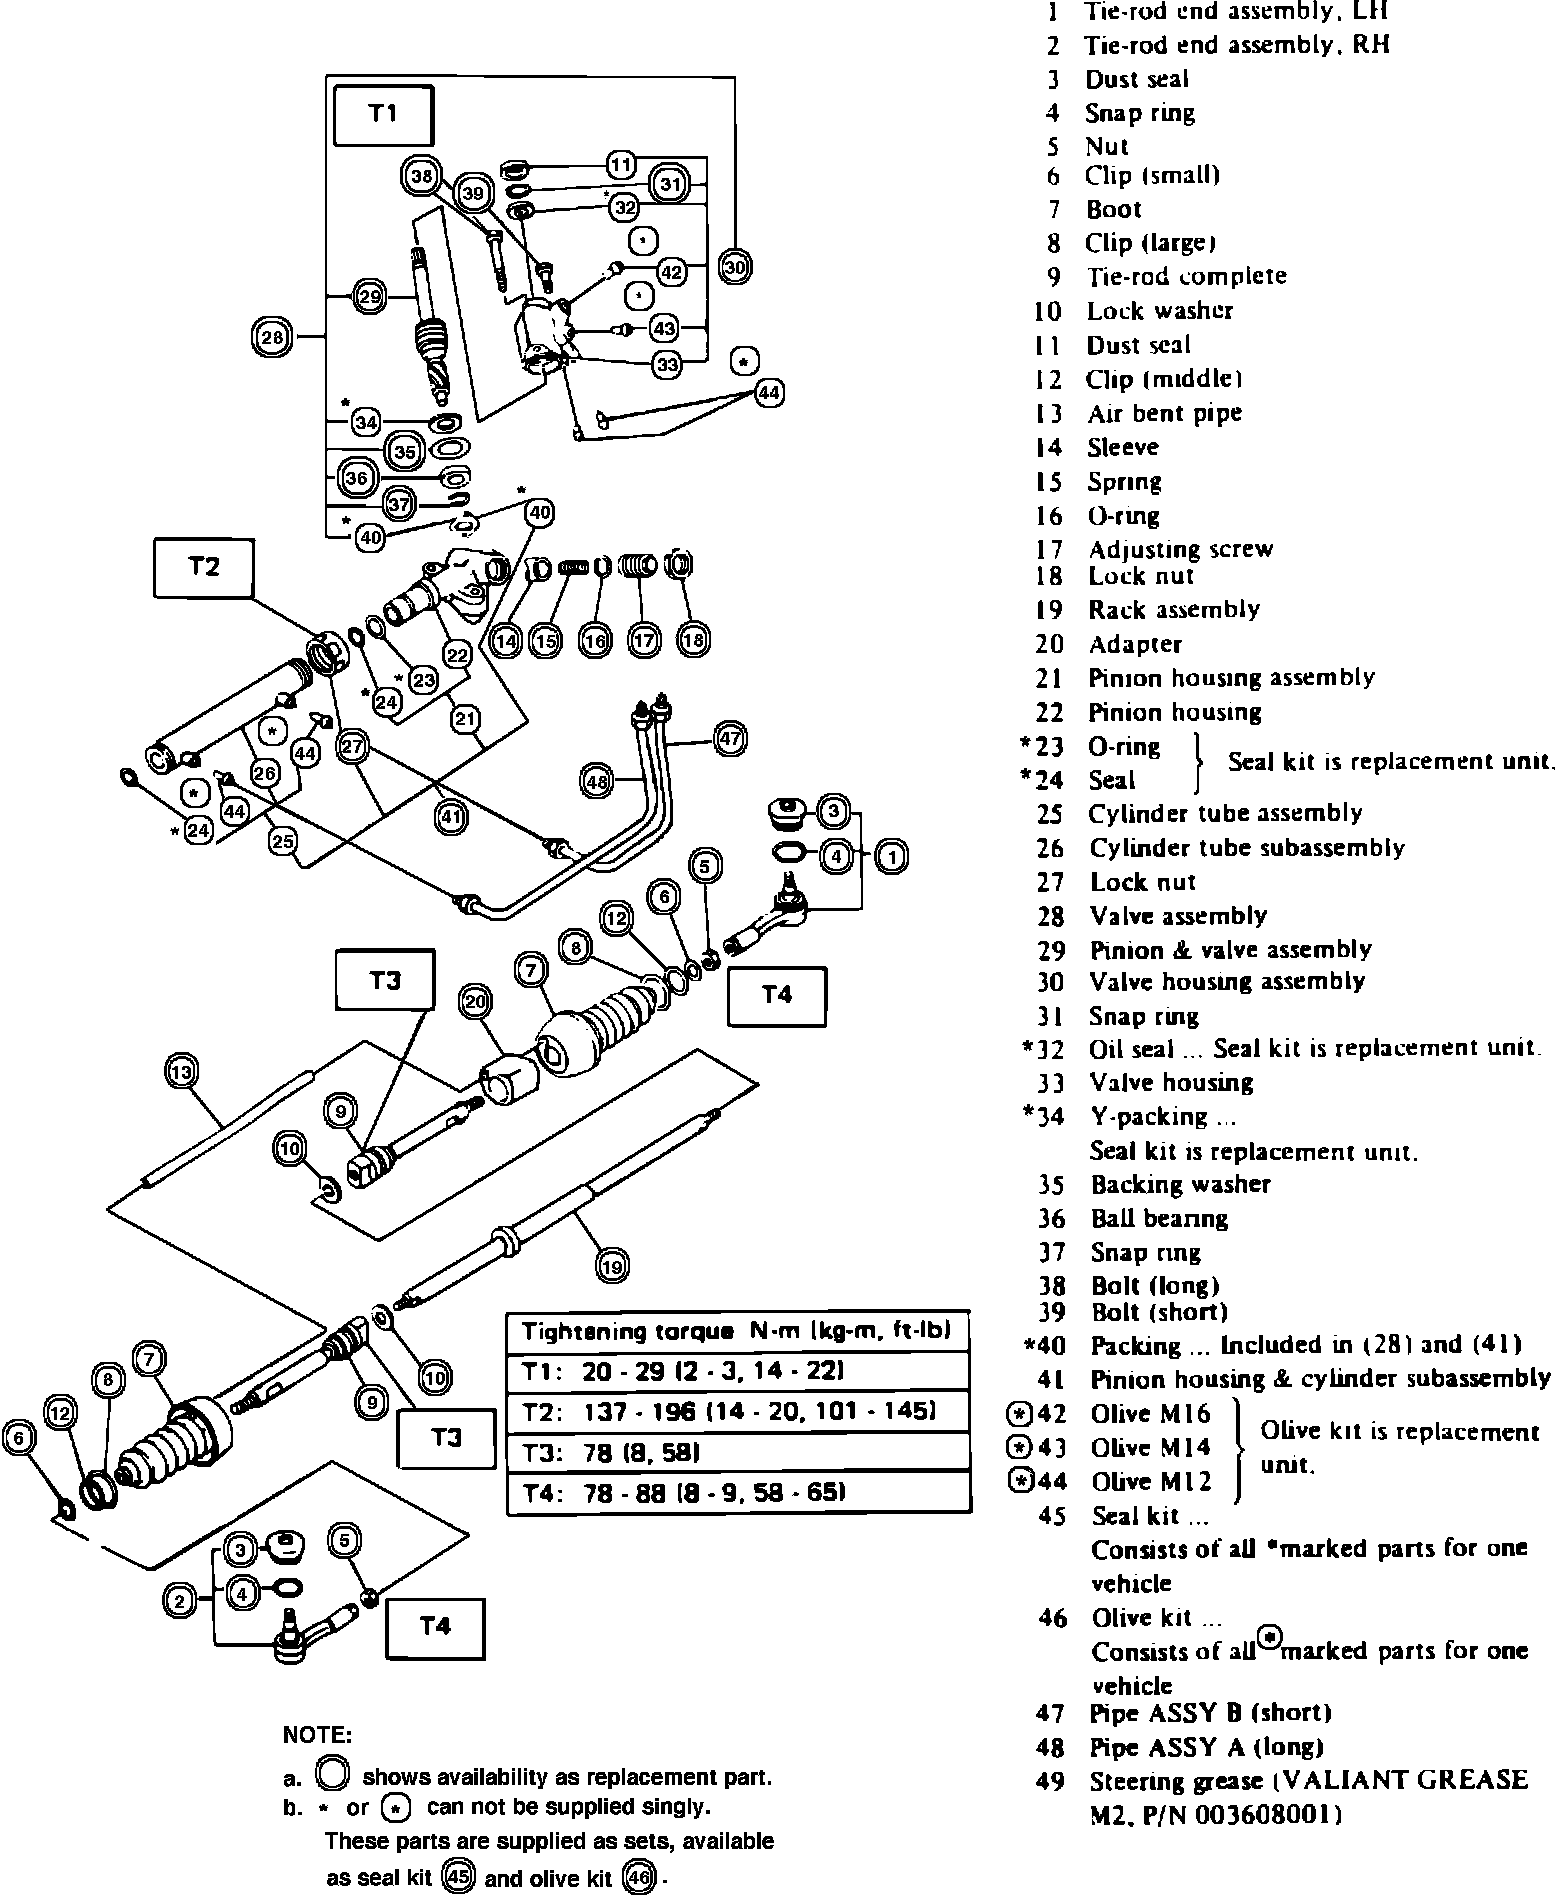
Fig. 8 Power rack & pinion steering gear seals & components. 1984:
Disassemble
1. Install gearbox in fixture No. 925690000, and then install assembly in vise.
2. Remove air vent pipe from boot, Figs. 7 and 8.
3. Remove the small boot clip.
4. Remove boot with large clip positioned on inside end of boot and middle clip mounted on it.
5. Straighten lockwasher with suitable screwdriver.
6. Remove ball joint with tie rod end from rack.
7. Loosen adjusting screw locknut and remove adjusting screw.
8. Remove spring and sleeve.
9. Using a suitable screwdriver, remove pinion dust seal.
Fig. 7 Power rack & pinion steering gear. 1984:
Fig. 8 Power rack & pinion steering gear seals & components. 1984:
Assemble
1. Lubricate rack teeth and sliding portion of rack shaft with suitable grease. Use caution not to apply grease to threaded portion at end of rack shaft.
2. Lubricate dust seal and sleeve openings with suitable grease.
Fig. 9 Installing dust seal. Power steering gear:
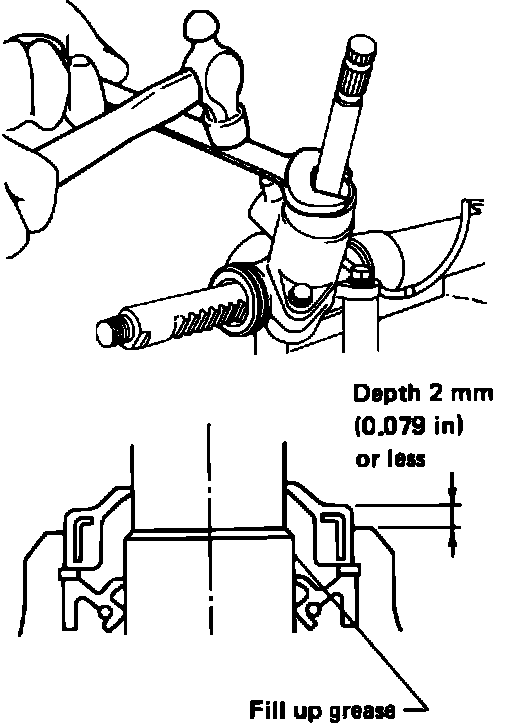
3. Install dust seal as shown in Fig. 9. Do not apply force directly on dust seal when installing or seal will be damaged.
4. Install sleeve, spring and adjusting screw. Lubricate adjusting screw O-ring prior to installation.
Fig. 10 Adjusting rack & pinion backlash. Power steering gear:
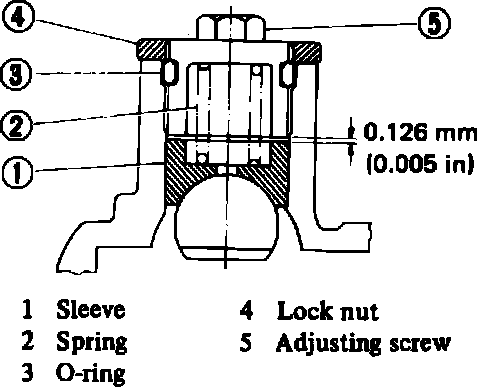
5. Adjust rack and pinion backlash, Fig. 10, as follows:
a. Check to ensure that sleeve contacts rack, then torque adjusting screw to 3.62 ft.lbs. (.5 kg-m), then back off 1/2 turn.
b. Rotate adjusting screw until resistance is felt, then back off 1/12 turn (30°).
c. Install locknut and torque to 22-36 ft.lbs. (3-5 kg-m). Clearance between screw tip and sleeve should be .005 inch (.126 mm).
6. Install new lock washer onto rack end. Torque ball joint to 58 ft.lbs. Install ball joint onto tie rod and torque to 58 ft.lbs. Bend lock washer tabs.
7. Install clips onto boot, then install boot onto gear and secure with small clip.
8. Install air vent pipe into boot, then install tie rod end into tie rod sleeve.
9. Rotate tie rod assembly to ensure that boots are not twisted excessively and that tie rods move freely.