Disassembly and Reassembly
DISASSEMBLY1. Front Bushing
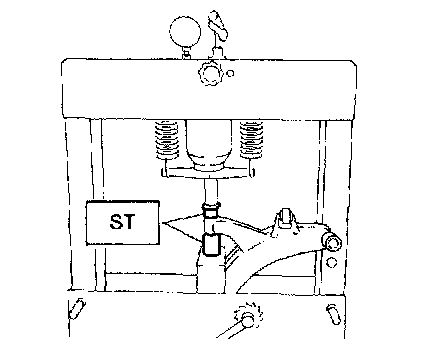
Using ST, press front bushing out of place. ST 927680000 INSTALLER & REMOVER SET
2. Rear Bushing
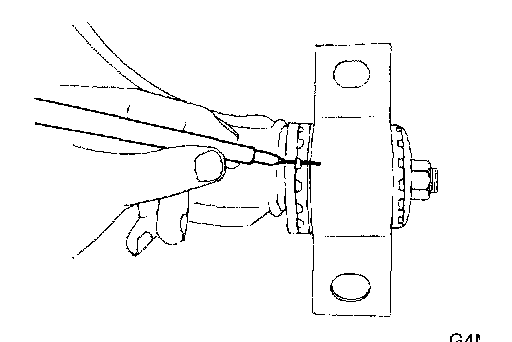
1. Scribe an aligning mark on transverse link and rear bushing.
2. Loosen nut and remove rear bushing.
INSPECTION
1. Check transverse link for wear, damage and cracks, and correct or replace if defective.
2. Check bushings for cracks, wear, damage and creeping.
3. Check rear bushing for oil leaks.
4. If defective, replace with new one.
ASSEMBLY
1. Front Bushing
To reassemble, reverse disassembly procedures.
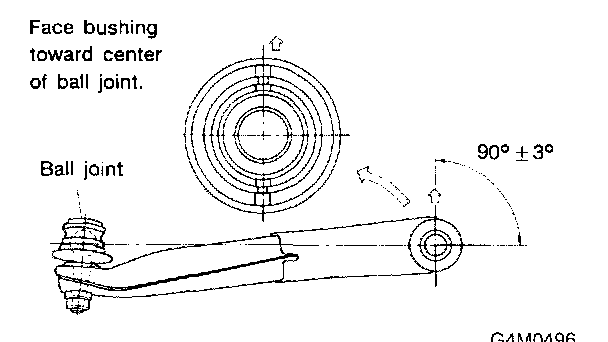
CAUTION: Install front bushing in correct direction, as shown in figure.
2. Rear Bushing
1. Install rear bushing to transverse link and align aligning marks scribed on the two.
2. Tighten self-locking nut.
CAUTION:
^ Discard loosened self-locking nut and replace with a new one.
^ While holding rear bushing so as not to change position of aligning marks, tighten selflocking nut.
Tightening torque: 186 ± 10 Nm (19.0 ± 1.0 kg-m, 137 ± 7 ft. lbs.)