Engine Controls - MIL ON/DTC P0011/P0012/P0016
ENGINEEG008-07
Title:
M.I.L. "ON" DTC P0011, P0012, OR P0016
Models
'05 - '06 Solara (2AZ-FE)
February 9, 2007
Introduction
Under certain conditions, customers may experience a M.I.L. "ON" condition with DTC P0011, P0012, or P0016 stored in the Engine Control Module/ECM (SAE term: Powertrain Control Module/PCM). In some cases, the cause of this DTC may be the VVT-i actuator. Use the procedures in this bulletin to verify the operation of the actuator and correct the condition.
Applicable Vehicles
^ 2005 - 2006 model year Solara vehicles equipped with the 2AZ-FE engine and produced BEFORE the Production Change Effective VIN shown below.

Production Change Information

Parts Information

Warranty Information
Applicable Warranty*:
This repair is covered under the Toyota Powertrain Warranty. This warranty is in effect for 60 months or 60,000 miles, whichever occurs first, from the vehicle's in-service date.
* Warranty application is limited to correction of a problem based upon a customer's specific complaint.
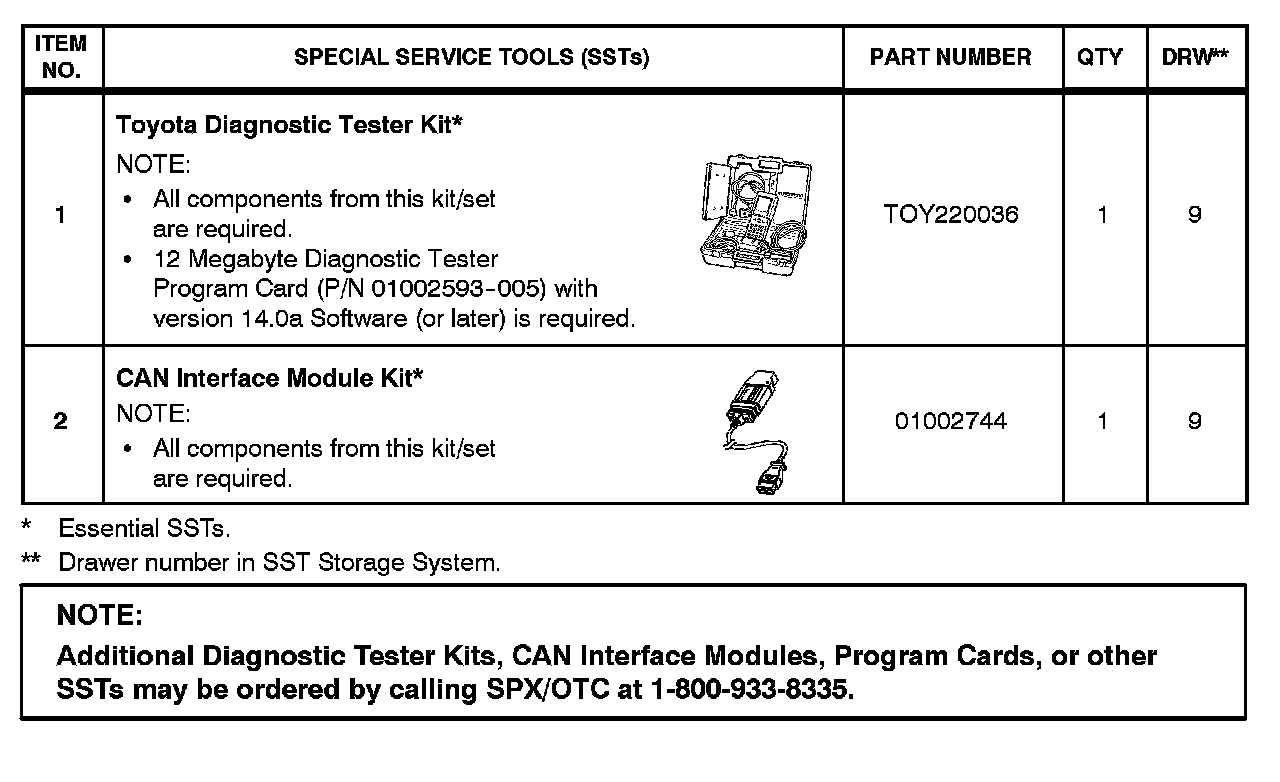
Required SSTs
Repair Procedure
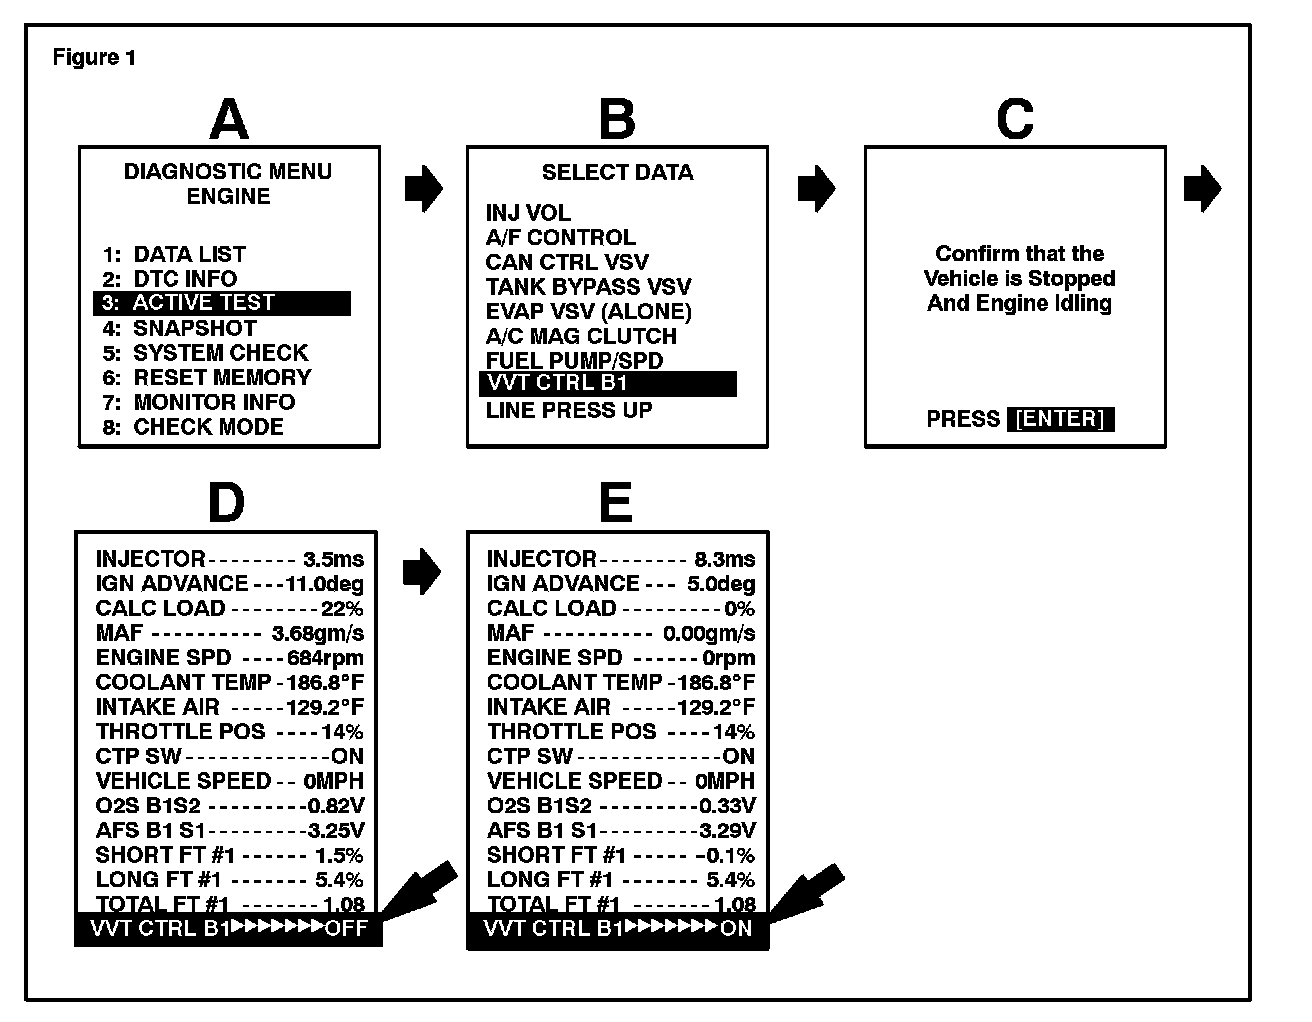
1. Referring to the screen flow in Figure 1 below, connect the Toyota Diagnostic Tester to the vehicle and select the VVT Control Bank 1 Active Test (VVT CTRL B1) from the Active Test Menu.
2. Using the right arrow key, toggle the VVT actuator "ON".
3. Does the engine run rough and/or stall?
YES: Proceed to step 4.
NO: Check the oil control valve operation.
A. Check the resistance of the camshaft timing oil control valve assembly.
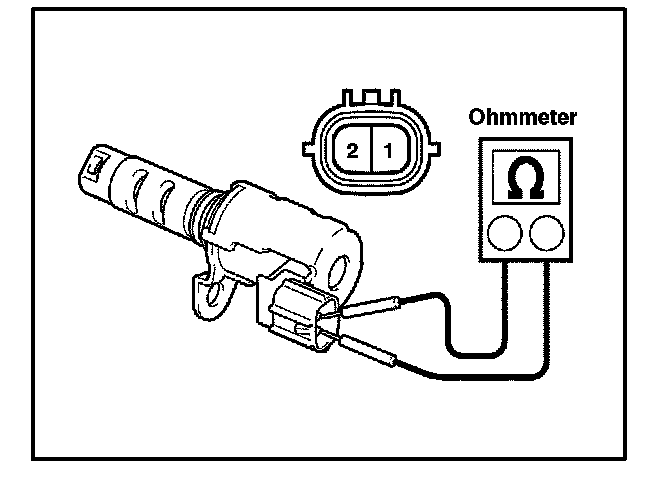
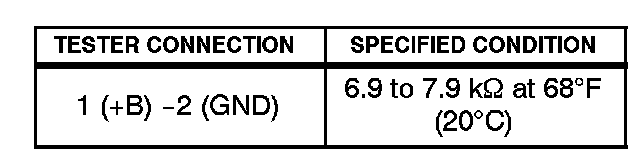
Using an ohmmeter, measure the resistance between the terminals.
If the result is NOT as specified, replace the camshaft timing oil control valve.
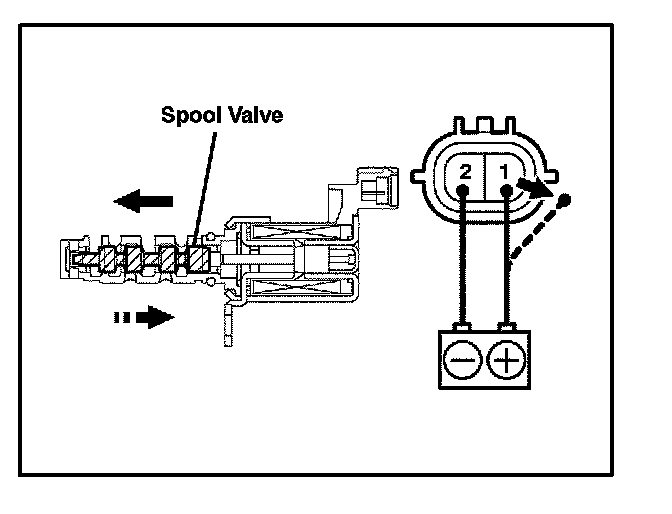
B. Check the operation of the camshaft timing oil control valve assembly.
Apply battery voltage across the terminals, then check that the spool valve operates.
NOTE:
Check: that the spool valve is NOT stuck.
HINT:
The spool valve may NOT return if foreign objects are caught in the spool valve. The object(s) may cause subtle pressure leakage to the advance side, and a DTC may be set.
4. Remove and replace the camshaft timing gear assembly. Refer to TIS:
^ 2005 model year Solara Repair Manual: Engine/Hybrid System - Engine Mechanical - "2AZ-FE: Camshaft: Replacement"
^ 2006 model year Solara Repair Manual: Engine/Hybrid System - Engine Mechanical - "2AZ-FE Engine Mechanical: Camshaft: Removal"
NOTE:
The timing gear MUST be in the unlocked position when installing on the camshaft.
Please see step 5 for instructions to unlock the camshaft timing gear.
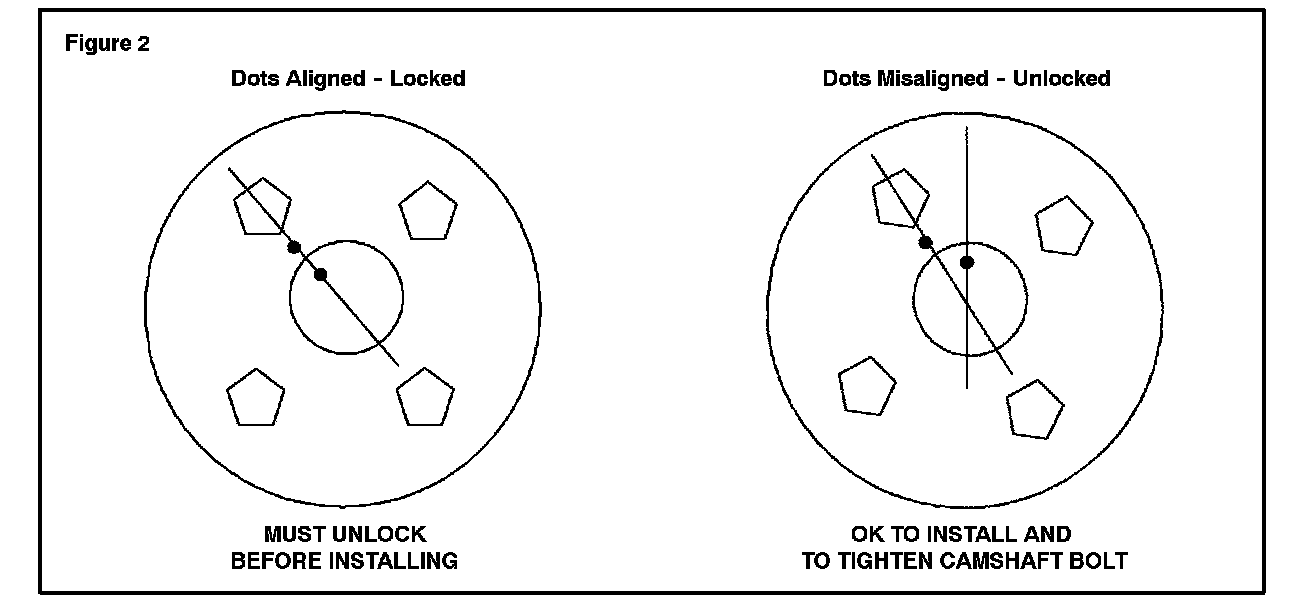
5. Identify whether the camshaft timing gear is unlocked or locked. (See Figure 2.)
^ If the camshaft timing gear is unlocked, it is ready to install.
^ If it is LOCKED, follow the steps below to unlock the camshaft timing gear before installing.
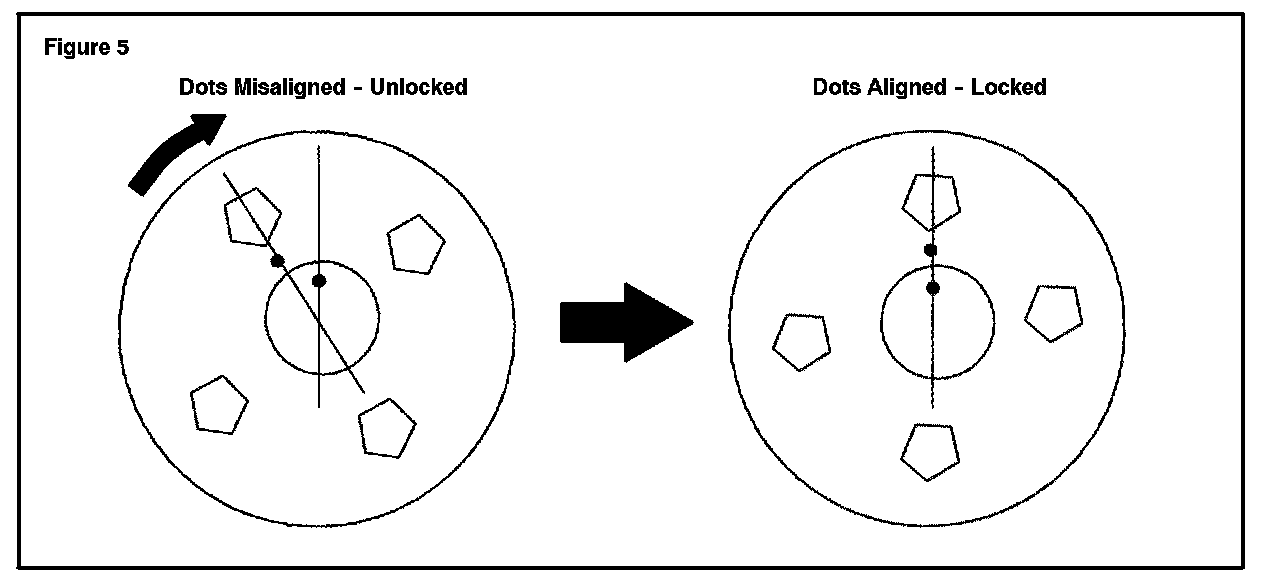
G. After torquing the camshaft bolt, rotate the camshaft timing gear in a clockwise direction while holding the camshaft stationary until the dots are aligned, thereby engaging the camshaft timing gear lock pin.
H. The timing gear is now ready for installation of the timing chain.
NOTE:
Camshaft timing is performed with the camshaft timing gear in the locked position (dots aligned).