Condenser (For Hatchback)
Condenser (for Hatchback):
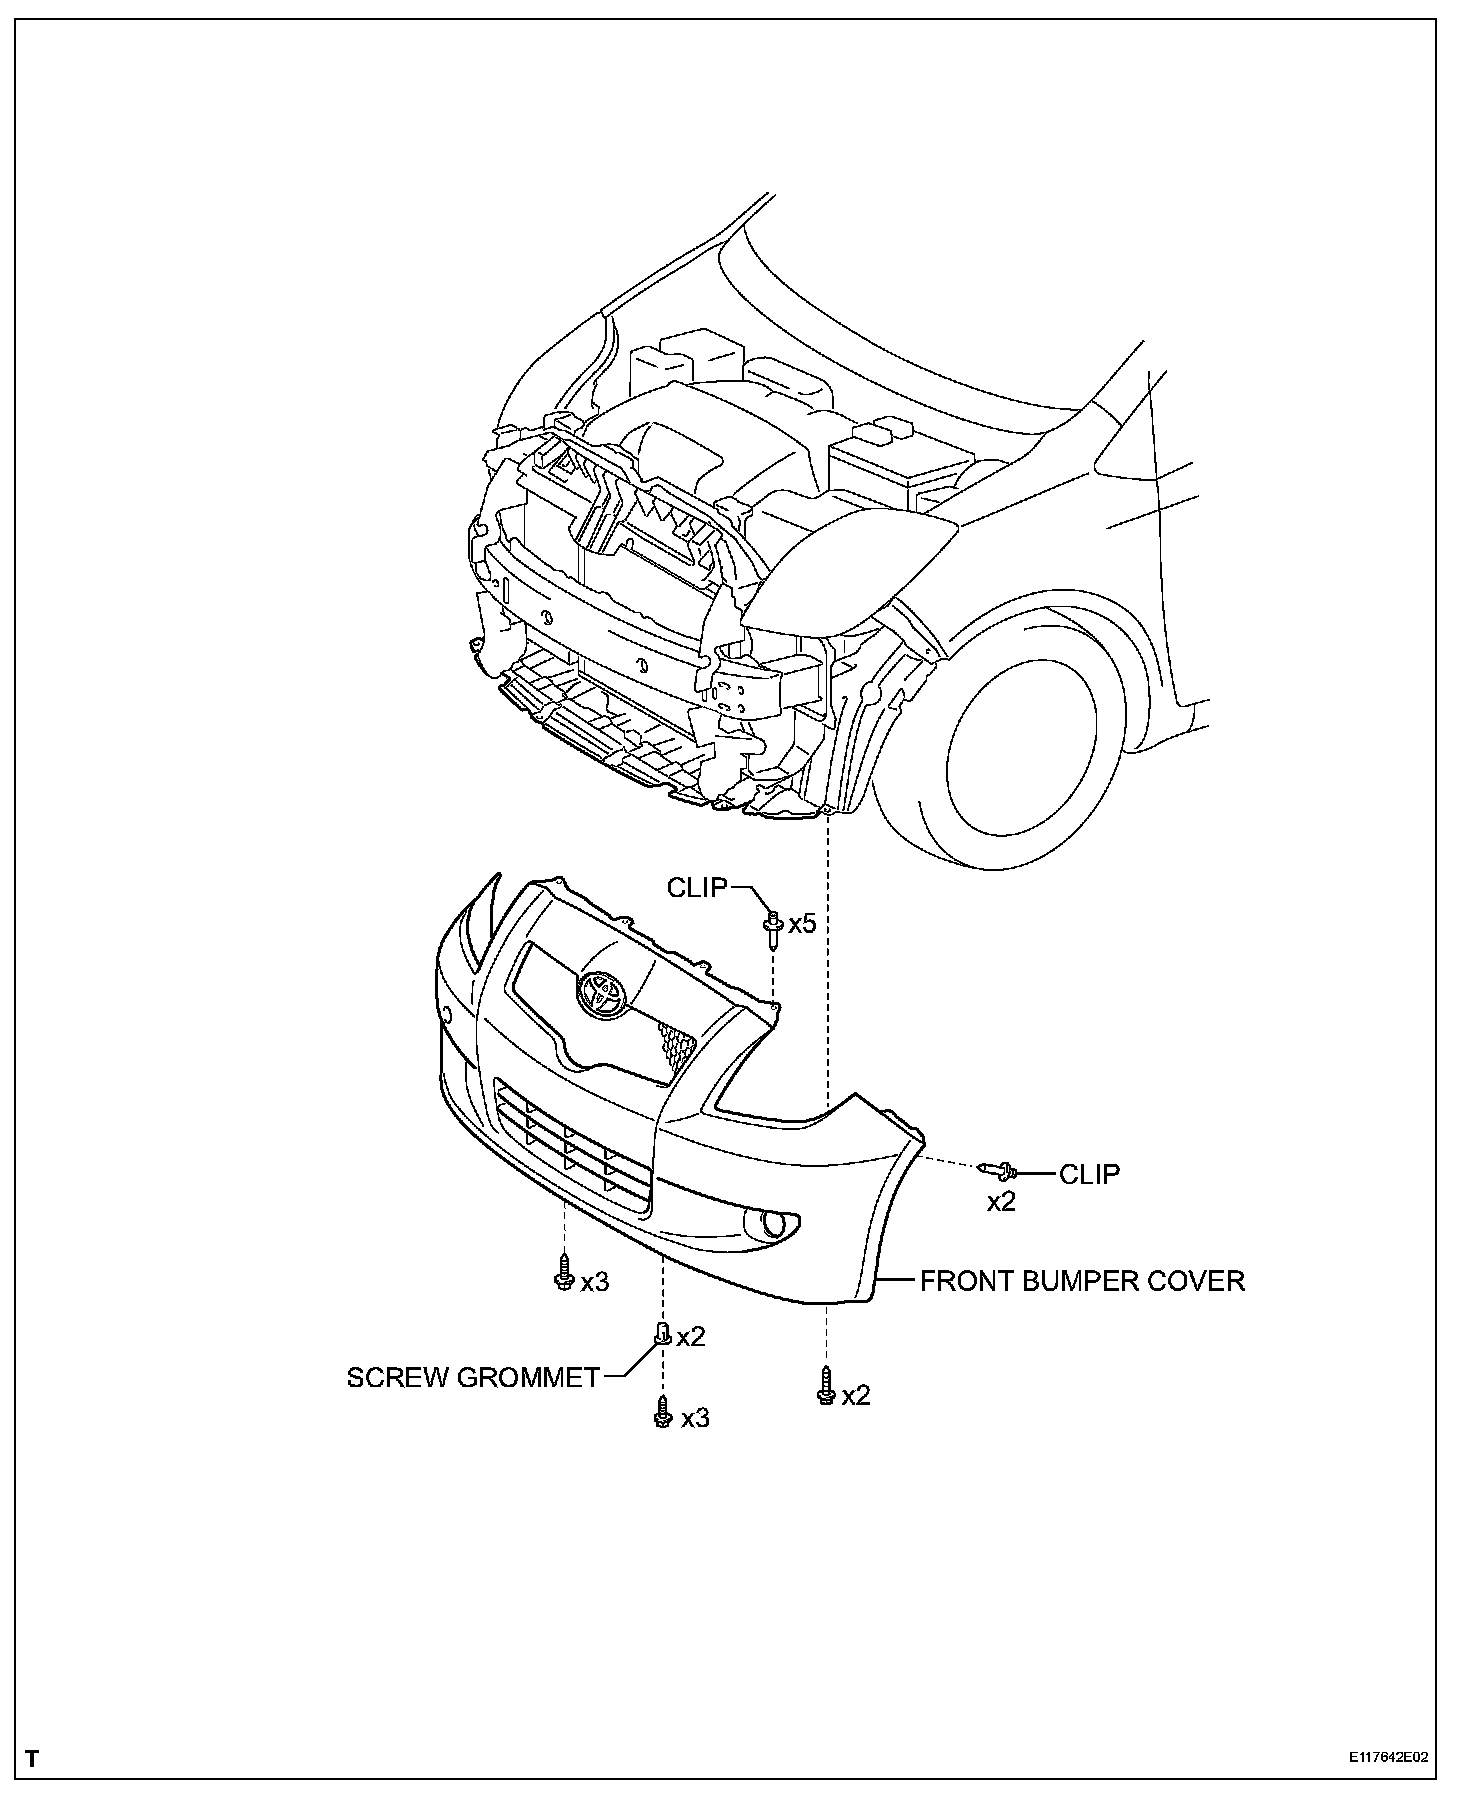
Condenser (for Hatchback):
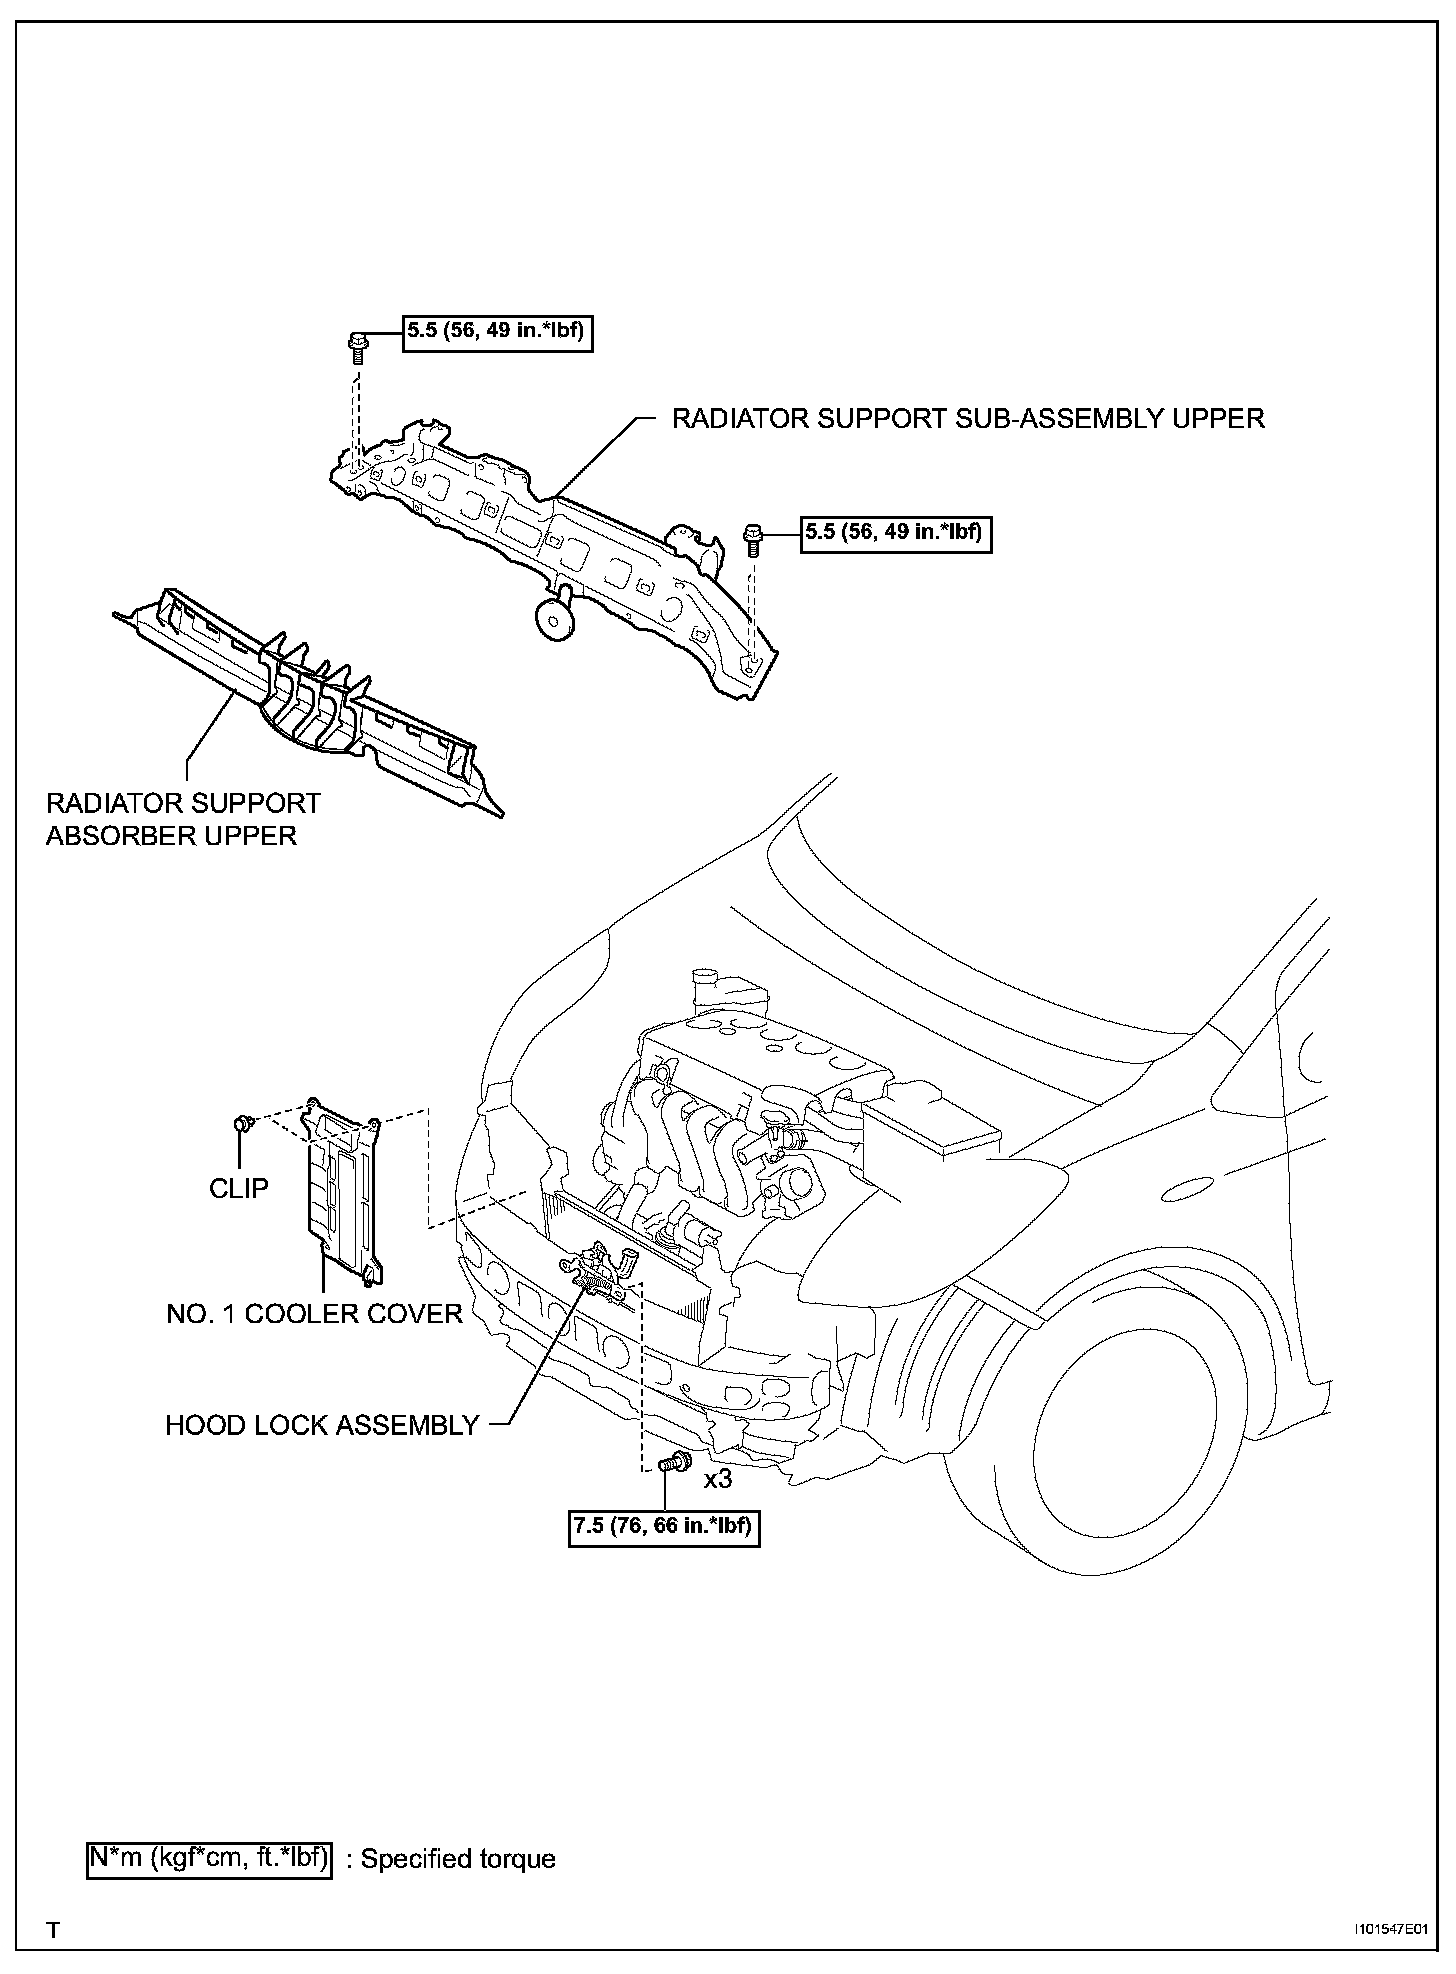
Condenser (for Hatchback):
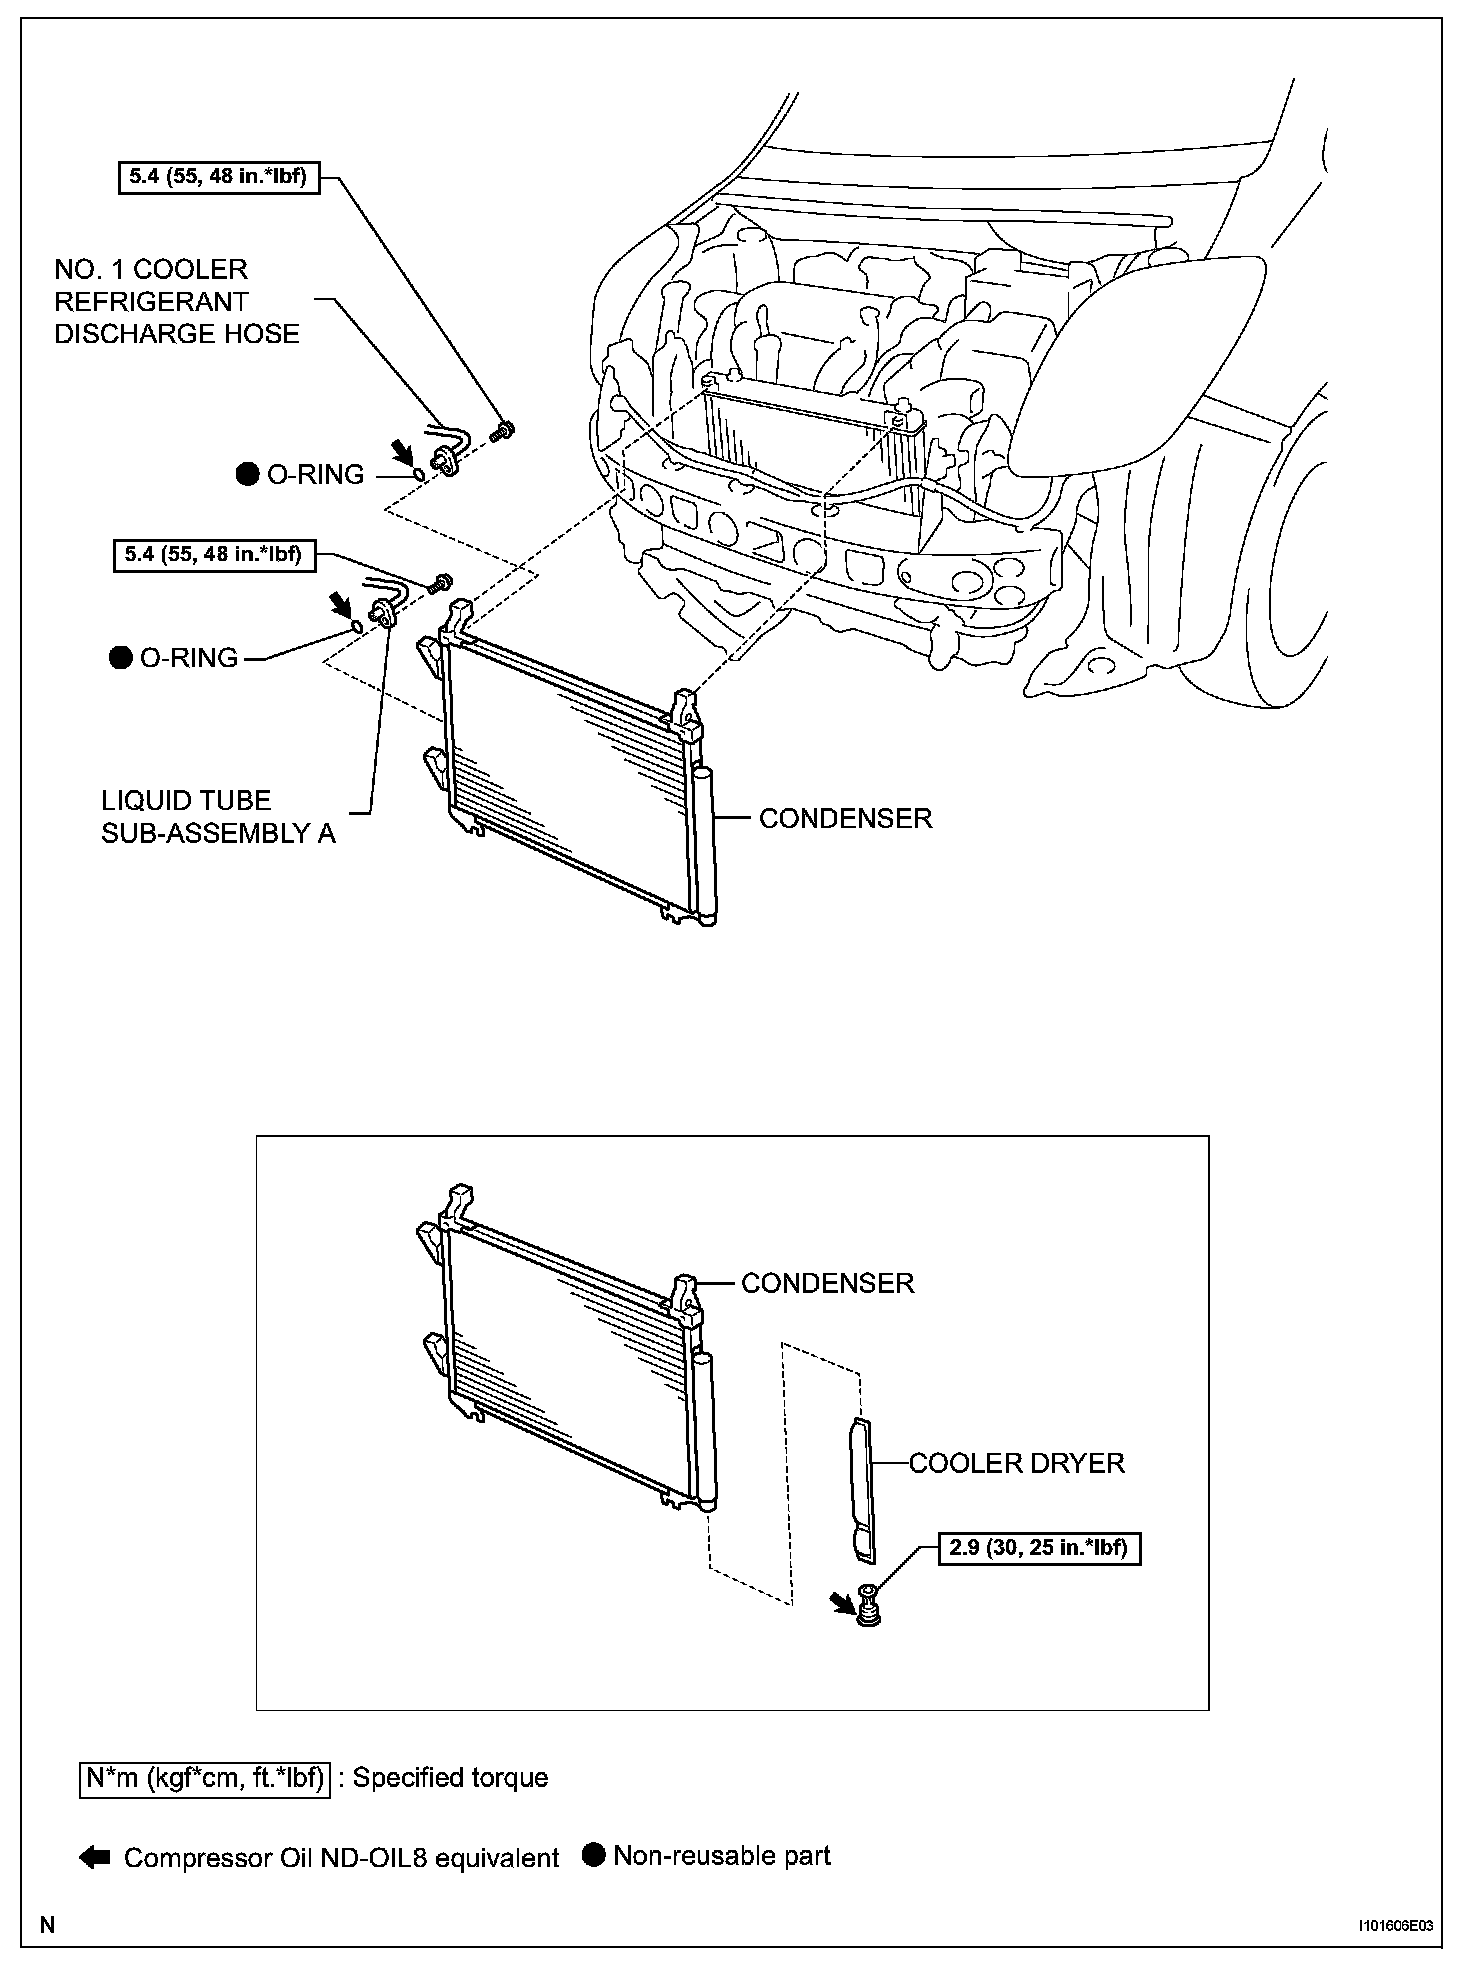
CONDENSER (for Hatchback)
REMOVAL
1. DISCHARGE REFRIGERANT FROM REFRIGERATION SYSTEM
2. DISCONNECT CABLE FROM NEGATIVE BATTERY TERMINAL
3. REMOVE FRONT BUMPER COVER
4. REMOVE RADIATOR SUPPORT ABSORBER UPPER
5. REMOVE NO. 1 COOLER COVER
6. SEPARATE HOOD LOCK ASSEMBLY (w/ Theft Deterrent System)
7. SEPARATE HOOD LOCK ASSEMBLY (w/o Theft Deterrent System)
8. REMOVE RADIATOR SUPPORT SUB-ASSEMBLY UPPER
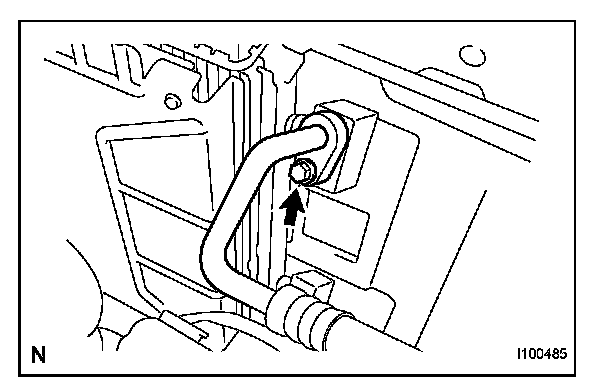
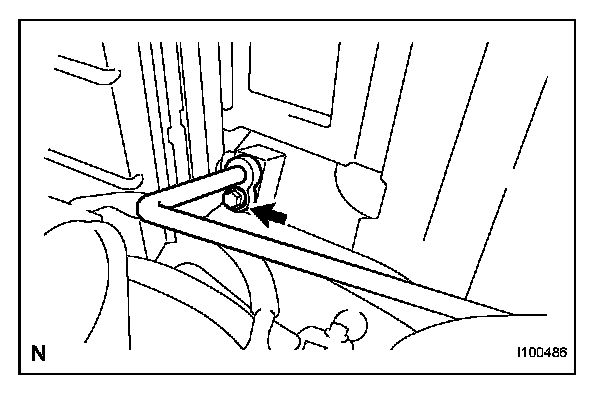
9. DISCONNECT NO. 1 COOLER REFRIGERANT DISCHARGE HOSE
a. Remove the bolt and disconnect the discharge hose from the cooler condenser.
b. Remove the O-ring from the discharge hose.
NOTE: Seal the openings of the disconnected parts using vinyl tape to prevent moisture and foreign matter from entering.
10. DISCONNECT LIQUID TUBE SUB-ASSEMBLY A
a. Remove the bolt and disconnect the liquid tube from the cooler condenser.
b. Remove the O-ring from the liquid tube.
NOTE: Seal the openings of the disconnected parts using vinyl tape to prevent moisture and foreign matter from entering.
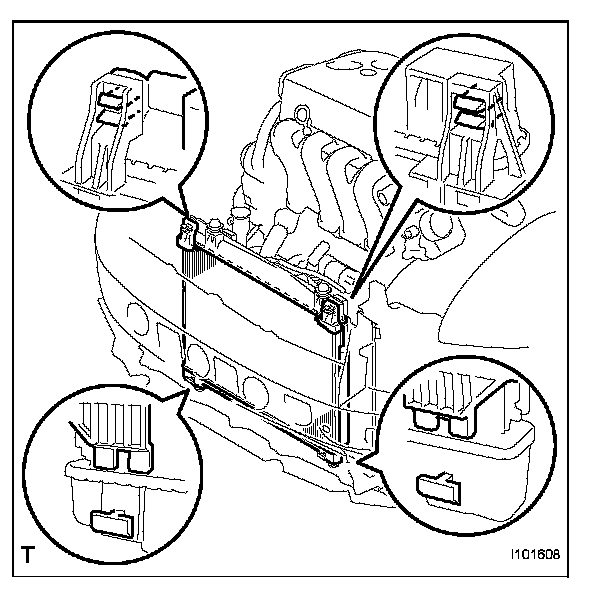
11. REMOVE CONDENSER
a. Disengage the 2 claws and remove the condenser from the vehicle.
NOTE: Do not damage the condenser or radiator when removing the condenser.
INSTALLATION
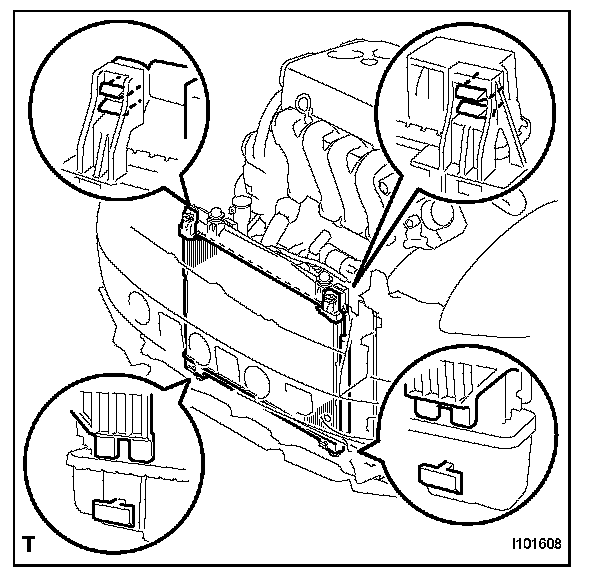
1. INSTALL CONDENSER
a. Engage the 2 claws and install the condenser into the vehicle.
NOTE: Do not damage the condenser or radiator when installing the condenser.
HINT: If a new condenser is installed, add compressor oil to the condenser as follows.
Compressor oil: ND-OIL8 or the equivalent. Add 40 cc (1.35 fl. oz.)
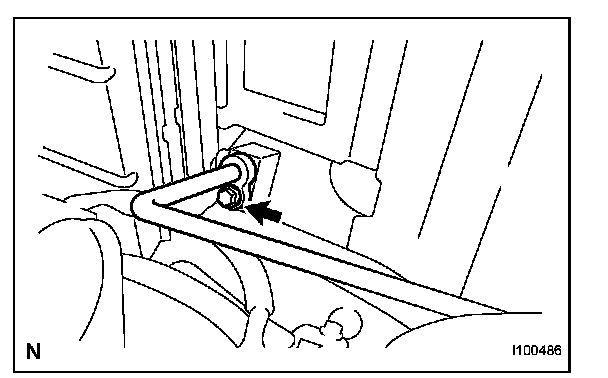
2. INSTALL LIQUID TUBE SUB-ASSEMBLY A
a. Remove the attached vinyl tape from the pipe and the connecting part of the cooler condenser.
b. Apply sufficient compressor oil to a new O-ring and the fitting surface of the pipe joint.
Compressor oil: ND-OIL8 or the equivalent
c. Install the O-ring onto the liquid tube.
d. Install the tube onto the condenser with the bolt.
Torque: 5.4 N.m (55 kgf.cm, 48 in.lbf)
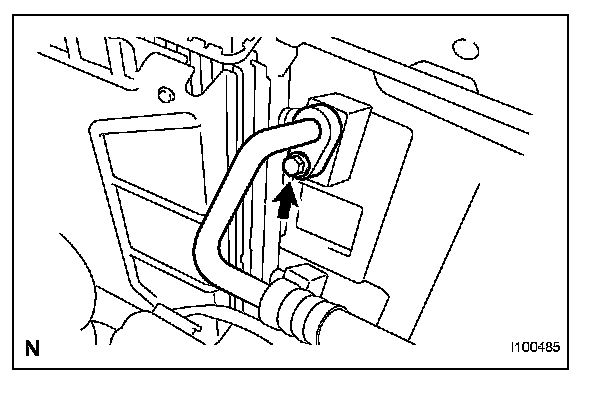
3. INSTALL NO. 1 COOLER REFRIGERANT DISCHARGE HOSE
a. Remove the attached vinyl tape from the hose and the connecting part of the cooler condenser.
b. Apply sufficient compressor oil to a new O-ring and the fitting surface of the hose joint.
Compressor oil: ND-OIL8 or the equivalent
c. Install the O-ring onto the discharge hose.
d. Install the discharge hose onto the condenser with the bolt.
Torque: 5.4 N.m (55 kgf.cm, 48 in.lbf)
4. INSTALL RADIATOR SUPPORT SUB-ASSEMBLY UPPER
5. INSTALL HOOD LOCK ASSEMBLY (w/ Theft Deterrent System)
6. INSTALL HOOD LOCK ASSEMBLY (w/o Theft Deterrent System)
7. INSTALL NO. 1 COOLER COVER
8. INSTALL RADIATOR SUPPORT ABSORBER UPPER
9. INSTALL FRONT BUMPER COVER
10. ADJUST HOOD LOCK ASSEMBLY
11. CONNECT CABLE TO NEGATIVE BATTERY TERMINAL
Torque: 5.4 N.m (55 kgf.cm, 48 in.lbf)
12. CHARGE REFRIGERANT
13. WARM UP ENGINE
14. CHECK FOR REFRIGERANT LEAK