Radiator: Service and Repair
Radiator
Special tools, testers and auxiliary items required
• Refractometer (T10007)
• Drip Tray for VAS 6100 (VAS 6208)
• Hose Clip Pliers (VAS 6362)
• Cooling System Charge Unit (VAS 6096)
• Adapter (V.A.G 1274/8)
Removing
- Remove the front bumper.
- Remove the fan shroud. Refer to => [ Fan Shroud and Fans ] Service and Repair.
- Drain the coolant. Refer to => [ Draining and Filling ] Draining and Filling.
- Disconnect the coolant hoses from radiator.
CAUTION!
To prevent damage to the condenser and the refrigerant lines, do not stretch, kink or bend the pipes and hoses.
- Remove the bolts - arrows - from the radiator brackets.
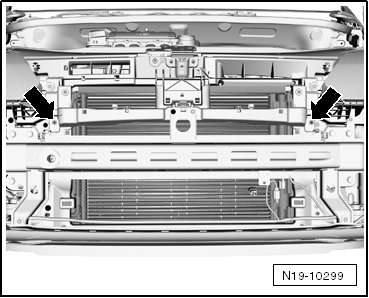
- Move the radiator and condenser toward the rear and out of the lower support. While doing this, pull the lock carrier on the left support - 1 - slightly downward.
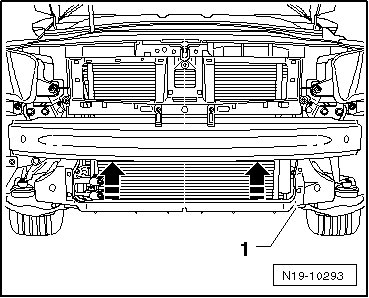
- Remove the bolts for the refrigerant lines on the right side of the radiator - arrow -.
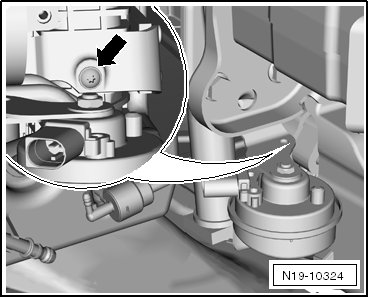
- Remove the condenser bolts. Secure the condenser on the lock carrier using cable ties, for example.
- Remove the radiator downward.
Installing
- Install the radiator from below and secure it to the condenser.
- Install the radiator and condenser in the lower supports.
- Place the upper radiator mount on the radiator and secure it with the lock carrier - arrows -.
- Install the front bumper.
- Install the fan shroud. Refer to => [ Fan Shroud and Fans ] Service and Repair.
Installation is performed in reverse order of removal. When doing this note the following:
• Replace coolant if a new radiator was installed.
• Fill with coolant. Refer to => [ Draining and Filling ] Draining and Filling.
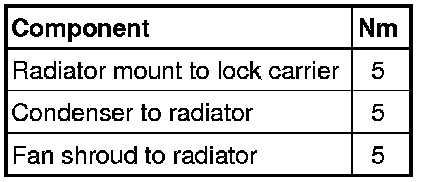
Tightening Specification