Marker Lamp: Service and Repair
Front Side Marker Lamps
Special tools, testers and auxiliary items required
• Trim removal wedge (VAS 3409)
• When removing and installing components in a visible area (switches, covers, trim, etc.), mask off the areas at which a prying tool ( trim removal wedge (3409), screwdriver) will be positioned, using commercially available adhesive tape.
• It is not necessary to disconnect battery.
• Illustrations show removal and installation of left Front, Side Marker Lamps (M11).
• Removal and installation of left and right Front, Side Marker Lamps (M11) is the same.
Removing
- Turn off the ignition and all electrical consumers.
- Carefully press the side marker lamps - 1 - into the bumper cover (0.5 - 1.0 cm) - arrow -.
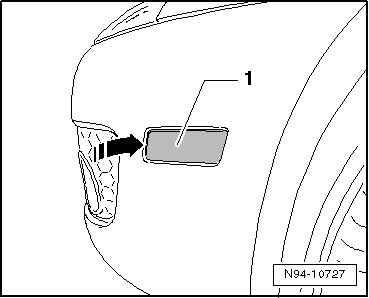
- Position trim removal wedge (VAS 3409) at back - arrow A - on side marker lamps - 1 - and lightly press forward in - direction of arrow B -.
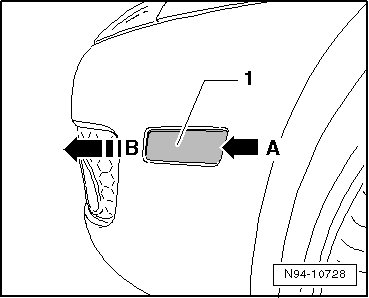
- Remove the side marker lamps - 1 - in the - direction of the arrow - from the bumper cover.
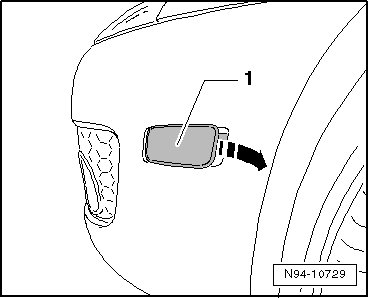
- Remove socket with bulb - 1 - from housing.
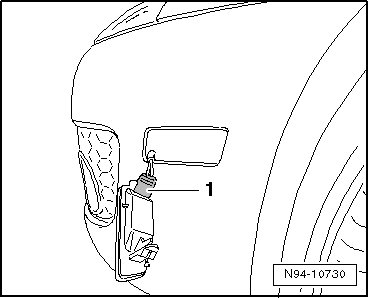
- Remove lamp from socket.
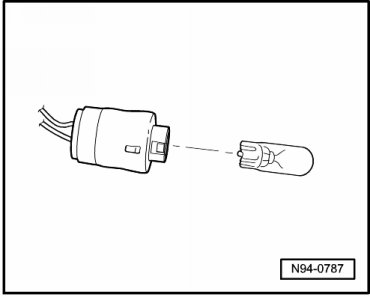
Bulb 12V, 5 W
Installing
- Insert new bulb in lamp socket.
- When sliding on bulb socket - 1 -, ensure markings align.
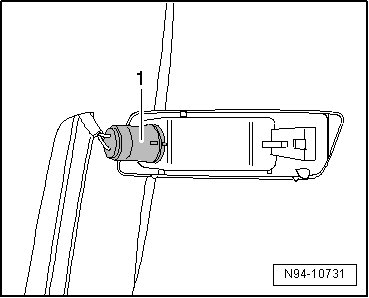
- First insert the front of the side marker lamps in the bumper cover opening and then press on the back of the lamps until they engage audibly.