Clutch Switch: Service and Repair
Clutch Position Sensor (G476)
Special tools, testers and auxiliary items required
• Hose Clamps Up to 25 mm Dia. (3094)
Removing
- First check whether a coded radio is installed. If so, obtain the anti-theft code.
- Turn off the ignition and disconnect the battery ground cable.
- Remove the air filter housing, if it is located near the battery.
- Remove the battery and the battery tray.
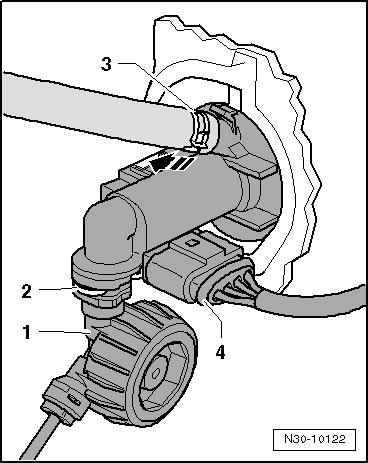
If a hose/line assembly - 1 - with a round component is installed directly below the master cylinder, the hose/line assembly must be removed.
• While performing the following work, make sure no brake fluid comes into contact with the longitudinal member or with the transmission below. If it does, clean the area thoroughly.
• Place a lint-free cloth under the clutch master cylinder.
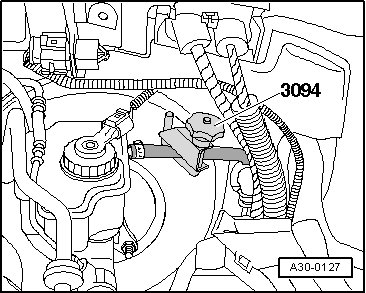
- Clamp off the supply hose to the master cylinder using hose clamps up to 25 mm dia. (3094).
- Disengage the clip - 2 - using a screwdriver or a pointed tool and pull the clip out until it stops.
- Remove the hose/line assembly - 1 - from the master cylinder and seal it off.
- Disconnect the connector - 4 -.
- Unclip the clutch position sensor (G476) from the master cylinder - arrow - and remove it.
Installing
Installation is performed in the reverse order of removal. Pay attention to the following:
• Replace the clips
• Allocate all components via the Parts Catalog.
If the hose/line assembly was removed:
- Press the hose/line assembly - 1 - and seal - 2 - into the clutch master cylinder connection - 4 - until the clip - 3 - clicks into place.
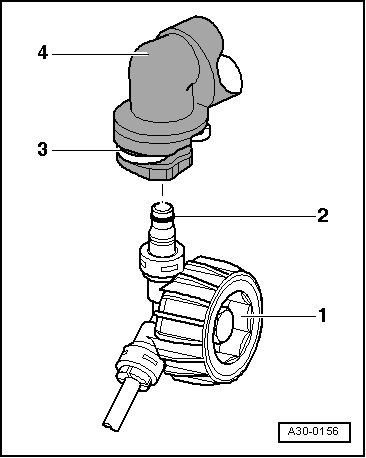
- Pull on the hose/line assembly to make sure it is secure.
- After removing the (3094), bring the hose back to its original shape.
- Bleed the clutch system. Refer to => [ Clutch System, Bleeding ] Procedures.
- Install the battery tray and the battery.
- If removed, install the air filter housing.
- Connect the battery and follow the steps for after connecting the battery.