Power Window Control Module: Service and Repair
Door Lamps and Switches
Driver Window Regulator Switch Module
Special tools, testers and auxiliary items required
• Trim removal wedge (VAS 3409)
• When removing and installing components in a visible area (switches, covers, trim, etc.), mask off the areas at which a prying tool ( trim removal wedge (VAS 3409), screwdriver) will be positioned, using commercially available adhesive tape.
In vehicles with 4 doors, the following components are integrated in window regulator switch module on driver side:
• Left Front Window Regulator Switch (E40)
• Driver's Left Rear Window Regulator Switch ( E53)
• Driver's Right Rear Window Regulator Switch ( E55)
• Driver's Right Front Window Regulator Switch ( E81)
• Child Safety Button (E318)
• Push Button Light (L76)
• The components listed above cannot be replaced separately.
In vehicles with 2 doors, the following components are integrated in window regulator switch module on driver side:
• Left Front Window Regulator Switch (E40)
• Driver's Right Front Window Regulator Switch ( E81)
• Push Button Light (L76)
• The components listed above cannot be replaced separately.
Removing
- Turn off the ignition and all electrical consumers.
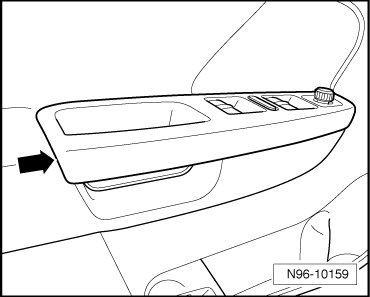
- Carefully pry installation frame out of door trim - arrow - using trim removal wedge (VAS 3409) or a screwdriver.
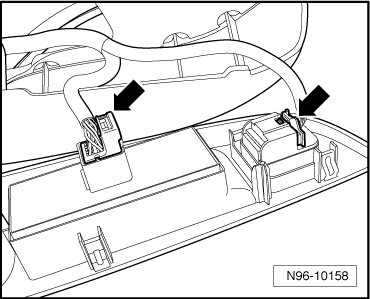
- Disconnect connectors - arrows -.
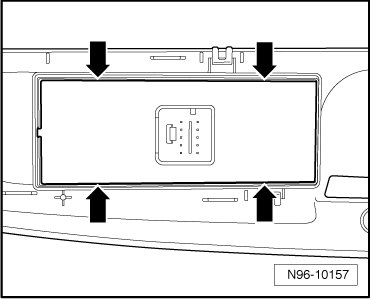
- Disengage retaining tabs - arrows - and remove switch from installation frame.
Installing
Install in reverse order of removal.