Removal and Replacement
Haldex Clutch
Special tools, testers and auxiliary items required
• Torque Wrench (5-50 Nm) (V.A.G 1331)
• Drip Tray for VAS 6100 (VAS 6208)
• Engine-/Gearbox Jack (V.A.G 1383 A)
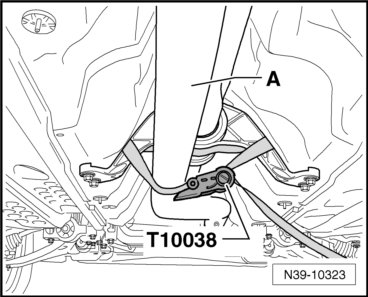
- Support the front exhaust pipe - A - using the tensioning strap (T10038) on the driveshaft center bearing.
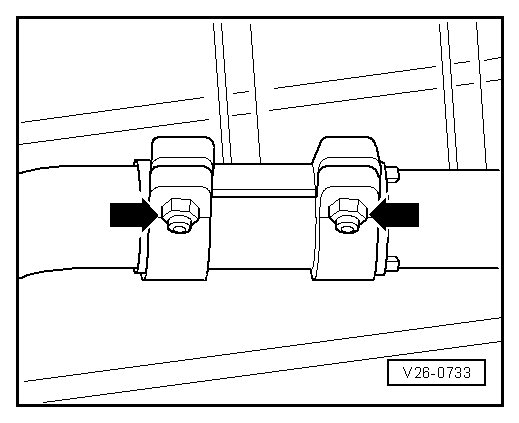
- Disconnect the exhaust system at the clamping sleeve - arrows - and then remove the rear section of the exhaust system.
- Remove the noise insulation from below engine/transmission.
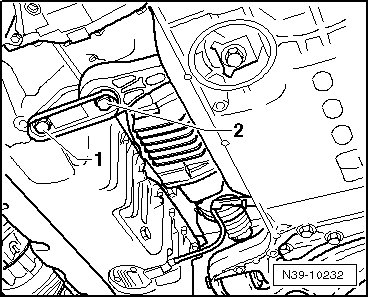
- Remove the pendulum support bolts - 1 and 2 -.
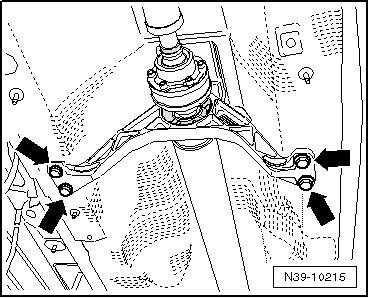
- Loosen the driveshaft intermediate bearing bolts - arrows - approximately 2 turns.
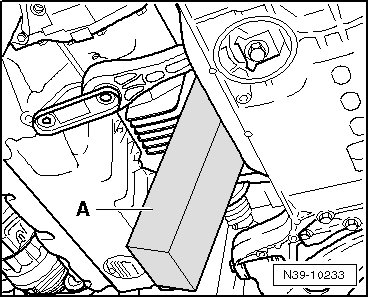
- Push the engine and transmission forward and secure the in the position using a piece of wood - A -.
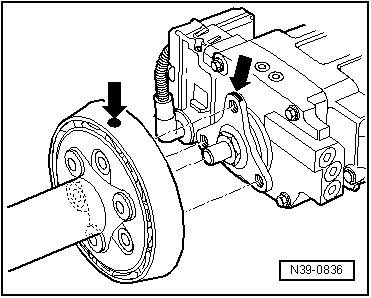
So that noises due to imbalance do not occur later:
- If no marks - arrows - are present, mark the position of the driveshaft flexible disc with respect to the input flange on the rear final drive.
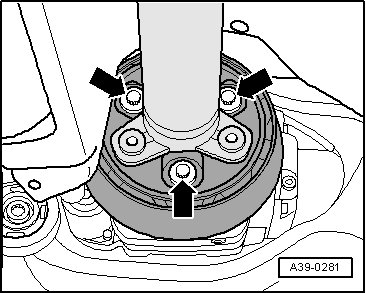
- Remove the driveshaft flexible disc bolts - arrows - from the input flange.
- Place a cloth on the tunnel brace.
- Remove the driveshaft with flexible disc from the input flange and place it on the tunnel brace.
• In order to remove the Haldex clutch, it is necessary to have sufficient clearance to the flexible disc.
- When doing this, only loosen the tunnel brace, do not remove it.
- Place the drip tray for VAS 6100 (VAS 6208) under the final drive.
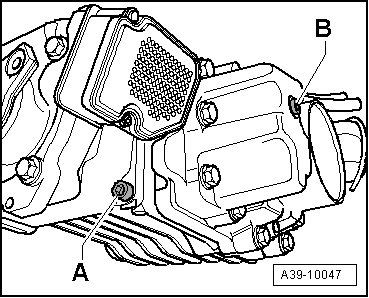
- Remove the drain plug - A - and completely drain the high performance gear oil for Haldex coupling.
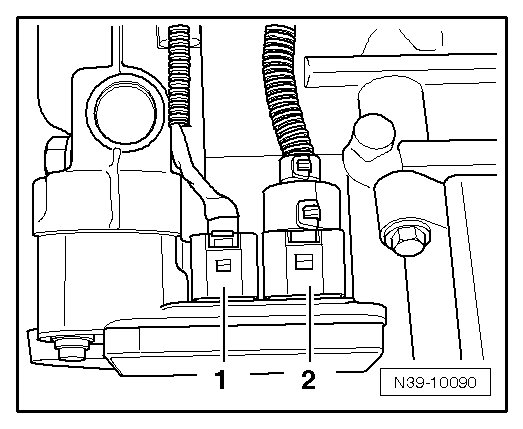
- Disconnect the connector - 2 - from the all wheel drive control module.
- Place drip tray for VAS 6100 (VAS 6208) under the final drive.
- Install the drain plug - A - with a new seal and tighten it to 30 Nm.
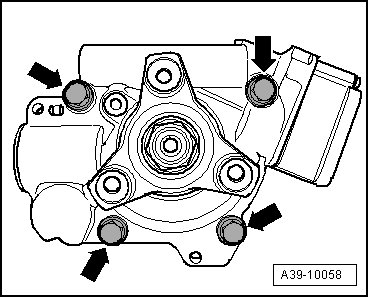
- Remove the bolts - arrows - and remove the Haldex clutch from the rear final drive.
Installing
Install in the reverse order of removal. Note the following:
- Install all parts marked to each other in their original positions.
- Insert the new O-ring - arrow - and lightly coat it with high performance gear oil for Haldex coupling.
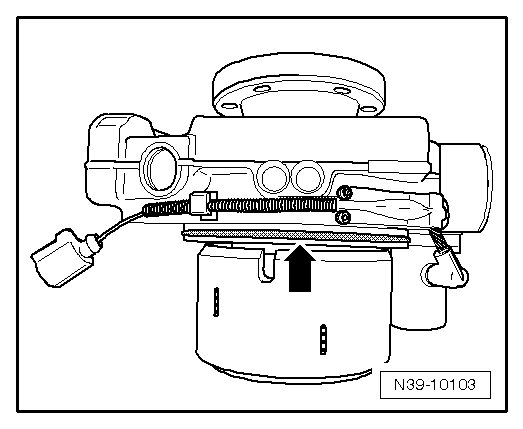
- Insert the Haldex clutch in the rear final drive.
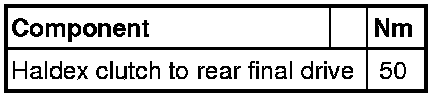
- Tighten the bolts - arrows - to specification, see - item 1 - in the => [ Haldex Clutch Overview ] Haldex Clutch Overview.
- Connect the harness connector - 2 - to the all wheel drive control module.
- Tighten the driveshaft flexible disc to input flange bolts. Tightening specifications, refer to the following:
CC and Golf R, refer to => [ Driveshaft Overview ] Driveshaft Overview.
- Align the intermediate bearing free of tension and tighten the bolts - arrows -. Tightening specifications, refer to the following:
CC and Golf R, refer to => [ Driveshaft Overview ] Driveshaft Overview.
- Tighten the tunnel brace.
Tiguan and Golf R
CC
- Secure the pendulum support with new bolts.
- Install the exhaust system and align it so that it is free of tension.
- Install the noise insulation. Refer to one of the following:
For the Tiguan and Golf R
For the CC
- Add new high performance gear oil for Haldex coupling and check the oil level in the Haldex clutch. Refer to => [ Haldex Clutch Oil Level, Checking or Filling ] Haldex Clutch Oil Level, Checking or Filling.
Tightening Specifications