Heater Core Case: Service and Repair
Heater Core
Special tools, testers and auxiliary items required
• Drip Tray For Workshop Hoist (VAS6208)
• Hose Clamps up to 40 mm (3093)
• Compressed air gun, commercially available
Removing
- Place (VAS 6208) under the engine.
Contact with hot engine coolant can cause severe scalding.
Coolant temperature can be above 100 °C (212 °F) with a warm engine. The coolant system is under pressure.
If necessary, reduce pressure and temperature before repairs.
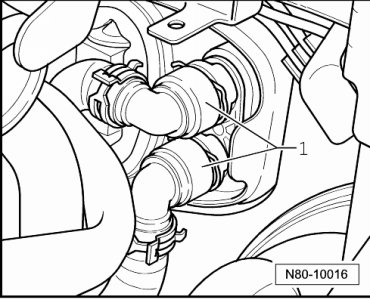
- Clamp the coolant hoses - 1 - using the (3093) and remove the coolant hoses from the heater core.
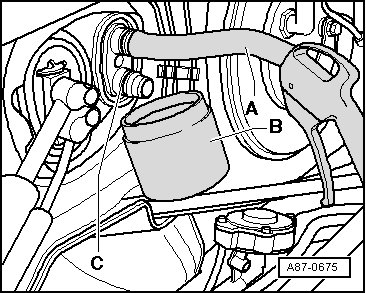
- Connect a section of hose - A - to the upper connection on the heater core.
- Hold a container - B - under the lower connection - C -.
- Using a compressed air gun, carefully clear out any coolant still inside the heater core into the container - B -.
Depending on the engine, additional parts may need to be removed such as the charge air pipe.
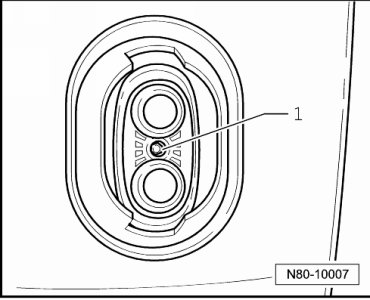
- Loosen the bolt - 1 - on the connection flange between the heater core connections, but do not remove it.
• By loosening the screw - 1 -, the coolant pipes are loosened and it is easier to remove the heater core.
- Remove the knee airbag mount.
- Remove the storage compartment for the driver side trim panel.
- Remove the trim in the left footwell of the center console (it is not necessary to remove the trim any further).
- Remove the driver footwell vent. Refer to=> [ Driver Side Footwell Vent ] Driver Side Footwell Vent.
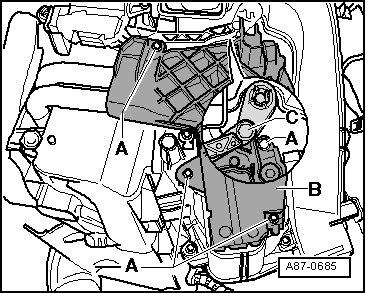
- Remove the bolts - A - and the cover - B -.
• There are different versions of cover - B -.
• The illustration shows the version with Auxiliary Air Heater Heating Element (Z35).
• If the temperature door lever - C - is a position that hinders access to the upper screw - A -. Change the position of the temperature door using the hot and fresh air controls; on vehicles with Climatronic (for example"Hi" setting).
- Cover the carpet the in area under heater core with waterproof foil and water absorbing paper.
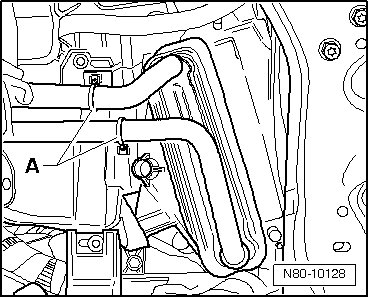
- Open the clamps - A - and remove the coolant pipes from the heater core.
- Remove the heater core from the heater.
Installing
Install in reverse order of removal. When doing this, note the following:
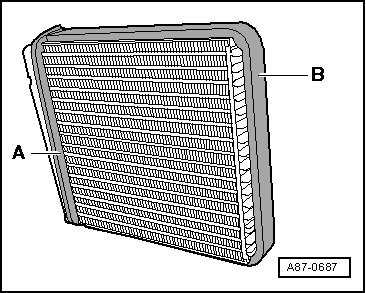
- Inspect the seals - A - and - B - attached on the heater core. Only install the heater core if the seals are not damaged.
• An incorrectly glued seal can roll up into heater when sliding in the heater core.
• Cold air may flow past heater core if seal is damaged or not properly fitted.
- Check the heater (while the heater core is removed) through the opening - A - for the heater core, for dirt.
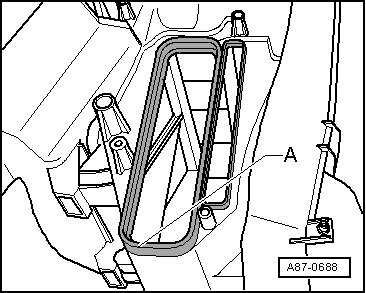
- Remove any dirt or coolant which has leaked out of the heater (for example, after removing a leaking heater core).
- Install the heater core into the heater.
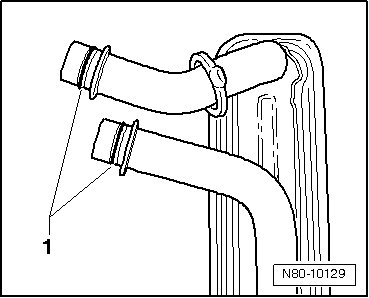
- Replace the sealing rings - 1 - coat them with coolant before installing.
• If pipe clamps are deformed, replace them.
- Attach the coolant pipes to the heater core.
- Pipe clamps - A - must be able to be twisted slightly when installing onto the coolant pipes.
- Pipe clamps - A - must be installed as shown in the illustration.
- Tighten the pipe clamps - A - to 2 Nm.
- Make sure the clamps - A - are tight after tightening the screws. They must completely enclose the flange on the heater core and coolant pipe and must not come in contact with other components.
- Tighten the connection flange bolt - 1 - between the heater core connections to 2 Nm.
- After assembling the grommet - C -, check to see that the plenum chamber bulkhead is in the correct position.
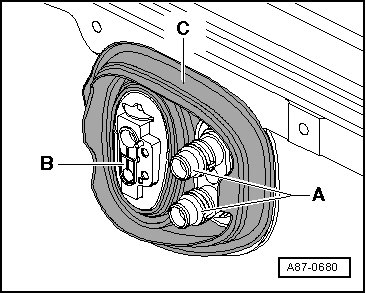
- Seal flange for coolant pipes to heater core - A - and for expansion valve (to evaporator) - B - at pass-through of grommet - C - with silicon adhesive sealant if necessary (to prevent water from penetrating).
- Replace the seals.
- Replace all the coolant after replacing the heater core.
- Inspect the coolant circuit for leaks. Pay close attention to the connections between the coolant pipes and the heater core when doing this.