Upper Intake Manifold
Upper Intake Manifold
Special tools, testers and auxiliary items required
• Torque Wrench (5-50 Nm) (V.A.G 1331)
• Assembly Tool (T10118)
Removing
• Read the safety precautions before starting. Refer to => [ Safety Precautions ] Safety Precautions.
• Follow the guidelines for clean working conditions. Refer to => [ Clean Working Conditions ] Clean Working Conditions.
• If a fuel injector is removed, then the combustion chamber Teflon(R) seal and the support washer must always be replaced. Refer to => [ Combustion Chamber Teflon(R) Seal and Support Washer ] Combustion Chamber Teflon(R) Seal and Support Washer.
• Seal (- item 4 - in the => [ Fuel Injector Overview, Cylinders 1, 3 and 5 ] Fuel Injector Overview, Cylinders 1, 3 and 5) must also be replaced on fuel injectors for cylinders 1, 3 and 5.
• If the fuel rail is removed, the fuel injector spring - arrow - must be replaced.
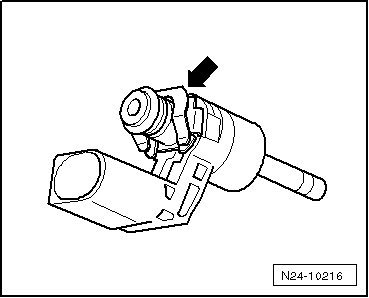
Note the following whenever working inside the engine compartment due to limited space:
• Route all lines and wires in their original locations.
• Ensure sufficient clearance to all moving or hot components.
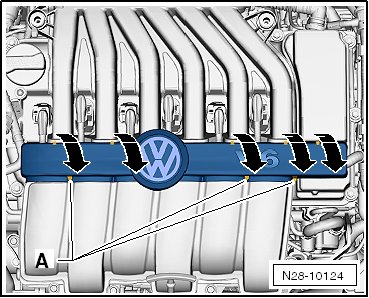
- Unclip the cover strip off the ignition wiring harness - arrows - and move it forward from the tabs - A -.
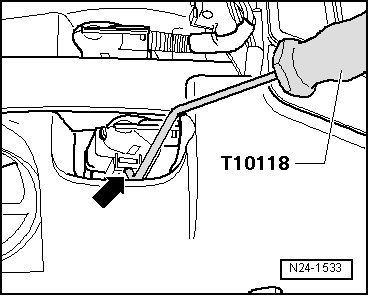
- Place the assembly tool (T10118) on the release button - arrow - and carefully pull up all connectors for the ignition coils with power output stage.
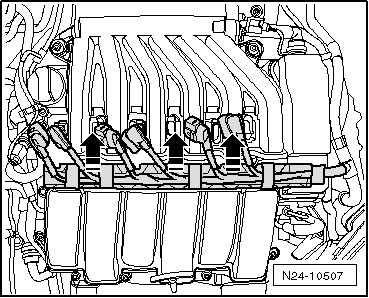
- Press the wire channel upward using a screwdriver and move the connectors to the side.
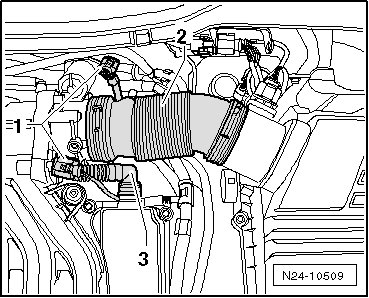
- Disconnect the connectors - 1 -, remove the intake pipe - 2 - and disconnect the vent hose - 3 - for the crankcase ventilation from the cylinder head cover.
- Remove the lines - arrows - from the upper intake manifold.
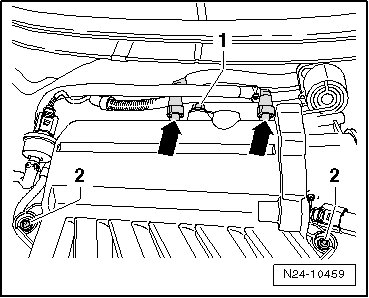
- Remove the intake manifold rear support bolt - 1 -.
- Remove the intake manifold front support bolts - 2 -.
- Remove the intake manifold upper bolts - 1 through 5 -.
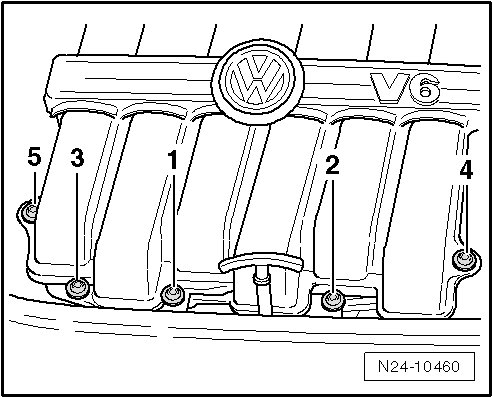
- Remove the upper intake manifold and lay it on a suitable surface.
• Cover the intake passages in the lower intake manifold with clean cloths.
Installing
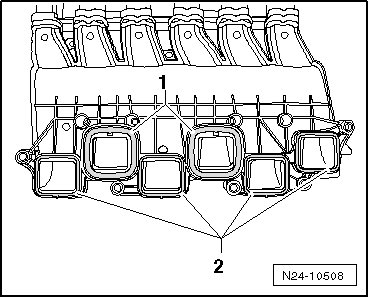
• Remove the gaskets from the lower intake manifold and install them again just before installing the lower intake manifold to keep them clean.
- Install the gaskets in the upper intake manifold and lightly coat them with clean engine oil.
- 1 - "large" gaskets
- 2 - "small" gaskets
- Mount the upper intake manifold onto the lower intake manifold.
- Tighten the upper intake manifold to lower intake manifold bolts evenly starting from the inside and working toward the outside - 1 through 5 -. Tightening specification: 10 Nm
- Then, install and tighten the intake manifold support bolts.
Further installation is in the reverse order of removal.
Tightening specifications, refer to => [ Intake Manifold Overview ] Intake Manifold Overview.