Headlamp Alignment Switch: Service and Repair
Headlamp Switch (E1)
• Turn off the ignition and all electrical consumers.
• Remove the key.
• When removing and installing components in visible area (switches, covers, trim, etc.), cover by taping the areas at which a prying tool ( trim removal wedge (3409) , screwdriver) will be positioned using commercially available adhesive tape.
The headlamp switch consists of
• Fog Lamp Switch (E7)
• Headlamp Switch Light (L9)
Removing
- Turn the headlamp switch to "0".
- Push the headlamp switch handle in - arrow 1 - and turn it to the right - arrow 2 -.
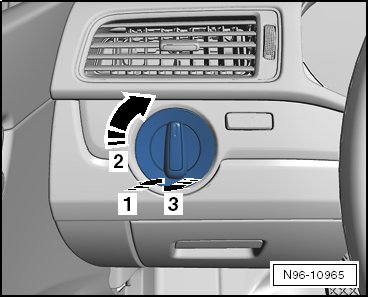
- Hold the rotary handle in this position and remove the headlamp switch from the instrument panel by the handle - arrow 3 -.
- Disconnect the connector - arrow -.
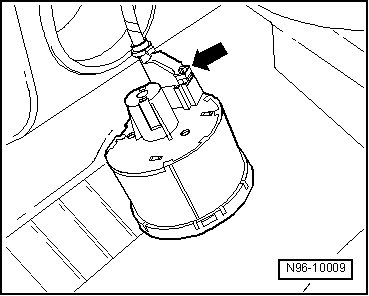
Installing
- Connect electrical connector.
- Hold the headlamp switch firmly and press in rotary handle of headlamp switch - arrow 1 - and turn slightly toward right - arrow 2 -.
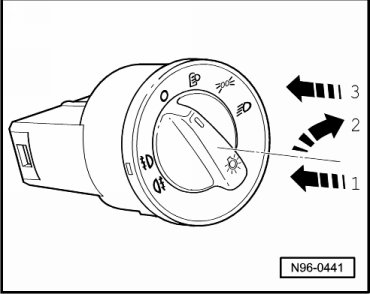
- Hold the rotary handle in this position and insert the headlamp switch into the instrument panel - arrow 3 -.
- Turn the rotary handle to "0" to lock the switch in the instrument panel.