Battery, Charging
Battery, Charging
Special tools, testers and auxiliary items required
• Battery Charger VAS 5903 (VAS 5903)
Risk of injury. Follow all Warnings and Safety Precautions. Refer to => [ Battery Safety Precautions ] Battery Safety Precautions.
Batteries that have a light yellow visual indicator do not have to be tested or charged. Jump starting must not be used!
There is a risk of explosion during testing, charging or jump starting.
These batteries must be replaced.
• The battery temperature must be at least 10 °C (50° F).
- Turn off the ignition and all electrical consumers.
- Plug in the electrical system connector of the charger. The last selected operation mode is shown on the display. Refer to => [ Battery Charger ] Battery Charger (VAS 5903).
- Select battery type using INFO.
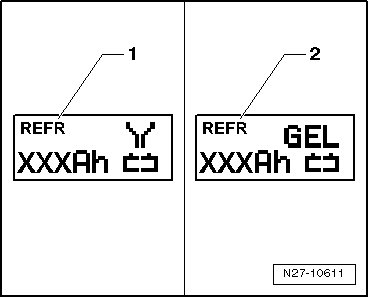
The symbol - 1 - for "standard charge of wet batteries" or the symbol - 2 - for "standard charge of Gel/Absorbant Glass Mat (AGM) batteries" is indicated in the display.
- Set the capacity (Ah) of the battery to be charged with the corresponding button "Up" [Up Arrow] or "Down" [Down Arrow].
- Clamp the red charging clamp "+" to the positive battery terminal.
• In the case of vehicles with a start/stop function and an installed battery monitoring control module (J367) , the black charge terminal - must be connected to the body ground. The start/stop system will malfunction if it is connected to the negative terminal on the battery.
- Connect the black charging clamp "-" to the negative battery terminal.
The charger recognizes the nominal voltage of the connected battery (6 V, 12V, or 24 V) and begins the charging process automatically.
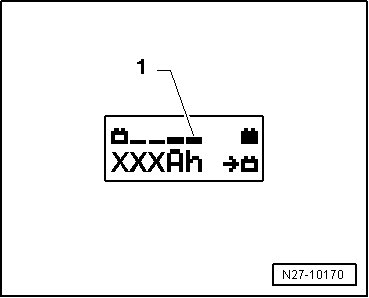
At a charge condition of approximately 80 - 85%, charging unit begins the "Final-charging". The fourth bar is indicated on the display - 1 -. The battery is ready for operation.
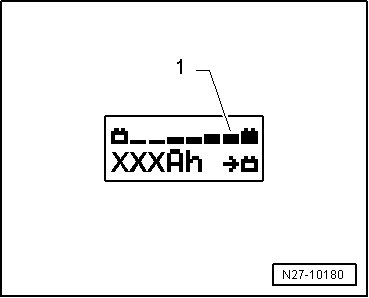
With a charge status of 100 %, all bars are indicated on the display.
• With the battery type "standard charge", parallel operation of consumers during the charging process is possible. The charging time is lengthened by this.
• Depending on battery type, the charger switches over to sustain charging after approximately 1-7 hours. To achieve a 100% charge status, the battery should remain connected to the charger for that long.
Possible Malfunctions and How They Are Handled
1 - Displayed Voltage Does Not Match The Nominal Voltage
- Hold the appropriate button "Up" [Up Arrow] or "Down" [Down Arrow] until the charging process begins.
2 - Displayed Battery Voltage Does Not Match Rated Voltage - Charging Process Has Already Begun
- Press START / STOP twice.
- Hold the appropriate button "Up" [Up Arrow] or "Down" [Down Arrow] until the charging process begins.
3 - The Charger Does Not Recognize A Battery, When The Battery Voltage Is Less Than 2 Volts
The display remains unchanged.
The selected battery type and Ampere hours (Ah) are displayed.
End Battery Charging Process
- Press START / STOP.
- Remove the black charging clamp "-" of the charger from the negative battery terminal.
- Remove the red charging clamp "+" of the charger from the positive battery terminal.
- Pull out the electrical system connector of the charger.