Front Door Window
Front Door Window
Special tools, testers and auxiliary items required
• Torque wrench (V.A.G 1783)
• The following describes removing and installing the left door window. Removing and installing the right door window is identical.
Removing
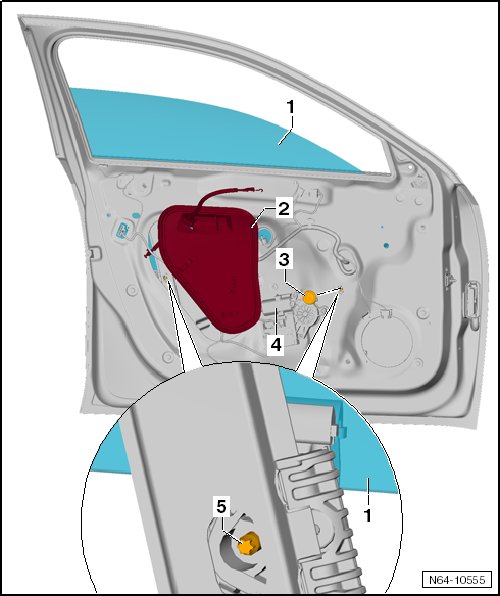
Perform the following:
- Remove the front door trim panel.
- Remove the cover - 2 -. Refer to => [ Door Cover ] Door Cover.
- Pry the cap - 3 - out.
- Lower the door window - 1 - until the clamping screws in the door window are accessible.
• If it is not possible to do this because the window regulator motor is faulty - 4 -, then remove the motor. Refer to => [ Front Window Regulator Motor ] Service and Repair.
• Then the door window can be moved.
Turn the clamping screw - 5 - to the right and loosen it.
- Turn the clamping screws - 5 - (quantity: 2) to the right to loosen it and separate the clamping brackets.
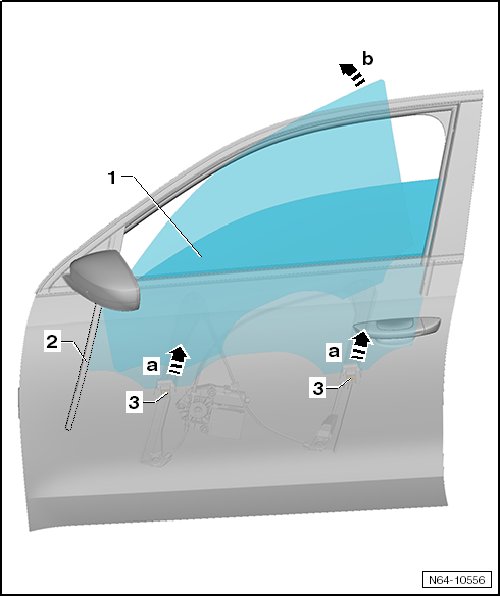
- Remove the door window - 1 - out of the brackets - 3 - - arrows a -.
- Lift the rear door window - 1 - and remove it in from the window guides - 2 - - arrow b -.
Installation
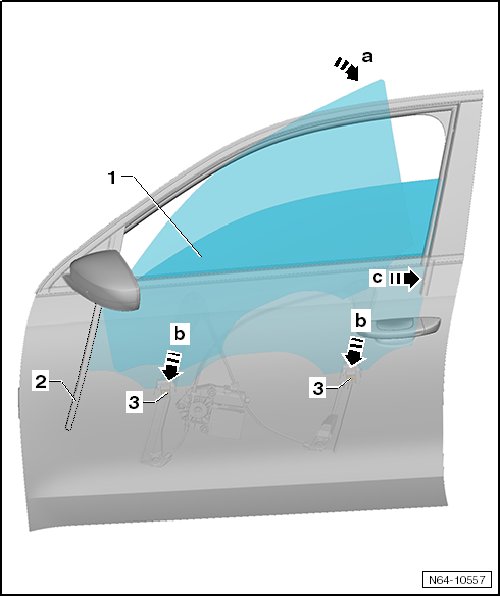
- Install the door window - 1 - into the window guides - 2 - - arrow a -.
• Make sure the door window is inserted correctly in the window guide.
- Without using any pressure, guide the door window - arrows b - into the clamping brackets - 3 -.
- Align the door window with the window frame - arrow c -.
- Turn the clamping screws - 5 - (quantity: 2) to the left to tighten it.
Tightening specification for the clamping screws - 5 -: 8 Nm.
Install in reverse order of removal.
• Perform a functionality test before installing the cap - 3 -, the cover - 2 - and the door trim panel.