Housing Assembly HVAC: Service and Repair
Complete unit, replacement
Removing
WARNING: Before starting work: read and observe Safety Precautions when working on A/C systems. Technician Safety Information
See also General Information on repair and replacement of A/C system components. General Information On Repair
- Disconnect battery ground lead.
- Empty system of refrigerant, refer to Service and Repair - Procedures Service and Repair
- Remove dashboard, refer to Body and Frame - Interior Trim - Dash Board - Service and Repair - Procedures Service and Repair
In engine compartment:
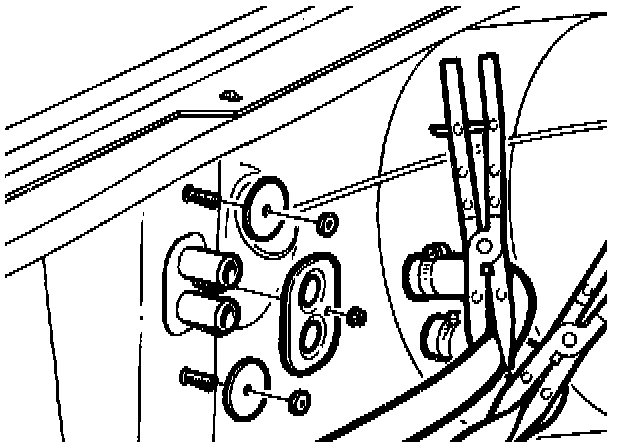
- Disconnect heater hoses at firewall.
- Clamp each hose with a hose clamp before disconnecting. Remove plate washer.
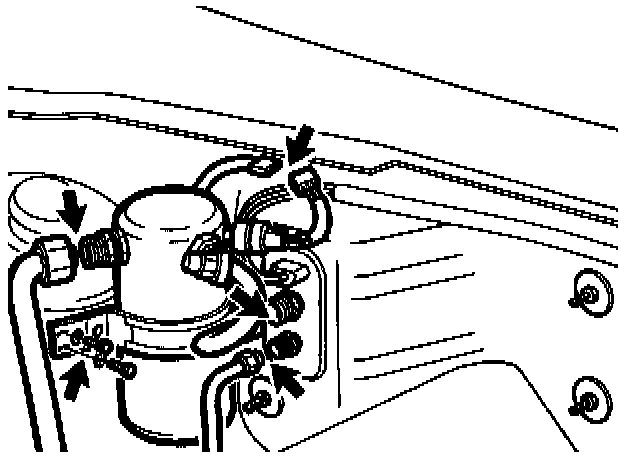
- Undo evaporator and air receiver connections at firewall.
- Remove air receiver/dryer from suspension strut tower.
- First undo connector.
Note: Plug connections immediately, including receiver connections if unit is to be reinstalled.
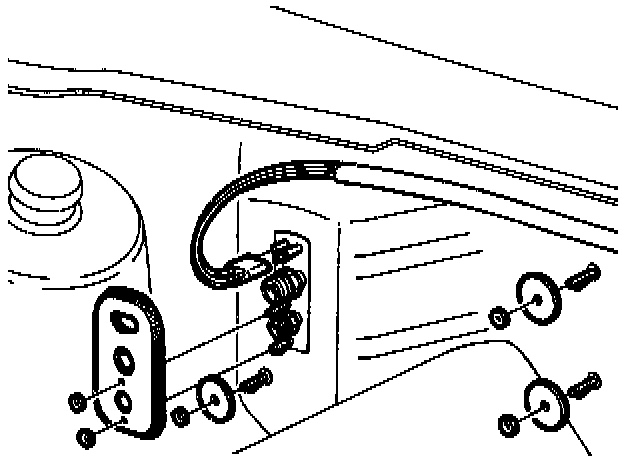
- Disconnect vacuum lines from firewall.
Remove:
- plate washer and foam rubber seal at firewall lead-through to firewall
- climate unit from firewall.
Inside car:
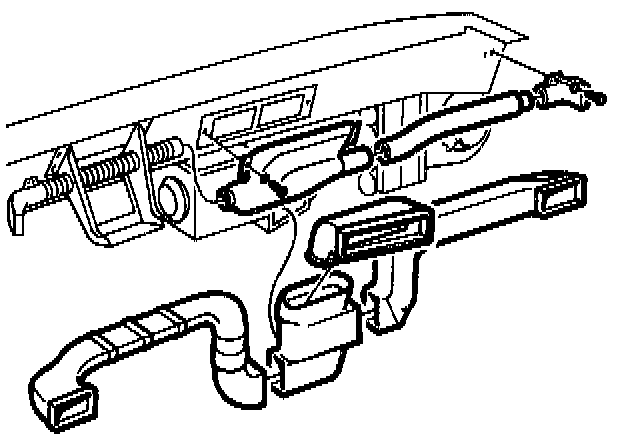
- Remove heater and defroster ducts.
(Do not remove duct through steering column mounting.)
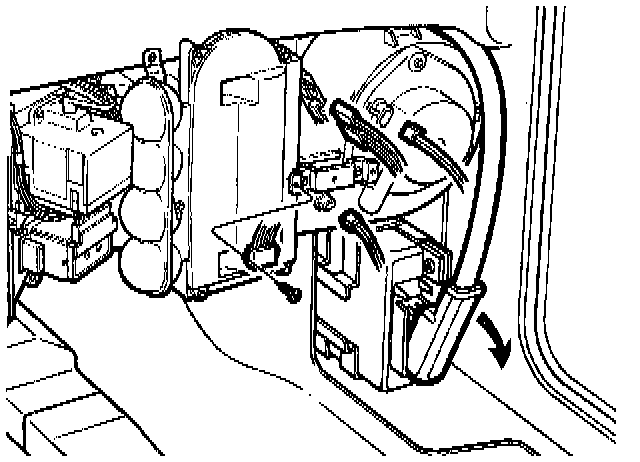
Disconnect following leads from climate unit:
- positive terminal strip
- connector for ambient temperature sensor, blower motor, power stage and control module (if applicable).
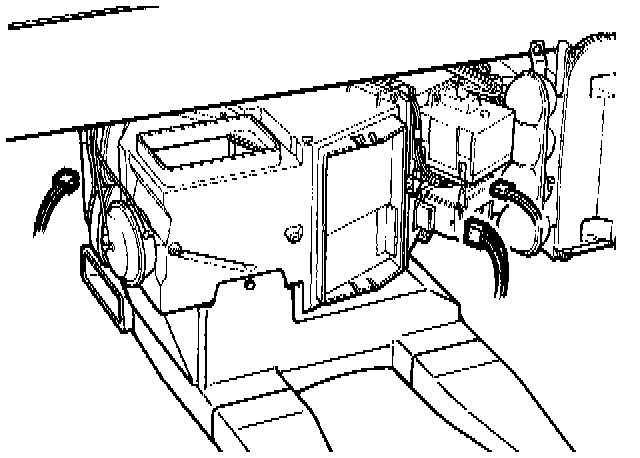
Disconnect connector for:
- coolant temperature sensor (connector at right in illustration)
- solenoid valves
- servomotor.
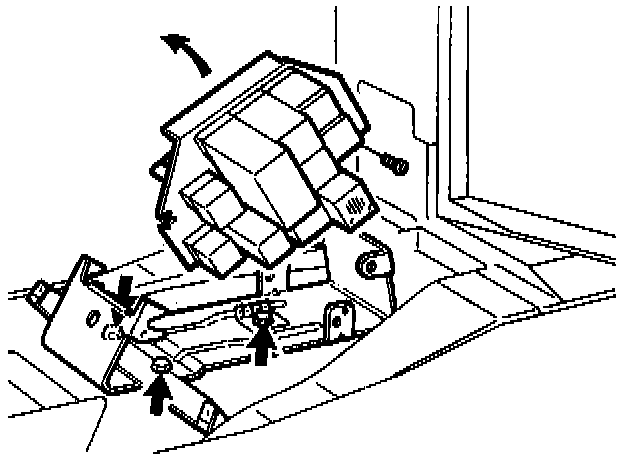
- Lift and tilt back relay board.
- Also remove relay board bracket.
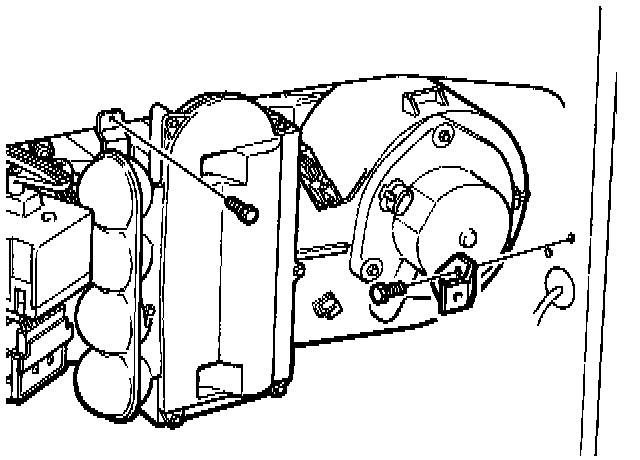
- Remove screw securing climate unit to dashboard on right-hand side.
- Undo mounting above vacuum tank.
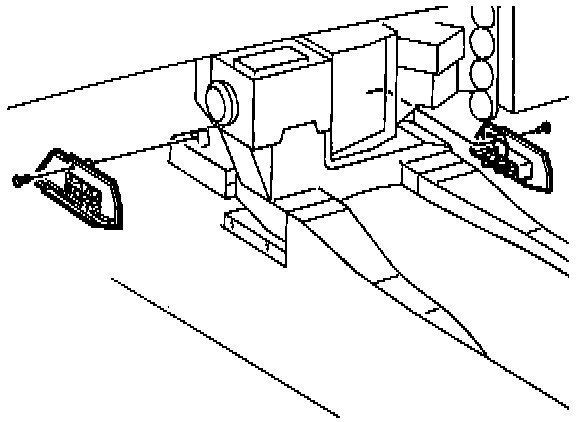
- Remove vents from floor air distribution box.
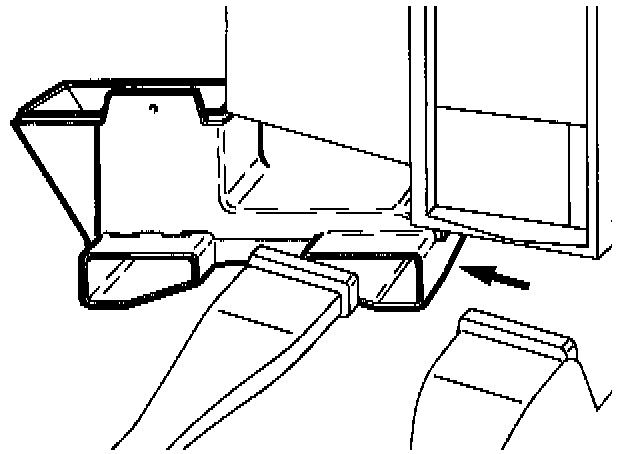
- Remove floor air distribution box.
- Carefully prise air ducts upward while pulling air distribution box to left.
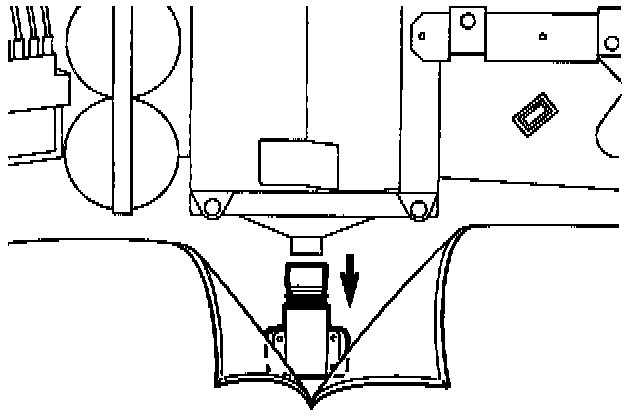
- Fold back carpet and disconnect evaporator drain.
- Lift out climate unit towards right.
Installation
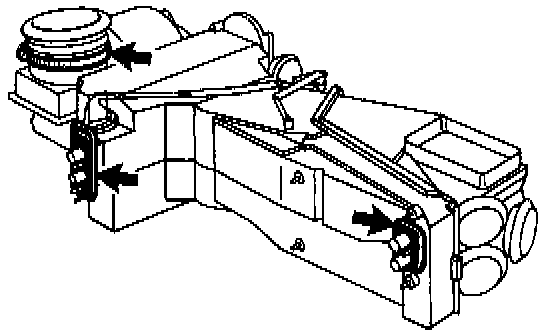
- Ensure that foam rubber seal and plate washer are in place before climate unit is lifted into position.
- Check both at heater and evaporator.
- Check that rubber gaiter is securely clamped at air intake.
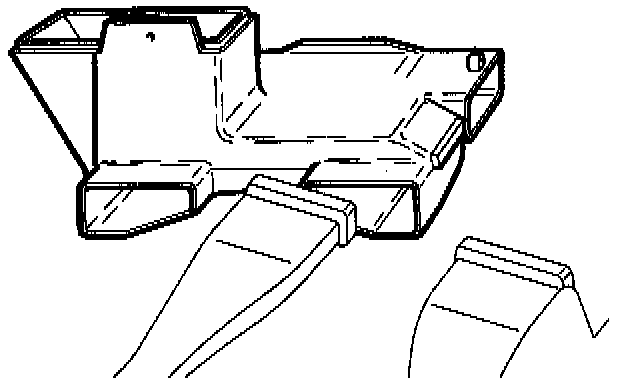
- Install heater and defroster ducts.
- Place air distribution box in temporary position.
- Lift in climate unit from right-hand side.
- Fit air distribution box and climate unit together. Attach air vents to box. Install knee bolster bracket.
Attach:
- unit to mounting above vacuum tank
- bracket to right-hand A-post.
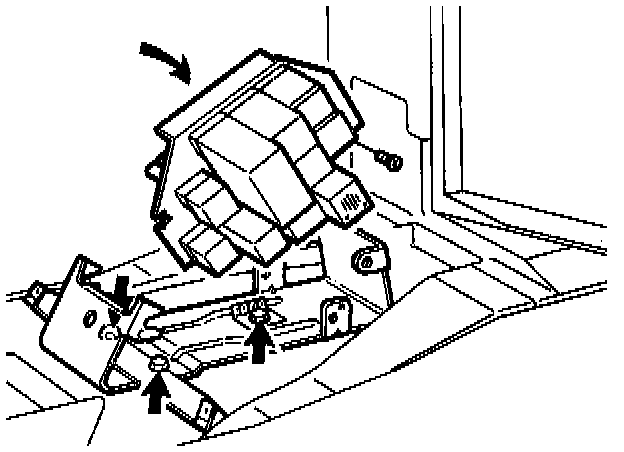
- Install relay board bracket.
Do not forget to connect ground rail to front screw of bracket.
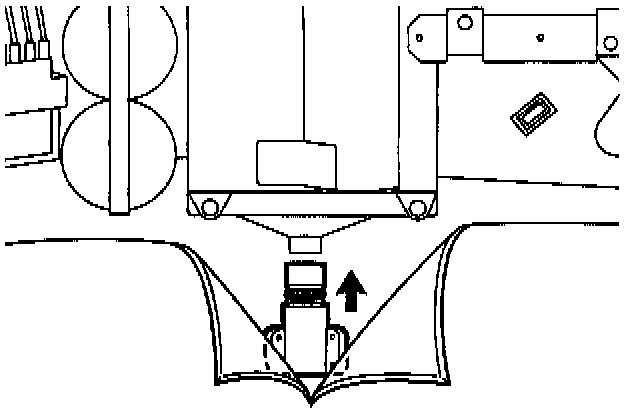
- Install relay board.
- Install evaporator drain.
Reconnect leads to:
- coolant temperature sensor
- servomotor
- solenoid valves.
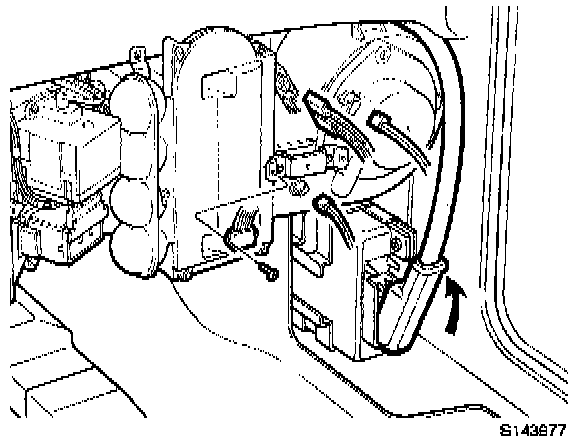
Reconnect leads to:
- blower motor
- ambient temperature sensor
- power stage
- control module (if applicable).
- Reconnect positive terminal strip.
In engine compartment:
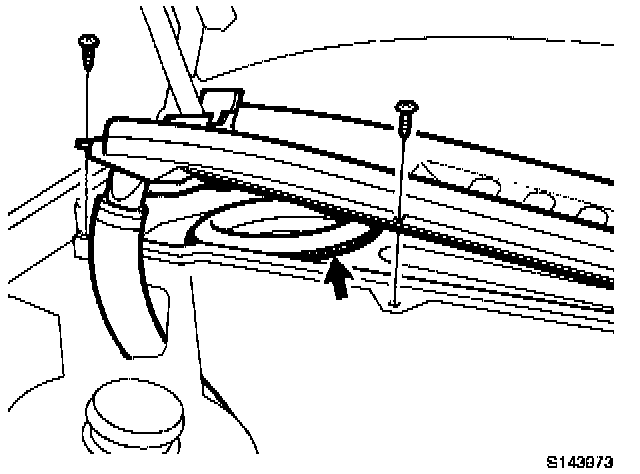
- Remove plastic cover over right-hand side of windshield wiper well.
- Prise up cover and pull out rubber bellows. Seal around bellows with butyl tape. Reinstall cover.
- Remount climate unit on firewall.
- Install foam rubber seal and plate washer on evaporator and heater penetration.
- Reconnect pipes and hoses to evaporator and heater.
Install/reconnect:
- air receiver on suspension strut tower
- refrigerant hoses to evaporator and air receiver
- connector
Torque refrigerant hoses per specification
- Install dashboard, refer to Body and Frame - Interior Trim - Dash Board - Service and Repair - Procedures Service and Repair
- Fill system with refrigerant, refer to Service and Repair - Procedures Service and Repair