Fuel Tank - Sending Unit Replacement Tips
MODEL900
GROUP
23
NUMBER
724
TITLE
FUEL TANK AND SENDING UNIT REPLACEMENT 940 ALL, 960 WAGONS 1993-->
MARKET
US and Canada
DATE
August 1992
REFERENCE:
TP 31903/1 (ENGLISH); 09/91; FUEL SYSTEM REGINA
TP 31354/2 (ENGLISH); 09/90; FUEL SYSTEM LH JETRONIC 2.4 AND ELECTRONIC TURBO CONTROL UNIT
TP 31714/2 (ENGLISH); 05/91; B6304 ENGINE
Fuel tank and sending unit replacement
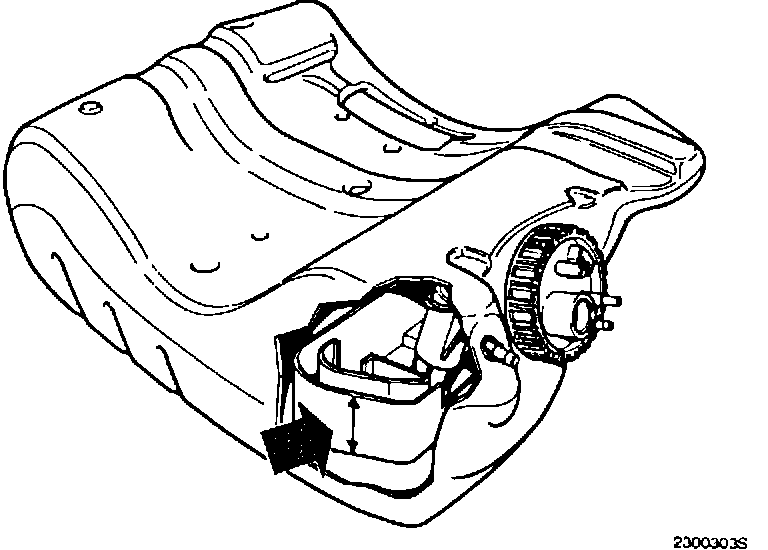
A new 75-litre (19.8 gallon) fuel tank has been introduced in 1993 M/Y 900 series vehicles with a live rear axle. Since the new tank has a higher baffle plate than the previous type, greater care is required when replacing the sending unit to avoid damage to the pump and filter.
Drain fuel tank
Use appropriate drain equipment.
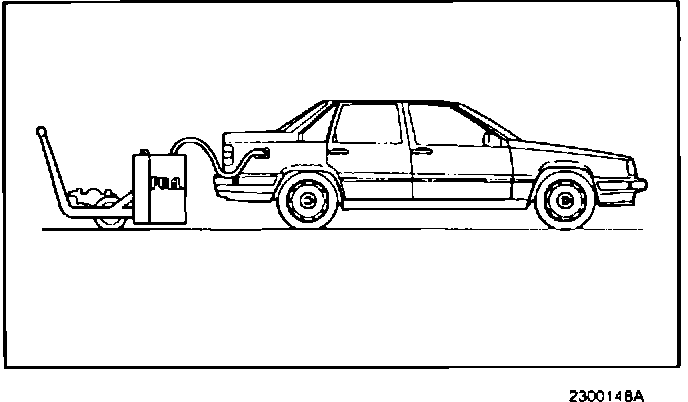
Insert hose in filler pipe.
Note:
The hose must be inserted at least 100 cm (39 in) to ensure that it is immersed in the fuel. The end of the hose may need to be cut at an angle to ensure that it can pass sharp corners.
Remove/disconnect:
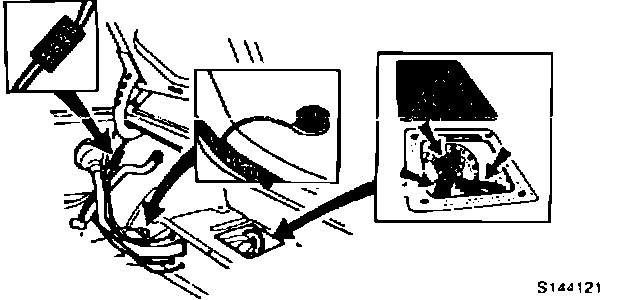
- sender unit cover
- hoses from sender unit lead. Press out rubber grommet and withdraw lead connected to sender unit.
- clamp around sender unit nut. Remove nut using tool 999 5448.
Sender unit, removal
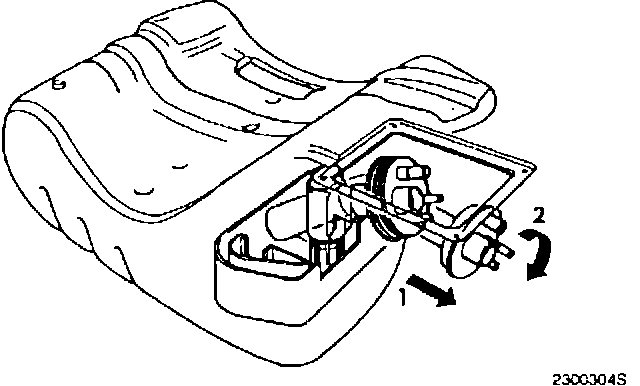
Withdraw sender unit slightly and move forward/ backward (1).
Turn unit clockwise through approx. 60 degrees (2).
Caution:
Use care to memorize movements when removing unit since installation is carried out in reverse order.
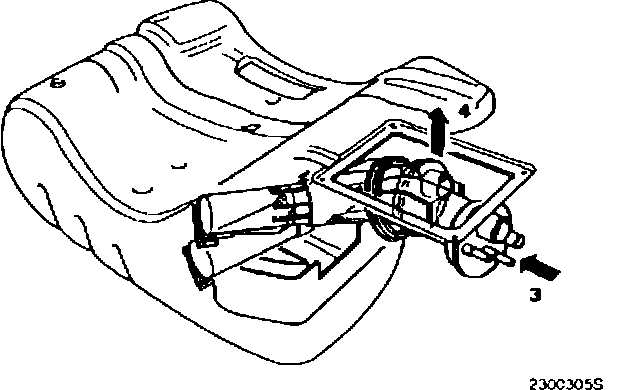
Move sender unit slightly forward again (3).
Turn unit a little further clockwise.
Connections should now be visible through hole (4).
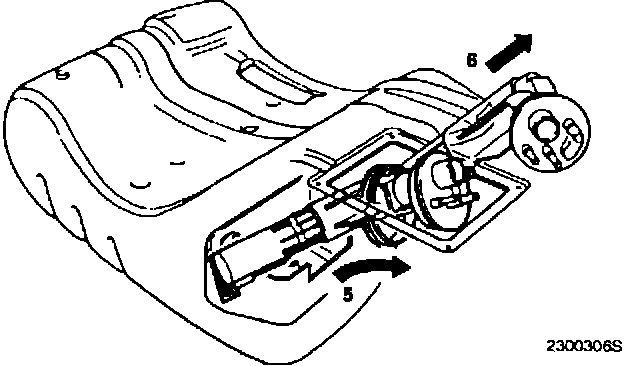
Lift sender unit carefully (5), approx. 100 mm (4 in). Turn slightly counterclockwise (6) and continue to lift.
Note:
Use care to avoid damage to pump and filter.
Sender unit, installation
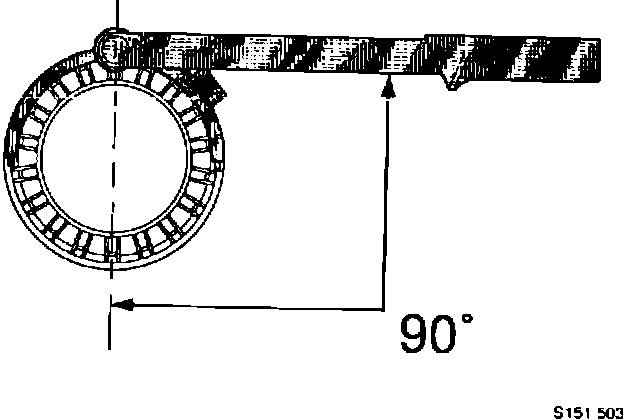
Installation is carried out in reverse order of removal.
Unit must be installed with great care to avoid damaging pump and filter.
Tighten sender unit nut
Use tool 999 5448. Attach tool to nut and tighten using adjusting screw.
Tighten nut to 45 N-m (33 ft.lb). Refit clamp around nut.
Fuel tank, removal
Use assembly hoist and fixture 999 5972.
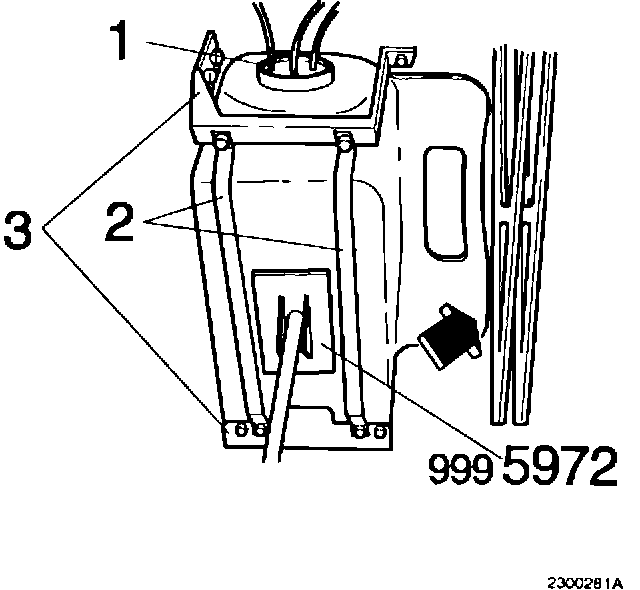
Withdraw leads already disconnected from connectors and disconnect all hoses from tank unit (1).
Remove:
- straps (2)
- bracket and rear mounting plate (3)
- fuel tank
Fuel tank, installation
Lift tank and place in position.
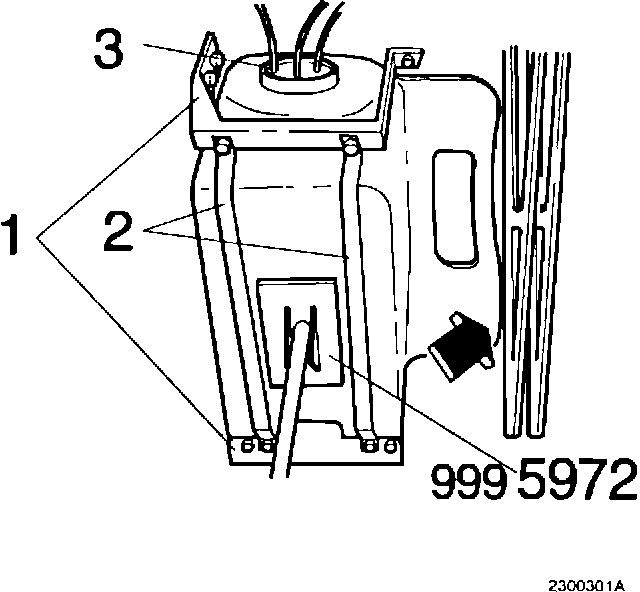
Install bracket and rear mounting plate loosely (1).
Insert straps (2) in rear mounting plate slots and tighten all bolts to 25 N-m (18 ft.lb).
Note:
Press tank towards left while tightening bolts to ensure that it does not rub against sub-frame (arrowed).
Reconnect all hoses. Insert and reconnect electrical leads (3). Reinstall all panels in luggage compartment.
WARRANTY STATEMENT:

Claims may be submitted under the New Car Limited Warranty using chart.