Magnetic Clutch
Magnetic Clutch
Special Tools: 999 5597, 999 5596, 999 5598, 999 5599, 999 5091, 999 5087, 999 5600, 999 5604.
Magnetic Clutch, Replacing In The Car
Preparations
NOTE: Do not disconnect and drain the air conditioning (A/C) system.
- Remove the multi-groove V belt
- Remove the splashguard. Disconnect the wiring
- Disconnect the air conditioning (A/C) hoses from the support
- Remove the compressor (4 x bolts) and hang it up with a steel wire.
Clutch Driven Plate, Removing
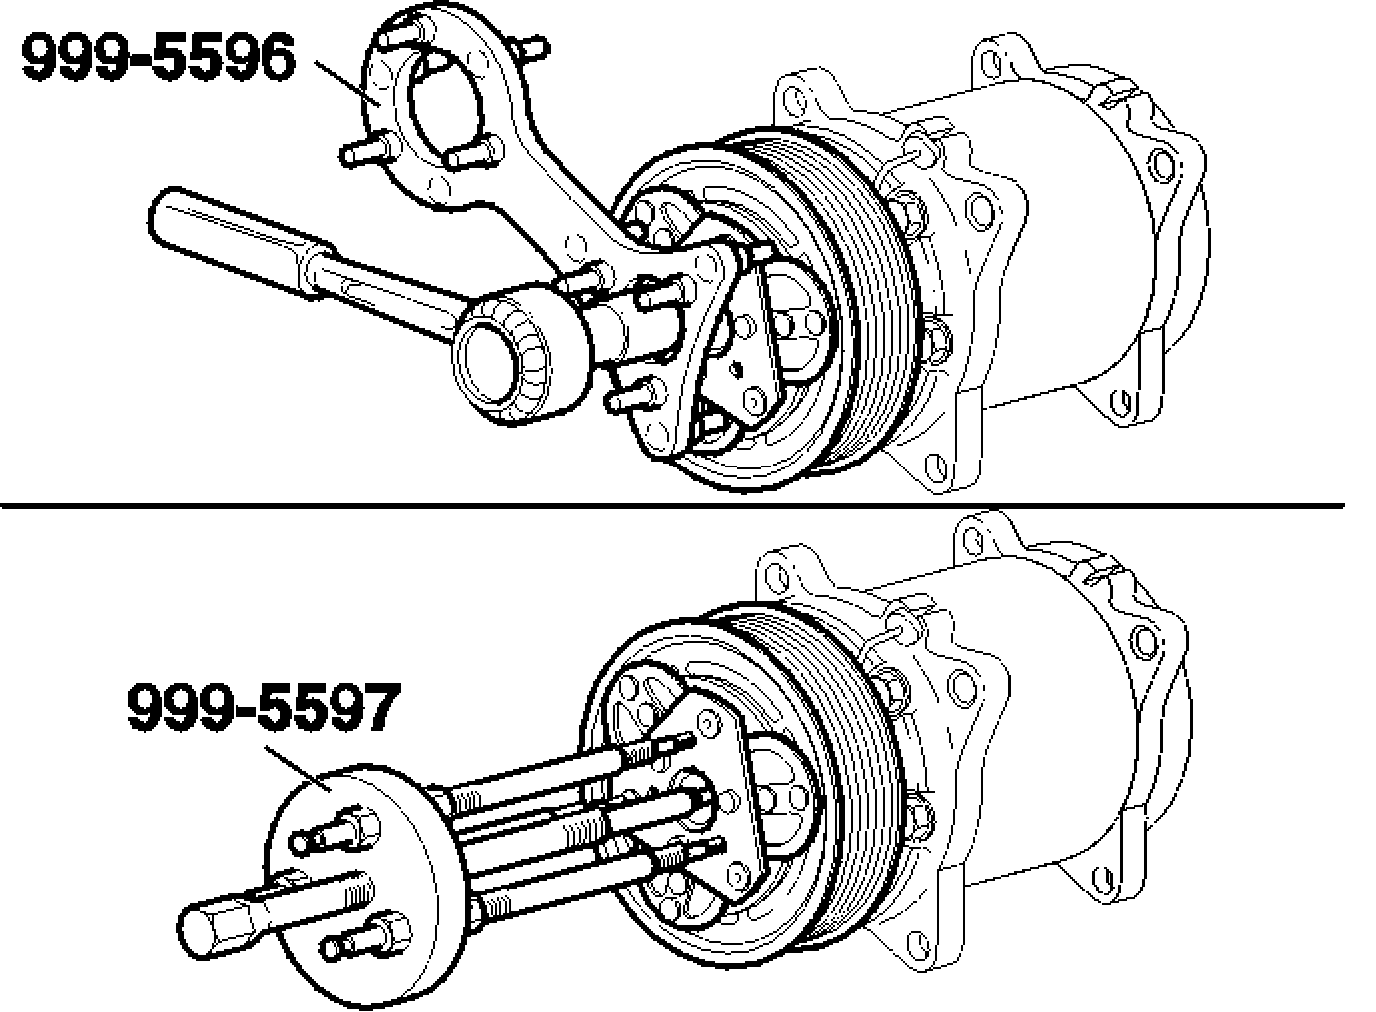
Position counterhold 999 5596 over the clutch driven plate and remove the bolt.
- Position puller 999 5597 on the clutch driven plate
- Pull off the clutch driven plate.
NOTE: Do not lose the adjustment washers.
Removing The Pulley
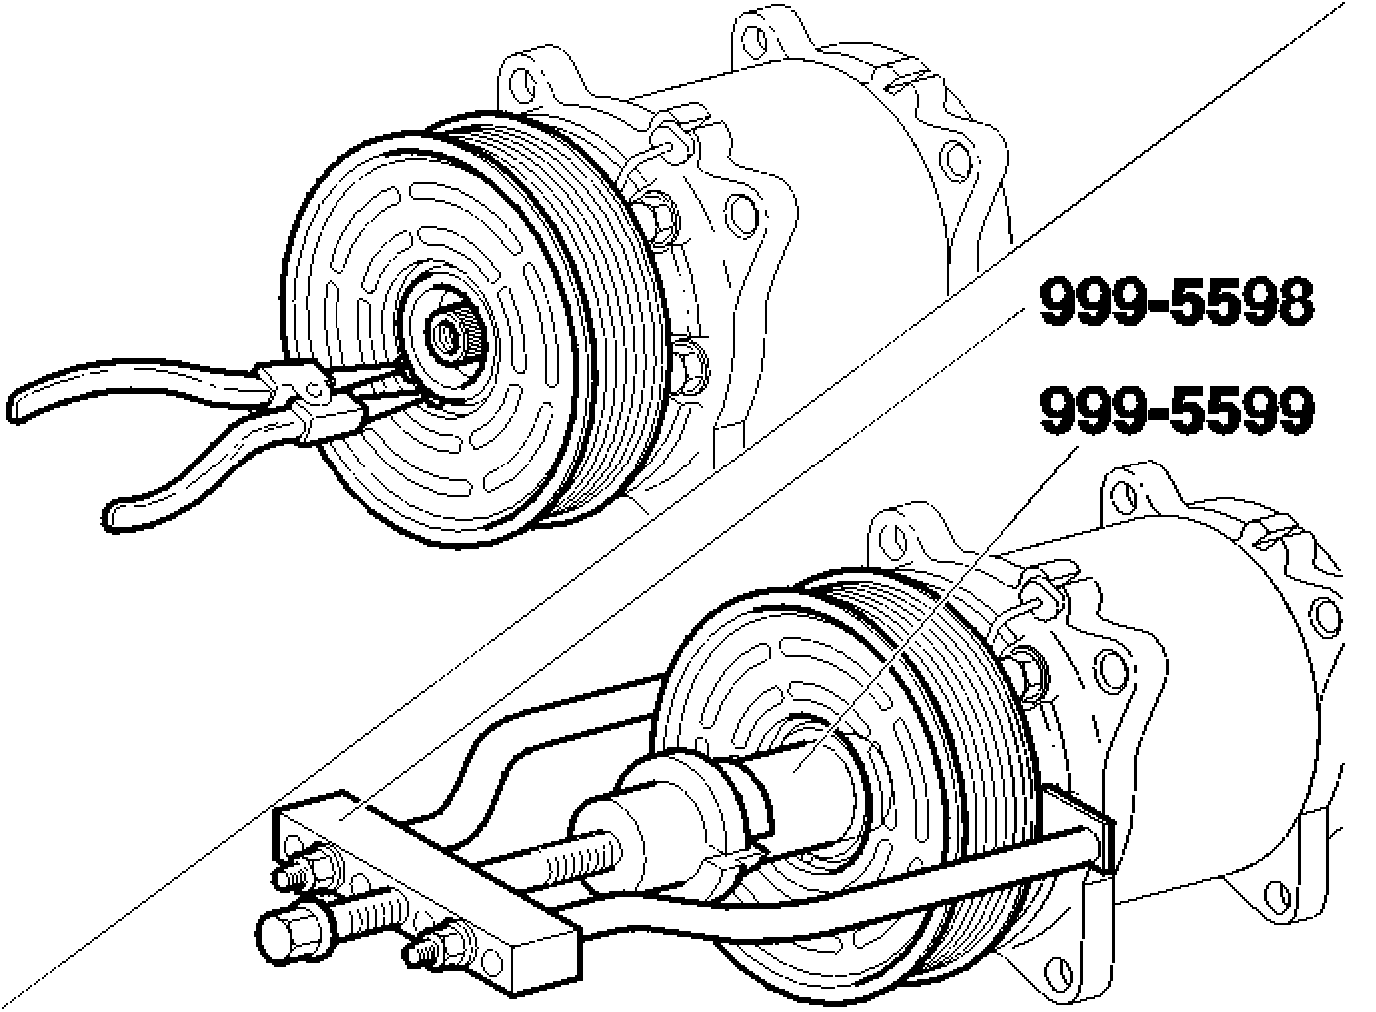
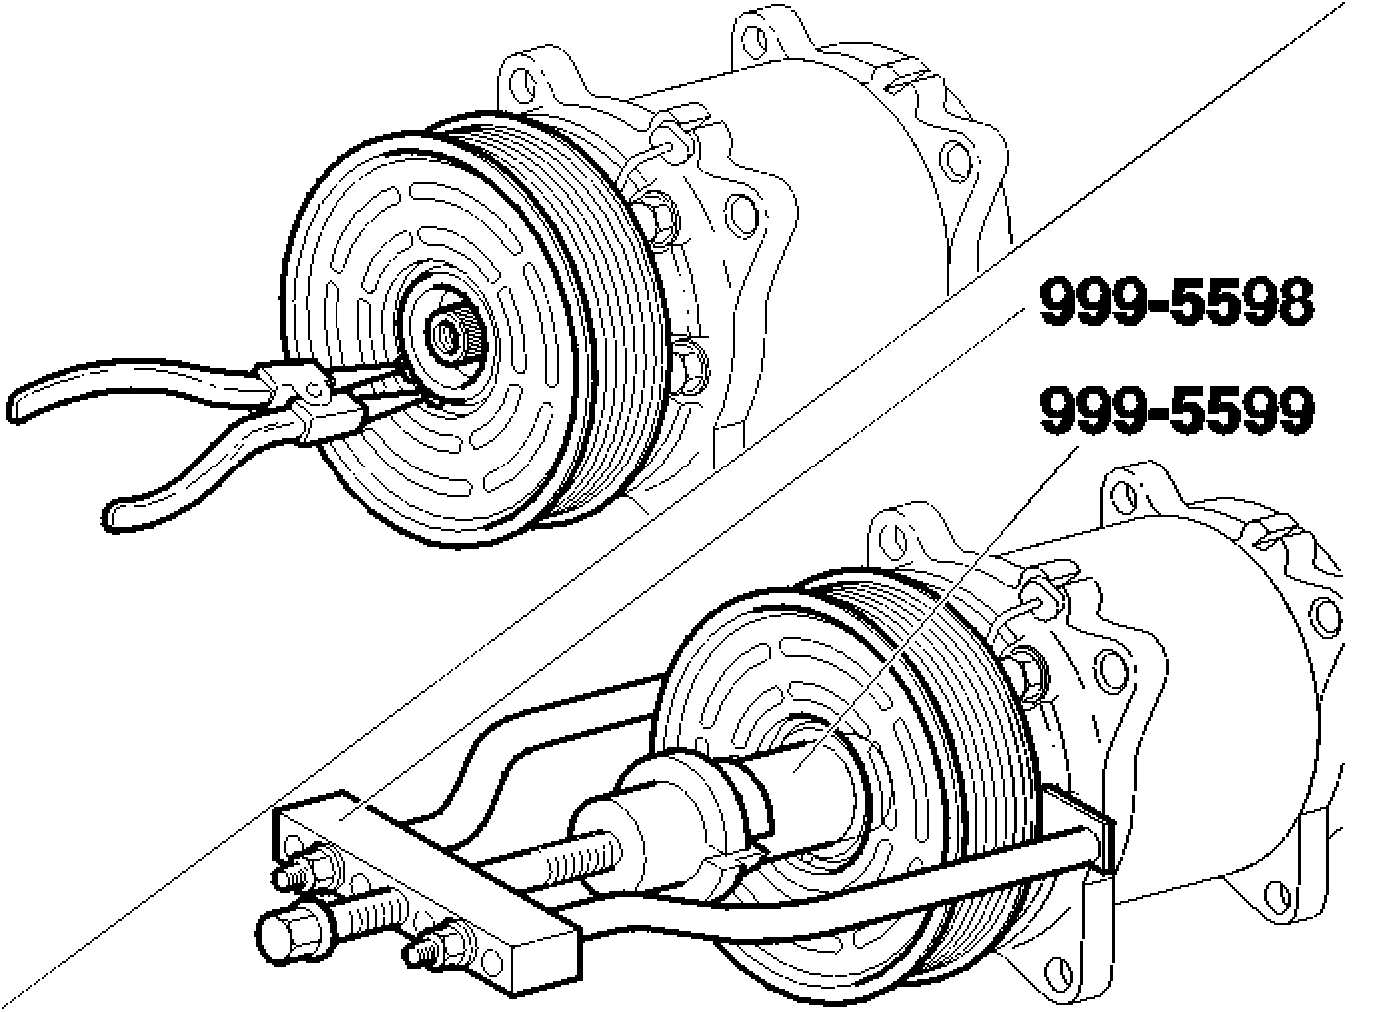
- Remove the snap ring
- Install the puller 999 5598 in position as close to the electro magnet as possible
- Install the bushing 999 5599 in position on the compressor housing
- Pull the pulley wheel out of the housing.
Removing The Magnet
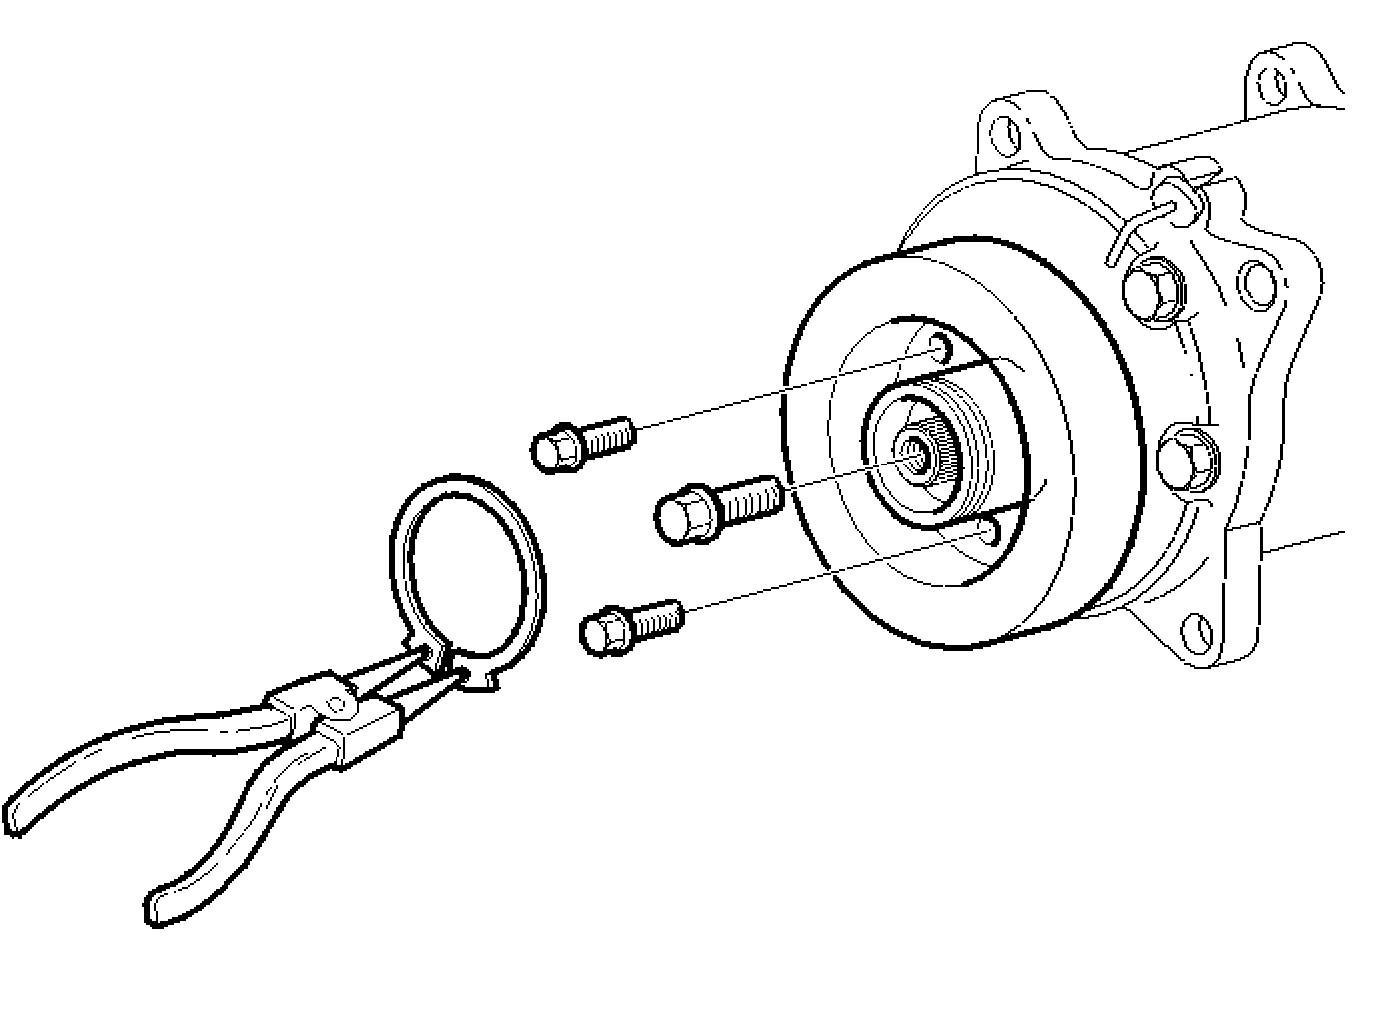
- Disconnect the wiring from the compressor
- Remove the three mounting bolts
- Clean and check all components carefully.
Installing The Magnet
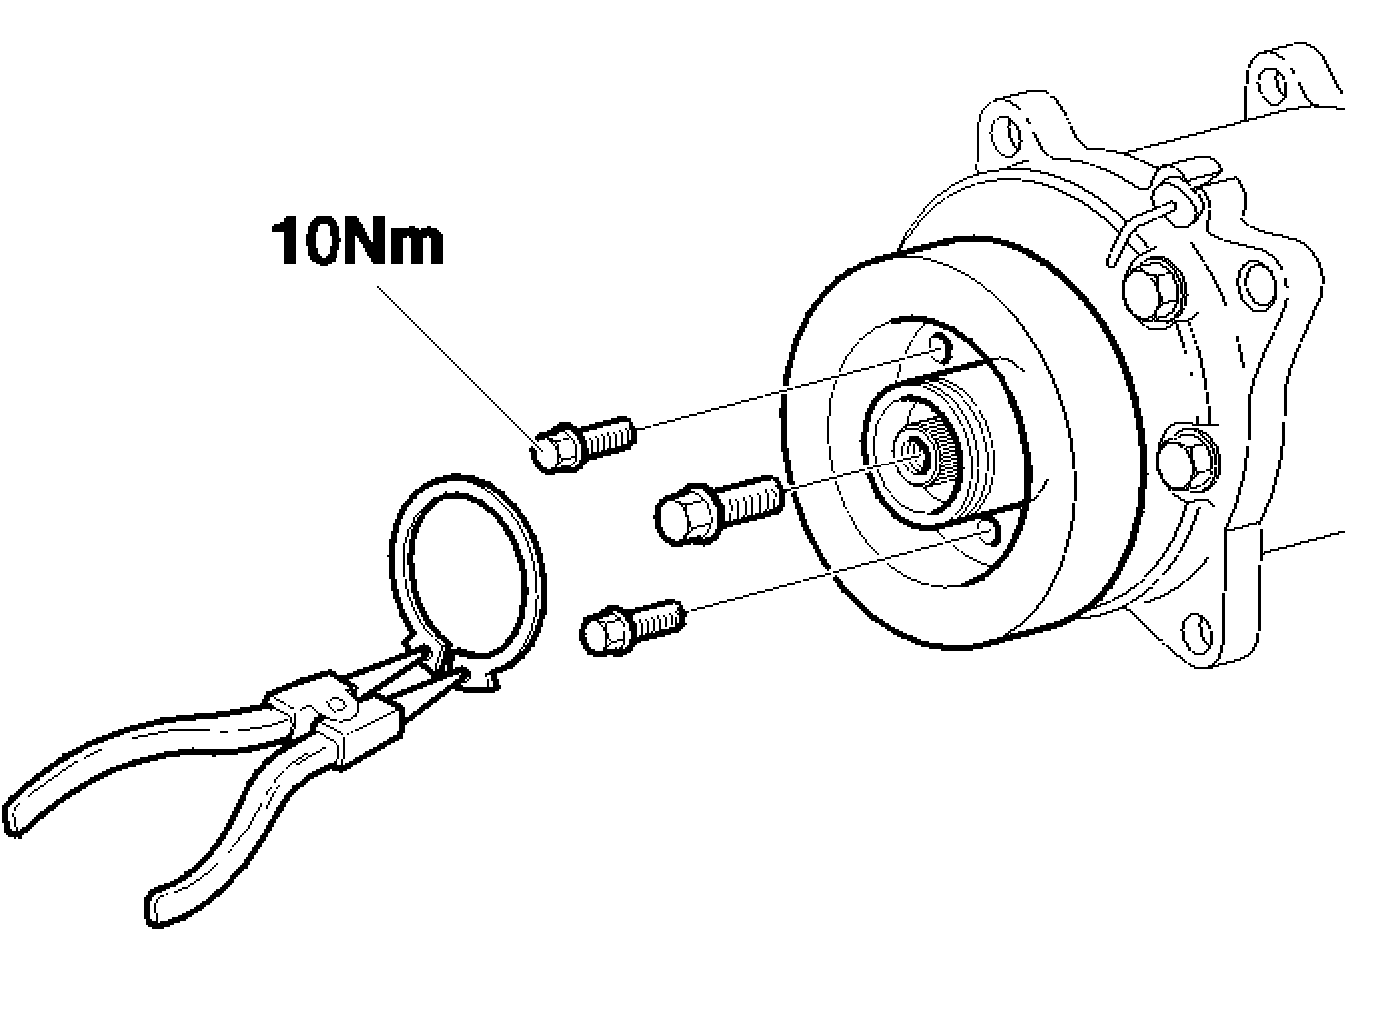
- Install a new magnet in position (note the guide pin) and install the bolts
- Replace the wiring
- Tighten the bolts to 10 Nm.
Installing the pulley
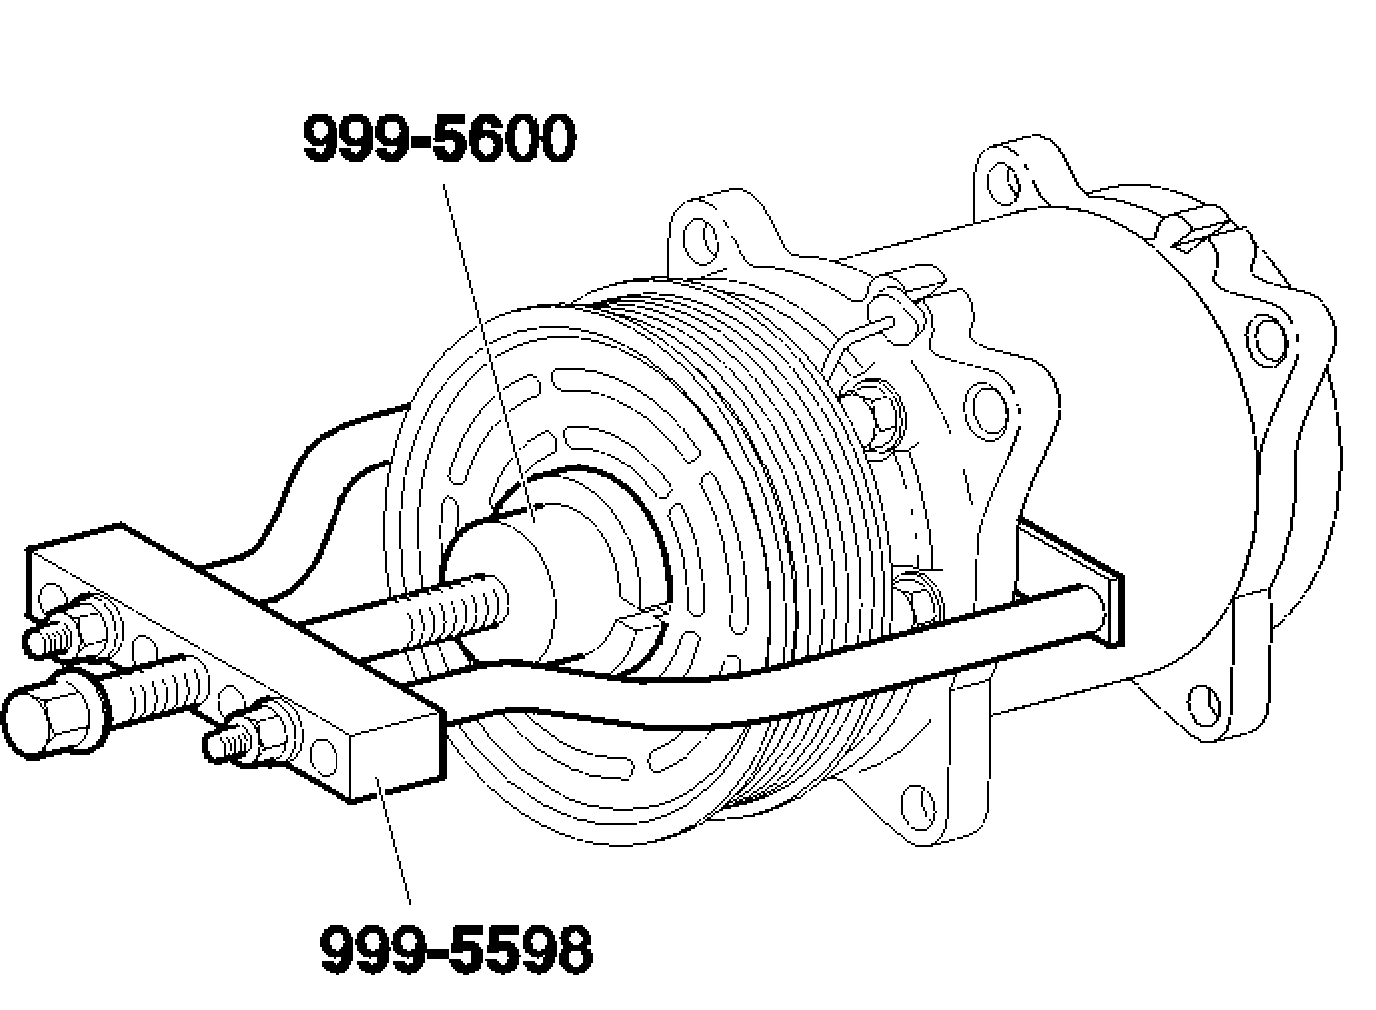
- Position the pulley
- Carefully tap the pulley with a plastic hammer
- Install extractor: 999 5598 and bushing 999 5600 on the pulley and press the guide bushing into place
- Tighten the pulley
- Install the snap ring with the beveled side upwards.
Clutch Driven Plate, Installing
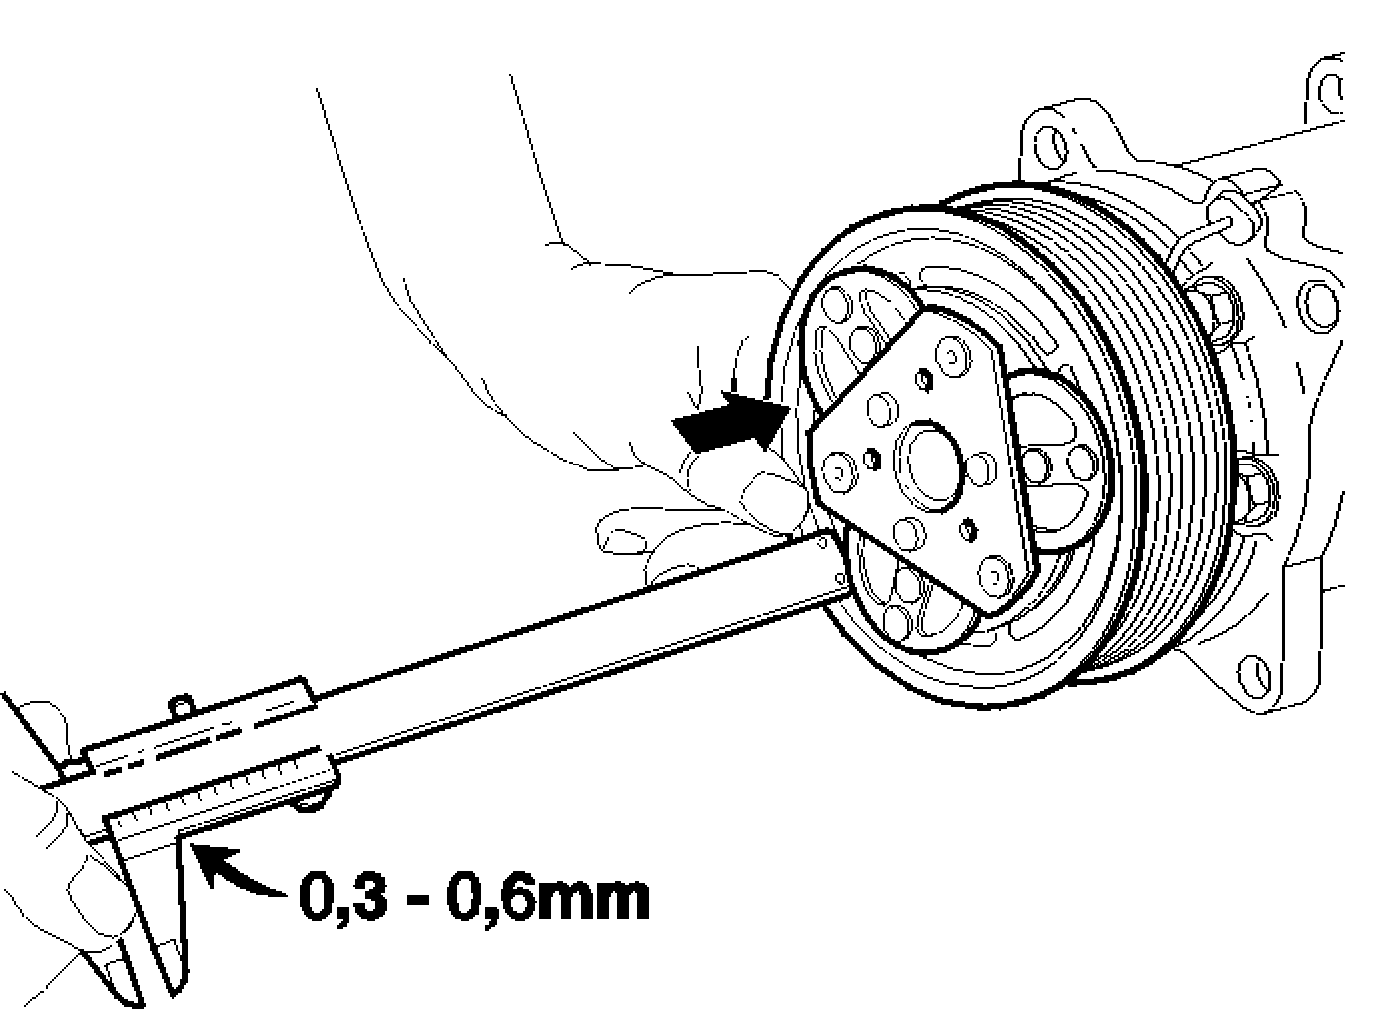
- Install the old spacer washers on the shaft. Install the clutch driven plate
HINT: Use a plastic mallet if necessary.
- Install the center bolt or nut.
NOTE: Using 999 5596 as a counterhold.
Tightening torque: 12 Nm.
- Check the play between the coupling plate and the pulley with a gauge
- Measure the height between the plate and the pulley
- Press the plate and measure the height again
- The difference in the readings indicates the play
- Checking and adjusting the value: 0.3-0.6 mm
- Correct the play with adjustment rings
- Install the compressor.
HINT: To replace the sealing ring.