Shift Unit
Shift Unit
Special tools, testers and auxiliary items required
• Thrust Piece (T10203)
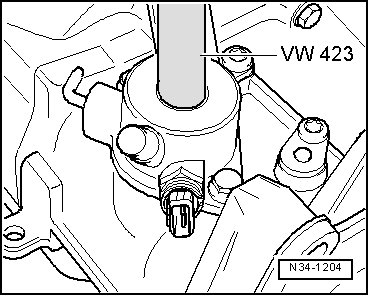
• Sleeve (VW 423)
• Torque Wrench (5-50 Nm) (V.A.G 1331)
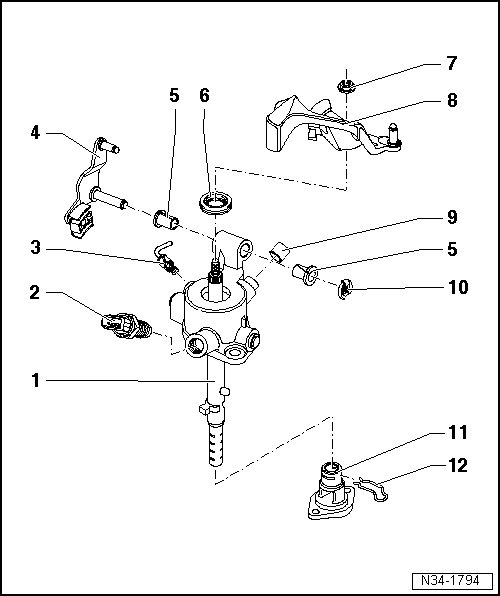
1 Shift Unit
• Consisting of the shift shaft and the shift cover.
• The components cannot be separated from each other.
2 Back-Up Lamp Switch (F4)
• 20 Nm
• Lubricate the tab lightly with MoS 2 grease.
3 Locking Pin
• For adjusting the shift mechanism.
• Removing, refer to => [ Removing the Locking Pin from the Shift
Cover ].
• Installing, refer to => [ Pressing the Locking Pin into the Shift
Cover ].
4 Relay Lever
• Installed position, refer to => [ Selector Lever/Relay Lever, Installed
Position ] Shift Mechanism Overviews.
• Plastic relay lever from 05.07, refer to => [ Plastic Relay Lever ] Plastic Relay Lever.
5 Bushing
• Not needed with the plastic relay lever.
6 Seal
• Pry out with a screwdriver.
• Installing, refer to => [ Installing the Seal ].
7 Nut
• 23 Nm
• Always replace
• Self-locking
8 Shift Lever
• Insert so that the master spline aligns with the shift rod.
• Can be replaced with the shift mechanism still installed.
• Installed position, refer to => [ Selector Lever/Relay Lever, Installed
Position ] Shift Mechanism Overviews.
9 Cap
• For the transmission ventilation.
10 Circlip
• Always replace
• Not needed with the plastic relay lever.
11 Cover
12 Spring
• Not installed in all transmissions.
• Install if present
Removing the Locking Pin from the Shift Cover
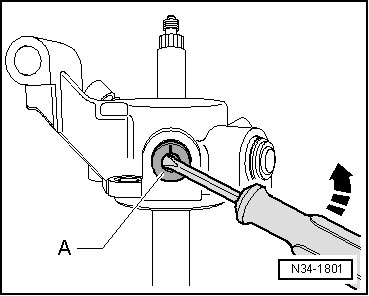
- Remove the outer part of the locking pin - A -.
- Then carefully pry out the locking pin with a screwdriver.
Pressing the Locking Pin into the Shift Cover
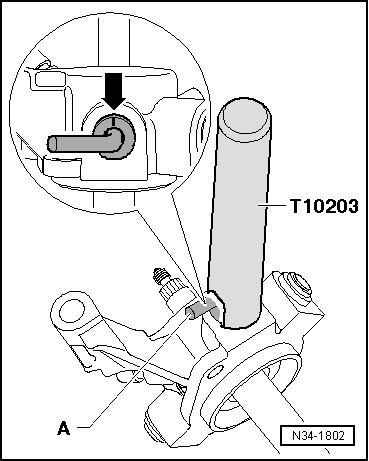
Installed position:
The mark - arrow - faces toward the upper part of the shift shaft.
Installing the Seal